Fix: Mouse Pointer Auto-Select Hovering over a Hyperlink
Your mouse pointer may show the auto-selecting behavior if the BIOS, Windows, or drivers of your system are outdated. Also, the wrong configuration of the mouse/touchpad settings may also cause the error at hand. The issue arises when the mouse of a user’s PC starts auto-selecting when hovered over a hyperlink. For some users, the issue started after a Windows update.
You can stop your mouse from selecting when hovering in Windows 10 by trying the solutions below but before that, check if booting your system with the bare minimum solves the problem. Moreover, check if connecting the mouse directly (without any adapter/dongle) to the computer solves the problem.
Solution 1: Update the BIOS, Windows, and Drivers of Your System to the Latest Build
The mouse pointer issue may be caused by the incompatibility between the OS modules as the modules are not updated to the latest build. In this context, updating the BIOS, Windows, and drivers of your system to the latest builds may solve the problem.
- Update Windows and drivers (especially, the system’s BIOS) to the latest build. Make sure to install all the optional updates as well. If you are using an OEM utility (like Dell Support Assistant) to update drivers, then use that utility to update the drivers.
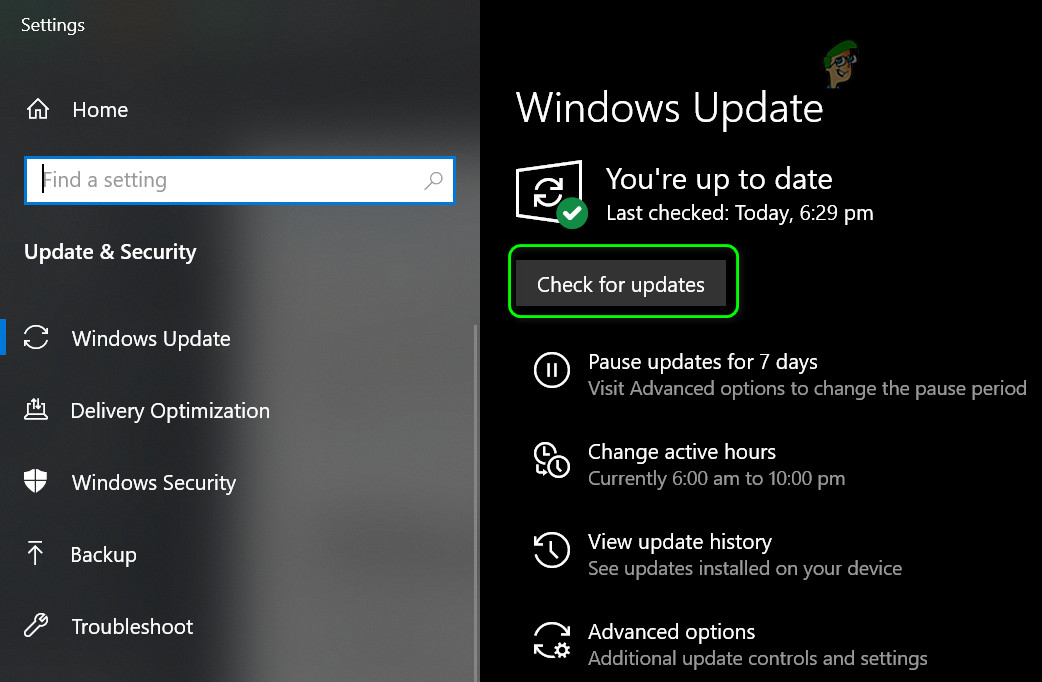
Check for Windows Updates - After updating the modules, check if the mouse hovering issue is resolved.
Solution 2: Edit the Ease of Access Settings
The mouse pointer may show the current behavior if it is configured to behave in this way in the Ease of Access Settings of your system. In this context, editing the relevant Ease of Access settings may solve the problem.
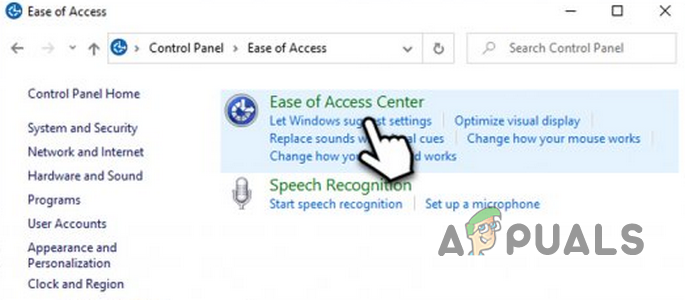
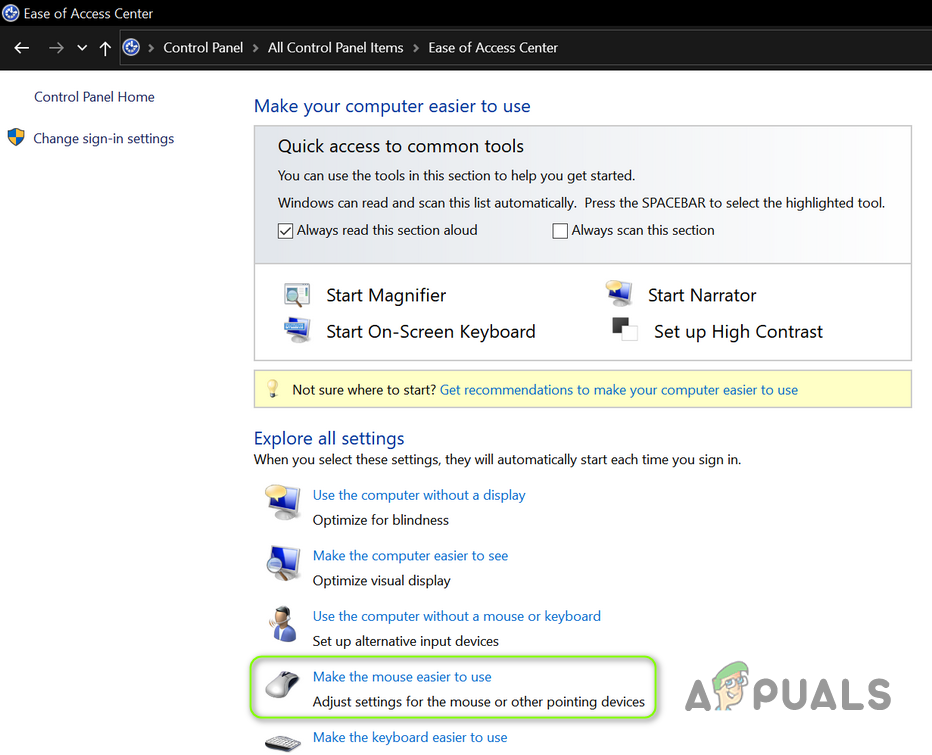
- Click on the Start menu button and in the search box, type: Control Panel. Then open Control Panel.
Open Control Panel - Now open Ease of Access and then Ease of Access Center.
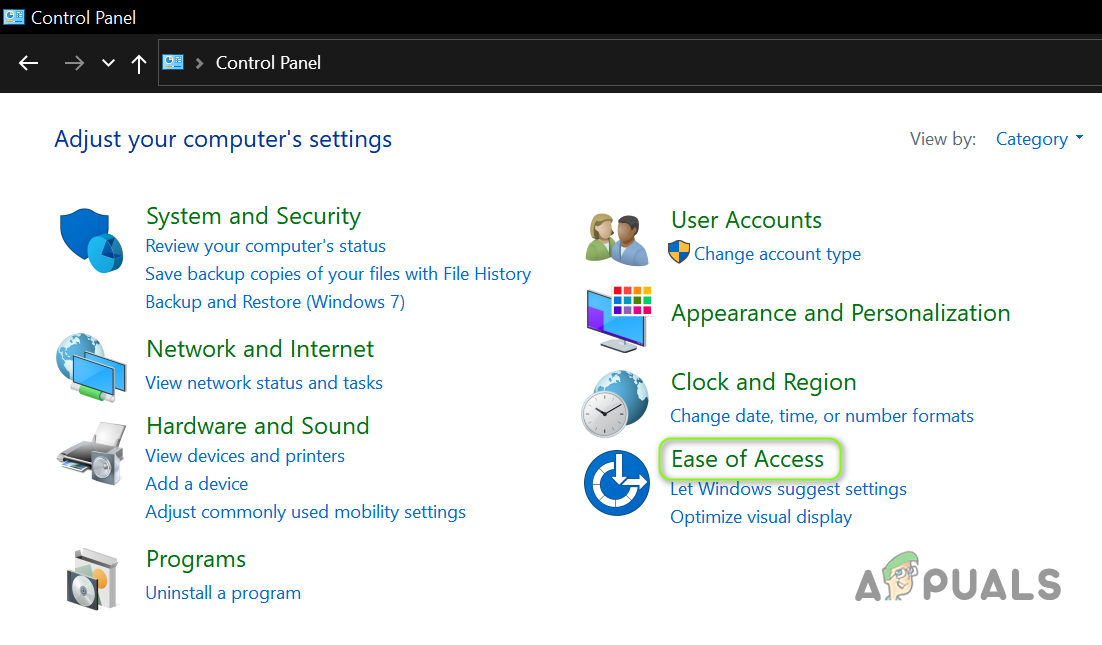
Open Ease of Access in the Control Panel - Then click on ‘Make the Mouse Easier to Use’ and uncheck the option of Activate a Window by Hovering Over it With the Mouse.
Open Make the Mouse Easier to Use - Then click on Apply/OK and check if the hovering issue is resolved.
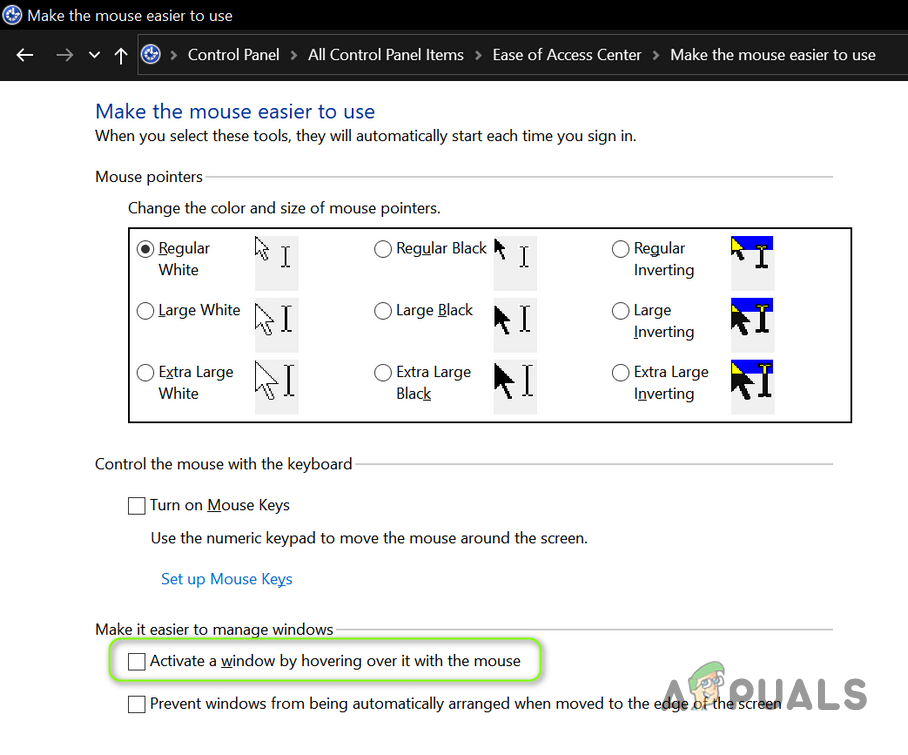
Enable Activate a Window by Hovering Over it With the Mouse
If, at step3, the said option is already disabled, then checkmark it and click on the Apply button (do not click on the OK button or close the window). Wait for a minute and then uncheck the option. Then apply your changes and check if the hovering issue is resolved.
If this doesn’t work, then enable the Hovering Over option again and reboot your PC. Upon reboot, check if the issue is resolved; if not, disable the Hovering Over option and check if the issue is resolved.
Solution 3: Disable ‘Scroll Inactive Windows When I Hover Over Them’
The mouse auto-selecting issue may arise if the setting of Scroll Inactive Windows When I Hover Over Them is enabled. In this case, disabling the said option may solve the problem.
- Press the Windows key and open Settings.
- Now open Devices and then, in the left pane, steer to the Mouse tab.
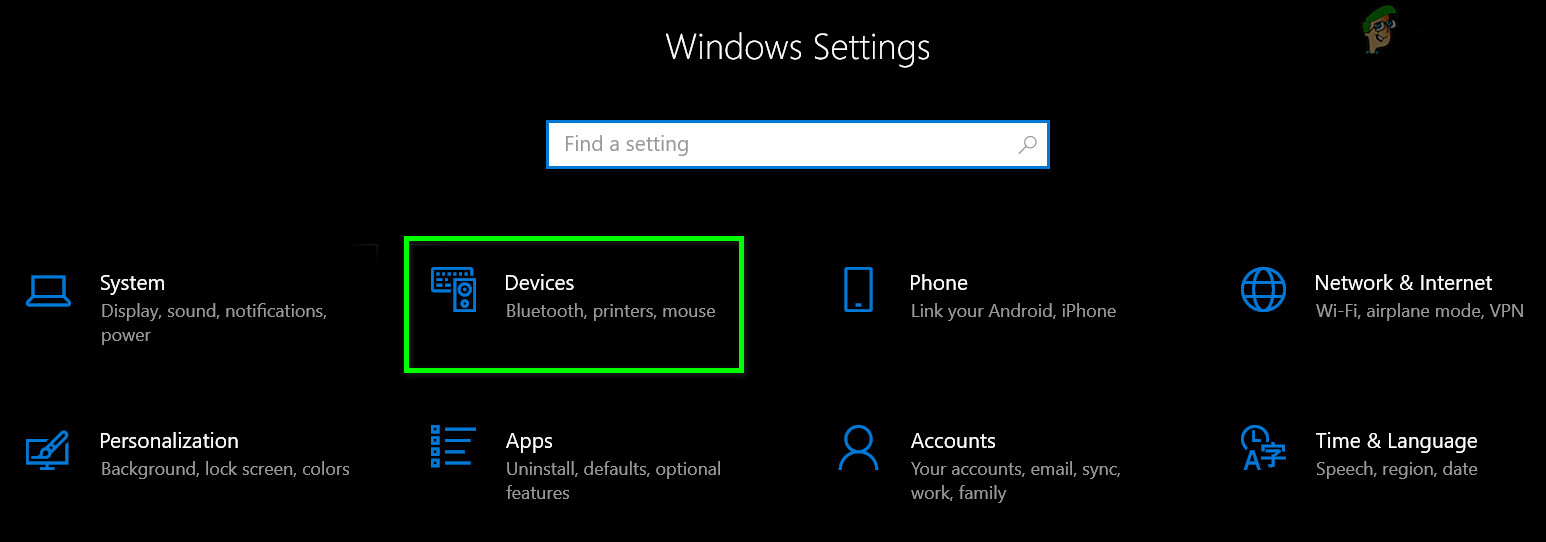
Open Devices in Windows Settings - Then, in the right pane, disable the option of Scroll Inactive Windows When I Hover Over Them and reboot your PC.
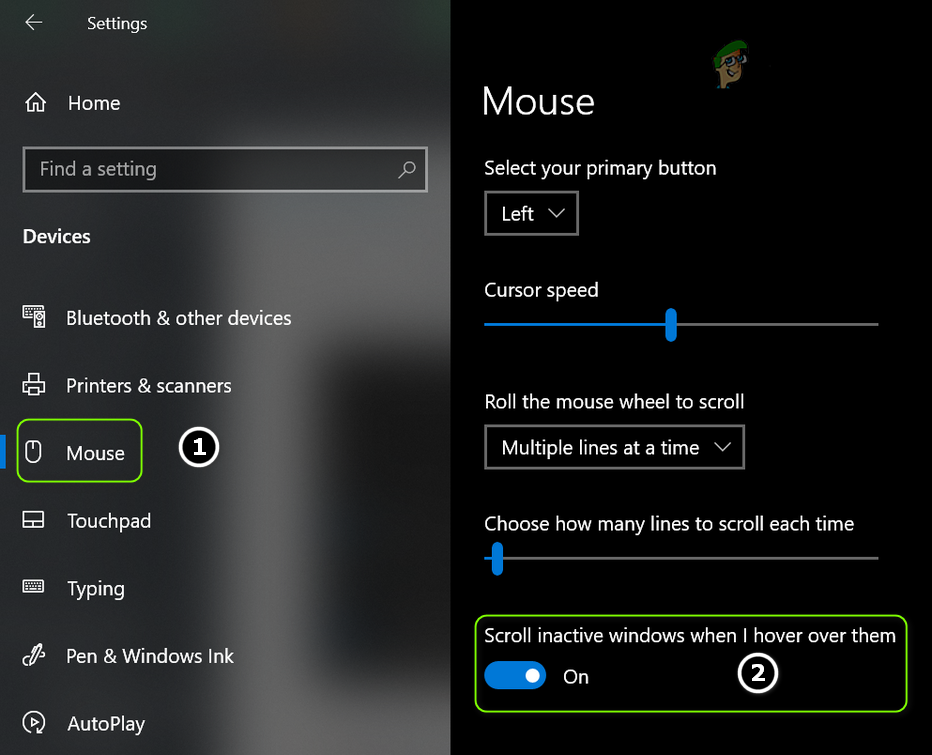
Disable Scroll Inactive Windows When I Hover Over Them - Upon reboot, check if the mouse is clear of the hoovering issue.
If the issue persists, then check if changing the Cursor Pointer (Settings>> Ease of Access>> Mouse Pointer) solves the problem.
Solution 4: Edit Visual Effects in the Advanced System Settings
The auto-selecting issue could be a result of a system bug and the bug can be cleared by editing the Visual Effects in the Advanced System Settings (a solution reported by the users).
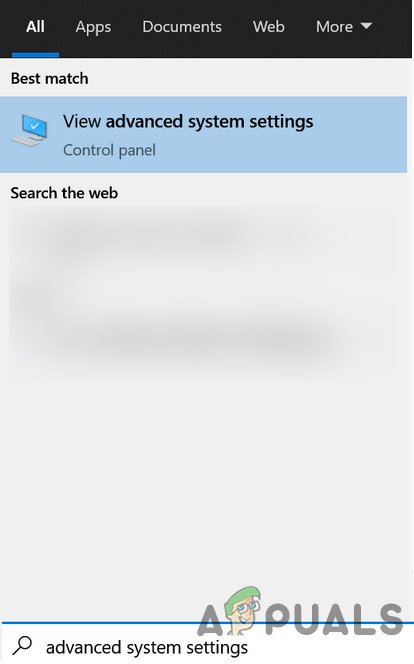
- Click on the Windows button and in the search, type: Advanced System Settings. Then open ‘View Advanced System Settings’.
Open Advanced System Settings - Now, in the section of Performance, click on the Settings button, and in the Visual Effects tab, select the radio button of Custom.
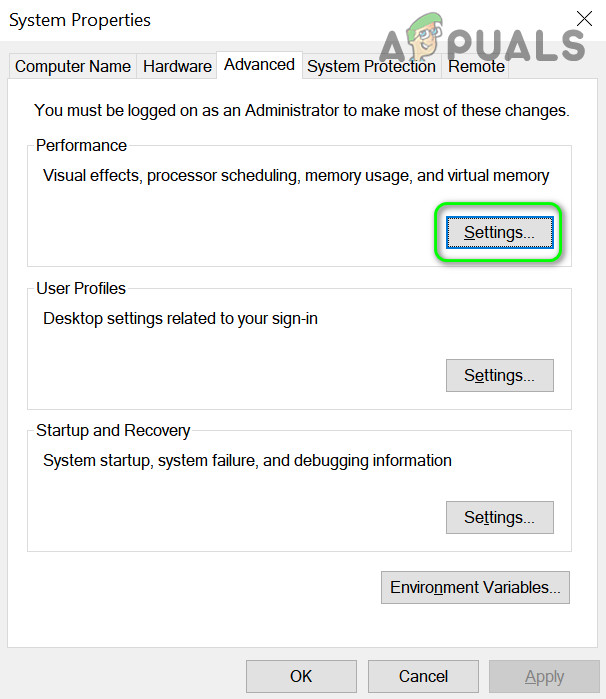
Open Performance Settings in Advanced System Settings - Then uncheck all the options and apply your changes to check if the issue is resolved.

Choose Custom and Uncheck All the Visual Effects - If so, enable the options one by one till you find the one which triggers the issue. Once found, keep that option disabled. Some users have reported that keeping animation-related options disabled solved the problem.
Solution 5: Set the File Explorer to Use Double-Click to Open an Item
You may encounter the hovering issue due to different File Explorer configurations (for example Single Click to Open Item). In this case, editing the relevant File Explorer Options may solve the problem.
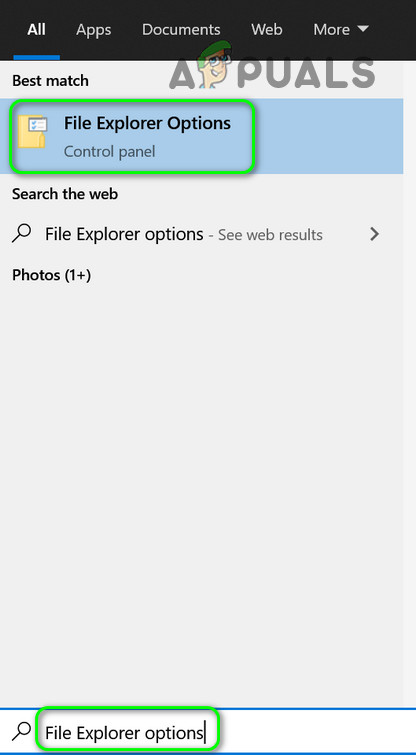
- Click on the Start menu button and in the search box, type: File Explorer Options. Then open the File Explorer Options in the results.
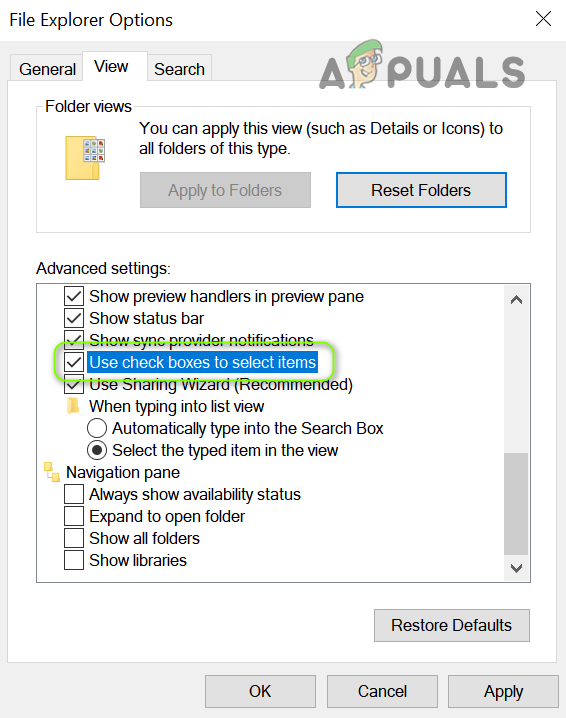
Open the File Explorer Options - Now, in the General tab, select the radio button of Double-Click on Open an Item (Single-Click to Select) and apply your changes.
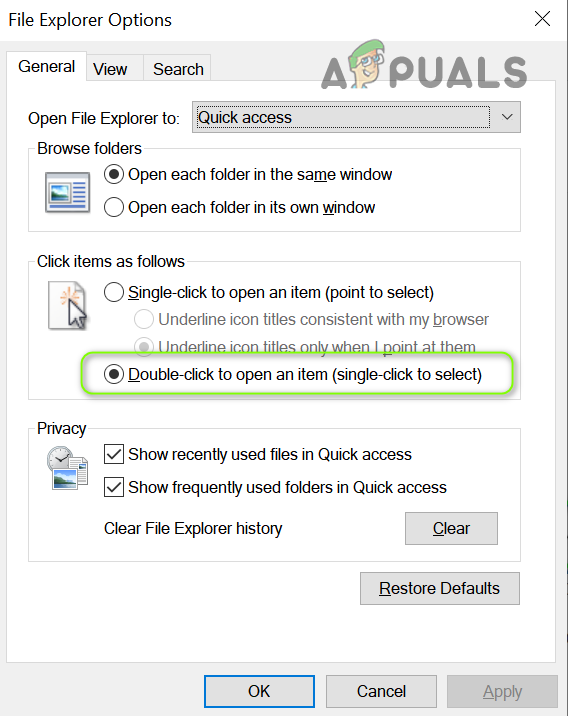
Enable Double-Click on Open an Item (Single-Click to Select) - Then check if the mouse is operating normally.
If the issue is resolved but you want to use the single-click option, then navigate to the View tab of the File Explorer Options and enable Use Check Boxes to Select Items.
Solution 6: Remove the Conflicting Applications
The mouse pointer may show the auto-selecting behavior if another application on your system is hindering/controlling (like Ultranav utility) the operation of the mouse. In this context, removing the conflicting application (or editing its relevant settings) may solve the problem. You can find if a 3rd party application is causing the issue by ending the irrelevant tasks in the Task Manager of your system or booting your computer into the safe mode (or clean booting it). For illustration, we will discuss the process for the Logitech Setpoint application (reported by the users to create the issue).
- Launch the Quick Access menu (by right-clicking on the Start menu button) and choose Apps & Features.
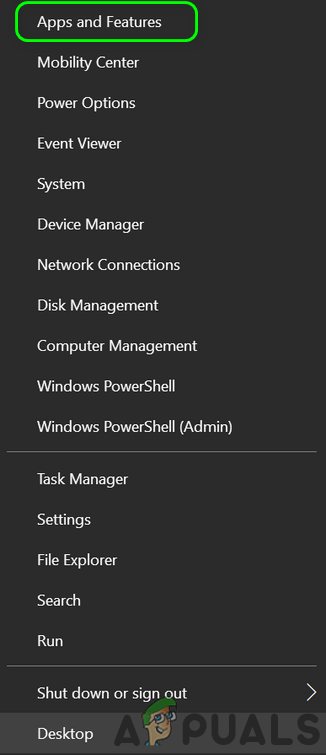
Open Apps & Features - Now expand Logitech Setpoint and then click on the Uninstall button.
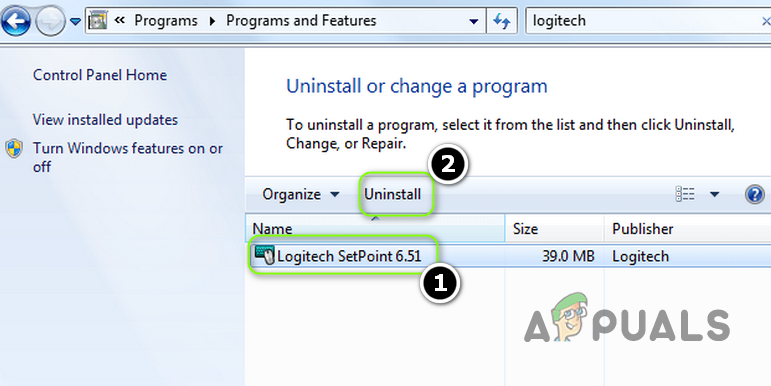
Uninstall Logitech Setpoint - Then confirm to uninstall the Logitech Setpoint and let the uninstallation complete.
- Now reboot your PC and check if the mouse is functioning properly.
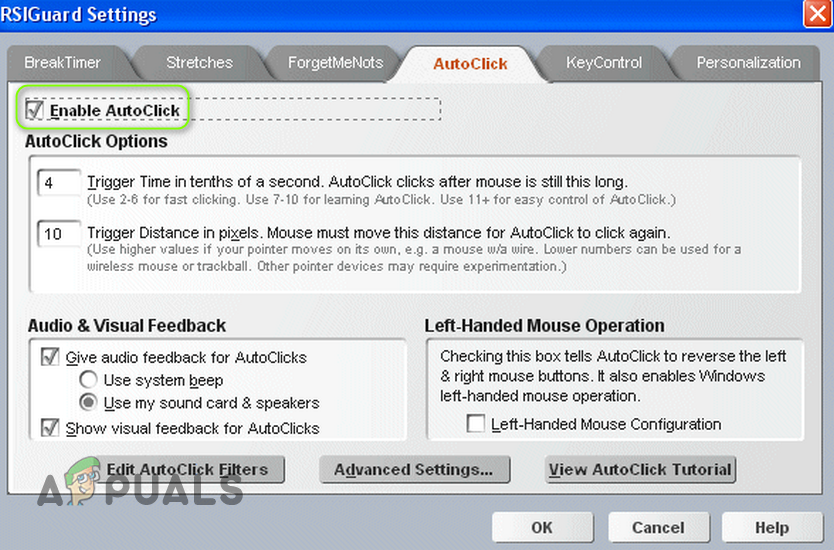
If you do not want to uninstall the problematic application, then check if you can disable the mouse hovering feature in the application’s settings. For example, launch the RSIGuard application and uncheck the AutoClick option to sort out the issue. If the setting is not working or applying, then make sure to update the utility that is causing the issue.
Solution 7: Reinstall the Touchpad/Mouse Driver
The auto-selecting behavior by the mouse may be triggered by a corrupt installation of the mouse/touchpad driver. In this case, reinstalling the mouse/touchpad driver may solve the problem. If you are using a touchpad, then make sure to keep a mouse nearby (as you may need it).
- Before moving on, make sure to download the latest driver from the OEM website.
- Now, simultaneously press Windows + X keys (which will pop-out the Quick Access menu) and choose the Device Manager.
Open Device Manager - Then expand the Mice and Other Pointing Devices option and right-click on the touchpad (or mouse) driver.
- Now, in the menu shown, select Uninstall Device and checkmark the option of Delete the Driver Software for This Device.
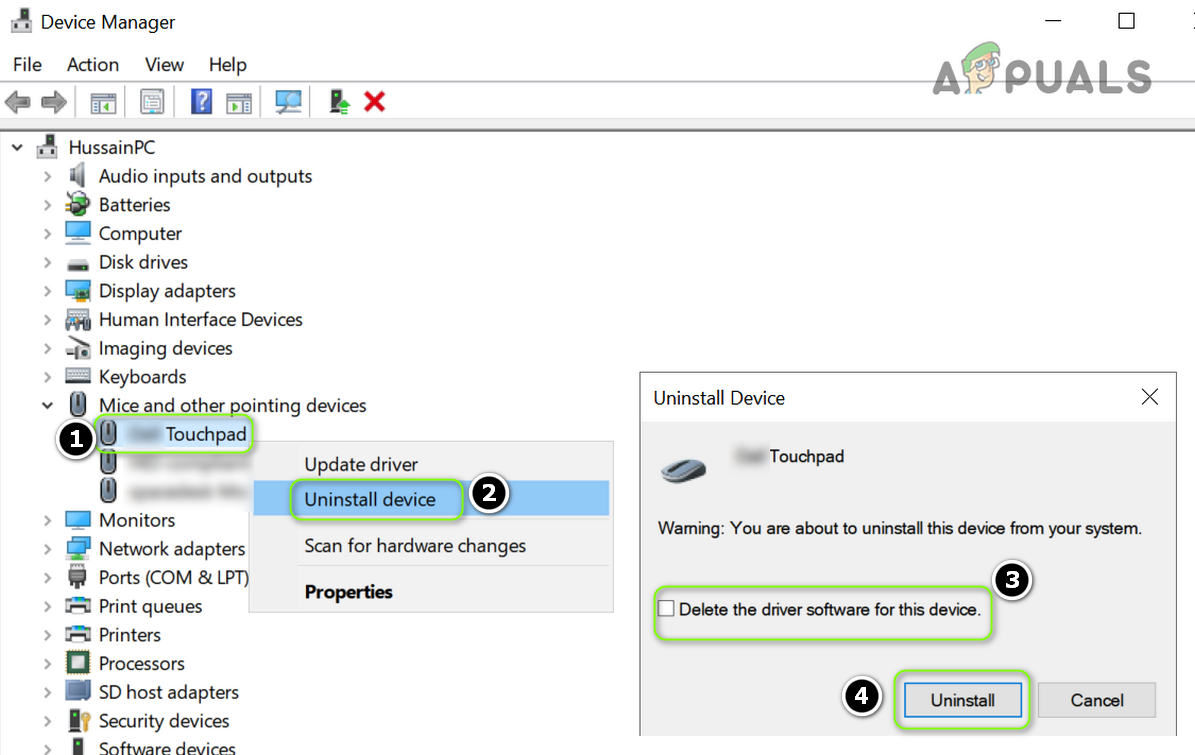
Uninstall the Touchpad Device and Delete its Driver - Now click on Uninstall and let the touchpad driver installation complete.
- After touchpad uninstallation, power off (do not reboot) your PC (you may use the keyboard to navigate).
- Now power-on your PC and check if the hovering issue is resolved (Windows may install its default driver).
- If the issue persists or Windows did not install the driver (you may need to use a mouse to proceed further), then install the latest touchpad/mouse driver (downloaded at step 1) with administrative privileges and reboot your PC.
- Upon reboot, check if the mouse is clear of the auto-selecting issue.
If the issue persists, then check if using an older touchpad/mouse driver sorts out the hovering issue.
Solution 8: Edit the Touchpad Settings (Laptop Users Only)
The mouse may show auto-selecting behavior if the touchpad of your system is hindering the operation of the system’s mouse. In this case, making the relevant changes to the touchpad settings may solve the problem.
Launch the touchpad application (e.g., Dell Touchpad) or use the Touchpad in Devices of Windows Settings (if applicable). Then make the following changes (one by one) to check if the issue is resolved but keep in mind these options may vary from user to user.
- Lower the Sensitivity of your Touchpad and check if the mouse is working fine.
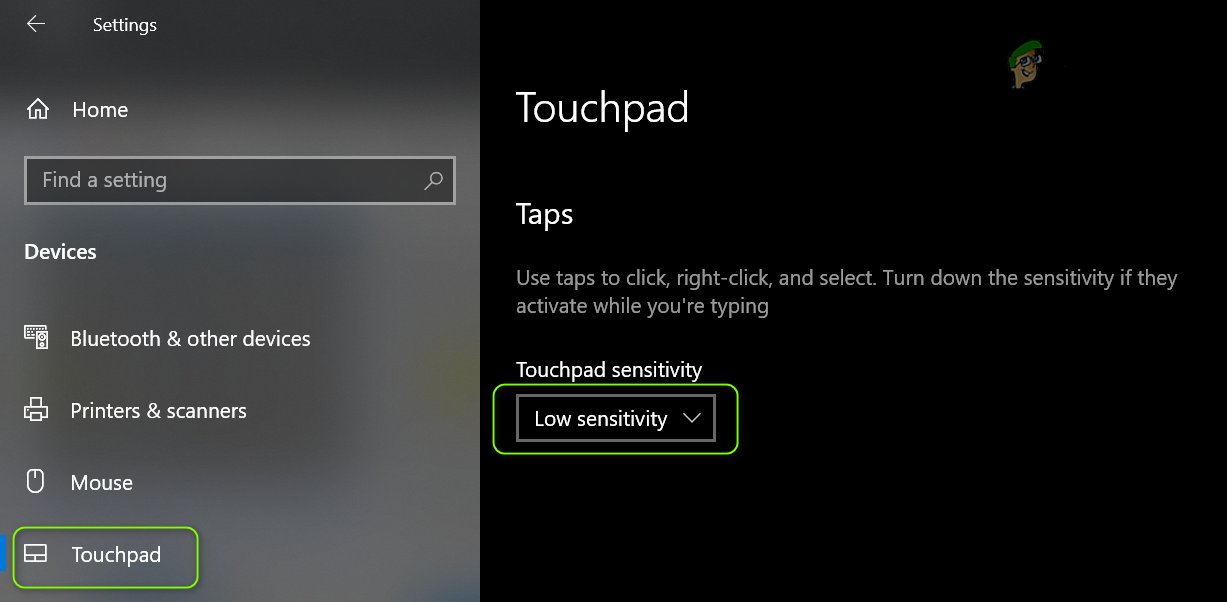
Set the Touchpad to the Low Sensitivity - Check if increasing the delay in clicking/tapping solves the problem.
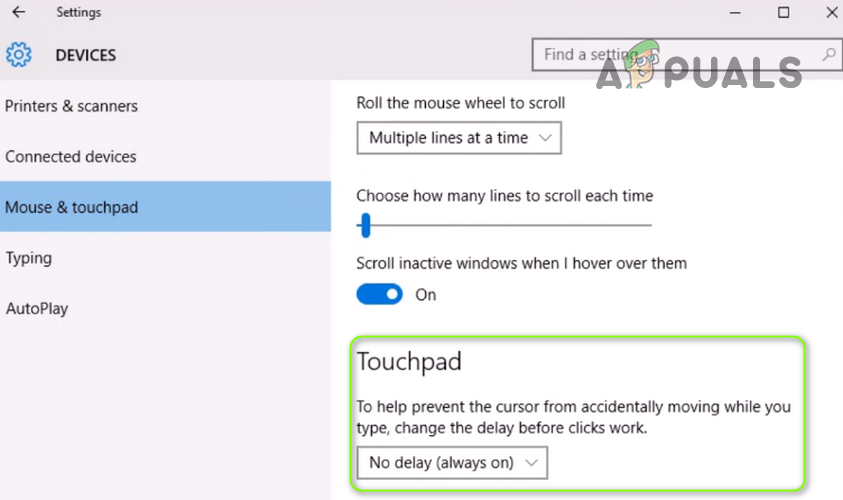
Change the Touchpad Delay - Disable the Tapping, Tap, and Drag, or Tap to Click options in the touchpad application and check if the issue is sorted out.
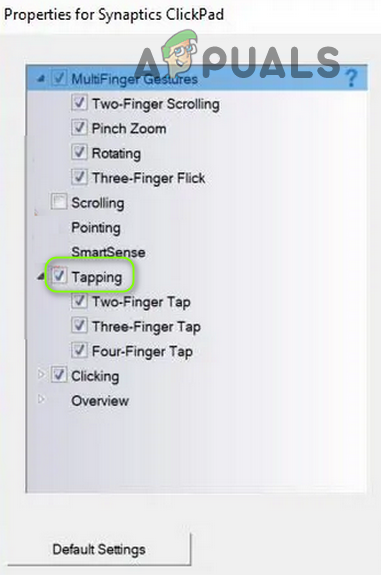
Disable Tapping in the Touchpad Settings - Disable One Click in the Touchpad application and check if the hovering issue is resolved.
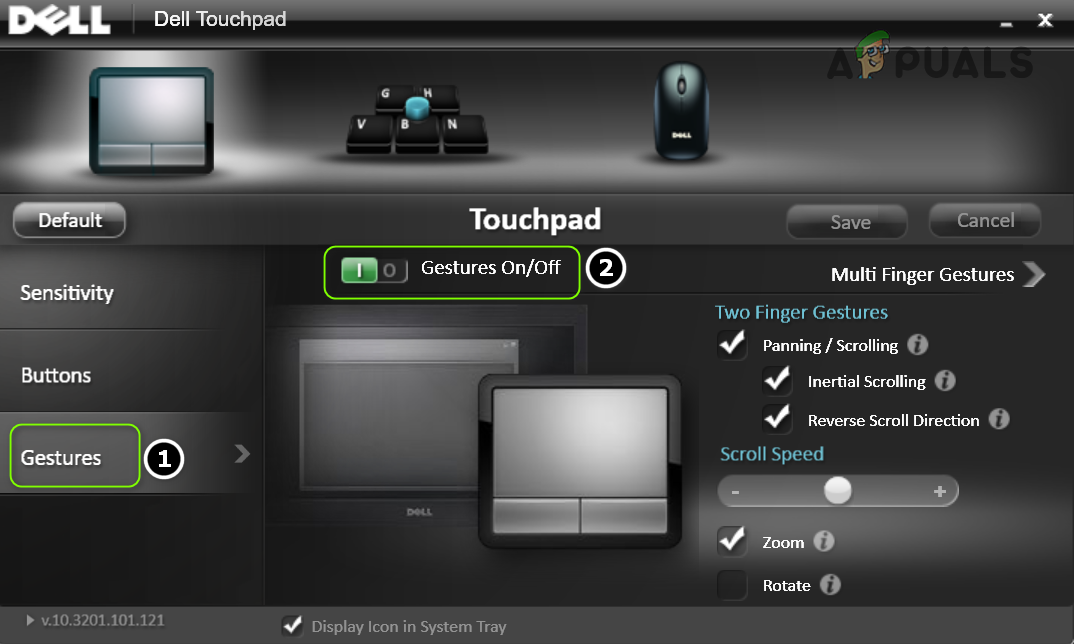
- Check if disabling the Smart Gestures in the Touchpad settings solves the problem. If so, then you may enable Scroll and Zoom.
Disable Touchpad Gestures - If everything else fails, then you may disable the Touchpad/Trackpad (either in the Device Manager or system’s BIOS) till the issue is resolved.
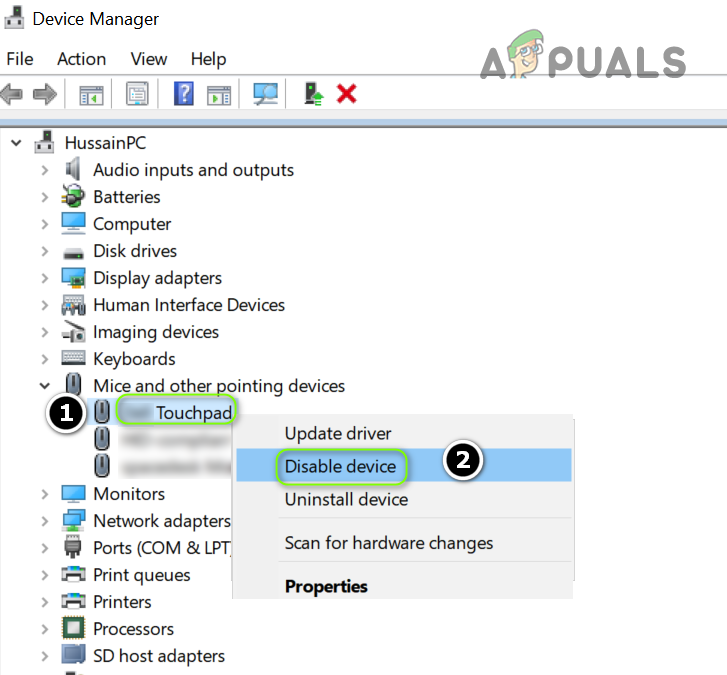
Disable Touchpad in the Device Manager
Solution 9: Edit the Registry of Your System
If none of the solutions has worked for you, then you may edit the system’s registry to solve the problem.
Warning: Proceed with care as editing the system’s registry requires a certain level of skill and if not done accurately, you may cause everlasting damage to your PC/data.
Before moving further, make sure to create a backup of your system’s registry.
Set the Value of MouseHoverHeight and MouseHoverWidth to 0
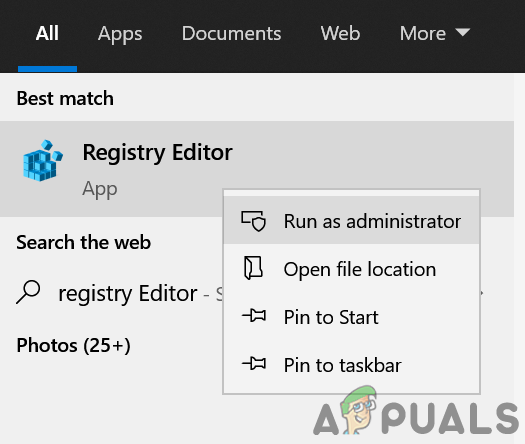
- Click Start, type: Registry Editor, and right-click on the Registry Editor. Then choose Run as Administrator.
Open Registry Editor as Administrator - Now navigate to the following path:
Computer\HKEY_CURRENT_USER\Control Panel\Mouse
- Then, in the right pane, double-click on MouseHoverHeight and set its value to 0.
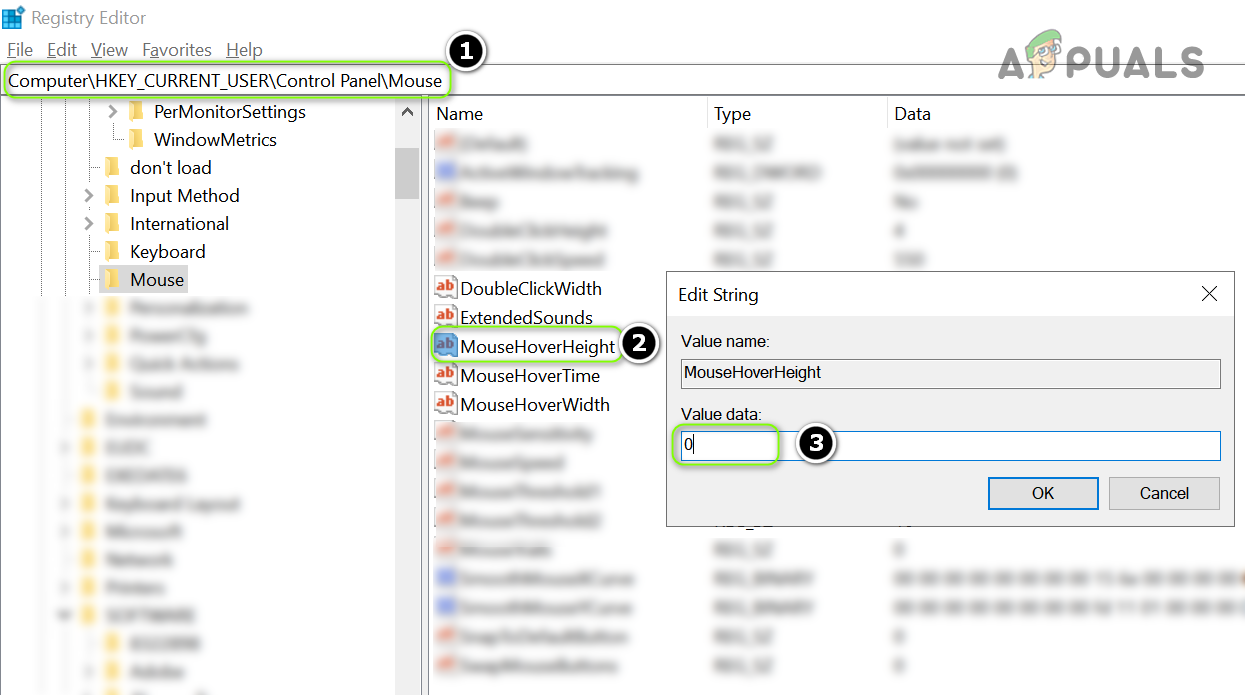
Set the Value of MouseHoverHeight to 0 in the Registry Editor - Now repeat the same to set the value of MouseHoverWidth to 0 and close the editor.

Set the Value of MouseHoverWidth to 0 in the Registry Editor - Then reboot your PC and check if the auto-selecting issue is resolved.
But this may disable thumbnail previews on the system’s taskbar.
Disable ForegroundLockTimeout
- Launch the Registry Editor (as discussed above) and navigate to the following:
HKEY_CURRENT_USER\Control Panel\Desktop
- Now, in the right pane, double-click on ForegroundLockTimeout.
- Then change the Base to Decimal and in the Value Data box, enter 0.
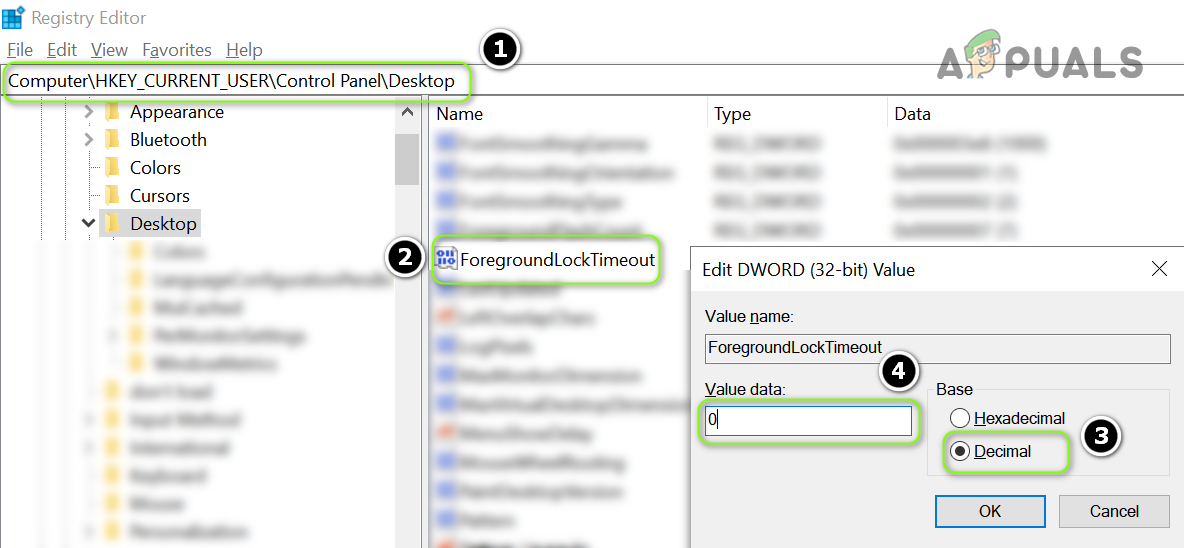
Change the Base of ForegroundLockTimeout to Decimal and Set its Value to 0 - Now click on the OK button and exit the editor.
- Now reboot your PC and upon reboot, check if the mouse is clear of the hovering issue.
Keep in mind that whenever you want to revert the above setting to default, set the value of ForegroundLockTimeout to 200000.
Set the HoverSelectDesktops Value to 0
- Navigate to the following path:
Computer\HKEY_CURRENT_USER\SOFTWARE\Microsoft\Windows\CurrentVersion\Explorer
- Now, in the left pane, right-click on Explorer and choose New > Dword (32-bit) Value.
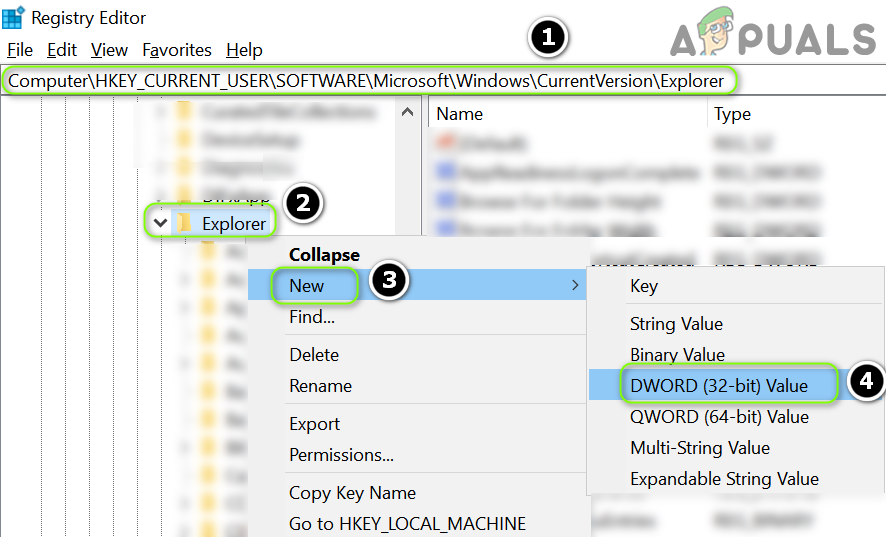
Create a New Dword (32-bit) Value for the Explorer Key - Then, in the right pane, rename the new value as HoverSelectDesktops and double-click the file to open it.
- Now set its value as 0 and click on the OK button.
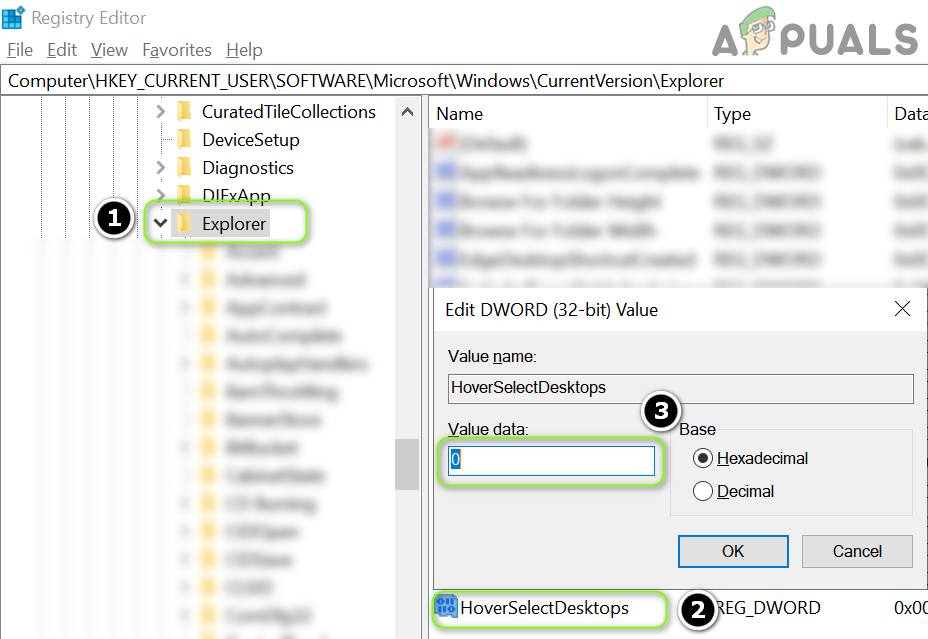
Rename the Key to HoverSelectDesktops and Set its Value to 0 - Then exit the editor and reboot your PC.
- Upon reboot, check if the mouse hover issue is resolved.
If the issue persists, then you may try another mouse with the system ( from a different manufacturer).


THANK YOU for a complete article offering ALL possible solutions, after struggling for an hour to find the right solution, because all other articles stop at “Ease of Access”. You finally helped me to fix the “File Explorer Options” problem I had.