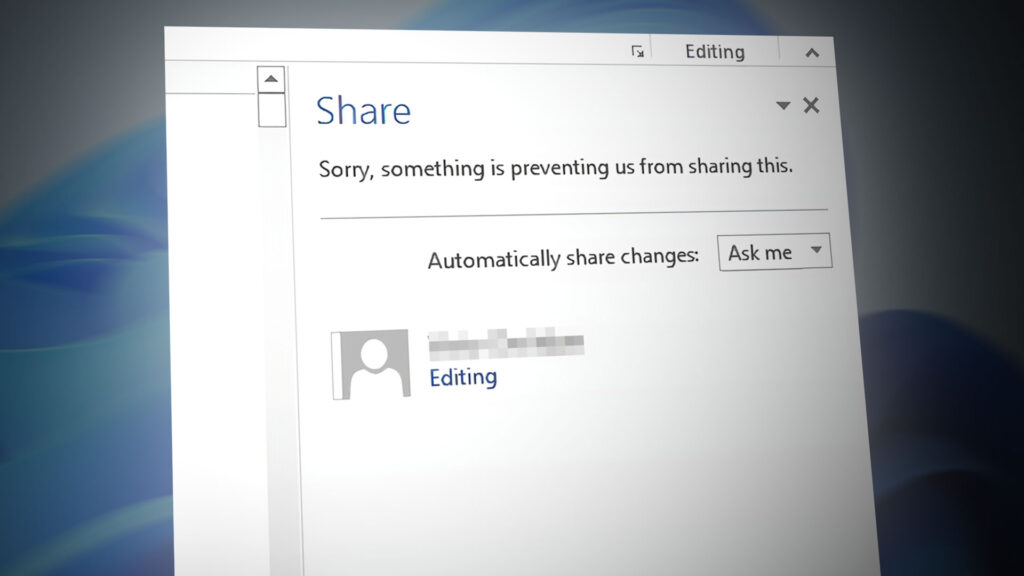
Fix: Sorry, something is preventing us from sharing this
The error ‘Sorry, something is preventing us from sharing this‘ occurs when certain Office users try to share Word files via email or attempt to generate the share link. This problem has been confirmed to occur with Microsoft Office 365 as well as with older Office suites.
If you are just beginning to troubleshoot the issue, the first thing you should investigate is whether you have a secondary copy of the document you are trying to share. Duplicated documents will trigger this error in certain Office suites due to a logic error.
Another reason you might see this error is if link editing is disabled in your Microsoft 365 account settings, or if the share link functionality is broken.
Since system file corruption can also be responsible for this issue, reinstalling the Office suite and scanning for malware are good practices before ensuring that Word is updated to the latest version.
However, there are documented cases in which this problem occurs due to an issue with OneDrive syncing. Try clearing the OneDrive sync cache and unlinking your account temporarily to resolve the issue in these instances.
Below you’ll find a series of step-by-step methods that will walk you through everything.
1. Remove the duplicate copy of the document.
If the file you are trying to share is a duplicate of another document that is already part of the Shared list, this is most likely the reason why you are experiencing issues when trying to generate a share link or when attempting to invite people via email.
This problem seems to occur only with the standalone installation of Word, as it has not been confirmed to occur with Office 365.
In case you are just beginning to troubleshoot this issue, start by ensuring that the file you are trying to share is not currently open in another instance of Word. If it is, close one instance.
Next, navigate to the location where the file you are attempting to share is hosted, and delete any duplicates of this file that are residing in the same path.
Note: Hosting Word file duplicates shouldn’t be a problem, but certain Office builds (particularly Office 2019 and older) will restrict specific sharing functions for duplicated files.
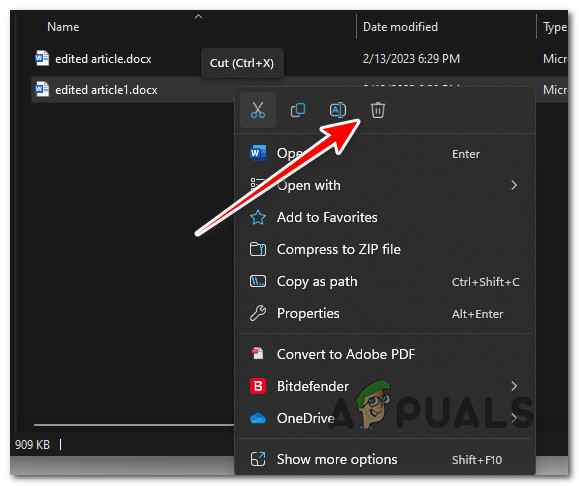
If you navigate to the location path and notice two Word files with the same type, size, and modified date, delete one of them before attempting to share the remaining file once again.
2. Allow link editing (Microsoft 365 only).
If you see this error in Microsoft 365, it is likely because the individual file settings for the documents you are trying to share are configured to disallow editing.
If this scenario applies, you’ll need to navigate to Share > Link Settings and adjust the permissions to “Allow Editing” before clicking “Apply.
Note: When you share a document, the document and its metadata are automatically added to the recipient’s Shared view in OneDrive, Word, Excel, PowerPoint, and Office.com.
If this scenario applies, follow the instructions below to enable link editing for the specific file that is causing the error:
- Begin by opening the Word file that is causing the error within Office 365.
- Go to the right corner of the screen and click on Share.
- From the context menu that just appeared, click on ‘Link settings’ (Anyone with the link can edit).
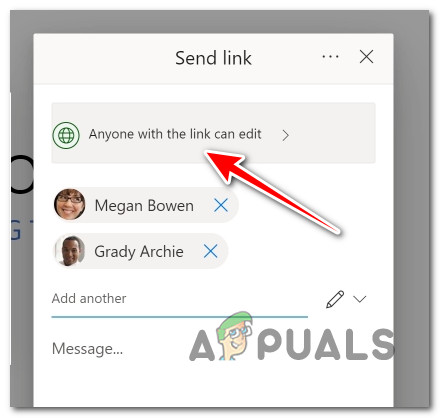
Accessing the Link settings - Next, choose the permissions you want to grant for this shared link, and then click “Apply.
- Finally, generate the shared link, invite via email, and add an optional message before clicking on “Send.
3. Share the document via email invitation (Microsoft 365).
If you’re using an older Office suite, it’s possible to see this error due to a glitch that affects the link generation function for shared files.
While some users have managed to resolve this issue with a simple restart, others report that the problem has persisted even after they’ve reinstalled the Office suite.
However, there is one fix that the majority of affected users have successfully used to bypass the error when sharing Word documents via the link-sharing function. It involves sending the invitation using the built-in integration.
Note: If you choose this option, the link will automatically be embedded in the invitation email that your shared contact will receive.
Here is a quick guide on how to share a Word document via email and avoid errors.
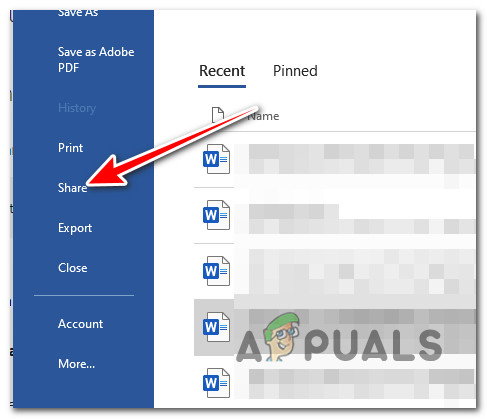
- Open the Word document within the Office suite that is displaying the error.
- From the ribbon bar at the top, click on File.
- From the context menu that just appeared, click on Share.
Sharing the Word file Note: Keep in mind that these options will vary significantly depending on the Office program you are using.
- Next, from the dedicated Share options, click on Email.
- From the next screen, you can choose between Send as Attachment or Send a Link.
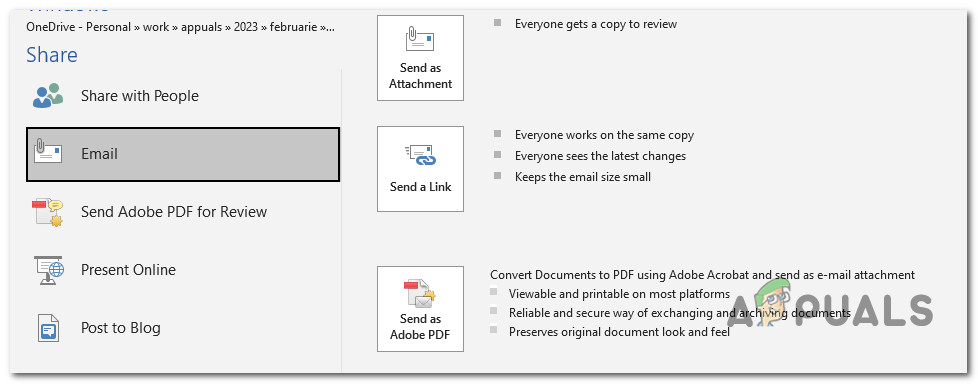
Sharing document via email Note: We recommend choosing the “Send as Attachment” option, as selecting “Send a Link” might result in the same error.
- You will then be redirected to your email program, where you’ll need to insert the recipient’s email address, subject line, and body. Do this before clicking ‘Send‘.
Note: If you don’t have an email client configured, you will encounter a different error after choosing either ‘Send an Attachment‘ or ‘Send Link.’ In this case, configure an email client properly before attempting again. - Ask the recipient if he successfully received the shared document.
4. Remove malware before reinstalling Office.
There are documented cases in which the error occurred because their machines were hosting spyware or malware that prevented Office from making registry changes.
This will prevent you from generating shared links, adding collaborators, or even installing, uninstalling, or updating the Office suite and any installed apps.
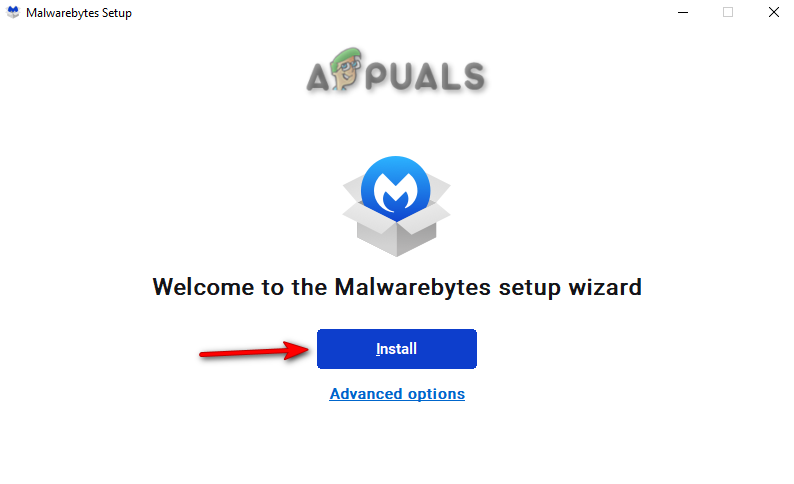
If this scenario appears to be applicable, you should begin by using a powerful anti-malware cleaning tool to remove the security threat before touching the Office installation. We recommend performing a deep scan with Malwarebytes.
Begin by installing Malwarebytes, then deploy a deep scan on every system partition, and wait until the operation is complete.
After the scan has finished and the security threat has been removed, follow the instructions below to uninstall your current Office installation. Then, reinstall the most recent version from scratch and install every cumulative update.
Here’s a step-by-step guide on how to accomplish it:
- Hit the Windows key + R to launch the Run dialog box. To open the Programs and Features menu, type ‘appwiz.cpl’ and press Enter.

Open up the Programs and Features menu - If the UAC (User Account Control) prompts you, click Yes to grant admin access.
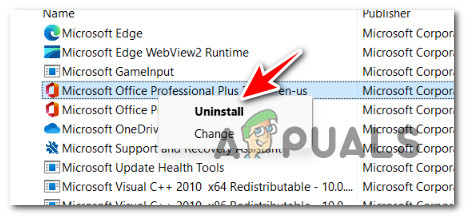
- Go down the list of installed apps on the Programs and Features screen until you find your Microsoft Office installation.
- Once you have found the Office suite causing you problems, right-click on it and select Uninstall from the context menu that appears.
Uninstall the Office suite - Follow the on-screen instructions to complete the uninstallation procedure, then restart your computer and re-download the latest version of Microsoft Office through the official channels.
Note: Depending on where you obtained your Office key, your Office version might not automatically update to the latest version when you reinstall it. To ensure you are running the latest version, go to File > Account > Office Updates and install any pending Office updates.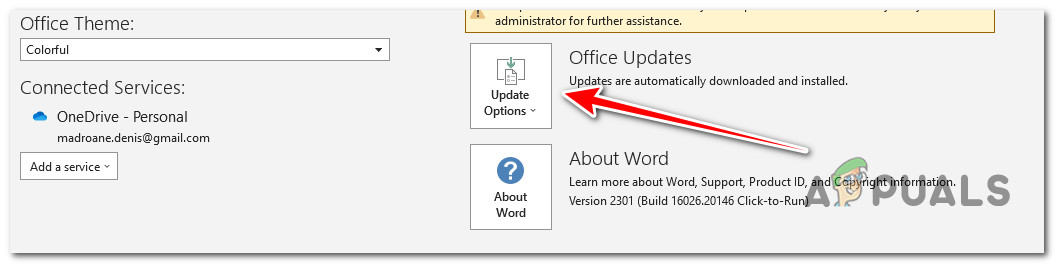
Updating Office to the latest version - Once Office has been reinstalled and updated to the latest version, check if the sharing function now works by trying to generate a share link or by attempting to share via email.
5. Unlink OneDrive sync.
The error might also be fixed by unlinking the OneDrive account that is synced to your Office account. This could cause the issue if you are currently using a different OneDrive account than the one synced at the moment.
You should try unlinking the current account to see if it makes any difference. You can do this from the Office Upload Center.
Here are the steps on how to do this:
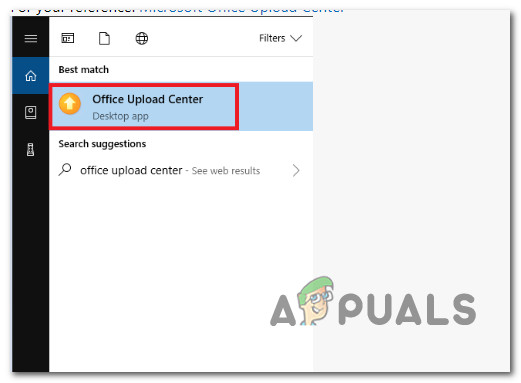
- First, press the Windows key, then type ‘office Upload Center’.
- From the list of results, click on the Office Upload Center.
Open the Office Upload Center Note: If you cannot find this app, skip the remaining steps and move directly to the next method below.
- From the Office Upload Center, click on the gear menu (Settings), and then select “Delete cached files” from the context menu that appears.Note: Confirm at the prompt, then wait until the operation is complete.
- Once the cache has been released, open up the tray menu and click on the OneDrive icon.
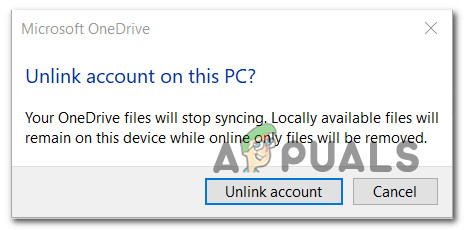
- From the next menu, go to Settings, and then look for the Unlink section.
- Click on “Unlink this PC“, and then click on “Unlink account” at the confirmation prompt.
Unlinking your account - Once the OneDrive integration has been desynced, reboot your PC. Afterward, access OneDrive at the next startup and add the email associated with OneDrive to sync it once again.
- After OneDrive has been re-synced, try sharing the problematic Word file once again to see if the problem has been resolved.
6. Reset the OneDrive temporary folder.
If you have already tried following the method above but couldn’t clean the Office Upload Center, the workaround is to reset the entire OneDrive sync client directly from your Run window.
Note: This method is typically reported to be effective with newer Office installations, including Microsoft Office 365.
Here’s a quick guide that will show you how to reset the OneDrive temp folder.
- Press the Windows key + R to open up a Run dialog box.
- Inside the Run window, type ‘%localappdata%\Microsoft\OneDrive\onedrive.exe /reset‘ and press Ctrl + Shift + Enter to effectively reset the entire sync client.

Reset the OneDrive Sync client - When the UAC (User Account Control) prompt appears, click Yes to grant admin access.
- Once the command has been run successfully, reboot your PC; then, try the sharing functionality again to see if the problem is fixed.


