How to Fix Slow Windows Startup on Windows 11?
Many users have reported their Computer with Windows 11 is starting up slower than Windows 10 and other operating systems they have used on the same Computer System
There are multiple causes that can slow your Windows 11 Startup, We have researched and found some common causes that can lead to this issue, here are a few examples:-
- Background Apps – Windows 11 Comes bundled with a lot of programs out of the box, these background applications can lead to a slow startup or overall slow performance.
- Malware – Malware as we all know is dangerous and injurious to our computer system, it causes the system to slow down and terminates a lot of very necessary processes.
- Bloatware – Windows 11 is bundled with a lot of bloatware applications such as Cortona, Maps, Etc. Which you might not be interested in using but they are a major cause of making your computer system slow in starting up.
- Hardware Limitations – Your hardware might need an upgrade. Since Following the above steps didn’t really work out for you, it is best to assume that your HDD is very old or is malfunctioning due to overload. Consider Switching to better alternatives such as an SSD.
We have lined up a few methods that will surely help you get your pc back on the right track, follow along.
Disable Startup Apps
Your Windows might be taking more than usual time to startup because of too many programs set to start on startup. Here are steps to reduce some startup programs from your Windows.
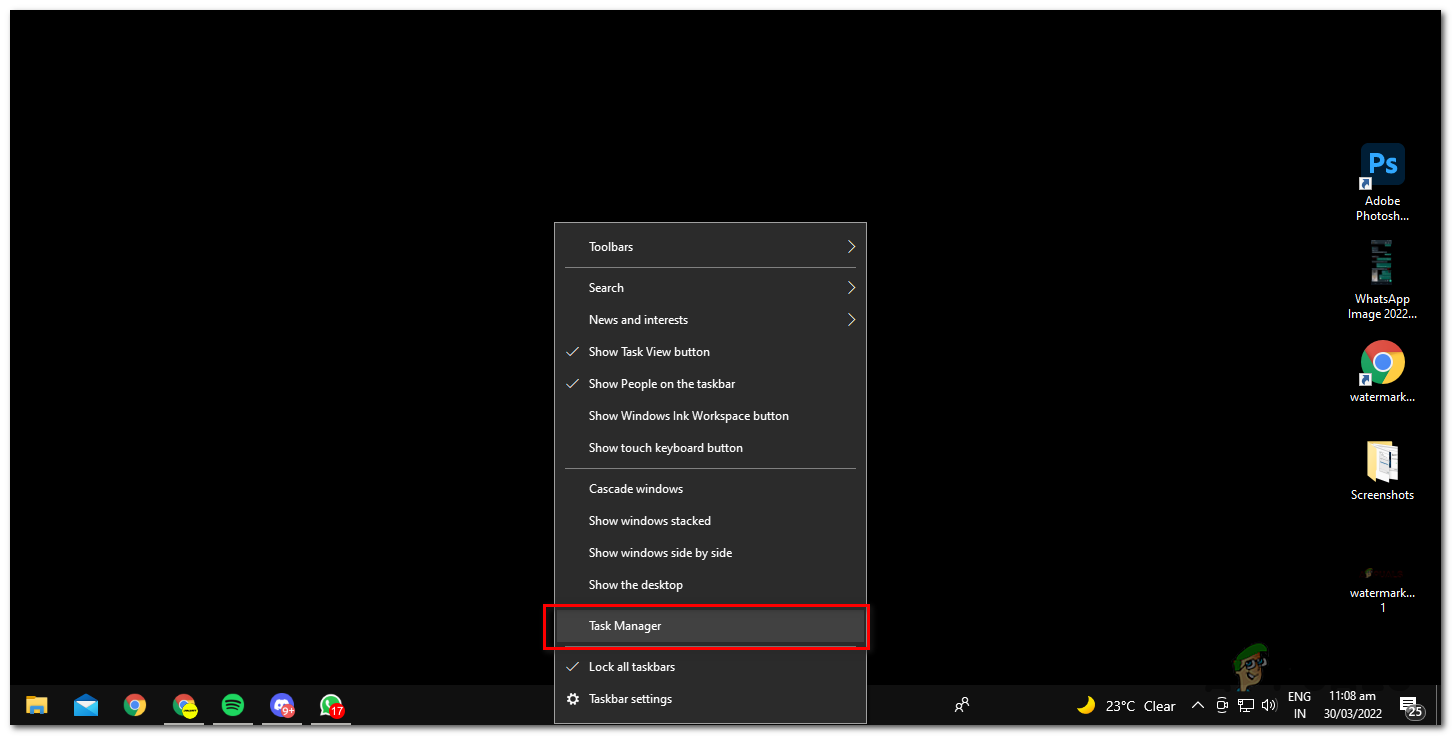
- Right-click on your Taskbar and click on “Task Manager”.
opening task manager - Disable the programs that you feel like you won’t need to start on startup. In my case, I disabled skype, Figma Agent, AnyDesk as I feel I will not be needing these programs to start on startup.
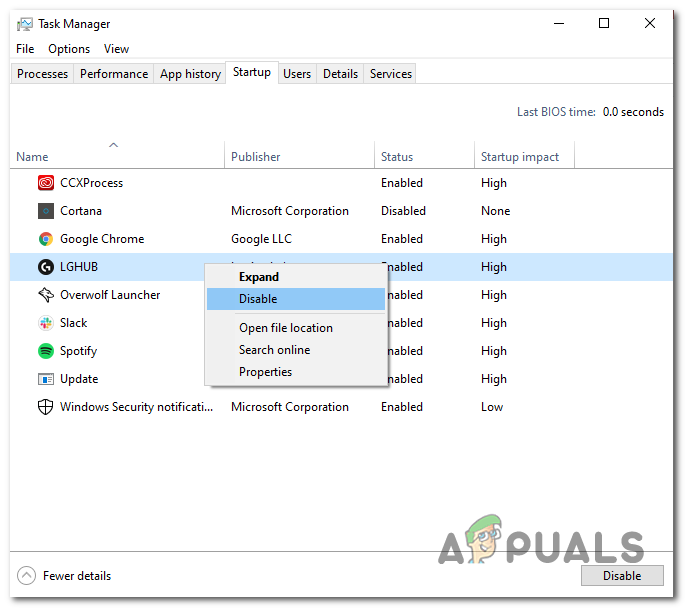
Disable startup apps using task manager - The programs won’t automatically startup the next time you restart your PC, you will have to manually turn them on.
Debloat your Windows
We’ll use a script developed by sycnex for debloating Windows 11. If you are not familiar with what debloating is you can check our article here.
Debloating means deleting applications and services which come bundled with Windows 11, in some cases those applications are necessary depending on your usage.
- Click the Windows key once and type Powershell, open it as an administrator.

Opening powershell as an admin - Next, copy the below-highlighted command and paste it into the PowerShell window.
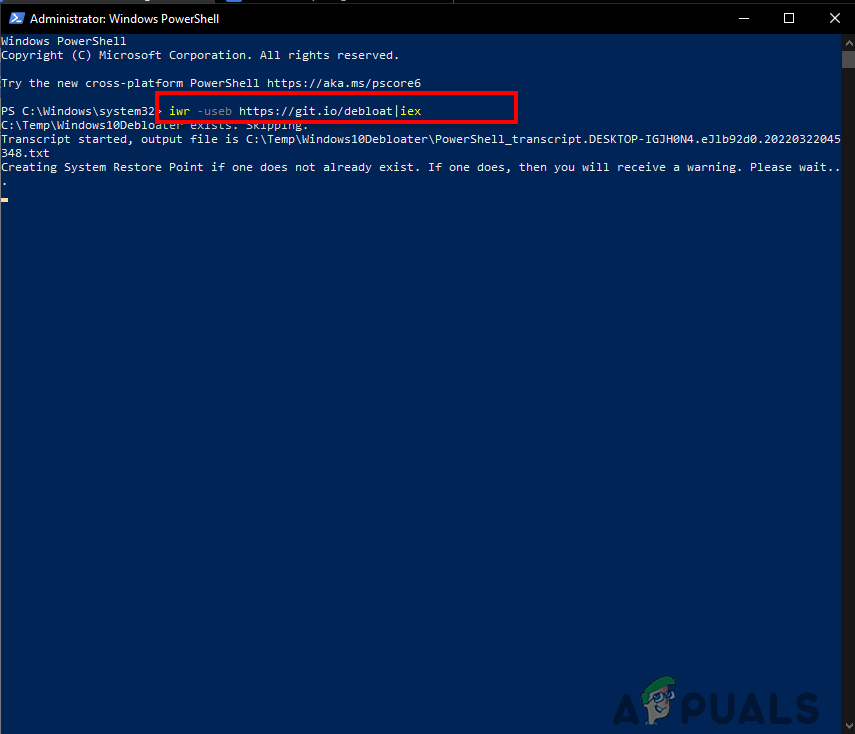
Installing debloater from web iwr -useb https://git.io/debloat|iex - After that hit Enter, it will automatically download the Windows 11 debloater script from the internet and launch the program within a few seconds.
Note: The command will also create a System Restore Point so, you can easily move back to a working build in case anything goes wrong after performing any actions. - Yes, this is a window 10 debloater but as tested by myself It completely works fine on windows 11, Moving on you will be represented by a window. Here I’ll suggest you to disable Cortona, Disable telemetry / Tasks.
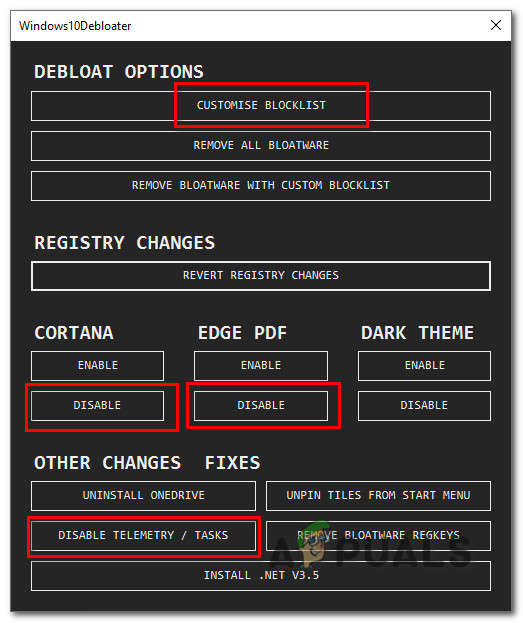
Debloater interface with visual instruction
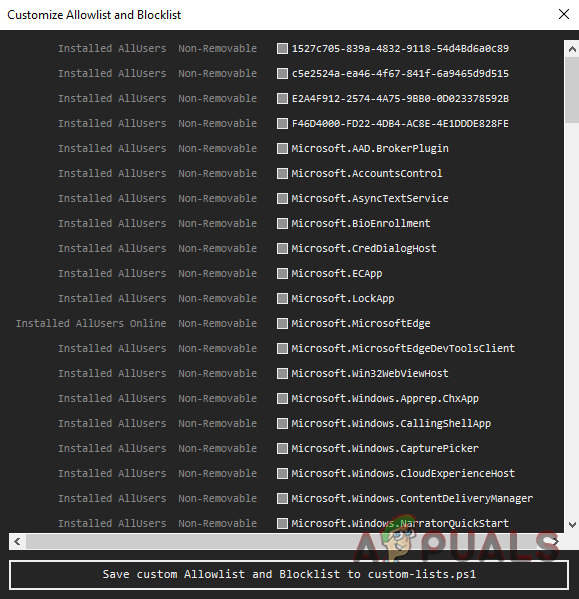
Customize Blocklist – box allows you to view a list of items that you can disable, it includes services like Microsoft store, Microsoft photos, Paint, Edge. You can disable these, it’s your personal preference. It totally depends on how you plan to use your computer.
Scan for malware using Malwarebytes:
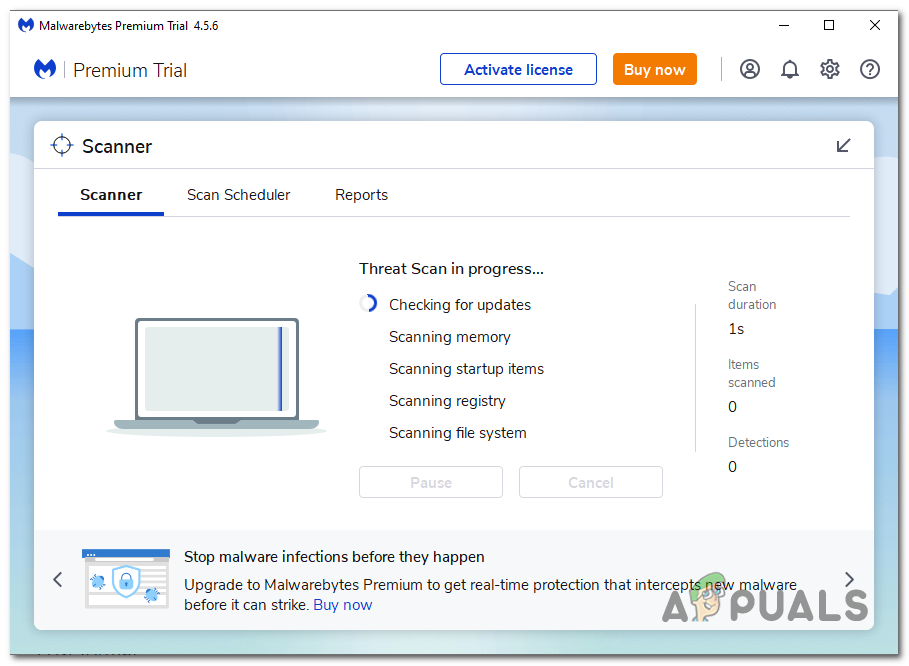
Malwarebytes is anti-malware software, scan your computer by using their services to discover any viruses or malware that might be affecting your computer’s startup time. Malware bytes is pretty easy to use, Follow along these steps to make your computer Malware free.
- Open Malware Bytes.
- Click on the Scan button and wait for a while
- After malware bytes has scanned the whole system, it will show the malware it found on your system.
- Click on quarantine and wait for a while.
- Reboot.
Now your Computer is malware-free and we have one less thing to worry about. Download Malwarebytes Here.
Defragment Hard Drive:
Defragging is a safe process in which you rearrange the data stored on your hard drive, it cleans it and makes it a tiny bit quicker than before. Defragging is a windows-based process so it is really hard to mess it up. Follow These steps if you are a Hard disk Device user. If you are a Solid State Drive (SSD) user avoid defragging as it might affect the health of your drive since defragging is not supposed to work on SSDs as it is made to Defrag hard drives which have a completely different functionality as compared to SSDs.
-
- Open File Explorer.
- Right-Click on the HDD you are planning to defrag.
- Open File Explorer and right-click on the HDD you plan to defrag.
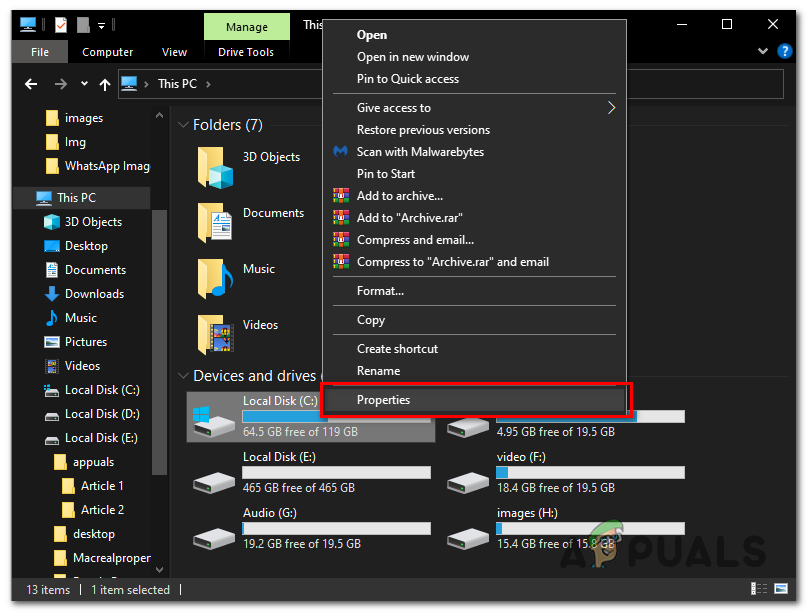
Opening properties of HDD to Defrag - Click On Properties.
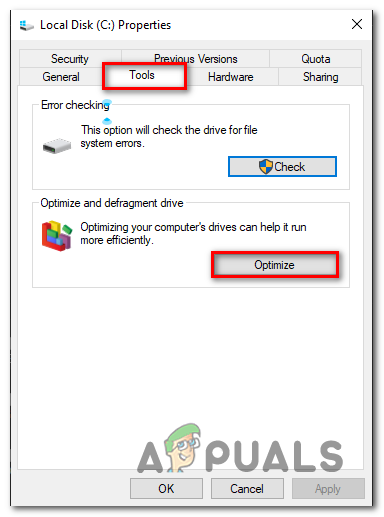
How to defrag HDD using windows utility
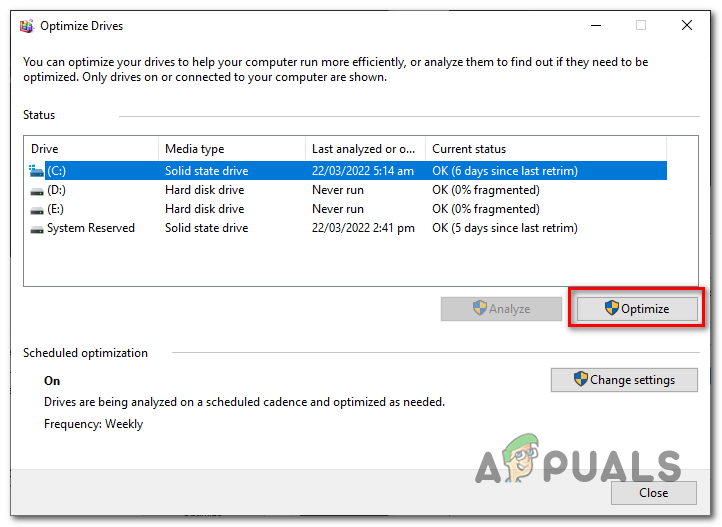
- Head over to tools and click on optimize.
- Click on the desired Disk you want to optimize.
Update Drivers:
This problem can be caused by incompatible Driver Version, You can easily Downgrade or upgrade your Graphics Card Drivers by visiting these websites. For Nvidia users and for AMD users. Driver’s can be a major playing factor since a lot of the time even new drivers may be slowing your PC down, play around with a few drivers and find the perfect one for you.
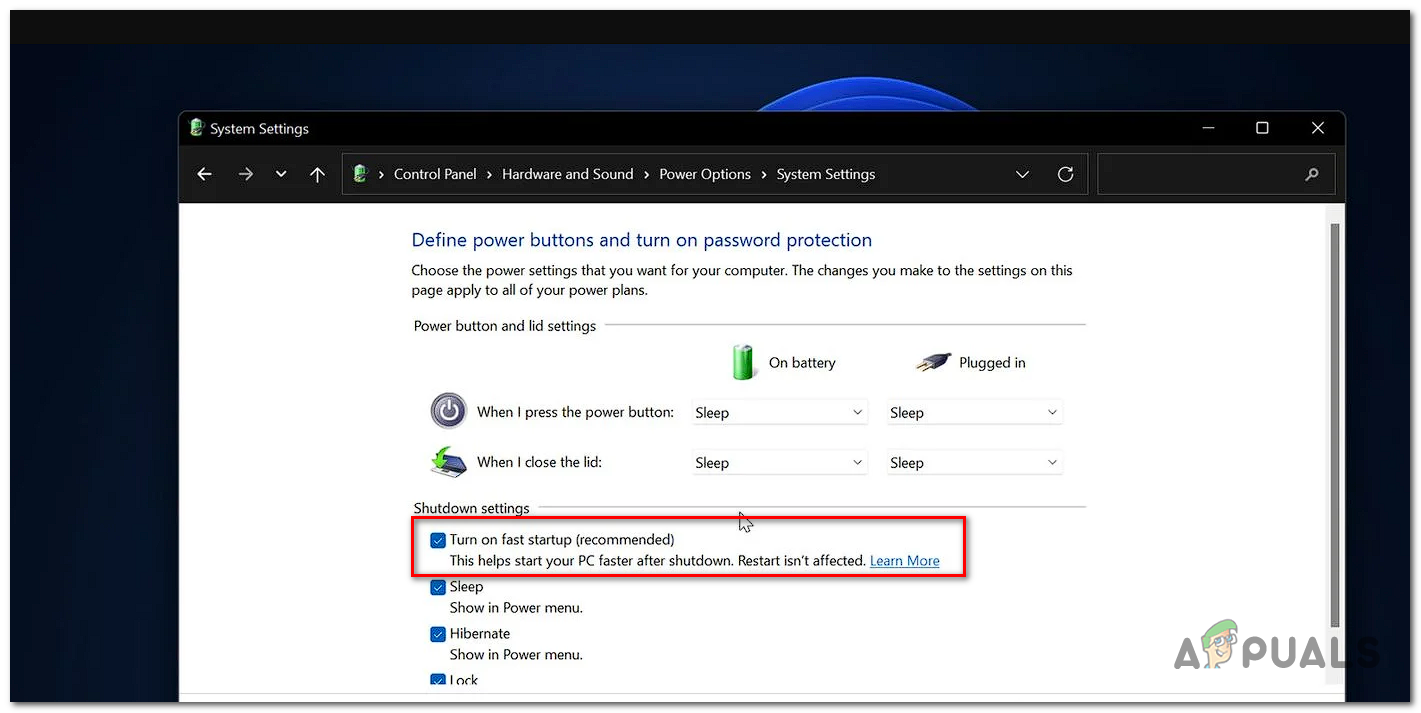
Fast Startup:
Fast startup is a feature that is built into windows 11, fast startup utilizes maximum available resources and basically makes your system try as hard as possible to turn on quickly, what it also does is that it never really turns off your system so it is easier to turn on. This does not work on restarts. Follow these steps to turn on the Fast-startup feature in windows 11. Avoid this step if you are on a laptop since it will harm your battery on the long term.
- Click on the windows button.
- Search Control Panel.
- Open Power Options
- Tick the Fast-startup option.
Now the next time you startup you computer system you will see a drastic change in startup time
Upgrade Hardware :
If these steps did not work out for you, I feel like it’s time to upgrade your HDD to an SSD since SSDs are much quicker as compared to HDDs and honestly, they are not that expensive either. So consider upgrading your hardware or degrading your windows to a stable OS you have used in the past.


