How to Show Wi-Fi passwords on Android
Wi-Fi is one of the most used functions of our modern Android devices. Throughout a device’s lifespan, it will connect to a whole lot of Wi-Fi networks (free or password-protected).
Every time you connect to a new Wi-Fi network, your device is programmed to store the name along with the password of that particular network. Although the device will remember the password the next time you connect to a recurrent Wi-Fi, you can’t actually see the password with your own eyes. At least not without tinkering with your Android for a while.
But let’s assume you want to share the password with a friend or you need to connect with a different gadget to a particular Wi-Fi, but you can’t remember the password. What do you do? Well, if one of your Android devices was connected to that network before, you can fetch the password from it.
Unfortunately, the steps of retrieving saved Android passwords are not as easy as advertised. Contrary to what some similar articles claim, there isn’t a way to view Wi-Fi passwords without root access. The password file is located in the /misc directory, which requires root to be accessed.
As there are several different procedures of extracting the Wi-Fi password from your Android, I have split them into multiple methods. If the first method doesn’t’ work, jump to the next one until you find a guide that retrieves your Android Wi-Fi passwords.
If you don’t have root but you’re willing to get root access to retrieve your passwords, I have included some steps below that will help you quick-root your device.
Quick Rooting your Android device
Rooting your Android has gotten a lot easier over the years. Now you can use a 3rd party software that will root your phone with just a few clicks.
Keep in mind that these following steps won’t work with every smartphone manufacturer. Samsung, HTC, and a few other brands need some extra steps like unlocking the bootloader for a quick-root software to be successful.
Regardless of your device, you don’t run the risk of bricking your device by using a 3rd party quick root software, so it’s worth a try if you have the time. Here’s what to do:
- On your Android – Go to Settings > Security & Privacy > Aditional Settings, scroll down and enable Unknown Sources.

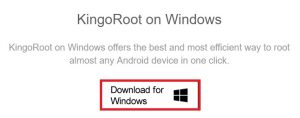
- On your PC- Visit the official website of Kingo Root, scroll down and click on Download for Windows. Install the .exe on your PC.
 Note: You can also download the Kingo App directly on your Android, but it has a smaller probability of success than using the desktop software.
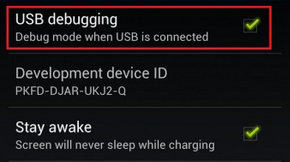
 - On your Android – Go to Settings, tap on Developer Options and enable USB debugging.
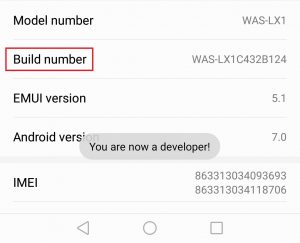
 Note: If you don’t see a Developer Options tab, go to Settings > About Phone and tap the Build Number 7 times until you see the “You are now a developer” message. Now return to Settings, Developer options should be under About device.
- Launch the Kingo Root software on your PC. Turn your attention to your Android device and make sure the device has at least 50% battery and is connected to a Wi-Fi network. Mobile data also works, but it will use a lot of traffic data to download some large files.
- Connect your Android device to the PC and allow USB Debugging.

- Afte your device get’s recognized, alt that’s left to do is click on the Root button.
- It will take a while until all the files are downloaded and installed. Your device will also restart several times until the rooting process is complete.
Note: Don’t disconnect the cable during this period, even if your device looks unresponsive. - When the process is complete, you’ll either get a message saying “Root Succeed” or “Root Failed“. Regardless of the outcome (hopefully it was a success), you can safely disconnect your device from the cable.

Now that your device is successfully rooted, let’s get to the actual password extracting.
Method 1: Viewing Wi-Fi passwords with a file manager
- Download & Install a File manager capable of accessing the root directory if you don’t already have one installed. I have used ES File Explorer, but you can use any other file manager that you’re more comfortable with like ASTRO or Root Browser.
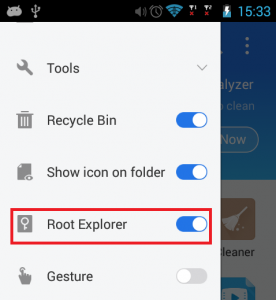
- Launch ES File Explorer, tap on the action menu and make sure Root Explorer is enabled.
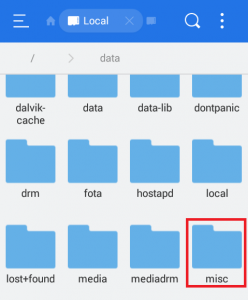
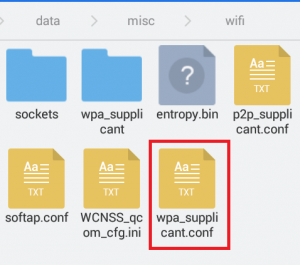
- Navigate through Local > Device > Data > Misc.
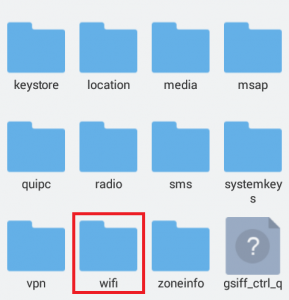
- Scroll down and tap on Wi-Fi.
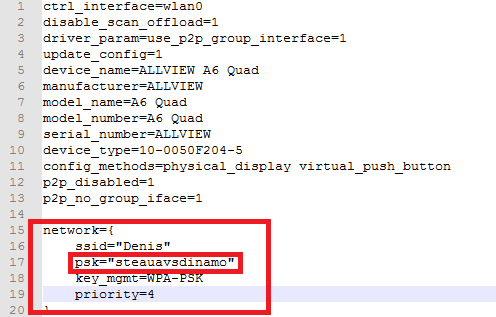
- Tap on wpa_supplicant.conf and open it with ES Note Editor or any other text editor you might have installed.
- You should be able to see a list with all the networks your Android device was connected until now. The password for each Wi-Fi name (ssid) is located after “psk”.
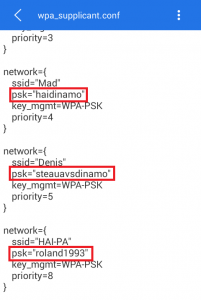
- You can copy the password for your own convenience, but don’t delete or modify any information from there.
Method 2: Using a password extractor app
If you didn’t manage to locate the password file yourself (or you don’t want to go through all that trouble), you can also use an app capable of extracting the passwords for you. I used Wi-Fi Key Recovery app to extract them, but feel free to explore other options if you’re feeling adventurous.
Keep in mind that even apps capable of extracting Wi-Fi passwords still need root privileges to be able to fetch the data. Here’s what you need to do:
- Download & install WiFi Key Recovery from Google Play Store. It’s available for free, but it won’t work on devices that aren’t rooted.
- When you launch WiFi Key Recovery for the first time, it will ask you to grant/allow Superuser access. Tap on Grant / Allow.

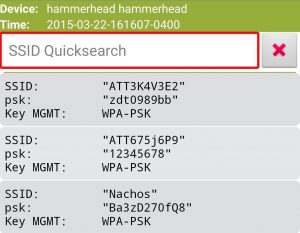
- After a brief waiting period, the screen will populate with a list of all Wi-Fi networks your Android has ever connected to. The password can be located in the psk field.
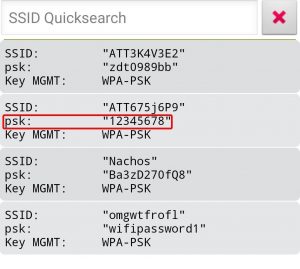
- If the list is too long you can search for it by using the quick search bar.
- Once you’ve located the password you can copy it easily by long-pressing on the entry associated with it. Select Copy password from that list.

Method 3: Extracting the password file using ADB
If you didn’t manage to view the Wi-Fi passwords directly from your Android, you can retrieve them by opening an ADB and typing the right commands on your computer. The end result is the same, but the steps are somewhat different:
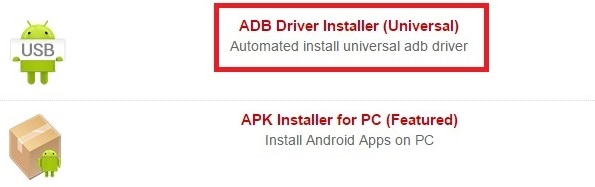
- First things first, make sure you have the ADB driver installed on your computer. If you don’t download it from here.
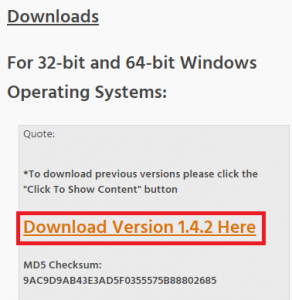
- After the ADB driver is installed, click this and scroll down to the Download section. Click on the last version to begin downloading the required Android platform tools. Once the download is complete, install the package on your PC.
 Note: If you have Eclipse or Android Studio installed on your computer, this step is not necessary.
 - On your Android – Go to Settings, tap on Developer options and enable USB Debugging (if you didn’t already).
Note: If you don’t see the Developer Options tab, you need to enable it first. Go to Settings > About Phone and tap the Build Number 7 times until you see the “You are now a developer” message. Developer Options should now be visible in Settings.
- Connect your Android device to your PC via a USB cable.
- Allow USB debugging on your Android by tapping on OK.
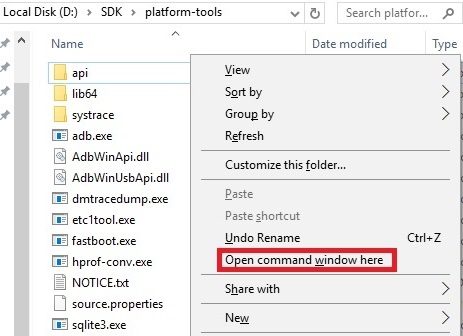
- Navigate to where the platform tools were installed. The default location is C:\Users\ *YourUsername* \ AppData \ Local \ Android \ sdk \ platform tools.
- Shift + Right Click anywhere inside the platform-tools folder and click on Open command window here.
- Insert the following command inside the newly opened Command Prompt window: adb pull /data/misc/wifi/wpa_supplicant.conf c:/wpa_supplicant.conf
Note: This command will grab the file which contains your Wi-Fi passwords (wpa_supplicant.conf) and paste it in the root directory of your C drive. - Navigate to This PC > Local Disk (C:) and locate the wpa_supplicant.conf file.

- Open the file with a text viewer (Notepad or Notepad+ works just fine).
- You should see a list with all the Wi-Fi passwords used by your Android device. The password can be seen after the “psk=” prefix.