FIX: Selected boot image did not authenticate
Windows has made significant progress in the realm of operating systems, especially with their flagship product, Windows 10. However, a boot error, “Selected boot image did not authenticate,” has surfaced, often associated with upgrades, updates, hot fixes, and driver updates. User complaints suggest that this error appears to be exclusive to HP computers.
Hewlett Packard (HP) produces high-quality computers, each equipped with a BIOS that inspects for errors while loading devices and the system. The error “Selected boot image did not authenticate” differs from the “bootmngr missing” message displayed when attempting to load an operating system from an incorrect location. This article explains the meaning of the former error, why it occurs in HP computers, and how to resolve it enabling your computer startup.
What does “selected boot image did not authenticate” mean, and why does it occur?
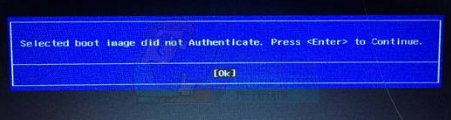
This error, displayed on a blue strip against a black background, appears shortly after rebooting or powering on. Pressing enter merely shuts down the computer, ultimately leading back to the same screen. Essentially, this error signifies a breach of a security protocol verified by a firmware database, or the device loading the OS can’t supply the necessary info for a secure boot.
Secure Boot is a technology enabling system firmware to verify that the boot loader is signed with a key authorized by a firmware-contained database. This database stores your boot sequence to protect your PC from potentially harmful system changes. An infringement of this protocol results in an insecure boot and a notification. Changes may occur due to new device installation, operating system updates (which modify boot loader information), device driver changes, or malware attacks.
This error may indicate missing boot loader information, preventing the operating system from loading. Boot information identifies the presence of an operating system on your drive. If it fails to load, the authentication process cannot complete successfully. The boot image can become corrupt due to updates or malware attacks. Certain viruses can infiltrate the boot information, preventing a secure boot, or even delete it. Additionally, updates can modify the boot information, inhibiting startup.
Here are solutions to clear the ‘selected boot image did not authenticate’ error and enable your HP computer to boot successfully.
Method 1: Switch from secure boot to legacy boot in your BIOS settings
To switch to legacy boot, be aware it ignores operating system and hardware changes and continues the boot. This is not advisable if you suspect a virus or malware attack; instead, use method 3. Below is how to disable secure boot and enable legacy support on an HP computer.
- Completely turn off the computer, wait briefly, then restart it by pressing the Power Button. Immediately and repeatedly press Esc about once per second until the Startup menu opens.
- When the Startup Menu appears, press F10 to access BIOS Setup.
- Press the right arrow key to select the System Configuration menu, use the down arrow key for Boot Options, then hit Enter.
- Press the down arrow key to select ‘Legacy Support‘ and hit Enter. If disabled, select ‘Enabled‘ and press Enter.
- Use the arrow keys to select ‘Secure Boot‘ and press Enter. Then, select ‘Disabled‘ and press Enter.
- Press F10 to accept the changes. Then, use the left arrow key to select ‘Yes‘ and press ‘Enter‘ to save and exit.
- The computer automatically reboots to Windows, with Secure Boot disabled and legacy support enabled.
Method 2: Perform a Hard Reset on Your Computer
This will reset all BIOS configurations (excluding passwords), accommodating new OS and hardware changes upon the next boot. Thus, any conflicting configurations will be eliminated. Here’s how to perform a hard reset on an HP computer.
- Turn off your computer.
- Unplug the AC adapter.
- Remove your battery.
- Hold the power button for at least 20 seconds to reset the hardware.
- Please power the device back on and tap the F2 key to load the hardware diagnostics.
- Initiate the startup test to examine all the system hardware and identify any issues.
- If the test is clean, reboot your PC and start it normally.
If your computer doesn’t boot, we must conduct a system repair.
Method 3: Repair Windows on your computer using system recovery
A system repair can rectify the boot information and other Windows-related issues on your device. Here’s how to perform a Windows system repair for HP users.
- Completely turn off the computer, wait a few seconds, then press the Power Button to turn it on. Immediately and repeatedly press the Esc key, approximately once per second, until the Startup menu opens.
- When the Startup Menu appears, press F11 to access the Recovery Console.
- Select ‘Troubleshoot,’ then ‘Advanced Options,’ and click on ‘Startup Repair.’
- Accept the repair process, wait for its completion, and then restart your PC.
If your computer does not have the option of using F11 recovery console, you can use our guide from here to do the same if you are running on windows 10. If you are using windows 7, here is our guide on how to repair your operating system. For window 8, 8.1 and Windows 10 users, you can also use this guide here.
It worked!! Thank You.. I change the settings from Secure boot to legacy boot in the BIOS. This article was so helpful. Thank You so much..