How to Take A Screenshot on iPhone 7 [Easy Ways]
 Reviewed by Huzaifa Haroon
No matter what device you’re using, there may come a time when you want to save or share something interesting on your screen with your friends or family. That’s exactly why screenshots exist in the first place.
However, taking a screenshot can be a bit confusing, especially if you’re still using an older iPhone or just prefer classic devices. In this article, we’ll walk you through how to take screenshots on an iPhone 7 and share some practical tips and tricks to make the process easier.
Taking a screenshot lets you capture exactly what’s showing on your phone’s screen. Even though the method is a bit different from newer iPhones, you can definitely take a screenshot on your iPhone 7, just like most older iPhone models.
How To Take A Screenshot on iPhone 7
Since Apple removed the home button in 2017, the way to take screenshots has changed for newer models. But the traditional method for iPhone 7 and earlier is still simple and doesn’t require any extra apps. Below are the best and easiest ways to take a screenshot.
1. Capturing Via Button Combinations: Home Button + Power Button
The easiest way to take a screenshot is by using a button combination. This method involves pressing certain buttons together, which quickly captures whatever’s on your screen. It’s a straightforward approach, requiring no additional apps or setup.
- First, go to the screen you want to capture—this could be a webpage, a photo, or even a frame from a video.
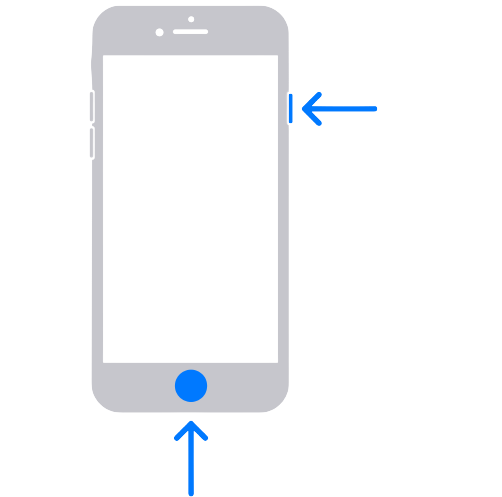
- Press the power button (on the right side) and the home button (at the bottom) at the same time, then quickly release both.
Taking a screenshot with the power and home button - You’ll see the screenshot minimize to the lower corner of your screen. Tap it to edit and save, or just ignore it and it’ll be saved automatically for you to use later.
2. Capturing Via Assistive Touch
AssistiveTouch is an accessibility feature built into iOS devices. When you turn it on, a small menu appears as a floating button on your screen. Tap it and you’ll find different shortcuts, like locking your phone, using the flashlight, and even taking screenshots. This is especially useful if your Home button isn’t working properly.
To turn on AssistiveTouch:
- Open the Settings app and go to General.
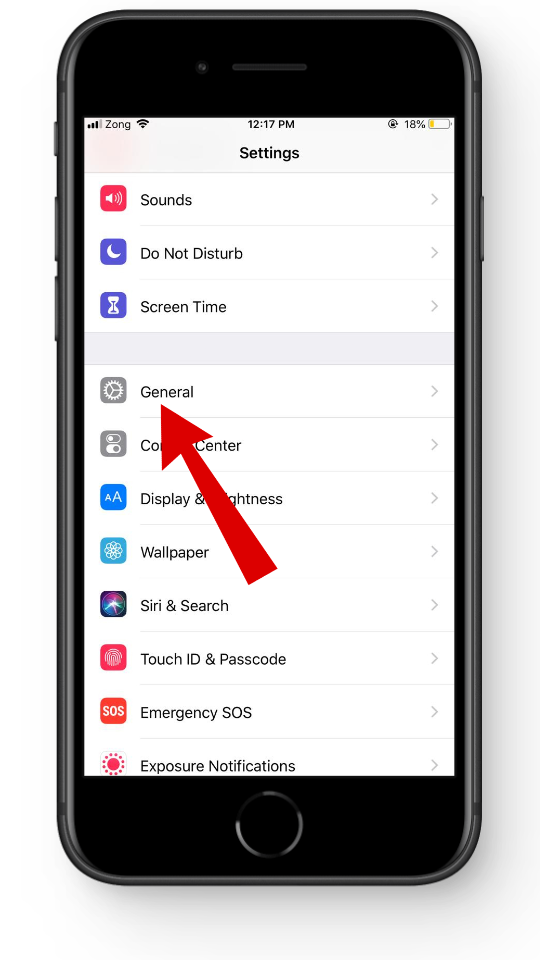
Head to Settings > General - Tap on Accessibility.
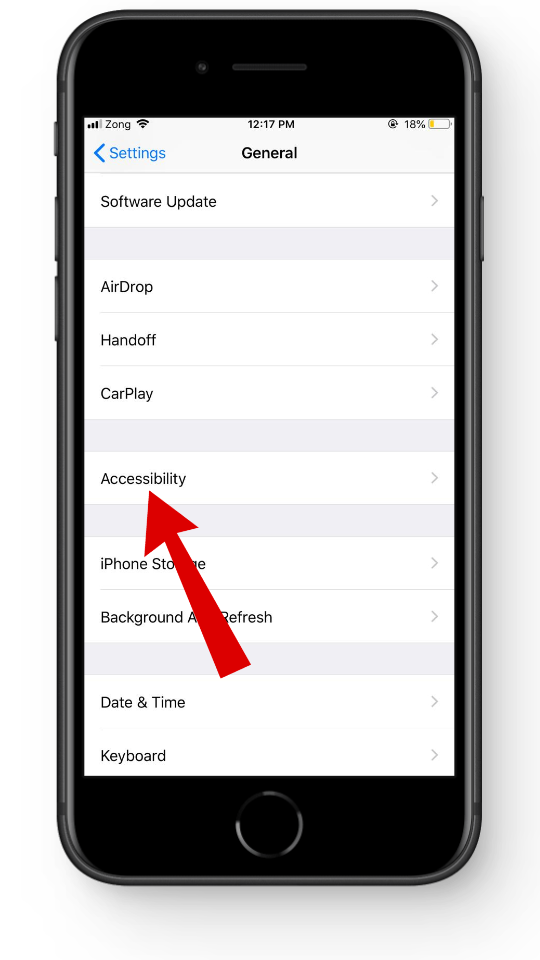
Tap on Accessibility - Tap AssistiveTouch.
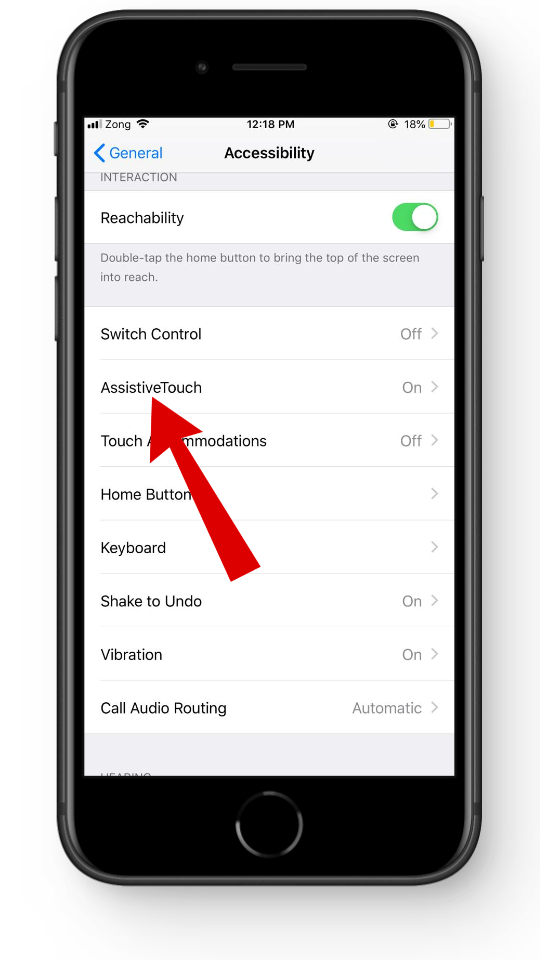
Select AssistiveTouch - Toggle AssistiveTouch on. You can also customize what this menu does based on your preferences.
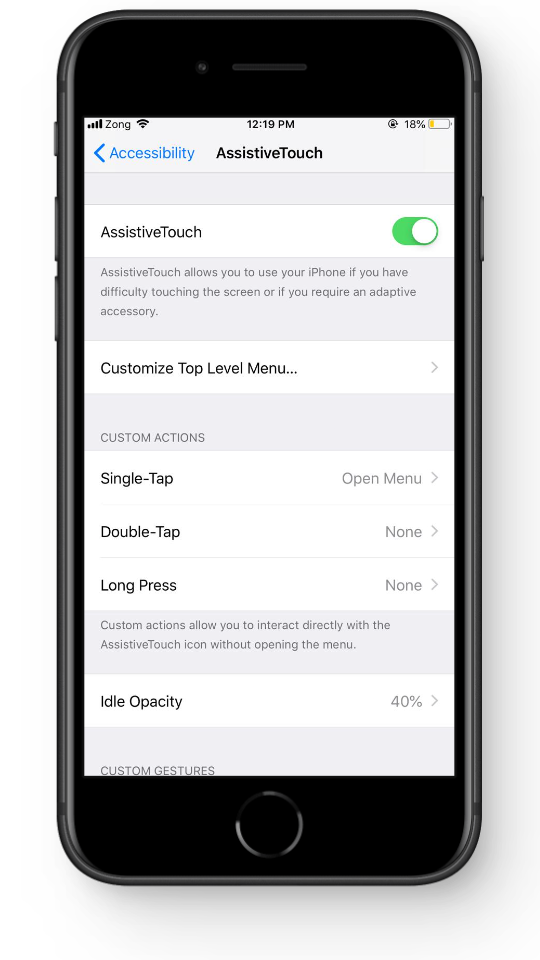
Toggle AssistiveTouch on
To take a screenshot with AssistiveTouch:
- Tap the AssistiveTouch floating button to open the menu.
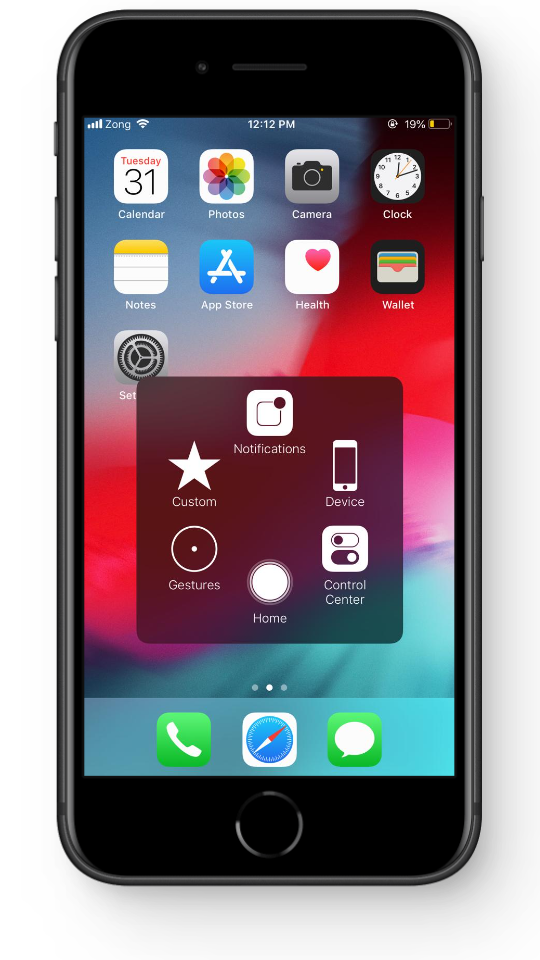
Assistive Touch menu - Tap Device.
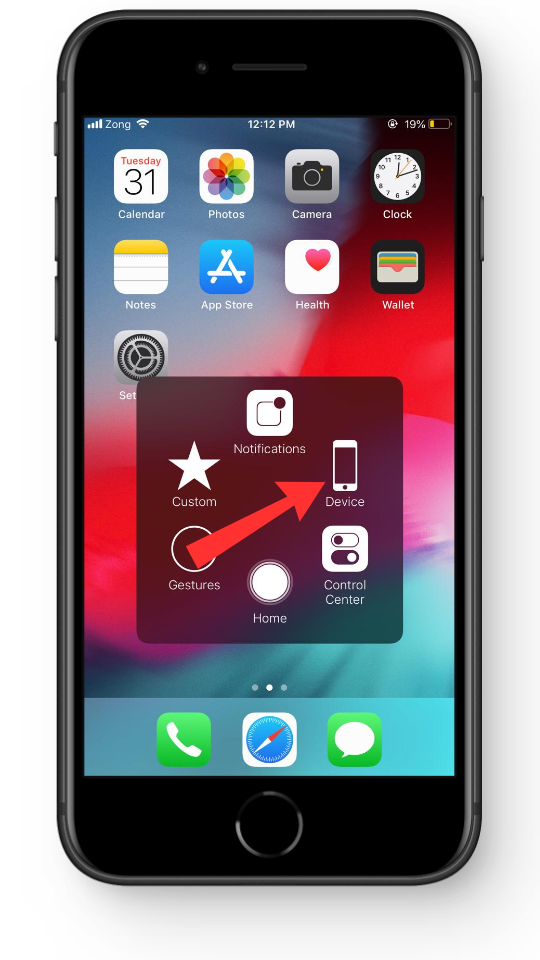
Tap on Device - Press More.
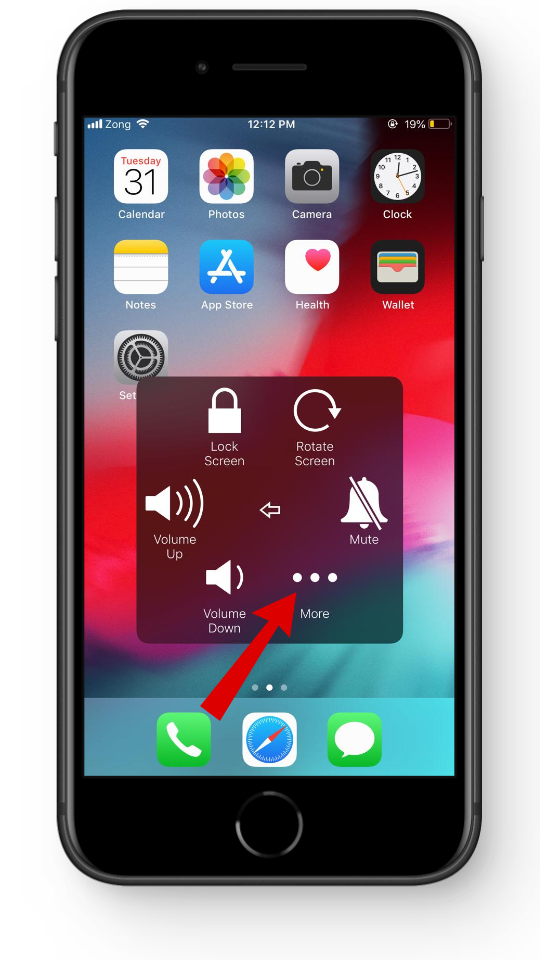
Select More - Select Screenshot.

Select the Screenshot option - You’ll hear a shutter sound and the captured image will minimize to the bottom corner. Tap it right away if you want to edit; if not, it’ll save automatically.
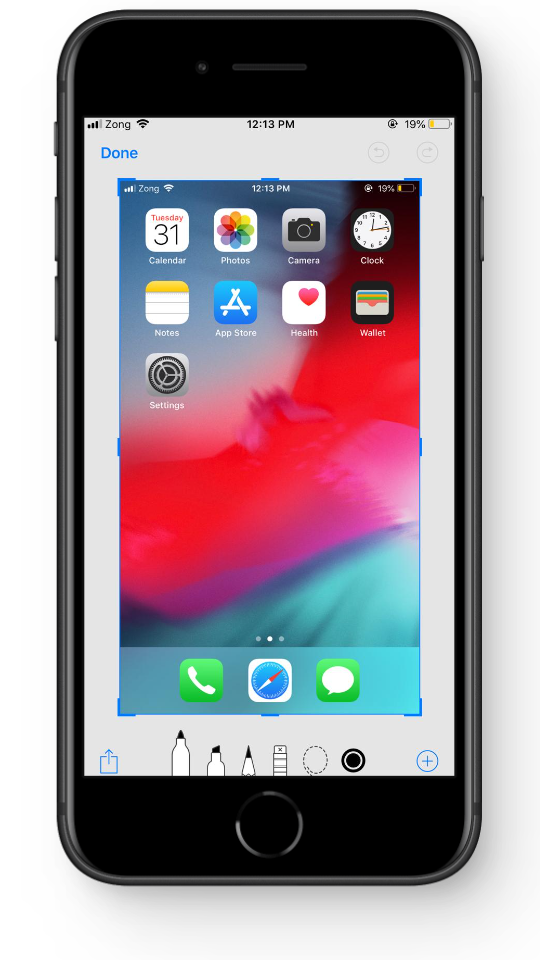
Edit your screenshot
Tips for Screenshotting on iPhone 7
Think of this section as an extra bonus—a bit like a free DLC for a game—helping you get even better at taking screenshots. While it’s pretty easy to grab a screenshot, there are a few tips and tricks that can help make the process smoother and more efficient.
1. Finding Screenshots
Whether you want to look at, organize, share, or delete your screenshots, iOS makes it simple to find and manage them all in one place.
Here’s how you can quickly find your saved screenshots:
- Open the Photos app on your iPhone and scroll down.
- Under the “Media Types” section, tap Screenshots.
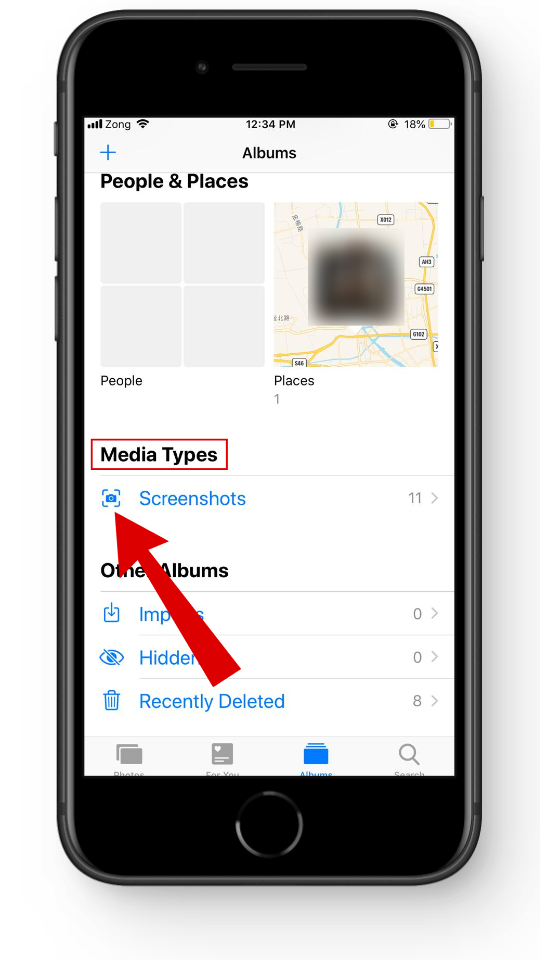
Open up the screenshots tab - Here you’ll see all your recent and older screenshots.
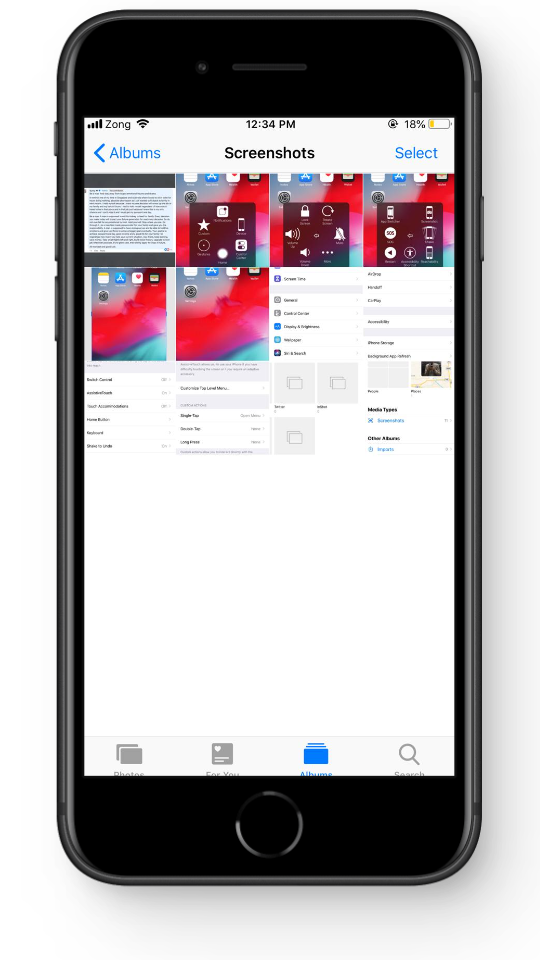
All your screenshots are saved here
2. Deleting Screenshots
It’s easy to forget about screenshots after taking them. Over time, they can clutter your photo library and use up storage. Here’s how to delete the ones you don’t need:
- Go to the Photos app and find your Screenshots folder.

Open up the screenshots folder - Tap the Select button in the top right corner.
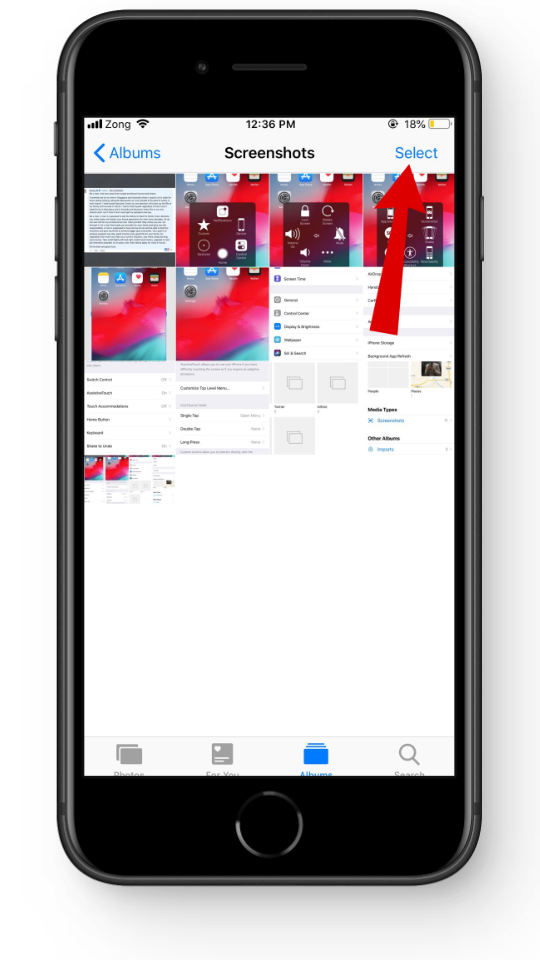
Tap on the Select button - Choose the screenshots you want to delete, then tap Delete and confirm.
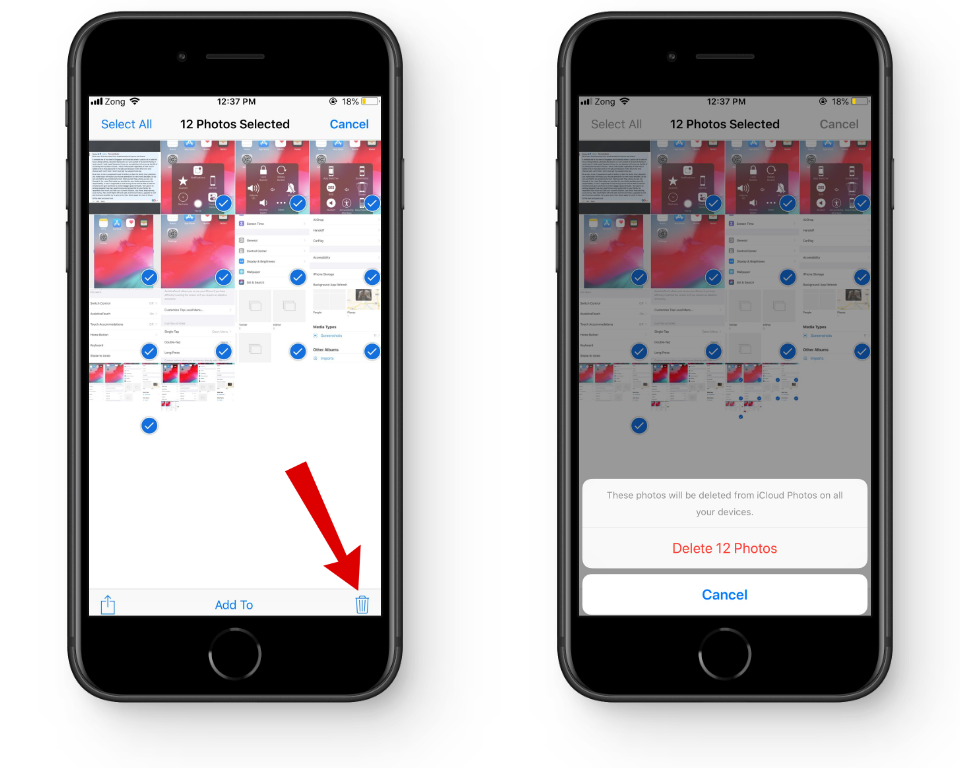
Delete unwanted screenshots
3. Recovering Deleted Screenshots
If you’ve accidentally deleted a screenshot, don’t worry. You have up to 30 days to recover it from the Recently Deleted folder before it’s permanently erased. Here’s how to do it:
- Open Photos and scroll down to the bottom.
- Under “Other Albums” tap Recently Deleted.
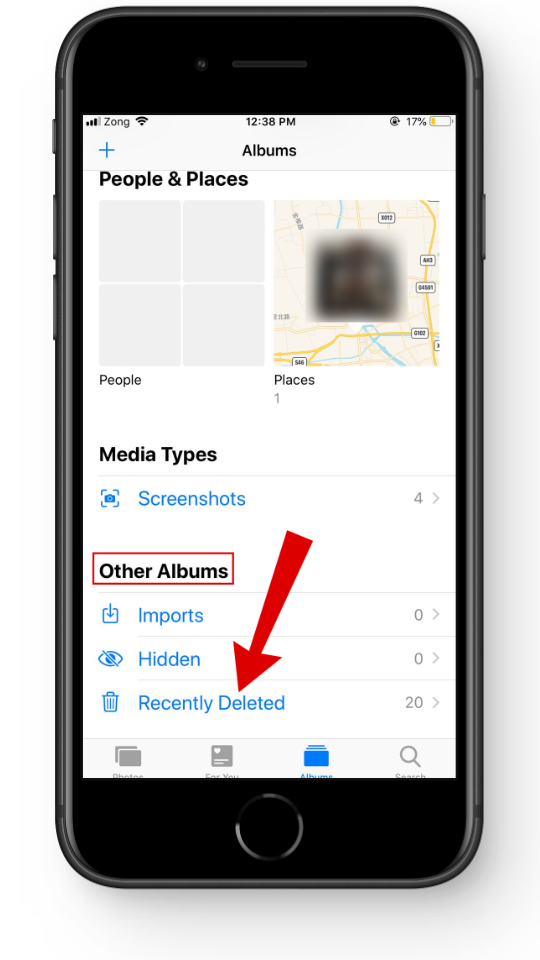
Head to Other Albums > Recently Deleted
To recover your deleted screenshots:
- Tap the Select button in the top corner.
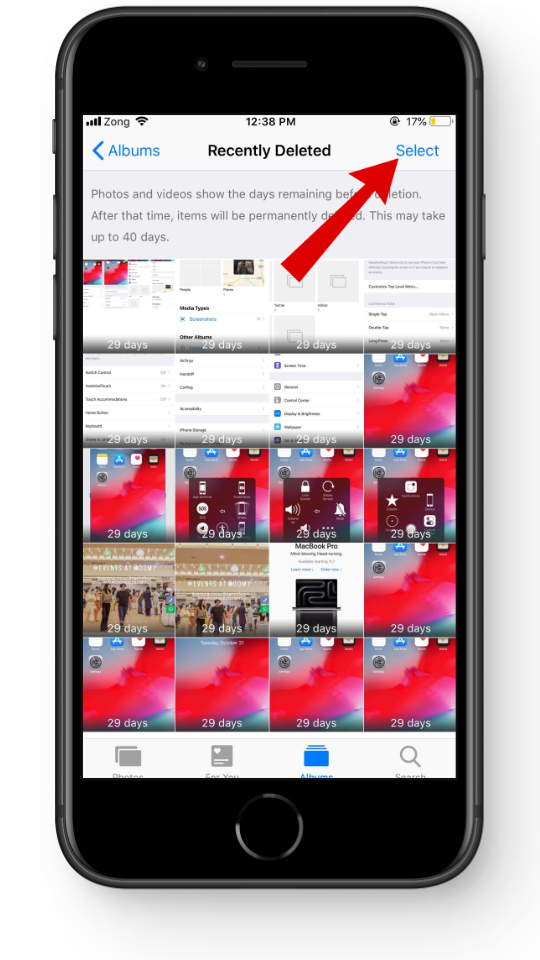
Tap on the Select button - You can either restore all, or select only the photos you want and tap Recover.

Restore your screenshots
Taking Screenshots in Newer iPhones – What’s Different?
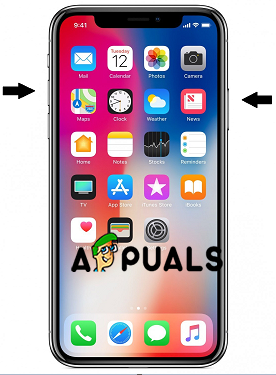
The method for taking screenshots on newer iPhones is a bit different, mainly because these models don’t have a home button. To take a screenshot on an iPhone X or later, press and hold the side button and the volume down button at the same time—this captures your screen instantly.
Another useful feature in newer iPhones is the ability to take scrolling screenshots, which lets you capture an entire webpage—not just what’s visible on the screen. Besides these updates, the basic process is the same. You can still use AssistiveTouch to take screenshots and manage them through the Photos app just as you would on older models.
Check out our full guide on taking screenshots on iPhone X and newer: How to Take Screenshot on Your iPhone X, XS, or XS Max
Reviewed by Huzaifa Haroon