Fix: Scheduling Assistant Free/Busy Data could not be retrieved
When scheduling a meeting using Outlook’s Scheduling Assistant, you might see the message “No free/busy information could be retrieved,” which prevents you from accessing the attendees’ availability. This error usually means that Outlook can’t get the information because of incorrect permissions or issues with the Exchange Web Services (EWS) setup.
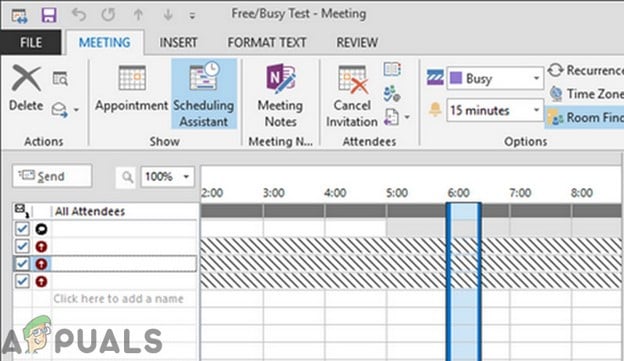
Common reasons for this error include wrong calendar sharing settings, an old autocomplete cache, or incorrect Exchange settings. It can also happen due to server connection issues or outdated software versions.
In this article, we will discuss different ways to solve this error.
1. Set Availability Timing According to the Organization’s Working Hours
Matching your availability with your organization’s work hours helps Outlook’s Scheduling Assistant display accurate free/busy data. When your calendar aligns with work hours, the server can easily identify and share your open times, reducing the chance of errors in the Scheduling Assistant.
- Launch Outlook, click the File menu, and select Options.
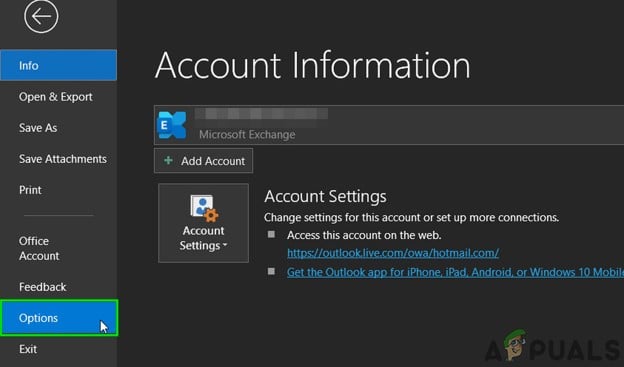
Open Outlook Options - Select Calendar from the left pane.
- Adjust the timing and working days to align with your organization’s schedule under the Work Time section.
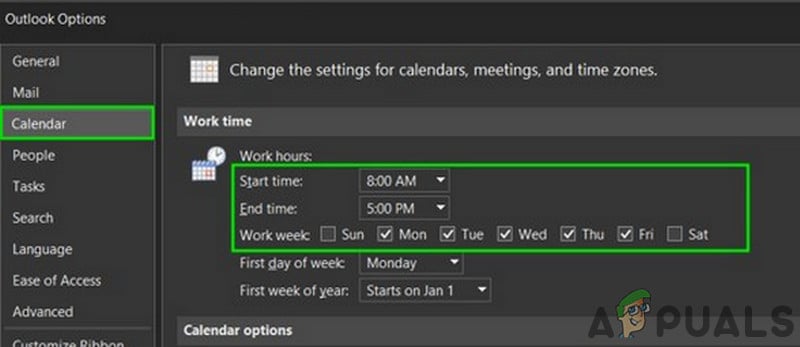
Modify Work Time in Outlook Calendar - Restart Outlook and verify if the Scheduling Assistant operates correctly.
2. Use Online Mode
Switching to Online Mode lets Outlook get real-time data from the Exchange server, skipping any old or corrupted local data. This updates free/busy data immediately and often fixes issues caused by outdated or delayed synced information.
- Open Outlook and click on the File menu.
- Choose Account Settings from the drop-down and click Account Settings again.
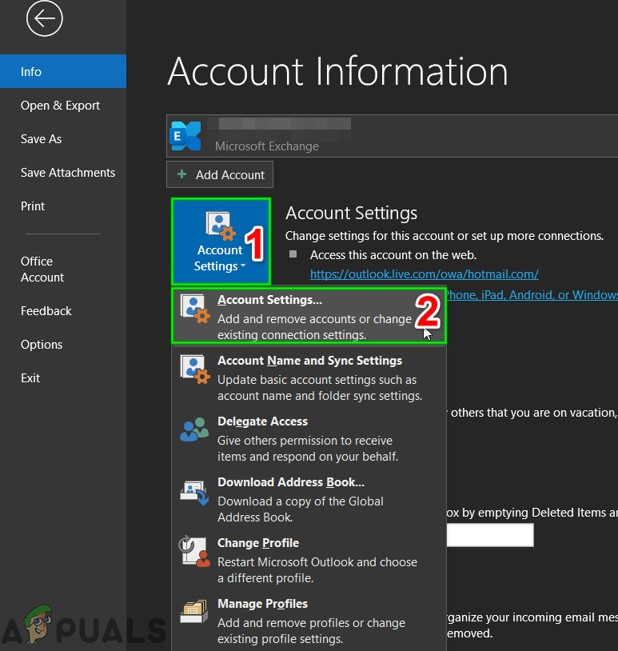
Access Account Settings - Select the Email tab, highlight your account, and click “Change”.
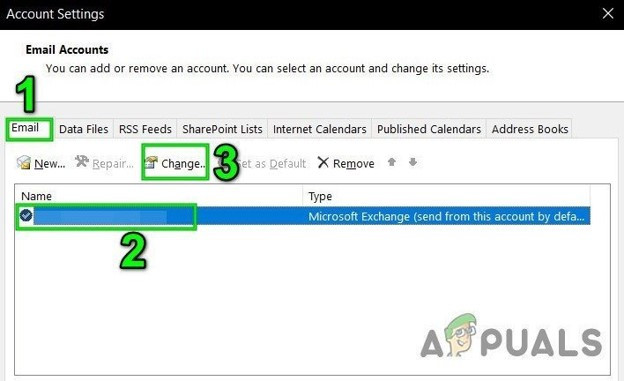
Modify Email Account Settings - In the Exchange Account Settings window, click More Settings.
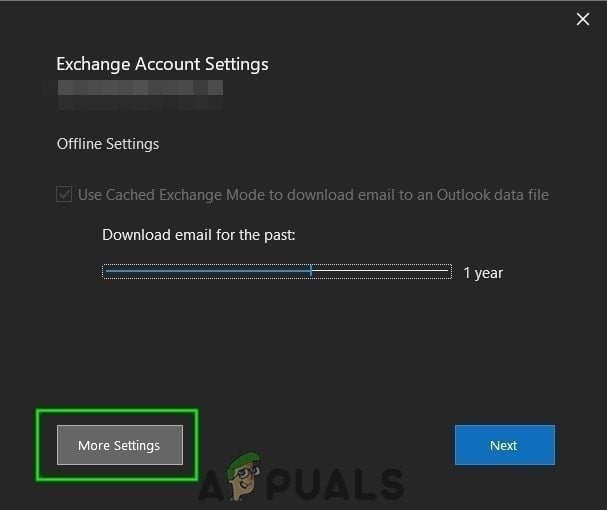
Open More Account Settings - Navigate to the Advanced tab and uncheck “Use Cached Exchange Mode”.
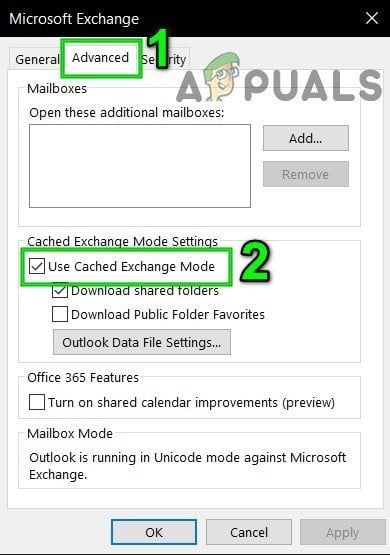
Disable Cached Mode - Restart Outlook and verify if free/busy data is accessible without issues.
3. Change the Calendar’s Permissions
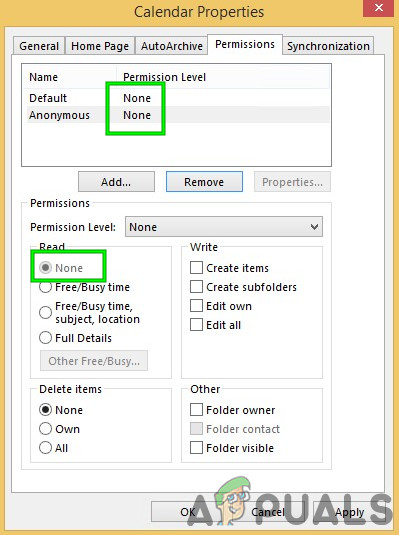
Having the right calendar permissions is important for fixing free/busy data errors. If permissions are too strict, Outlook might not be able to access attendee availability, leading to this issue. By adjusting permissions to allow at least “Free/Busy” access, you let Outlook retrieve and show availability information correctly.
- Open Outlook and navigate to Calendar.
- Right-click the default Calendar and choose Properties.
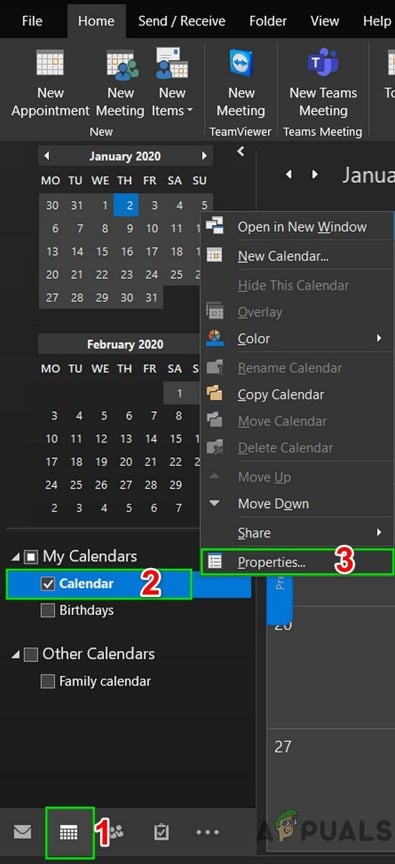
Access Calendar Properties - Go to the Permissions tab.
- Set permissions to Free/Busy time or Free/Busy time, subject, location.

Set Free/Busy Permissions - Click Add and assign the scheduler “reviewer” permission.
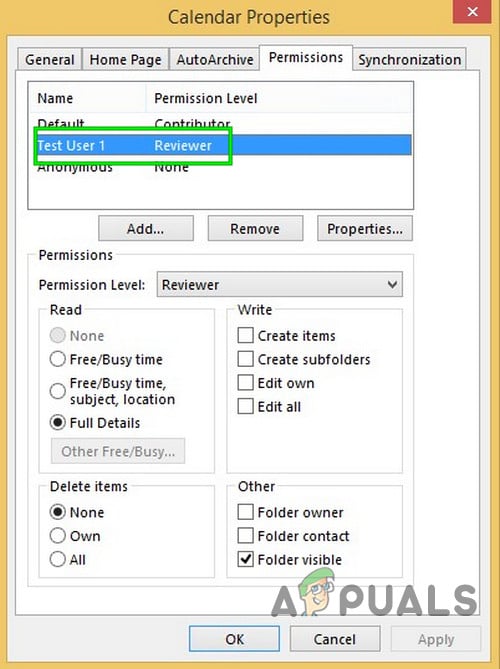
Assign Reviewer Permissions - Restart Outlook and verify if the Scheduling Assistant works properly.
4. Clear the Auto-Complete List
Autocomplete is a helpful Outlook feature that saves the names of people you’ve contacted before, suggesting them as you type. However, this list can get corrupted and cause problems, like errors with the Scheduling Assistant. Clearing the autocomplete list can fix this issue. The user who can’t see free/busy data should do this.
- Launch Outlook, click New Items, and select Meeting.
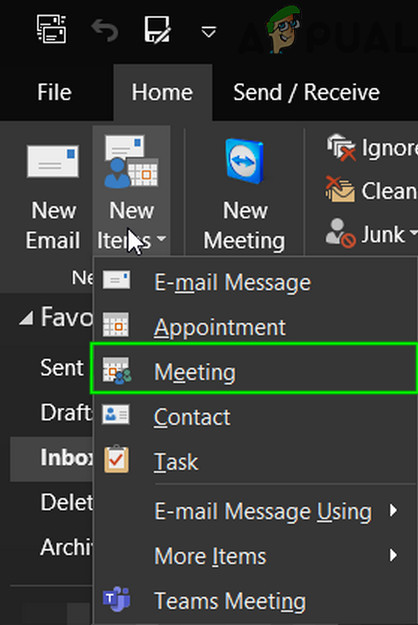
Create New Meeting in Outlook - Start typing the user’s name who’s experiencing issues.
- A dropdown/autocomplete list will show. Click the “X” next to the relevant entry to remove it.
- Close the Meeting invitation without saving.
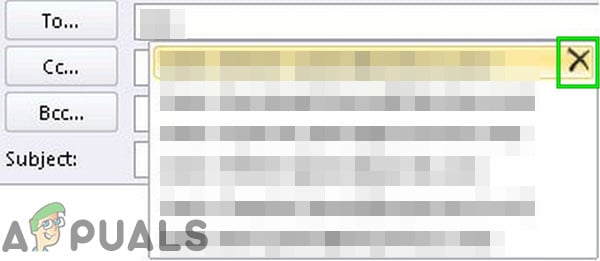
Delete Autocomplete Entry - Restart Outlook.
- Create a new meeting in Outlook, type the user’s full email address, and use Check Names if needed. Verify if the Scheduling Assistant shows free/busy info.
- If problems persist, clear the entire autocomplete cache by going to the File menu and selecting Options.

Open Outlook Options - Click on Mail in the left pane of the Options window.
- Find Empty Auto-Complete List on the right pane. Click Yes to confirm if prompted.
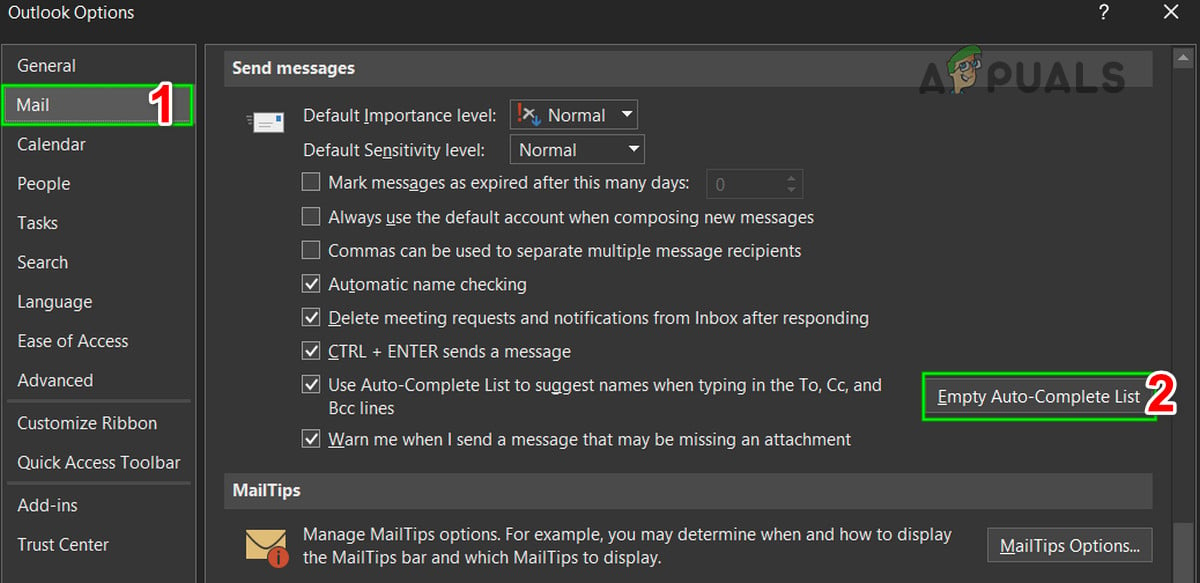
Clear Auto-Complete List - Restart Outlook and check if free/busy information is accessible in the Scheduling Assistant.
5. Disable Antivirus/Firewall
Antivirus and firewall programs, although protective, can sometimes conflict with Outlook, especially when there are problems retrieving information even though Outlook works in OWA. This should be checked on both users’ systems.
Note: Disabling or changing firewall/antivirus settings can make your system more vulnerable to harmful attacks. We do not recommend this step.
- Exit Outlook.
- Disable your antivirus software.
- Disable the Windows firewall.
- Launch Outlook and verify if the free/busy information is retrievable.
6. Clear Cached Credentials
Windows’ Credential Manager stores login credentials like usernames and passwords for Windows and apps like Microsoft Office. Corrupted credentials may cause errors. Removing Outlook-related entries from the Credential Manager may fix the issue. This step should be done on both users’ systems.
- Exit Outlook.
- Press the Windows key, type Credential Manager, and select it from the results.
- Click on Windows Credentials and locate entries related to Outlook. Also, look for any Office entries. Click Remove on each Outlook-related entry.
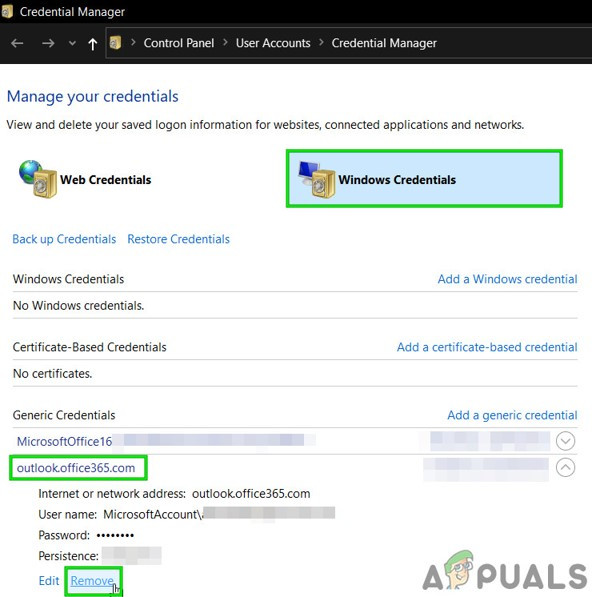
Modify Windows Credentials - Launch Outlook, sign in with your credentials, and check if the Scheduling Assistant displays free/busy information.
7. Use Outlook in Safe Mode
Add-ins improve functionality within your inbox, but they can sometimes disrupt Outlook. The iCloud add-in is a known culprit. Using Outlook’s Safe Mode, which runs without add-ins, may solve the problem.
- Exit Outlook.
- Press the Windows key, type Run, and select it from the options to open the Run command box.
- Type Outlook.exe /safe (ensure there’s a space after Outlook and before /) and click OK. If Windows cannot locate it, use the full path to Outlook.exe.
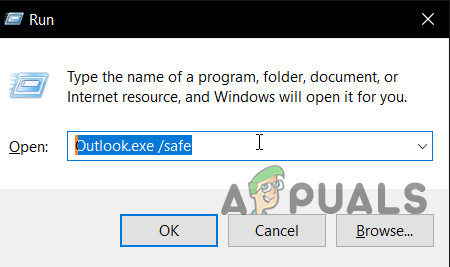
Launch Outlook in Safe Mode
Verify if the Scheduling Assistant shows free/busy information. If so, disable Outlook add-ins one by one using the following method:
- Open Outlook in normal mode, click the File tab, and then select Options from the backstage view.
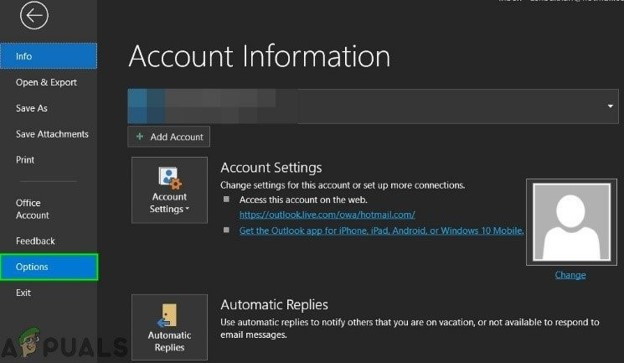
Access Outlook Options - Navigate to Add-Ins.
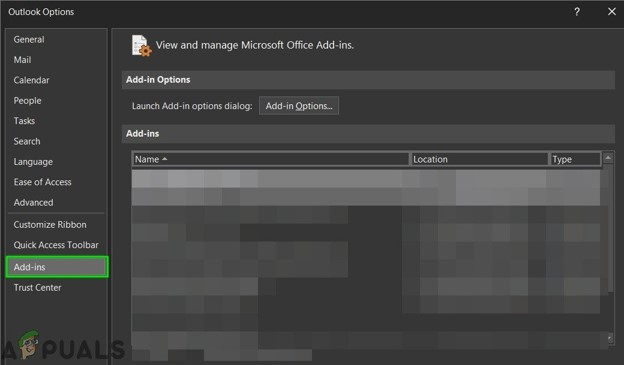
Open Add-ins - Find the “Manage” dropdown at the window’s bottom, choose the add-ins type (e.g., COM Add-ins), and click “Go”.
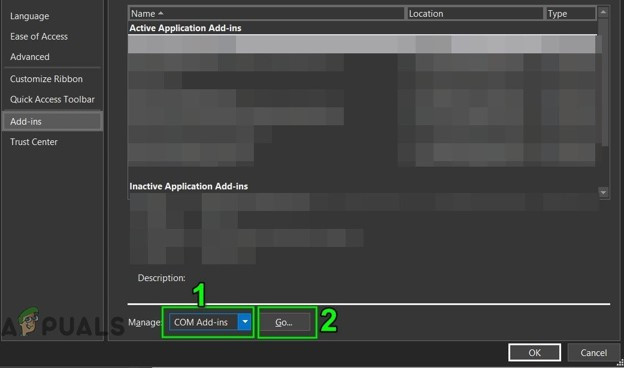
Manage Add-ins - Uncheck all add-ins and restart Outlook. Check if free/busy information is visible in the Scheduling Assistant. If it is, re-enable add-ins one at a time to find the problematic one and keep it disabled. Visit the developer’s site for updates on the problematic add-in. If an update is available, install it to see if the issue is resolved.
8. Regenerate the OST File
Refreshing Outlook’s data file (OST) can fix problems with missing or old calendar details. By regenerating the OST file, you reset your local mailbox copy, letting Outlook sync new data from the server. This helps resolve issues or damage in the local file that might block the Scheduling Assistant from showing the correct free/busy status.
- Launch Outlook and go to File.
- Choose Account Settings from the drop-down, then select Account Settings again.
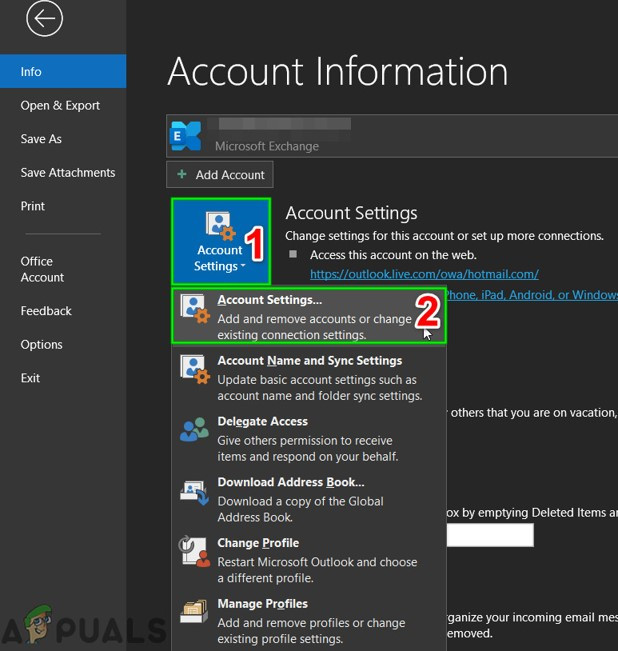
Access Account Settings - Go to Data Files, select the user file, and click “Open File Location”.
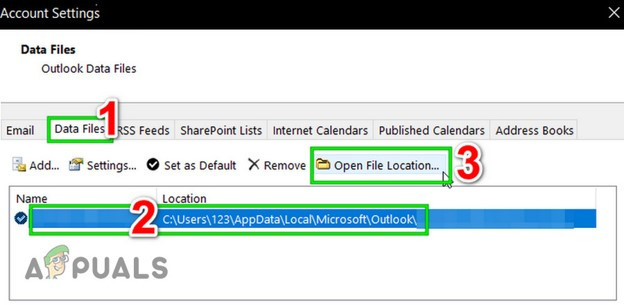
Locate OST File - Leave the folder open and exit Outlook.
- Right-click the OST file, select “Rename”, and change its extension to “.old”.
- Launch Outlook again to regenerate the OST file and check if free/busy information is accessible.
9. Change Server Configuration
Server settings like Autodiscover, EWS, and mailboxfolderpermission are important for accessing free/busy data. If Autodiscover is set up incorrectly, it often shows gray slashes instead of availability data and may also cause Out of Office problems. EWS manages calendar access, and mailboxfolderpermission affects data retrieval. Correct configuration is key for accurate scheduling.
- Check Outlook Autodiscover connectivity.
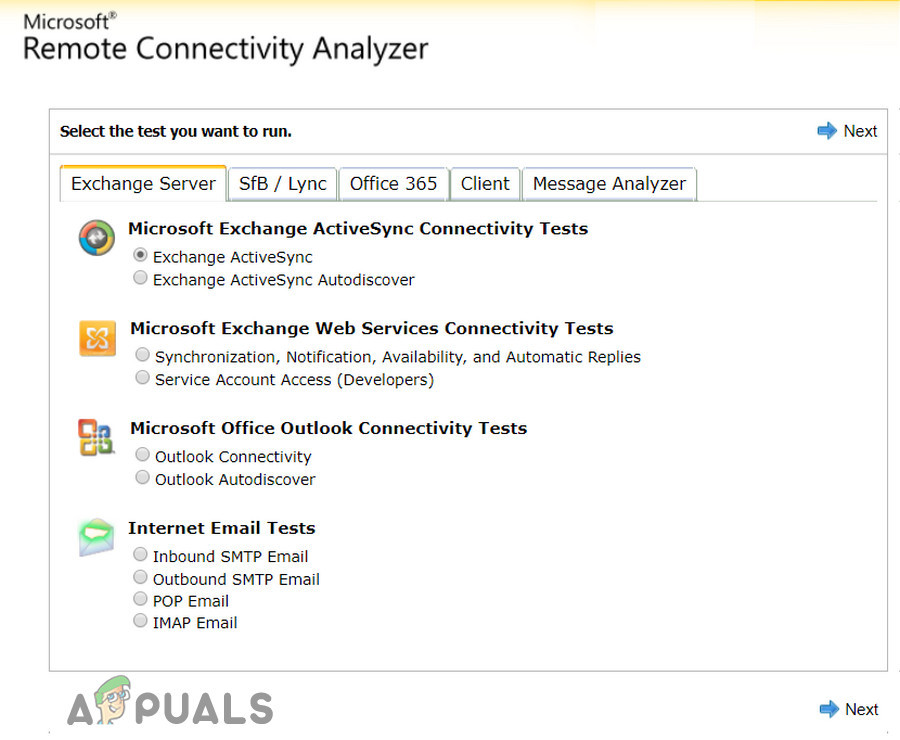
Check Outlook Autodiscover Connectivity - Review your Autodiscover EWS and Autodiscover in Exchange.
- Reset the setting EwsAllowOutlook to true.
- Execute mailboxfolderpermission commands to add the user to folder permissions.
- Verify if free/busy information is visible in the Scheduling Assistant.
10. Repair User Profile
A corrupted user profile in Outlook can block the Scheduling Assistant from retrieving free/busy information and accessing calendar data. Repairing the user profile can refresh settings, permissions, and data links, potentially resolving sync issues and restoring full functionality to the calendar and Scheduling Assistant.
- Launch Outlook and navigate to the File menu.
- Select Account Settings from the drop-down under Account Setting.
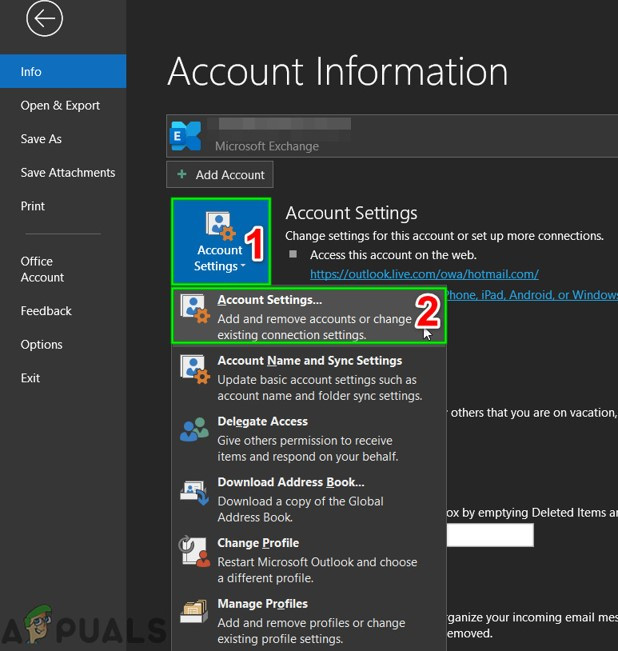
Access Account Settings - Under the Email tab, choose the user profile and click Repair.
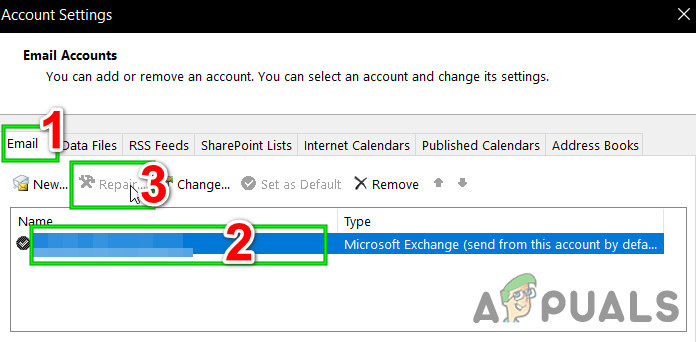
Repair Profile - Once the repair is finished, relaunch Outlook and check free/busy information visibility.
11. Create a New User Profile
Creating a new user profile can resolve issues blocking Outlook from accessing free/busy data. Corrupted or misconfigured profiles can prevent calendar information retrieval. Deleting the current profile and setting up a new one allows Outlook to reconnect correctly.
Note: This process will remove the existing profile, requiring a new setup and configuration.
- Exit Outlook.
- Press the Windows key, type Control Panel, and select it.
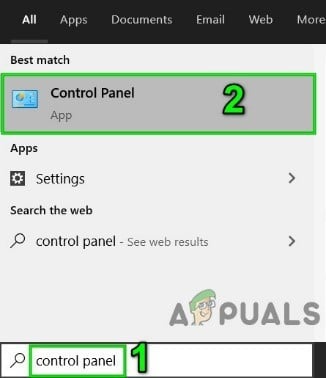
Open Control Panel - Set the View by option to Large Icons.
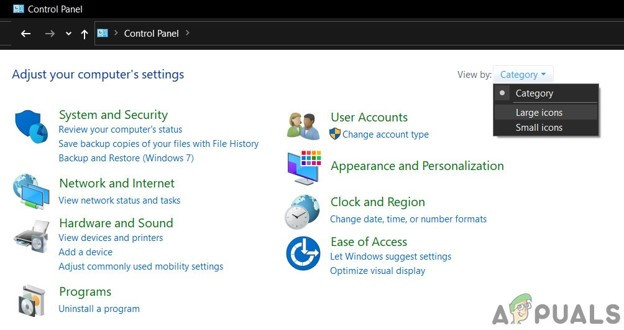
Change view to Large Icons - Select Mail.
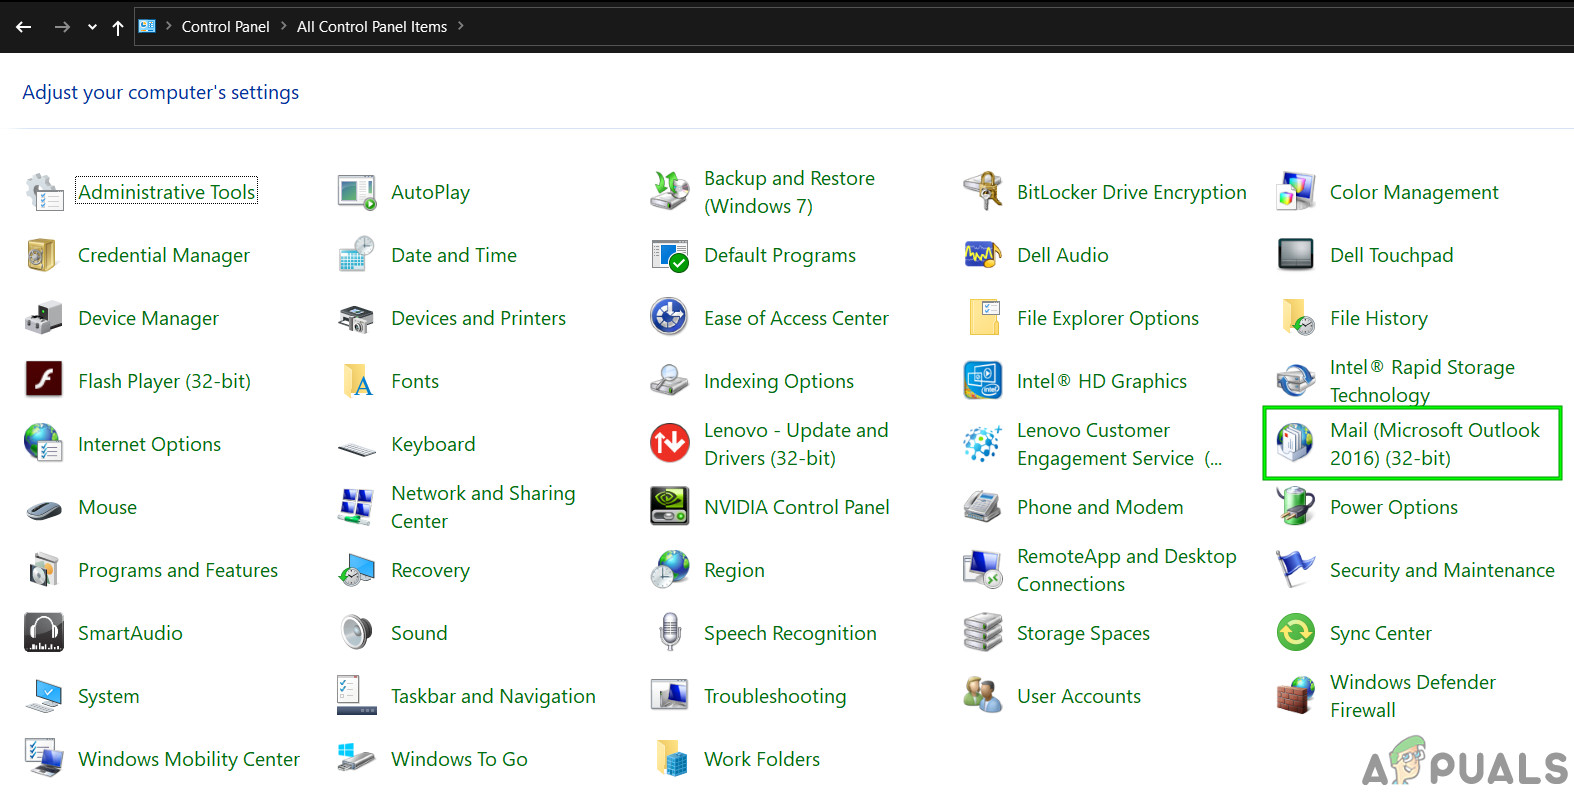
Access Mail settings - Click Show Profiles.
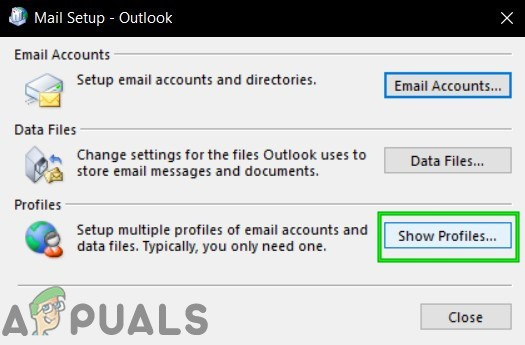
Show Profiles - Select your Outlook profile and hit Remove.
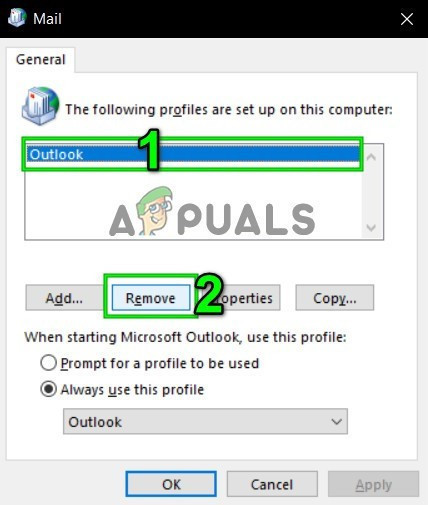
Remove Profile - Create a new profile.
- Reopen Mail (repeat steps 2-5).
- Select the new profile and choose Always use this profile.
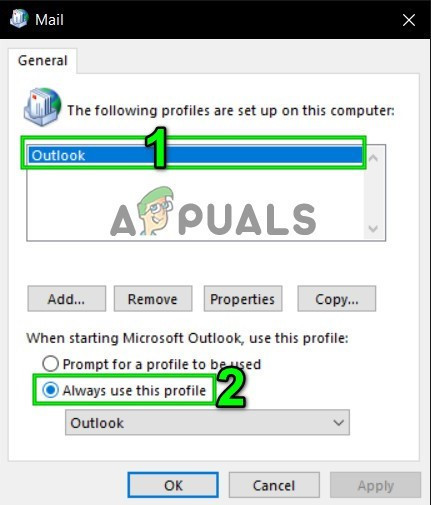
Set Default Profile - Click Apply and then OK.
- Relaunch Outlook.


