How to Save Specific or Selected Excel Columns as a .csv File
In Microsoft Excel, users can export data to a .csv file. This is a simple file format that is used to store spreadsheets and databases, and which can be opened in a multitude of operating systems and programs. This simple file format separates values by commas (hence the name comma-separated values).
When creating a .csv on Microsoft Excel, a user might want to select only the data from specific columns. One superuser.com poster explained:
“I want to export specific number of columns from excel into .csv file. I have around 10 columns like lname, fname, phone, address, email and so on. What should I do to export only certain columns like lnam, email and so on?”
It is possible to select the only columns you intend to export and create a .csv file from them, using the following method.
Method 1: Create a New Workbook
The simplest method of creating your .csv file is to begin by selecting the first column that you intend to export. You can do this by pressing the letter that represents the column at the top of the page. So for instance, if a user is intending to export the F, G, and L columns, they should begin by clicking the F column at the top.
The user must then hold down the Ctrl key on the keyboard, and select G and L. This allows you to select multiple columns. You should see the highlighter appear around each full column of data. Then, press Ctrl and C and then press Ctrl and N.
The first keyboard command will copy all of the columns you have highlighted, and the second command will open a new workbook. Once a new workbook has opened. Press any cell inside the sheet and then press Ctrl and V, which will paste the data you copied from the first wookbook.
Then, press Ctrl and S on your keyboard and in the field at the bottom of the window that opens, choose a name for your file in the dialog box that is labelled File name. Underneath the name dialog box, there is a box labelled Save as type. Click this drop down menu and choose .csv. Then press Save.
Method 2: Use The CSV Exported VBA
- Click (here) and download the VBA
- And install it. Then load the form by simultaneously pressing CTRL + SHIFT + C
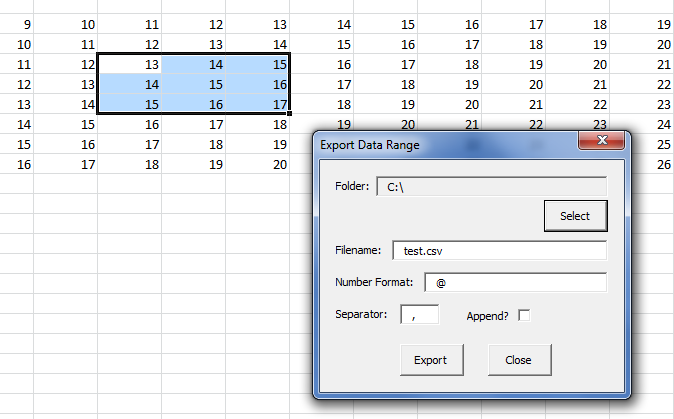
- Then highlight the range that you want to export
- Then select the folder where you want the export to be saved as CSV
- Name the file, format and specifiy the seperator.
- And Click Export.