Fix: Freezing, Stuttering & FPS Drops in Rust
Rust players have been facing Low FPS drops when playing the game; this can be caused by many factors, including incorrect GPU drivers, unsupported Hardware, misconfigured config file, incorrect GPU settings, etc. This article will show you how to properly adjust these settings and ensure your game is running smoothly.
1. Check Rust’s Recommended System Requirements
If you’re experiencing performance issues in Rust, the first step to finding its solution is to check the game’s system requirements.
If you want the game to run smoothly on your system with decent graphics settings, your system’s hardware must be comparable to Rust’s recommended system requirements.
According to Steam, the system requirements of the game are:
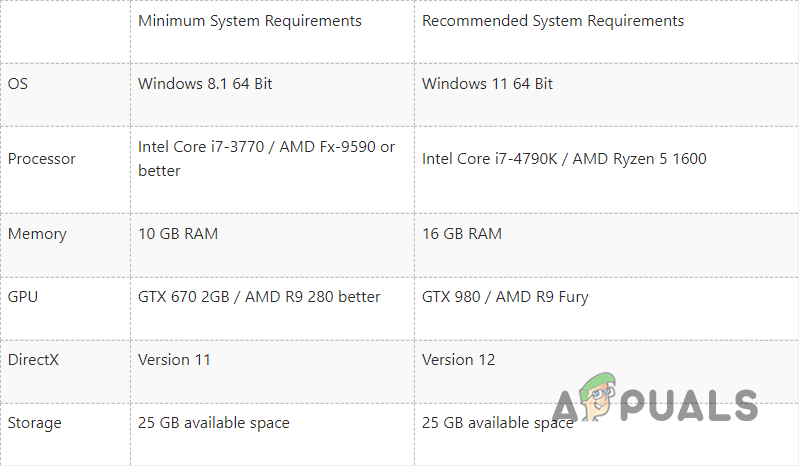
If your system fails to meet the game’s recommended system requirements, your weak hardware is likely the main cause of the performance issues.
However, you can still significantly improve the game’s performance by following the fixes we’ve listed below.
2. Optimal Game Settings
If your Graphics Settings are set too high for your system to handle, it can significantly impact your FPS. Therefore, you must optimize Rust’s in-game settings according to your PC’s specifications.
The image below shows the most optimal Graphics Settings for Rust.
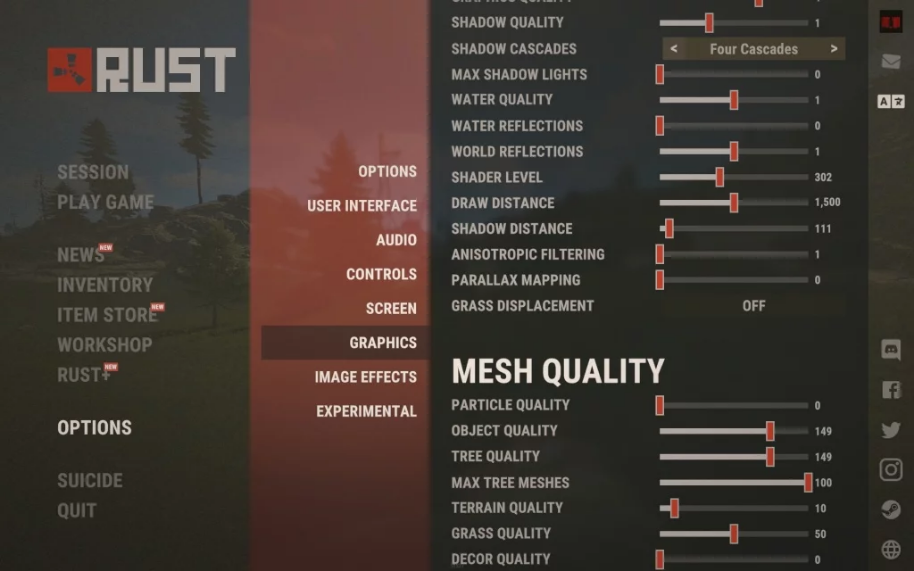
You should also ensure your game is running on your monitor’s native resolution and that Vsync is turned off. You’ll find these two options in the “Screen” tab in the Settings menu.
After optimizing the in-game settings, we need to use some launch options with the game. In certain games like Fortnite, launch options hurt the game’s performance, but for Rust, they have a positive impact on the game’s performance.
Below, we have listed the best launch options for Rust to boost performance and where you need to enter them:
- Open the steam app
- Locate the Steam Library
- Right-click Rust and go into Properties
- In the general tab, you will now see the launch options
- Here are the following best-tested launch options for Rust:
-window-mode exclusive (Sets the windowed mode to fullscreen exclusive, which boosts performance)

-high (Sets the game to high priority)

-force-feature-level-11-0 (Forces the game on DirectX 11)

-malloc=system (This command depends, it may or may not help you, but it configures the memory allocator for the game)

-maxMem=14000 ( ** The number in the red you need to change depending on your RAM, 14000 represents 14 GB of ram, for example. This command helps utilize your RAM on Rust)

-cpuCount=6 (** The number in the red you need to change depending on the number of cores you have, to check go into task manager by right-clicking the taskbar and selecting performance and CPU)

-exThreads=12 (** The number in the red you need to change to the logical processors you have it is located in the same place your cores were.)
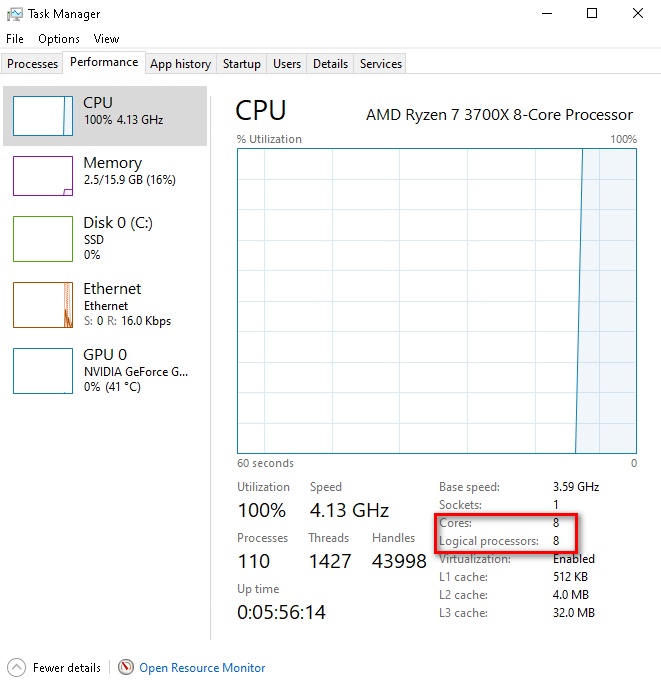
Check your CPUs Cores
Note: Always restart the game after entering launch options so that they can be applied!
3. Use Correct GPU Configurations
Unity, which is Rust’s game engine, has an issue where it sometimes selects your integrated Graphics Card (GPU) instead of your dedicated GPU.
Your dedicated GPU is much faster than your integrated GPU. So, make sure it’s set as your dedicated GPU.
AMD GPU Users:
- Press the Windows key + I on your keyboard at the same time to open up the Windows Settings app
- Select the “Gaming” tab
- On the top-right, select “Graphics Settings.”
- In the “Graphics Performance Preference” tab, select the dropdown and “Desktop App.”
- Now press Browse and navigate to the following directory:
C:\Program Files (x86)\Steam\steamapps\common\Rust
- Now select Rust in that directory and select “Add” on the bottom right
- The game will now be added to the page; click on Rust, select options, and select “High Performance.”
- It should now look something like this:
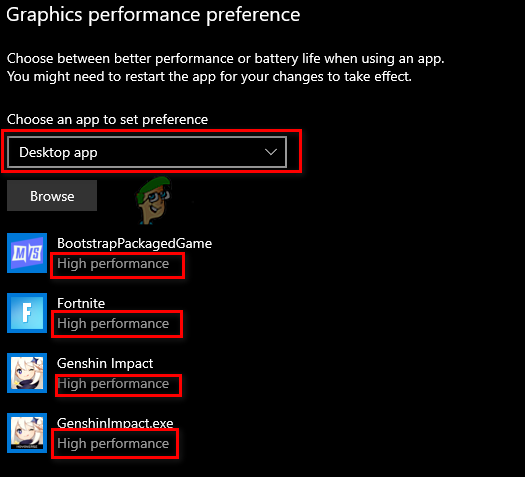
Changing Dedicated GPU for Games
NVIDIA Users:
- Click on Start Menu from Taskbar and Search for “Nvidia Control Panel”
- Open the NVIDIA Control Panel
- Head to “3D Settings” and click “Manage 3D Settings.”
- Open the “Program Settings” tab and select Rust from the dropdown
- On the other dropdown menu, select “Preferred graphics processor for this program.”
- Save your changes.
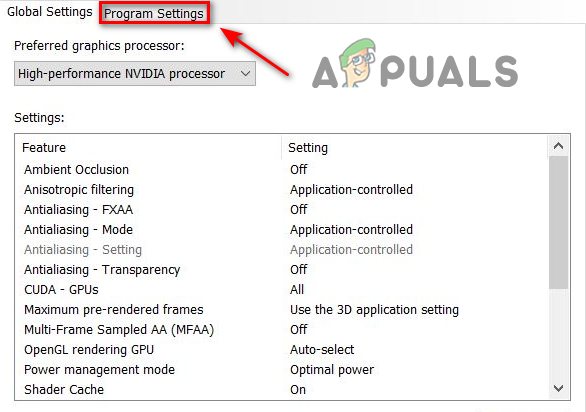
Changing GPU Settings for Rust in Nvidia
4. Disable Windows Fullscreen Optimizations
If you have the Windows Fullscreen Optimizations feature enabled on Rust, it can be one of the major causes of this performance problem.
The Windows Fullscreen Optimizations feature is usually turned on for games by default, but it should always be disabled.
This feature runs the game on a mixture of fullscreen and windowed mode, instead of running it in actual fullscreen. This leads to many types of performance issues with the game, such as input delay, stuttering, and low FPS etc.
To disable Windows Fullscreen Optimizations for Rust, first find the .exe file of the game by following the steps listed below:
- Open the Steam application.
- Locate the Steam Library.
- Right-click Rust and hover your cursor over Manage.
- Select “Browse Local Files.”
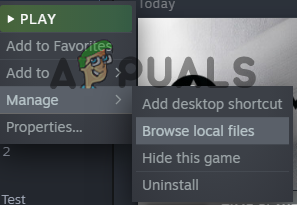
Opening Location of Rust’s Game Files through Steam
This will open the install location of Rust, where you’ll find the.exe file of the game. After locating this file, right-click on it and select Properties.
In the Properties window, remove the checkmark next to the “Disable Fullscreen Optimizations” option. Before clicking apply, also check whether there’s a checkmark next to the “Run as administrator” option.
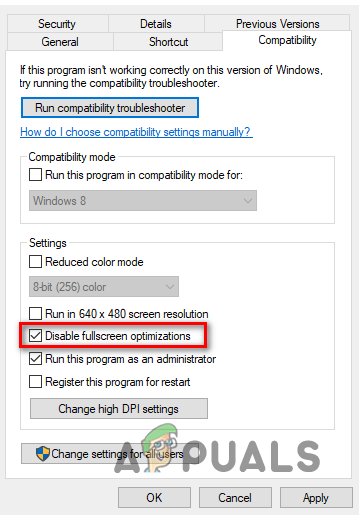
If there is not, you should enable this option as well, as it grants Rust complete read and write privileges, which usually leads to an improvement in FPS.
5. Update your GPU drivers
Regularly updating your GPU drivers helps solve game performance issues, as your GPU’s manufacturer further optimizes your GPU’s performance with each driver update.
If you’re using a very outdated GPU driver, or if there’s some corruption in your current driver, it can be the leading cause of the low FPS problem you’re experiencing.
To update your GPU drivers, you need to know the brand and model of the GPU installed on your PC. If you don’t know that, follow these steps to find out:
- Press the Windows Key to open the Start menu, type Device Manager, and enter.
- Click on the small arrow next to “Display Adapters.”
- Make a note of the name of the device that appears.
If you have an NVIDIA GPU, click on this link to find its latest drivers.
If you have an AMD GPU, click on this link to find its latest drivers.
After clicking on the link, use the dropdown lists to find the right drivers for your GPU. Once the driver installer has been downloaded, run it, and it will guide you through the installation process. Your GPU drivers will be updated within a few minutes.
6. Defrag your Hard Drive (HDD Only)
Defragging your HDD is a MUST when it comes to Rust. This is because Rust is a very heavy textured-based game. And if the textures don’t load, it will cause you to have lag spikes or even crash.
- Click on the start menu and type “Defrag,” and click “Defragment and optimize drives”
- From here, in the “Media Type” section, you will be able to see if you have a Hard Disk Drive or a Solid State Drive. You don’t wanna defrag your SSD because it does not increase performance; only do this on your HDD.
- Now click your HDD Drive, select “Optimize,” and wait for it to run.
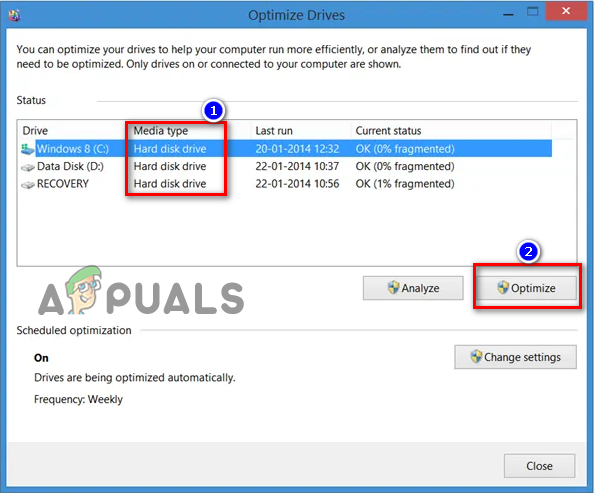
Defragging your HDD
7. Disable Background Apps
If you have random apps running in the background while playing Rust, they will consume system resources and decrease the game’s performance. The resources they use are RAM, CPU cycles, etc.
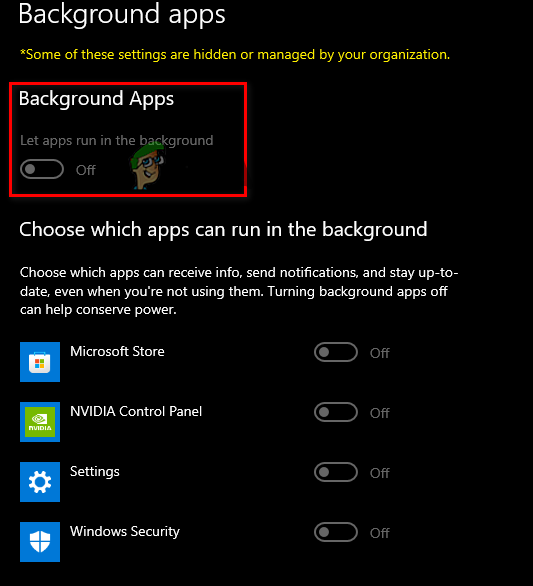
- Press your Windows Key + I at the same time to open the Windows Settings app
- In the search bar, type “Background apps” and select the panel
- Turn the toggle off for “Let apps run in the background.”
After turning this option off, press Windows Key + X at the same time and open Task Manager. In the Processes tab, see which programs currently consume the most system resources.
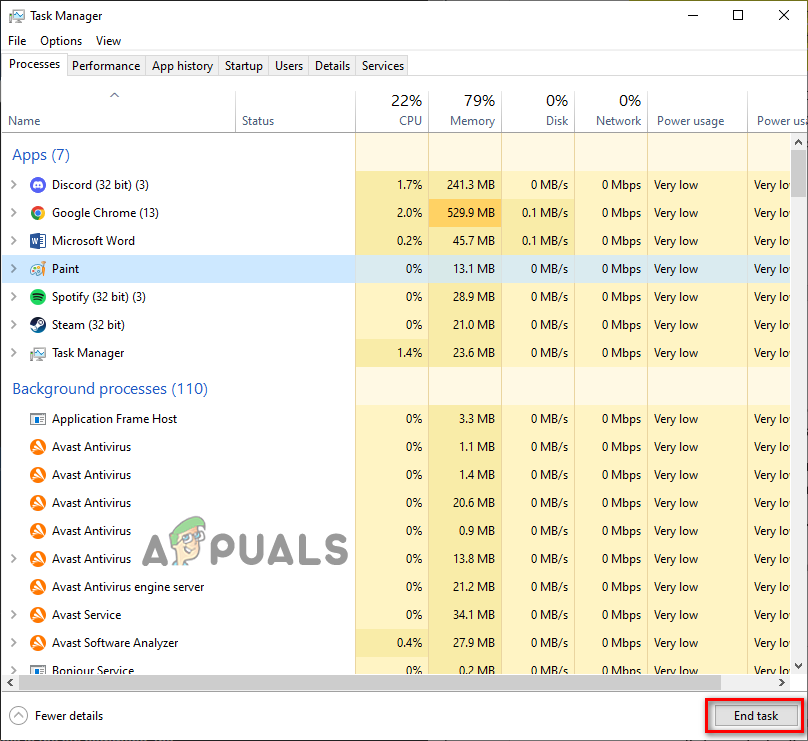
Left-click on all the unneeded programs and click the End Task button at the bottom to close them. This will free up even more system resources for Rust to use, which will further decrease the frame drops.
8. Disable Overlays
If you have overlays of different applications, disabling them will give you an instant boost in FPS. The most commonly used overlays are of Steam, NVIDIA GeForce Experience, Discord, and Xbox Game Bar.
These overlays allow for easy access, but they usually consume too many system resources and can even be incompatible with certain games.
This leads to performance problems, so it’s a good idea to disable them if the game is running poorly on your system.
If you use the Steam Overlay, you can disable it by following these steps:
- Open the Steam application.
- Click on the “Steam” option in the top-left corner and click on “Settings.”

Opening Steam Settings - Navigate to the In-game section
- Disable the “Enable the Steam Overlay while in-game” option.
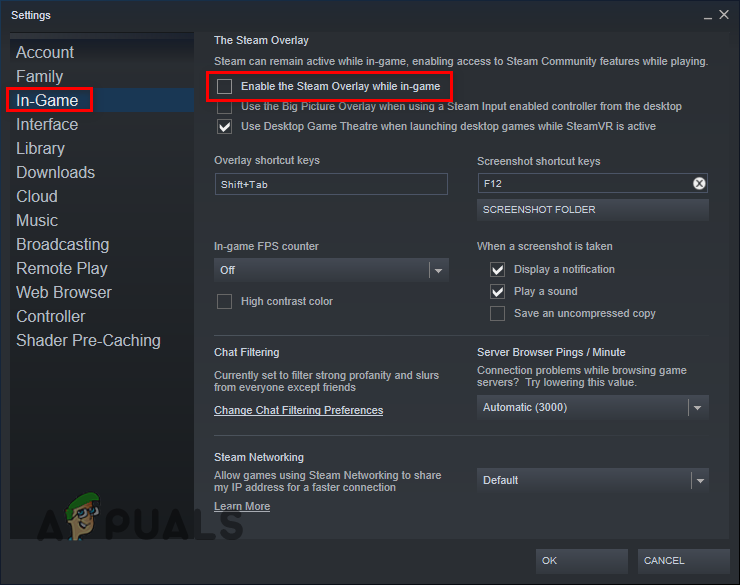
Disabling the Steam Overlay - Click the OK button.
If you use the NVIDIA GeForce Experience Overlay, you can disable it by following these steps:
- Press Windows Key, type GeForce Experience, and press enter.
- Press the gear icon in the top-right corner.

Opening NVIDIA GeForce Experience Settings - Disable the In-Game Overlay option.
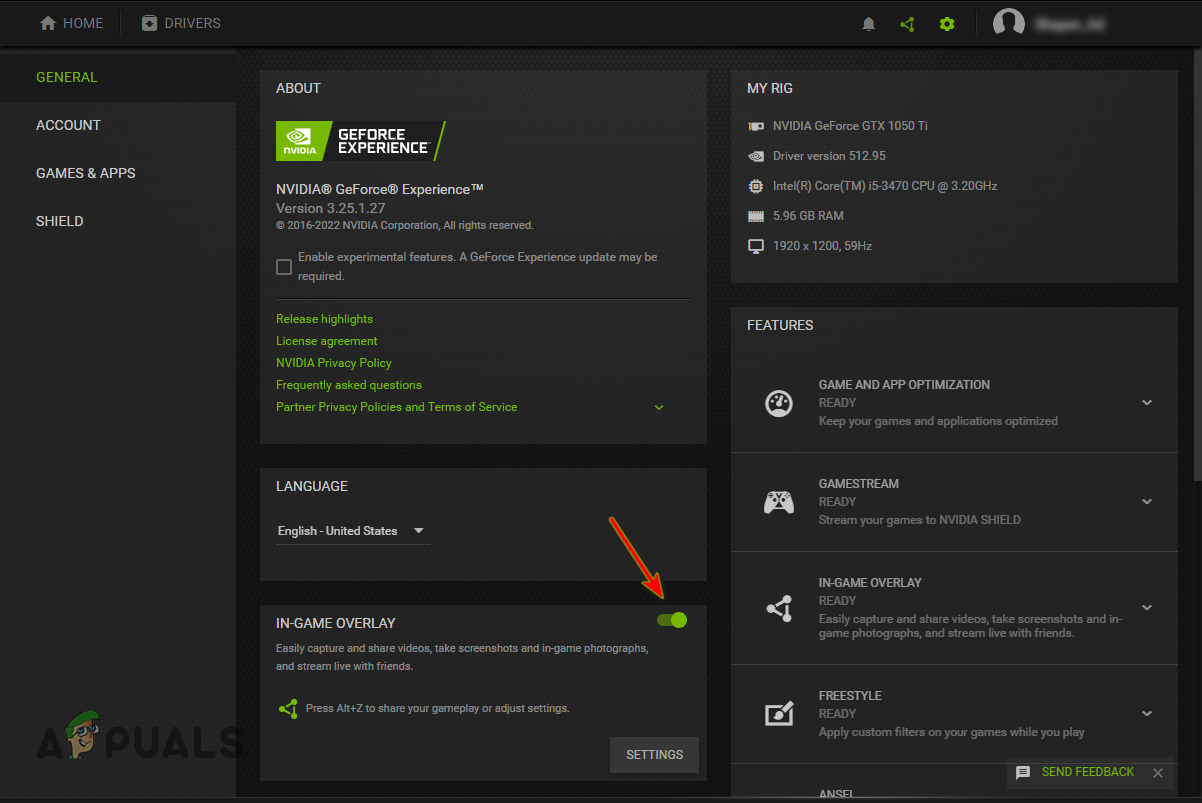
Disabling GeForce Experience In-Game Overlay
If you use the Discord Overlay, you can disable it by following these steps:
- Open the Discord application.
- Press the gear icon next to your name (at the bottom-left corner).

Opening Discord Settings - Navigate to the “Activity Settings” category.
- Disable the in-game overlay option.
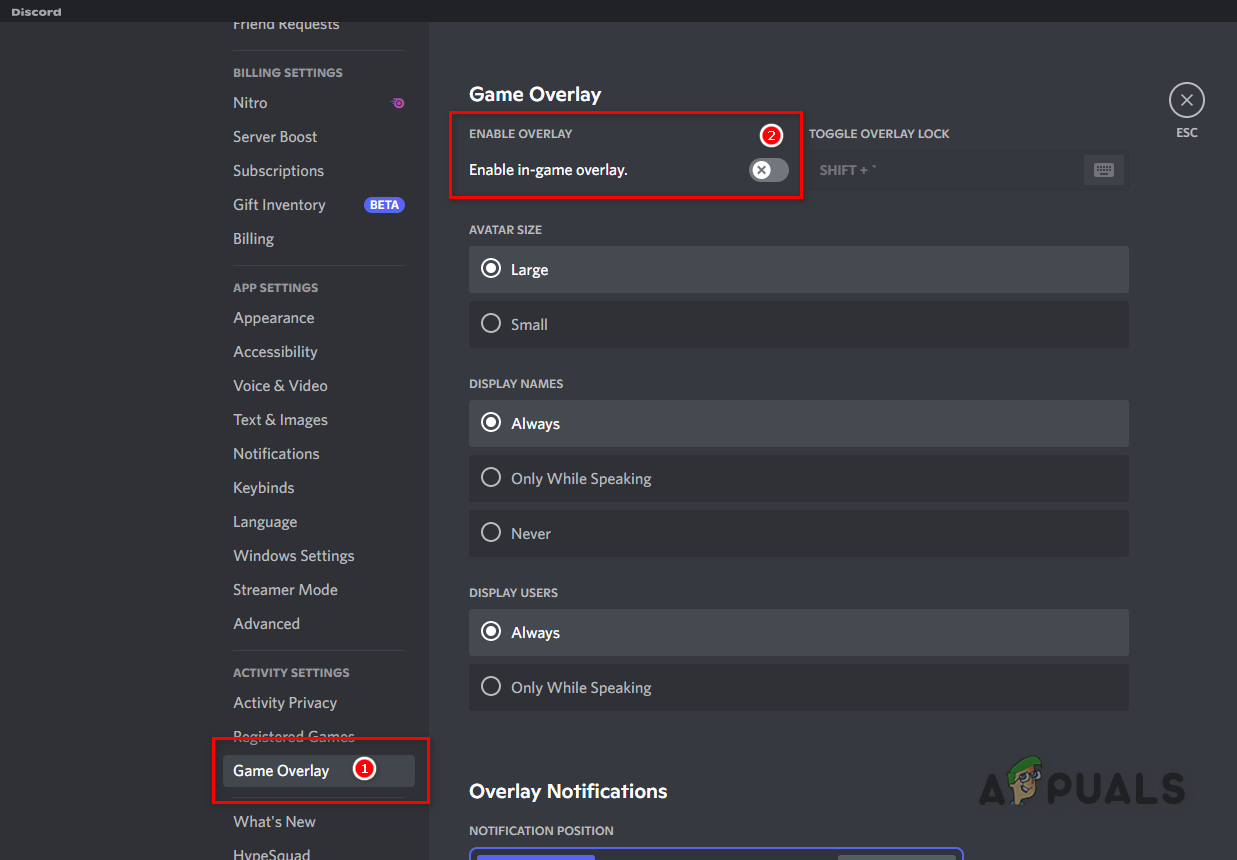
Disabling the Discord Overlay
If you use the Xbox Game Bar Overlay, you can disable it by following these steps:
- Press the Windows Key + I on the keyboard at the same time to open Windows Settings
- Select the Gaming tab.
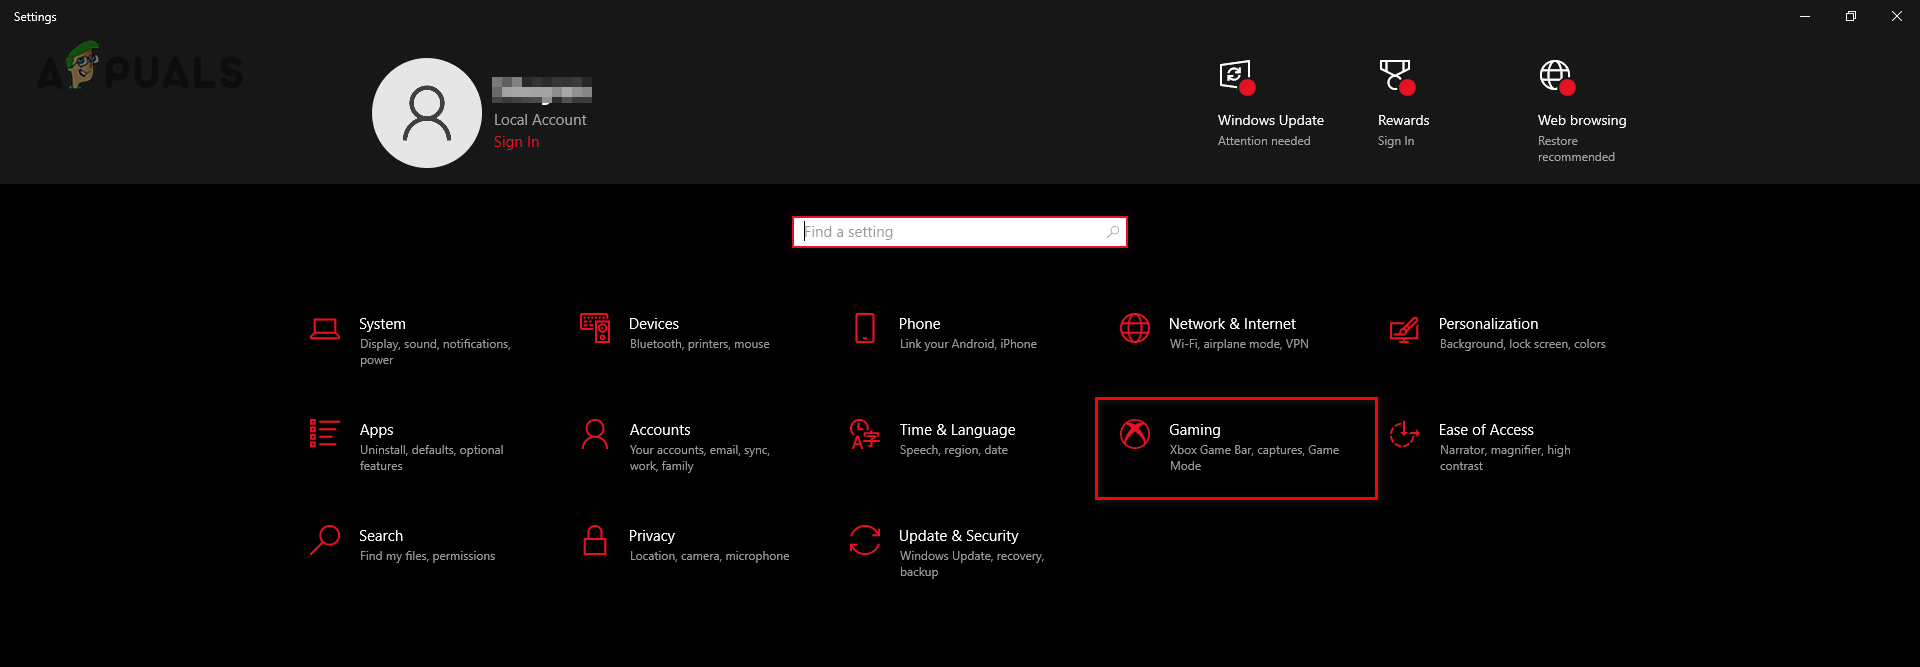
Opening the Gaming Settings menu - Disable the Xbox Game Bar.
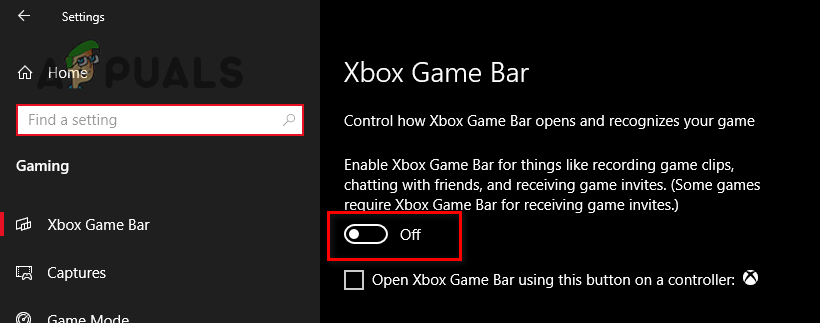
Disabling the Xbox Game Bar
9. Disable High Precision Event Timer (AMD ONLY)
High Precision Event Timer or HPET is a big problem for AMD users in gaming. This one setting has caused significant crashes and lag problems.
- Press Windows Key + X on the keyboard simultaneously, and at the bottom left on the pane that pops up, click “Device Manager.”
- Expand the “System Devices” tab by clicking the arrow on the left of the name
- Scroll until you find “High Precision Event Timer.”
- Right-click the name and click “Disable device.”
- A pop-up will appear; click Yes as it’s nothing to worry about
- It should now have a down arrow near the name like this if you disabled it correctly:
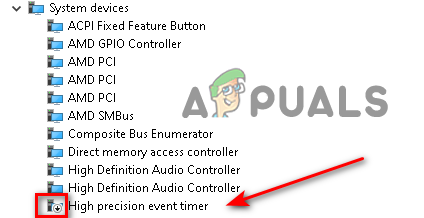
Disabling HPET Driver
10. Enable Windows Game Mode
After rigorous testing in different types of games, it has been shown that Windows Game Mode is good in some games, and for others, it leads to a loss in performance.
But for Rust, it’s perfectly fine to use as it gives you a slight boost in performance.
- Press the Windows Key + I on the keyboard at the same time to open Windows Settings
- Select the Gaming tab
- On the left-hand pane, select “Game Mode.”
- Turn the toggle On to enable game mode.
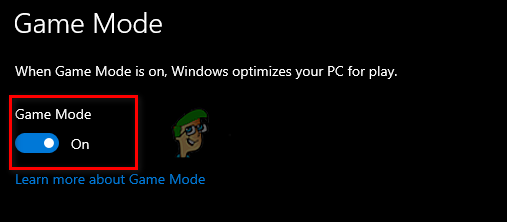
Enabling Game Mode


I have confirmed I have the required specs and completed all tasks as described above. By the way, thank you very much for the detail as it helped tremendously. I am still having lag issues with Rust. Do you have any other ideas? should I switch from wi-fi to LAN line?