How To Run Windows Softwares On macOS Easily
As someone who has changed their operating system of choice many times in the past, there have been a lot of times when I wish every OS could have the same version of every app. Granted, that’s wishful thinking more than anything, but I wish some of my favorite macOS apps were on Windows, and vice versa.
While macOS has a lot of great apps such as Final Cut Pro or Logic Pro X, Windows has a lot of free and casual apps that are more suited towards beginners or day to day users. I’m not saying one is better than the other, all of that is subjective. But both platforms seem to have a different demographic and focus, and that’s why some apps are present on one and absent on the other.
Let’s just cut to the chase, shall we? Yes, there are several methods to get Windows application running on your Mac, even on the newest version of macOS Catalina. We won’t be covering them all but let’s talk about a few options that are more plausible than the rest.
The Hard Way – BootCamp Assistant
If you don’t want to simultaneously run both Windows and macOS apps at the same time, you could always use the Bootcamp Assistant which is built into OS X Catalina and earlier versions of macOS. It makes a separate partition on your hard drive for Windows and allows you to install Windows 10 on there.
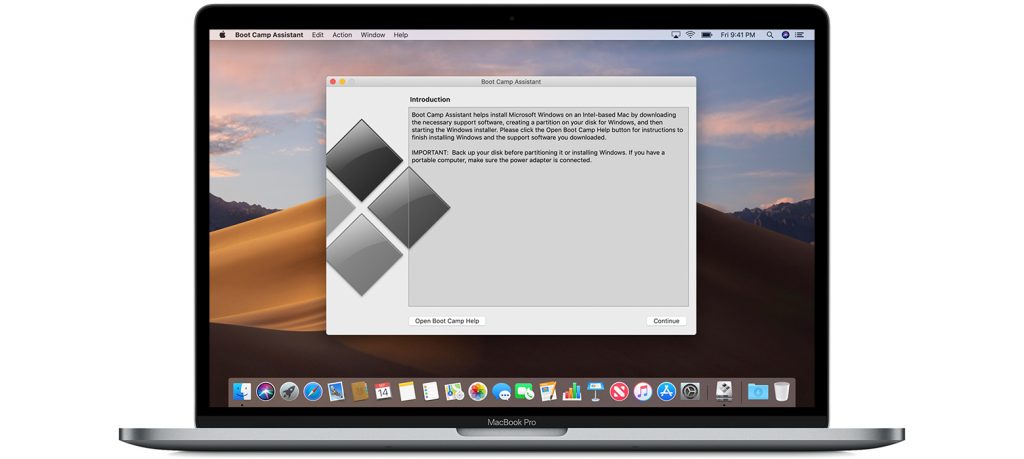
When BootCamp has done its job, you’ll be able to decide when you want to boot into Windows 10 and when you want to boot into macOS. While this might be one of the more reliable methods, as you can fully use the power of your Mac on either platform, you can’t really have Mac and Windows apps open side by side, can you?
If you have a very specific workload in which you have to use both Windows and Mac applications at the same time, or you just want the convenience of switching between platforms and apps in a pinch, BootCamp isn’t the best way, at least in terms of convenience.
But you know what’s much more intuitive and easy to use? Virtual Machines.
The Easy Way – Virtual Machines
Let’s say you want to work with macOS and Windows 10 apps simultaneously, well Virtual Machines are your answer. What’s a virtual machine I hear you ask? Well, they are basically an emulation of a computer system or OS inside of your existing system. They provide the functionality of an actual physical computer, and some of them can do this really well.

However, a lot of these services are bogged down by glitchy software, unreliable performance, and just straight-up poor design. However, I feel that we might have just found the perfect solution to these problems. Enter the world of Parallels.
Parallels 15 is the perfect virtual machine for your Mac. You can either go for the business edition, but there is a home edition aimed at the general audience. The company itself has been around for a long time, so they definitely know what they are doing. Their main area of expertise is enabling Mac users to use Windows apps in a stable, fast, and reliable environment.
The latest version, Parallels 15 for Mac, works like a charm and is incredibly intuitive and easy to get used to. It works with the latest release of macOS X Catalina and supports all the latest features.
Installing Windows 10 through Parallels is easy on your Macbook, Mac Pro, iMac, or any other macOS computer you might have. If you have your own copy of Windows, you can use that for the installation by plugging in a USB or using a disc-image (ISO file). However, Parallels can do all of that for you.
That’s the best part about Parallels. It doesn’t ask you to have any prior knowledge of Windows and it doesn’t ask you to configure anything. The software can do it all for you, just click on the same buttons and let the app do its magic. So let’s explain the setup process.
The Setup Process
Parallels 15 is easy to use and has a intuitive setup, follow these steps below to get started.
- Download, install, and setup Parallels 15 on your Mac.
- After that, follow the setup process for setting up Windows 10. If you don’t have a precious copy, you’ll have to pay for a new license of Windows 10.
- Parallels 15 will download Windows 10 for you and automatically create a partition for it on your drive
- When Windows 10 is done installing, go through the setup process as you would in regular Windows.
- Download and install all the Windows applications you want, these will be saved in Drive:C by default.
- You can even use Coherence mode to pin Windows applications to macOS dock.
That’s all there is to it! We meant it when we said Parallels was intuitive. If you need to mess around with settings to get a performance boost, right click on the Windows-like icon and click on configure from the menu that pops up. From here, you can decide how much resources the virtual Windows OS uses.
Parallels Features
Now that you’ve got Windows up and running inside your Mac, you can access all your favorite Windows 10 apps like Paint.Net, Full Fledged Microsoft Office, and many others. But there are a lot more accessibility features in Parallels than you might first think. It’s not just about the apps running, it’s how well they run.
Coherence Mode
If you’re working on, say a Word document in Windows, you don’t have to be confined to that tiny space. You can go fullscreen and have the full experience. But if you’re working on something in the macOS side of the things at the same time, you can use coherence mode.

Click on the upper right button which should turn blue when you hover over it, this will take you to coherence mode. While this mode is activated, any Windows 10 app will appear as if it’s running natively on macOS. This get’s rid of any ugly borders and makes it look like that app was on macOS, to begin with.
You can also pin apps onto the macOS dock. This way, you can quickly launch any Windows app straight from the dock without opening up Windows first.
DirectX 11 Support
I can imagine that implementing DirectX 11 support inside a virtual machine running inside a Mac must have been a stressful task. Somehow, parallel has been able to do this almost perfectly. This means that Windows games run much better on macOS. Keep in mind, however, that not all triple-A games will work depending on your hardware.
Still, you have access to a lot of games that aren’t as demanding, and it’s good for some casual fun. You can also access the Xbox app and browse the catalog there within Windows.
External Graphics Support
If you use an external GPU to help add some extra power to your Mac, don’t fret as Parallels supports this feature as well. Plug-in the eGPU as you normally would into the Mac, and plug the output cable into your display of choice. It works about as good as you’d expect, and Windows does recognize the external GPU as it normally would.

While the performance won’t have you playing Red Dead Redemption 2 in 4K60fps, it’s good enough that you can add extra power to your Mac. However, keep in mind that VRAM use is restricted to 2GB, so your GPU might not reach its full potential. Of course, if you just want to play games, Bootcamp might be a better option either way.
Final Thoughts
So, there you have it folks. Parallels is the best way to run any Windows application you want on your Mac. It’s a powerful and unique piece of software. There’s really nothing better when it comes to virtual machines on a Mac. With a great support team, customer service, reliable and powerful implementation of features, Parallels is an easy recommendation from us.