How to Fix rtf64x64.sys BSOD Error Code “0x000000d1” in Windows?
As per the rtf64x64.sys version information, rtf64x64.sys is a part of the Windows Packet Filter Kit developed by Realtek which recently has been causing a system crash, accompanied by the error code 0x000000d1.
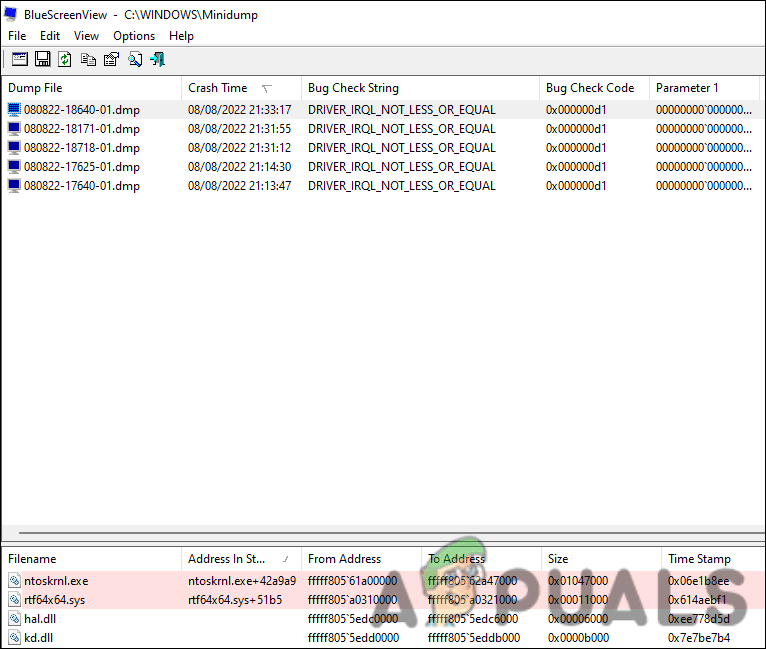
The error is typically caused due a communication problem between the hardware and the processor. It happens when too many hardware components try to communicate with the CPU together, causing the interrupt request level (IRQL) levels to rise. When the hardware attempts to access a system component that it does not have access to, the result is a blue screen of death like the one under consideration.
If you are facing a similar problem, worry not. In this guide, we will walk you through the troubleshooting methods that worked for other users and are sure to resolve the problem for you as well. We recommend going through the troubleshooting methods first to identify the cause of the problem in your case. Once that is done, you can follow the relevant troubleshooting method to resolve the issue.
1. Run System Scans
The first thing we recommend you do is scan the system for any potential errors contributing to this issue. If a corruption error or virus within the system is causing the problem, using the built-in Microsoft-developed utilities can fix the issue for you.
The two utilities we will be using in this situation are the System File Checker (SFC) and DISM (Deployment Image Servicing and Management). SFC /scannow scans all protected system files and replaces corrupted files with cached copies located in %WinDir%\System32\dllcache.
DISM.exe, on the other hand, can be used to prepare and service Windows images, such as Windows PE, Windows Recovery Environment, and Windows Setup. It is considered more powerful than SFC and is typically used to fix issues the SFC tool fails to resolve. Using both utilities will help make sure that no corruption error within the system is left untreated.
Here is how you can run the SFC and DISM utilities:
- Press cmd in the search area of the taskbar and click on Run as administrator.
- Alternatively, you can open a Run dialog by pressing Win + R.
- Type cmd in the text field of Run and press Ctrl + Shift + Enter to open Command Prompt with administrative privileges.
- In the Command Prompt window, execute the following command:
sfc /scannow
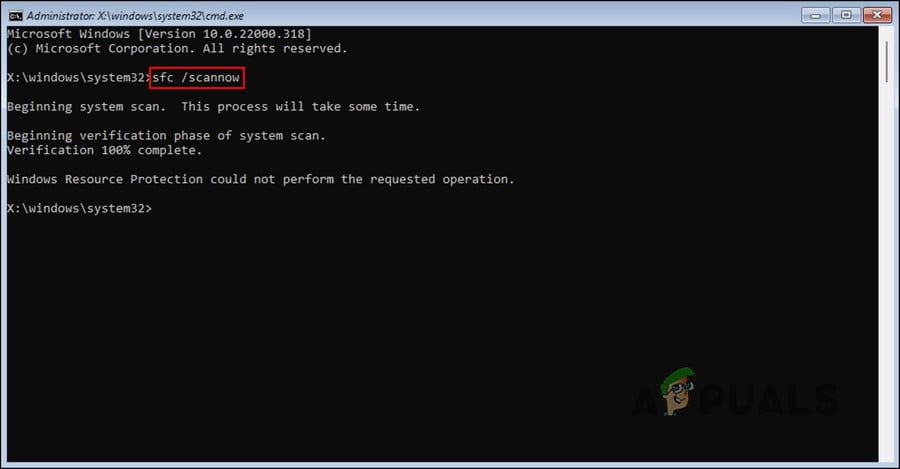
Run the sfc command - Once the command is executed, go ahead with executing the DISM command:
DISM /online /cleanup-image /restorehealth
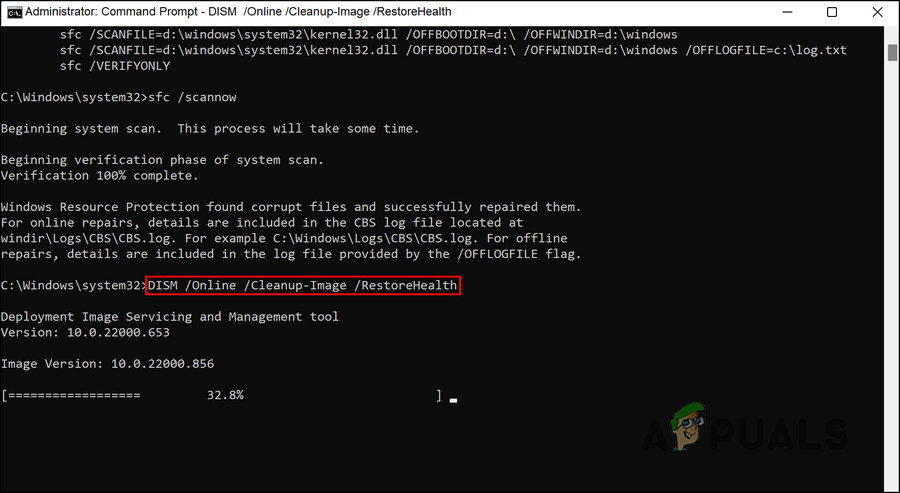
Run the DISM command in Command Prompt
This command can take a little while to complete, so hang in there. After the command is executed, close the Command Prompt window and check if the issue is resolved.
2. Update Your Network Drivers
Since this issue is also related to the network drivers, the next thing we recommend you do is update the network drivers. In this method, we will first look at the available driver updates in the system updates.
If no updates are available, we will manually update the network drivers using the Device Manager utility. If updating does not do the trick, then we will uninstall the drivers and reinstall them using the manufacturer’s website.
Here is all that you need to do:
- Press Win + I to launch Windows Settings.
- In the Settings window, choose Windows updates from the left pane.
- Now, click on the Check for updates button in the right pane. Wait for the system to scan for any pending updates.
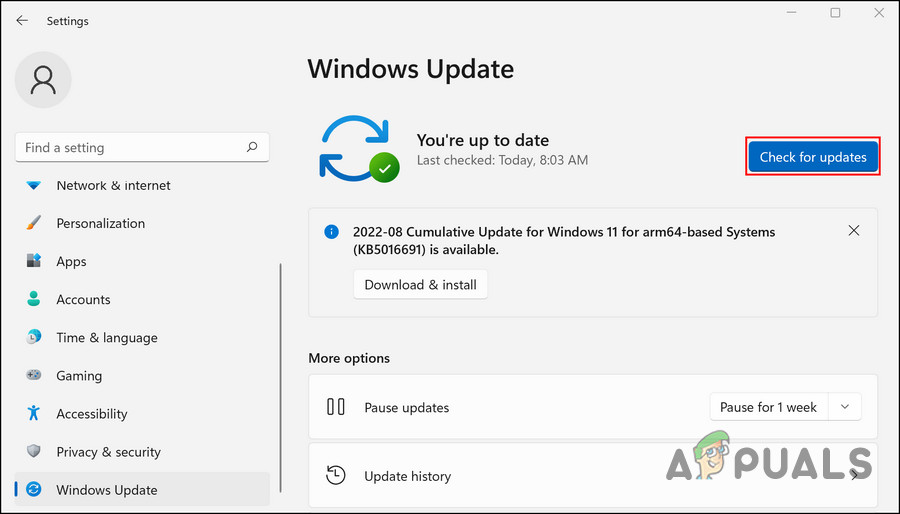
Click on the Check for updates button - If any driver updates are available, install them.
- If not, type Device Manager in Windows search and click Open.
- Expand the Network adapters section in the following window and right-click on the Realtek driver.
- Choose Update driver > Search automatically for updated drivers.
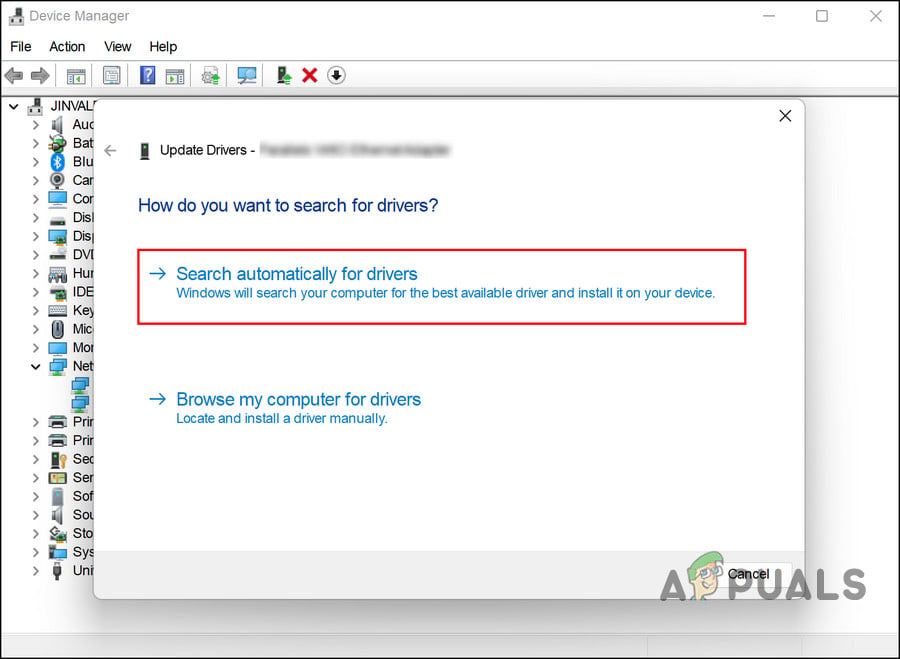
Search the system for drivers - Once the system identifies an updated version of the driver, follow the on-screen instructions to install it.
After installing the update, check if you are still facing the problem. If you are, then right-click on the Realtek driver again and choose Uninstall device from the context menu. Follow the on-screen instructions to complete the uninstallation process. Once done, install the latest version using the manufacturer’s website. Finally, restart the computer and check if the problem is not fixed.
3. Use System Restore
It is also possible to restore the system to a state where the error at hand was not present, and the driver under consideration was working properly. This can be done with the System Restore utility, which creates restore points regularly. You can restore your system to a previous state using these restore points.
Follow these steps to proceed:
- Press Win + R to open Run.
- Type control in the text field of Run and hit Enter.
- Select Create a restore point > System Restore from the Control Panel.

Click on the System Restore button - Click Next.
- This window should display a list of restore points created on your system. Click on the most recent one and then hit Next.
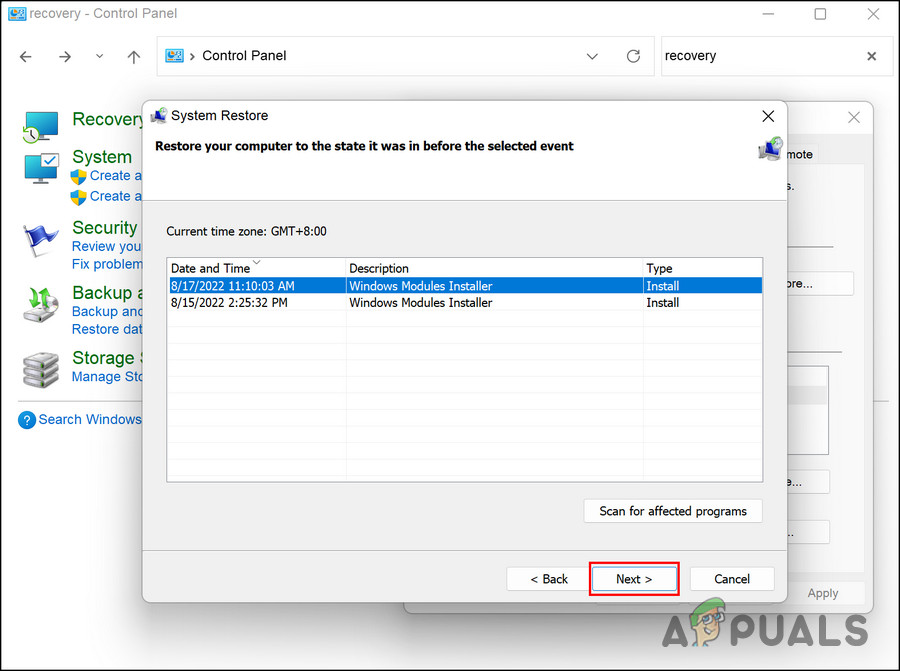
Pick a restore point - Wait for the changes to implement.
4. Clean Install Windows
If none of the methods above did the trick for you, then you can try clean installing windows as a last resort.
It is the process of installing a new operating system or application on a computer. The hard drive is formatted and completely erased during this process.
During a clean install of Windows 10 and 11, the user starts over with a new operating system. This helps declutter the computer, free up space, and eliminate performance and speed issues. Aside from removing viruses, Trojans, malware, and bloatware, it also solves system problems like blue screen errors, so the error at hand should be fixed once and for all.


