How to Rotate a Video for Windows Media Player
We’ve all been there – You shoot a wonderful video with your phone or camera and download it to your computer only to discover that you filmed in the wrong orientation.
There are multiple ways of going about tackling this issue. As you can imagine, there are better ways of solving this inconvenience than tilting your head or rotating the computer’s screen.
Unfortunately, there isn’t a native way of rotating the video in Windows Media Player. This is a little odd considering that the issue has been around for years with countless user complains about Microsoft’s servers. Despite this, Microsoft still hasn’t implemented a native way of rotating a video in Windows Media Player.
As a result, the only way to correct a video that was filmed sideways on Windows is to use a 3rd party solution. Fortunately, there’s a whole variety of feasible solutions, so we’ve taken the liberty putting together a guide with curated methods that will work without problems. Please follow whichever method seems more accessible to you.
Method 1: Using Windows Movie Maker
This method used to be the defacto way of rotating a video for Windows Media Player. It involves using Windows Movie Maker (part of the Windows Essentials 2012 suite).
Unfortunately, Microsoft ended support on the whole suite on January 10, 2010, and removed all official download links as a result. Luckily, Movie Maker enthusiasts are still able to use the software if it was already downloaded on their system or if they manage to find an offline installer. This method is probably the easiest option out of the bunch, but it will take a while to set up Windows Movie Maker if you don’t already have it installed.
If you want to edit your rotate your video using Windows Movie Maker or you’re looking for a way to get the software back, follow the steps below. But keep in mind that the whole process will take up some time. The following guide will work on any Windows version. Here’s what you need to do:
Note: If you already have Windows Movie Maker installed, please skip the first two steps.
- Since there isn’t an official download link for the suite anymore, we need to download it from an external source. To spare you from catching any unwanted malware or spyware, we have fetched a web archive copy of the download link that Microsoft previously provided. Download the Windows Essentials 2012 suite from this link (here).
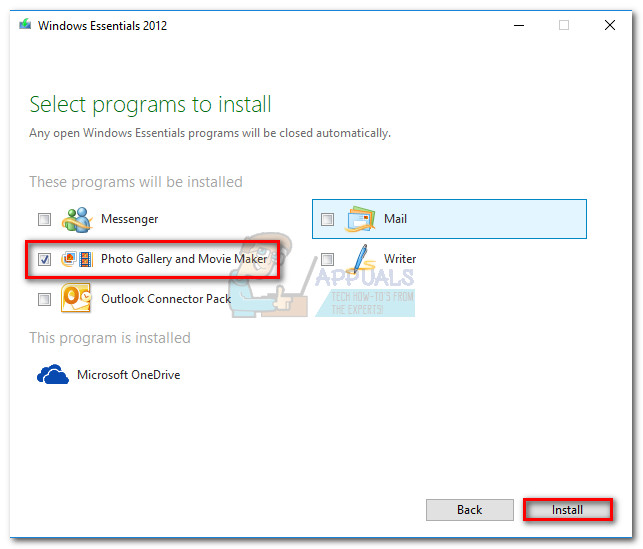
- Once the download is complete, open the installer and click on Choose the programs you want to install. In the next screen, check the box next to Photo Gallery and Movie Maker and leave the other boxes unchecked. Hit Install and wait for the process to complete.
- Once Movie Maker is installed successfully, go ahead and start it. First things first, drag the video that needs rotating in the Movie Maker Window to import it.

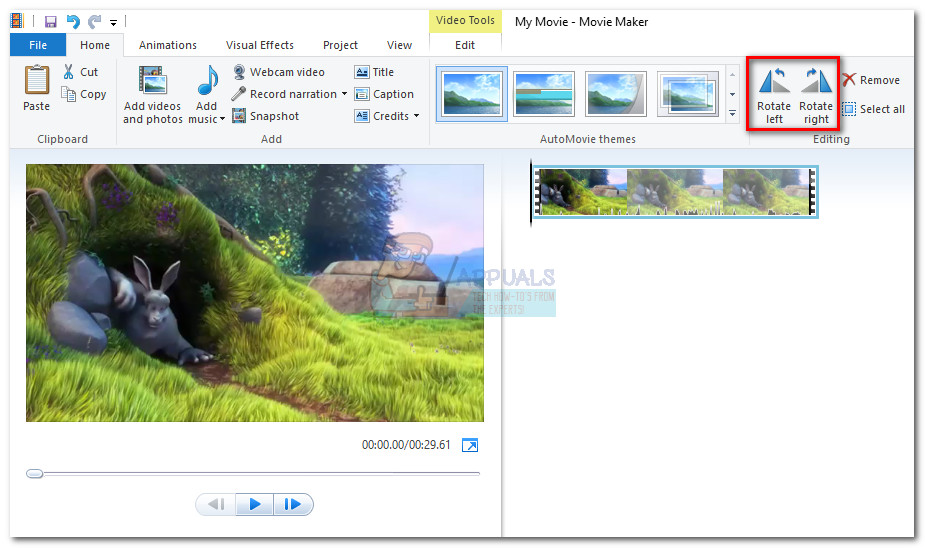
- Next, play the video for a couple of seconds to figure out which way to rotate it. Once you have the plan, go to the Home ribbon and make your way to the Editing section. You’ll notice two buttons – “Rotate Left” and “Rotate Right”. Each button push will rotate the video 90 degrees in the direction advertised. Use them to set the video in the correct orientation.
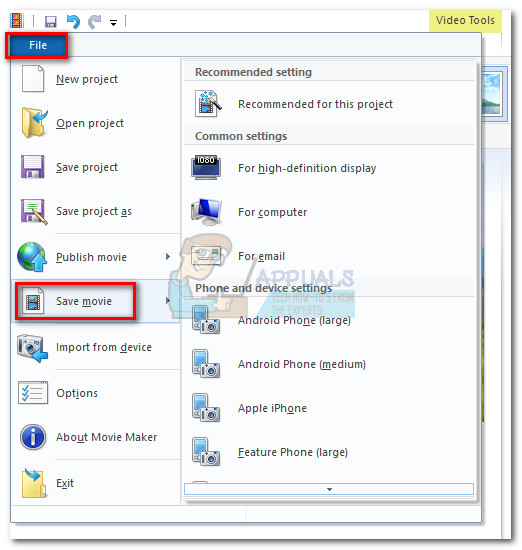
- Once the video is oriented the correct way, we need to save the video. Do this by going to File > Save movie and then select from the plethora of formats. If you’re unsure on which option to choose, click on Recommended for this project.
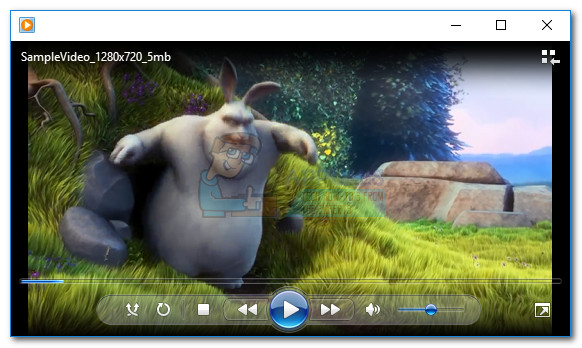
- Finally, open the video with Windows Media Player. It will open with the correct orientation.
Method 2: Using VLC Media Player
If you want to avoid going through the hassle of installing a software that is no longer supported, you can try a solution was developed outside of Microsoft’s ecosystem. VLC is a free open source media player with a built-in codec support for just about every video format you can find.
But if you watch movies on your PC, chances are you already have it installed. Rotating a video in VLC is not as easy as it is in Movie Maker, but don’t get demotivated as you’ll only have to do a couple of extra steps. Follow the steps below to rotate the video in VLC and prepare it for Windows Media Player:
Note: Keep in mind that you might need to update your VLC version in order to access the rotating feature.
- Download and install VLC Media Player from the official website (here).
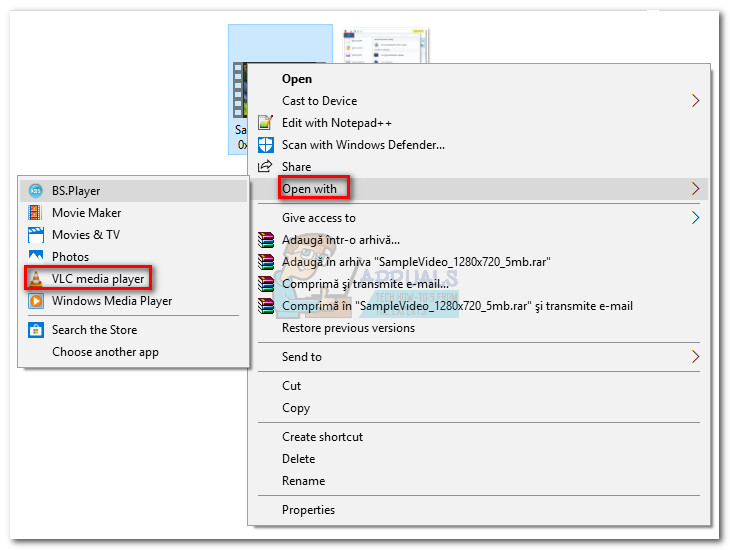
- Right-click on the video in question and choose Open With > VLC Media Player.
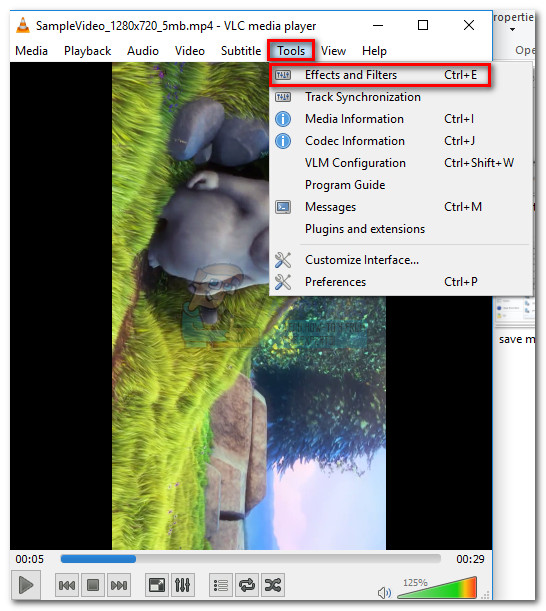
- Once you’ve opened the Video in VLC, access Tools from the ribbon bar and click on Effects and Filters.
- In the Adjustments and Effects window, select the Video Effects tab, then choose Geometry. Then, check the box next to Transform and use the drop-down menu below to select a preset that fixes the image. Hit Close to save your selection.
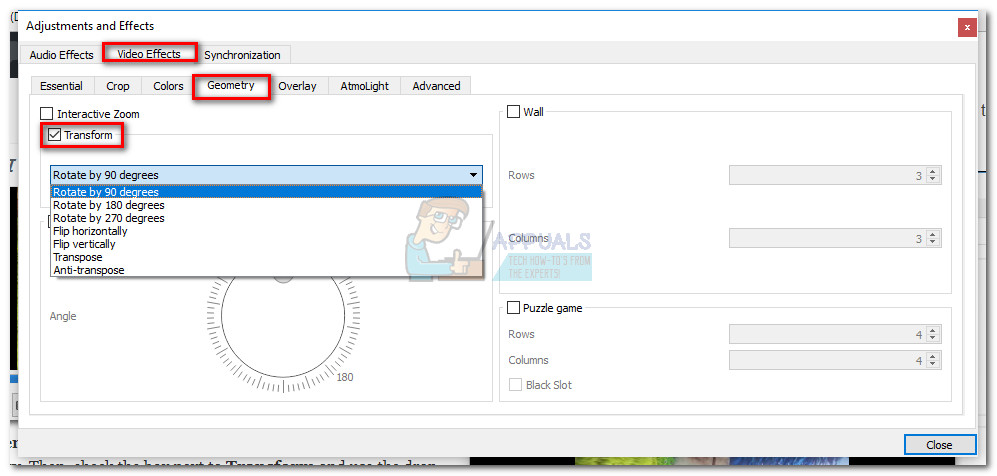 Note: You can also do it manually by checking the Rotate box and using the slider to rotate the video.
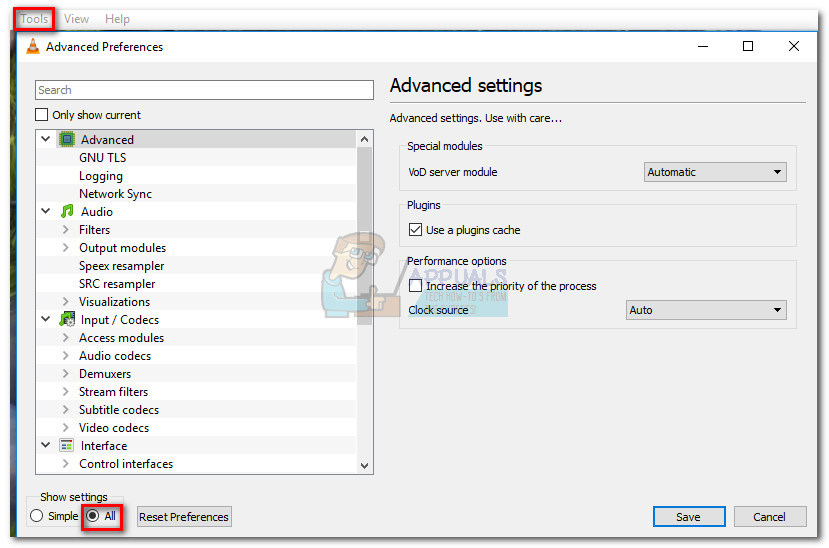
 - The video is now correctly oriented, but the changes will not be permanent, and we need to make the change visible in Windows Media Player. To do this, go to Tools > Preferences and enable the All toggle under Show Settings.
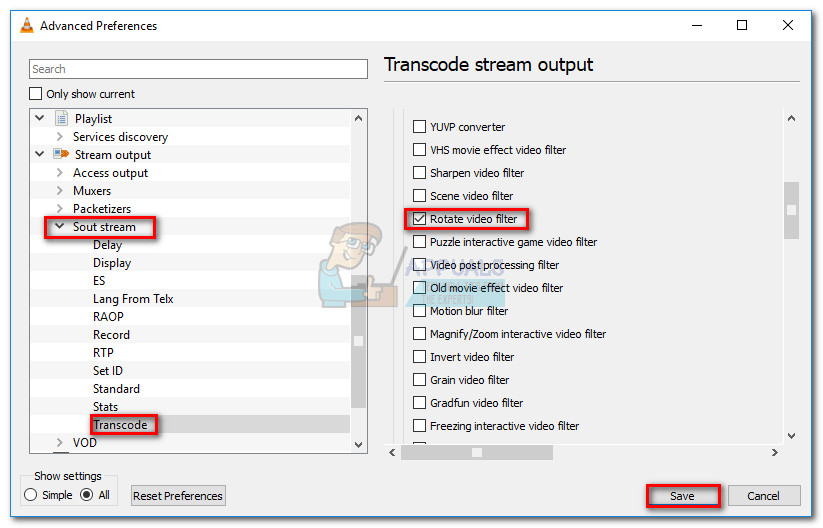
- Now that all the settings are shown, scroll down to the Sout stream heading (under Stream output) and click on Transcode. Then, use the menu on the right to check the box next Rotate video filter. Hit Save to confirm your modifications.
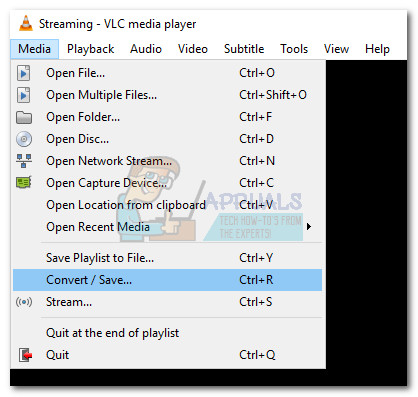
- Next, open the Media tab from the ribbon bar and click on Convert/Save.
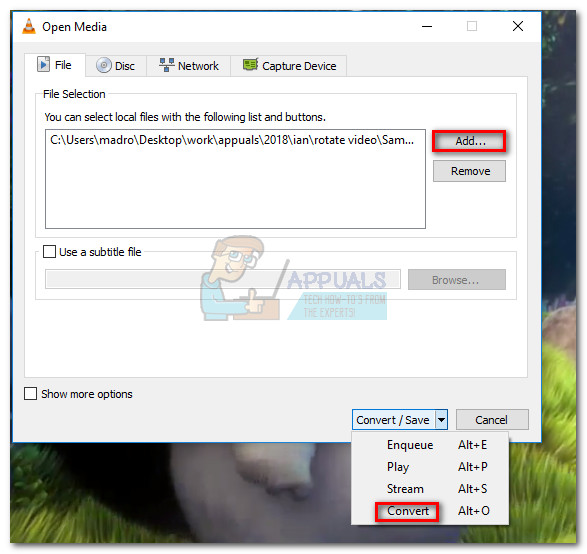
- When you arrive in the Open Media window, click the Add button and select the video that you’ve just modified. Then, use the drop-down menu in the bottom-right section of the screen and set it to Convert.
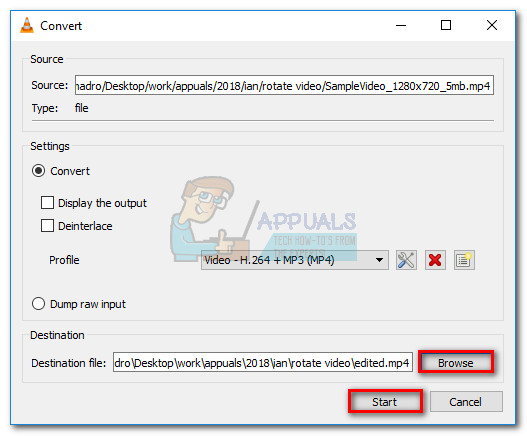
- In the Convert window, leave everything as it is. The default conversion profile should do the trick for the task at hand. Use the Browse button to set up a destination path and then hit Start to begin the conversion.
 The video is finally ready. You can open the newly created movie file in any application including Windows Media player and it should have the correct orientation.
Method 3: Using a video converter
If you didn’t fancy the first two methods, you can also make use of a more focused solution. Almost every video converting software currently on the market is capable of changing the orientation of a badly recorded video.
You don’t even have to spend any money since most video converters will have an orientation changing feature in the free version. We used a popular free solution called Freemake Video Converter, but you can go another route and use another option.
Below you have a step by step guide to rotating the video for Windows Media Player using Freemake Video Converter. Here’s how:
- Download and install the latest version of Freemake Video Converter from the official website (here). Pay attention and choose Custom install to prevent promotional add-ons from installing on your system.
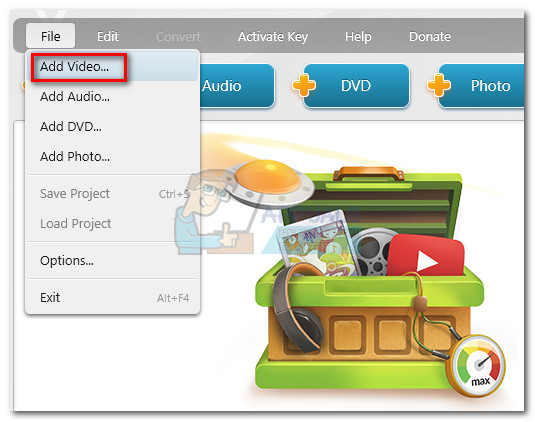
- In Freemake Video Converter, go to File and choose Add Video. Then, add the video that needs the orientation changed.
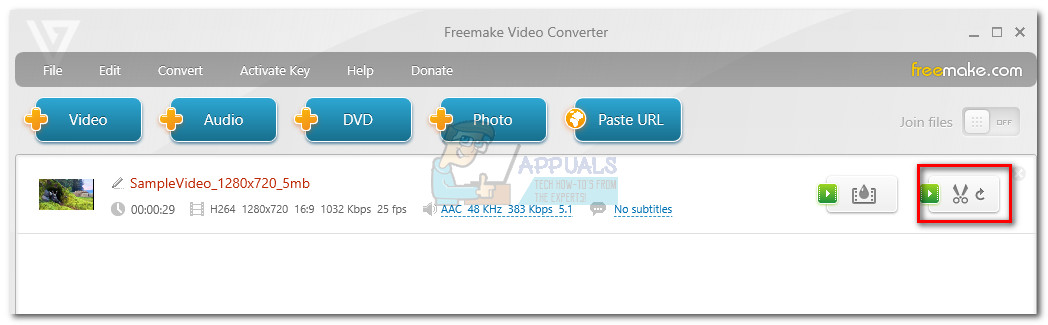
- Once the software loads the video, click the edit icon on the right-hand side.
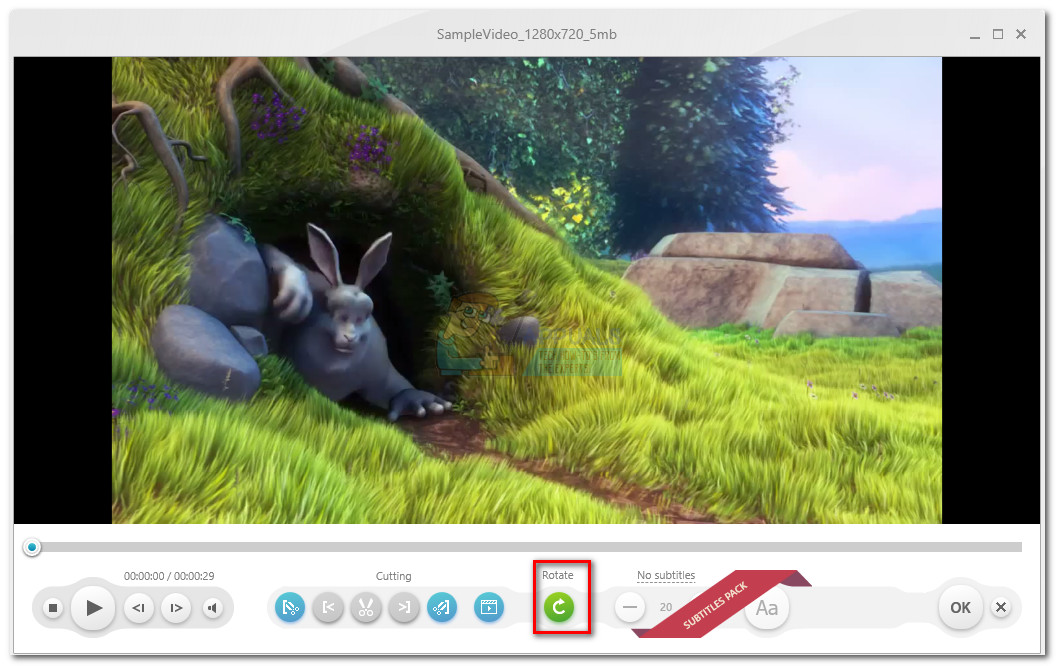
- In the next menu, hit the Rotate button until you achieve the desired orientation. Hit the Ok button to confirm your modifications.
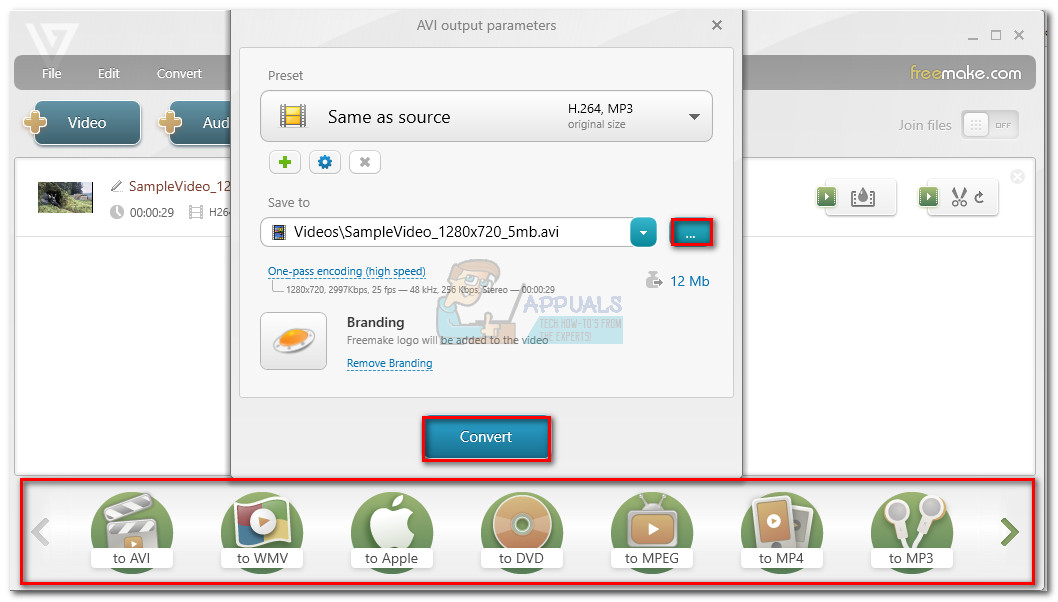
- Finally, select a conversion type from the menu located on the lower side of the screen. You’ll be prompted with a new pop-up in which you’ll need to set a path for the conversion. Once all the details are set, hit the Convert button and wait for the process to complete.
- Open the newly created video with Windows Media Player. It will have the correct orientation.
Method 4: Using Online Rotator
If you only want to rotate one video every once in a while, downloading an entire application for it might seem troublesome. Instead, you can use one of the many online rotators which can instantly rotate the video after you upload it to their website. Here are some of the online converters:
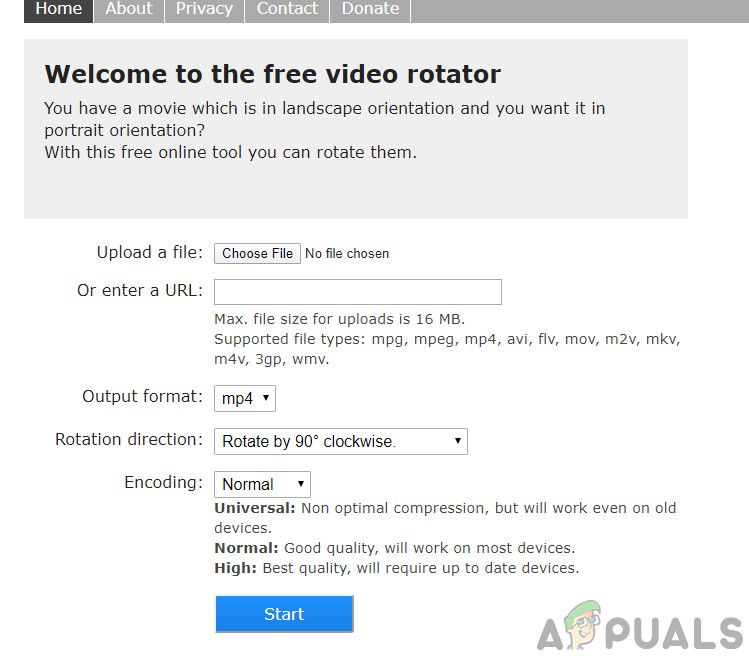
Simply upload your file in the website and select the option of Rotate. After some processing, the modified video will be available for download.
Method 5: Using Photos Application
Microsoft released a video editing software shortly after it released the Photos application in Windows 10. This video editing application can easily rotate, crop, add text, and perform other basic video editing actions. However, it must be noted that sometimes the application doesn’t accept very large files (videos above 1 hour); but you can still try.
- Press Windows + S, type “video editing” in the dialogue box and open the corresponding application.
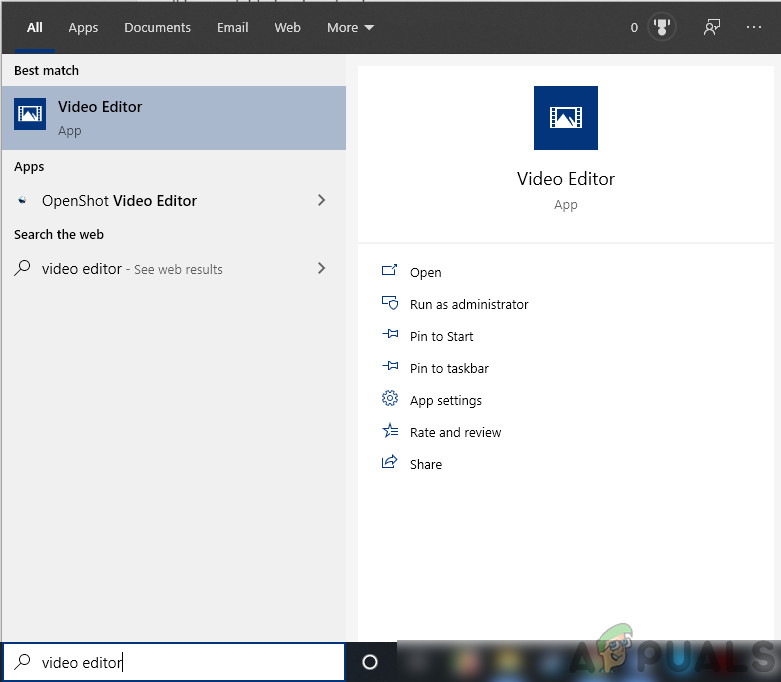
Video editor – Windows - Once in the application, click on New video project.
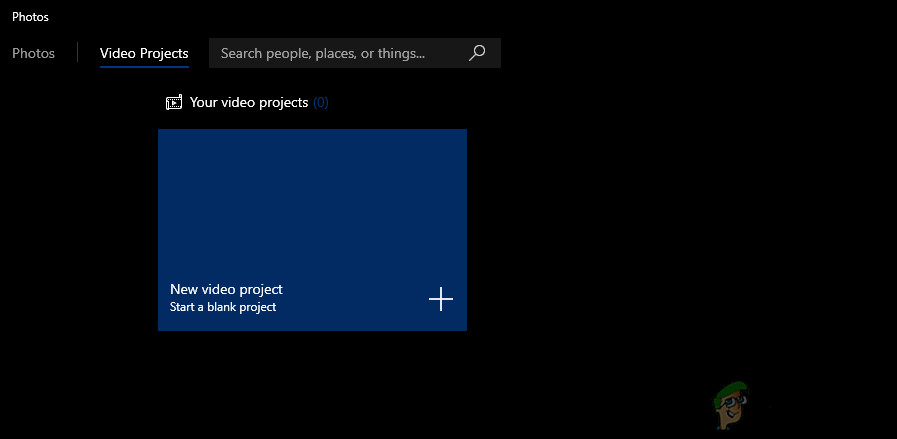
New Video Project – Photos application - Now, you should browse to the video that you want to rotate using the Add button.
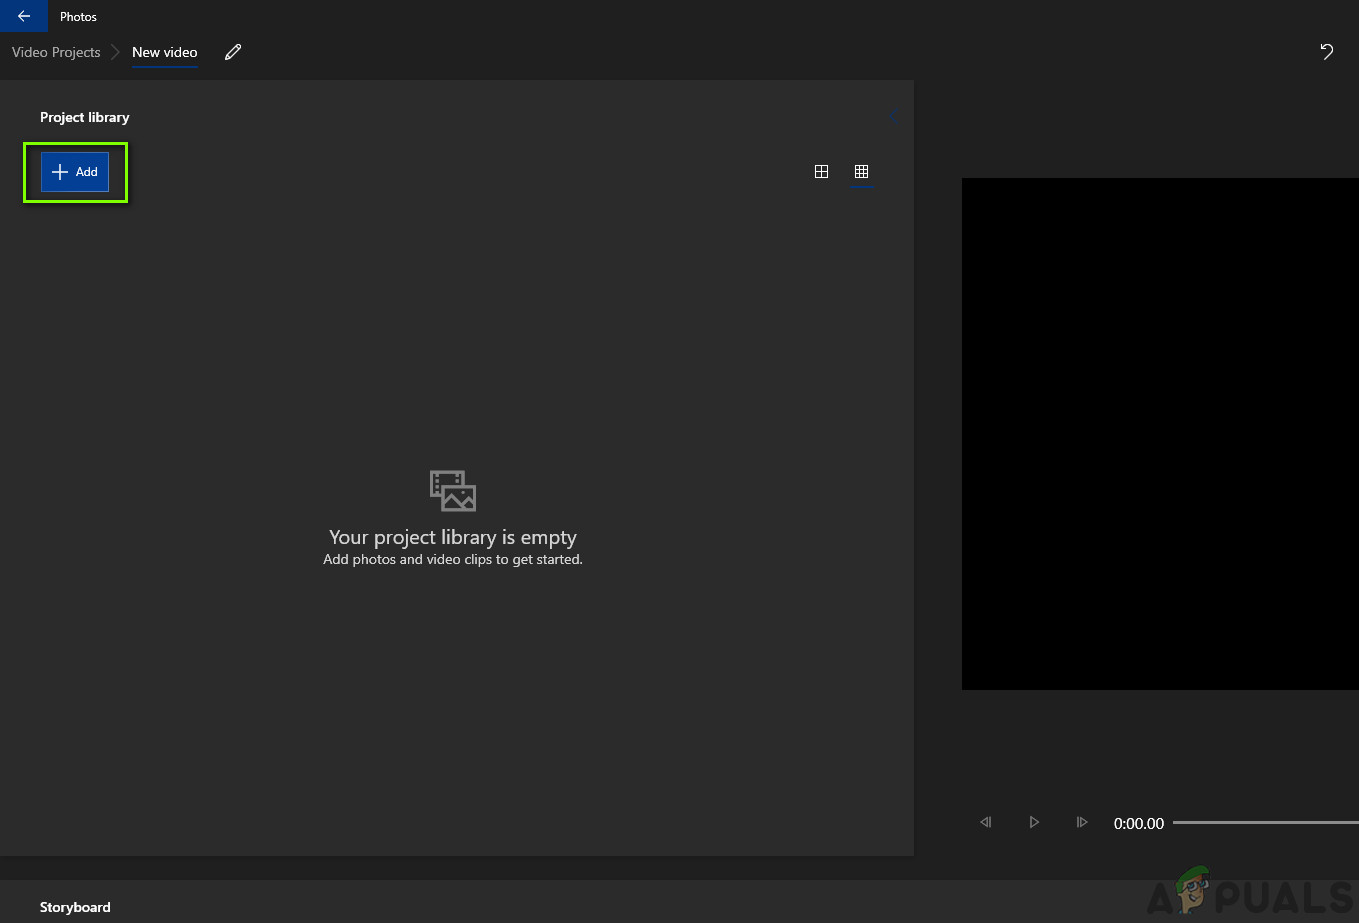
Adding Video file – Video editor in Windows - After selecting the video, drag and drop the video from the Project Library to the Storyboard.
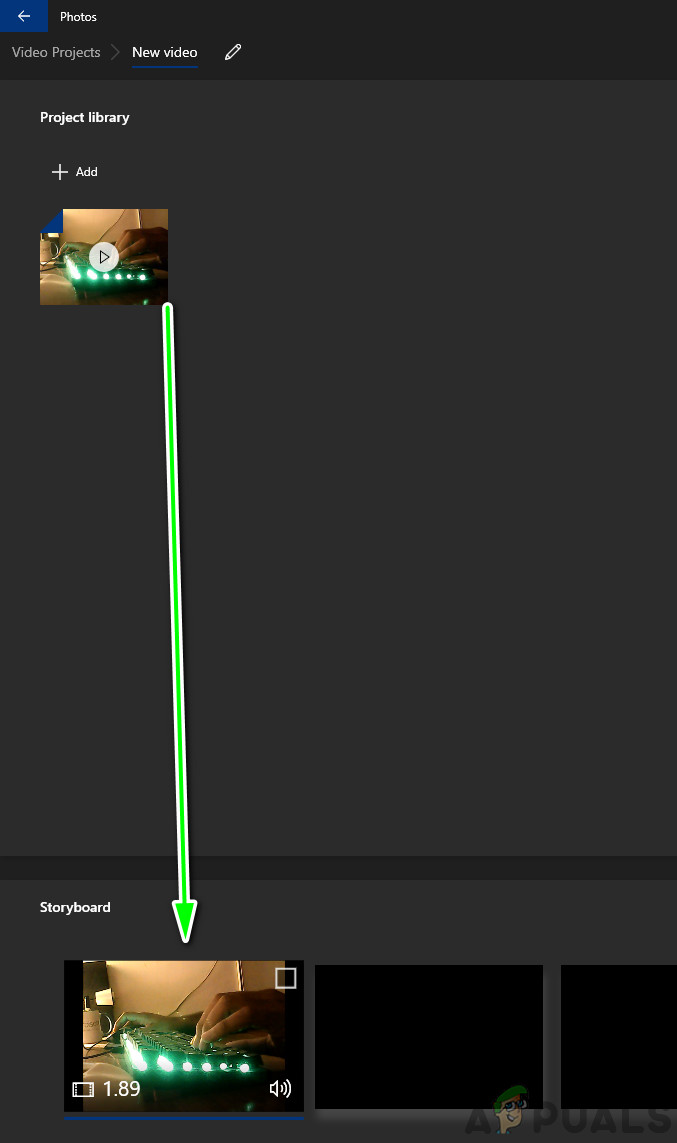
Adding video to storyboard – Video Editor - After you place the video in the storyboard, all the greyed out functions will become active. Look for the rotate icon present at the right side of the screen. Click it once to rotate the video 90 degrees.
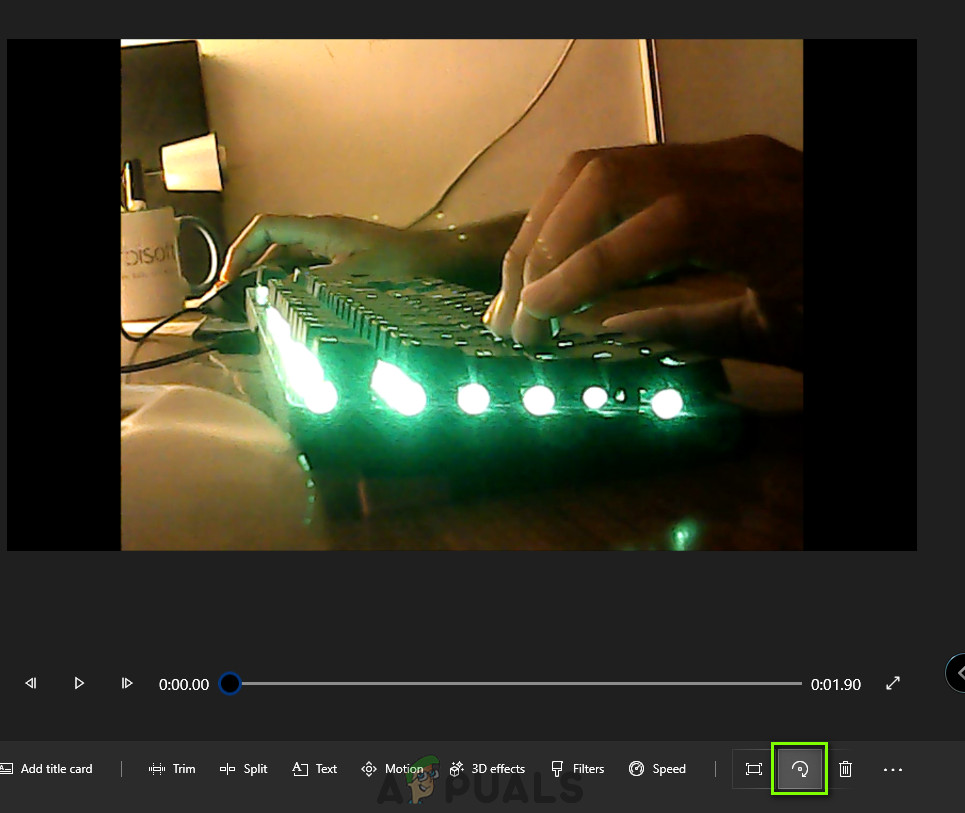
Rotating video – Video editor application - After you have made changes to the video, save it to an accessible location.
It is really helpful, thanks. I also find a good tool called wonderfox hd video converter factory that can help me to rotate videos 90 degrees clockwise or 90 degrees counter-clockwise, flip videos. Easy to use.