How to Remove “System Requirements not met” Watermark on Windows 11?
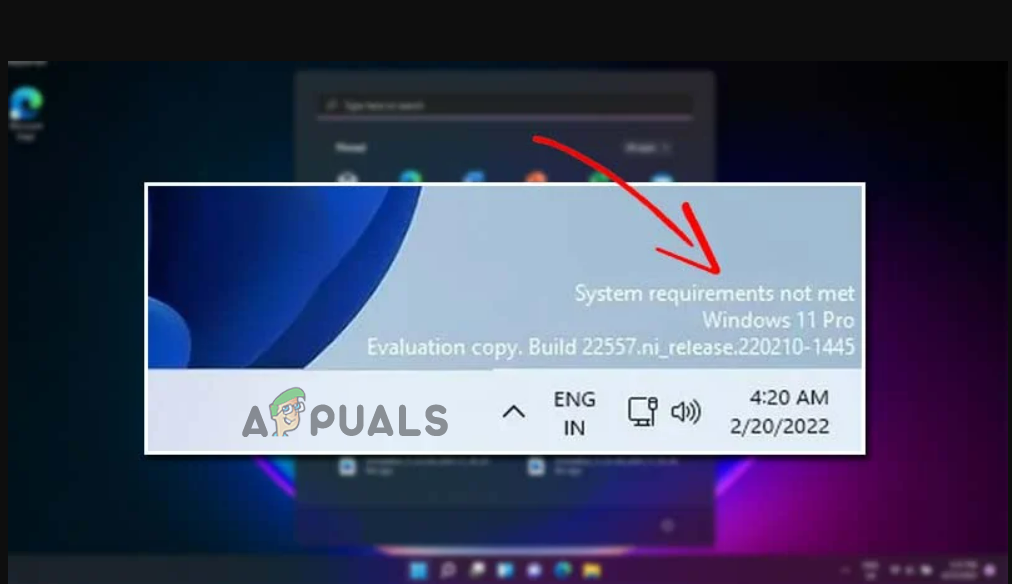
If you installed Windows 11 on an incompatible PC, it might show an annoying watermark at the bottom right corner on your Windows 11 PC or laptop. Here find out how to remove the “System requirements not met” watermark that appeared out of nowhere. Follow these simple steps to remove it permanently from your Windows 11 PC.
Windows 11 is leaps ahead in design language, under-the-hood development, and even user convenience compared to previous iterations of Windows. Maybe it had much more stringent specifications and supported only a handful of older released hardware.
Recently, many Windows 11 users have noticed a peculiar watermark saying ‘System Requirements not met’ on PCs not meeting the minimum requirement for running Windows 11. While many were unphased by the watermark, there is an equal number of people going silly when they see the watermark on their desktop or, in some cases the Settings app.
Fortunately, there is a quick registry fix that will help you remove this watermark from your system. However, before diving deep into the registry menu, it is worth knowing why did the watermark appear on your PC in the first place.
Microsoft’s new iteration of their operating system line is quite a heavy deal, and not all computers can support that kind of a heavy operating system. If you try to use Windows 11 on a low-end PC, then it will show an irritating watermark “System requirement not met,” which means your system’s specifications are not enough to handle the operating system properly.
However, if your system hardware is not that powerful, then you will not be able to install the operating system, but in case if you were able to bypass that restriction and install the operating system perfectly and then you are getting the “System requirement not met” watermark, then have some fixes to remove the watermark.
How To Get Rid of “System requirements not met” Watermark Windows 11 Desktop?
You can easily remove the watermark by modifying some registry editor values. To remove the “System requirement not met” watermark, follow the steps mentioned below:
- Press Win + R, type Regedit in the input box and then press OK.

Accessing the Regedit screen - Then click on the HKEY_CURRENT_USER and then click on Control Panel.
- Next, click on UnsupportedHardwareNotificationCache, right-click on the SV2 DWORD, and click on modify.
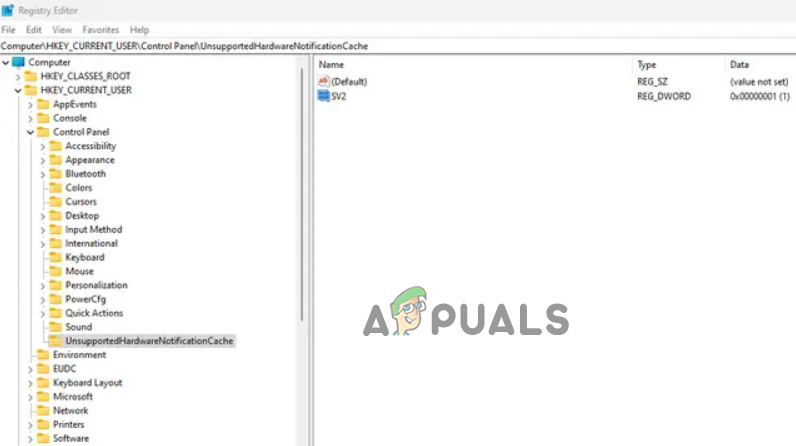
Click on UnsupportedHardwareNotificationCache - After that type the value data 0 and press OK.
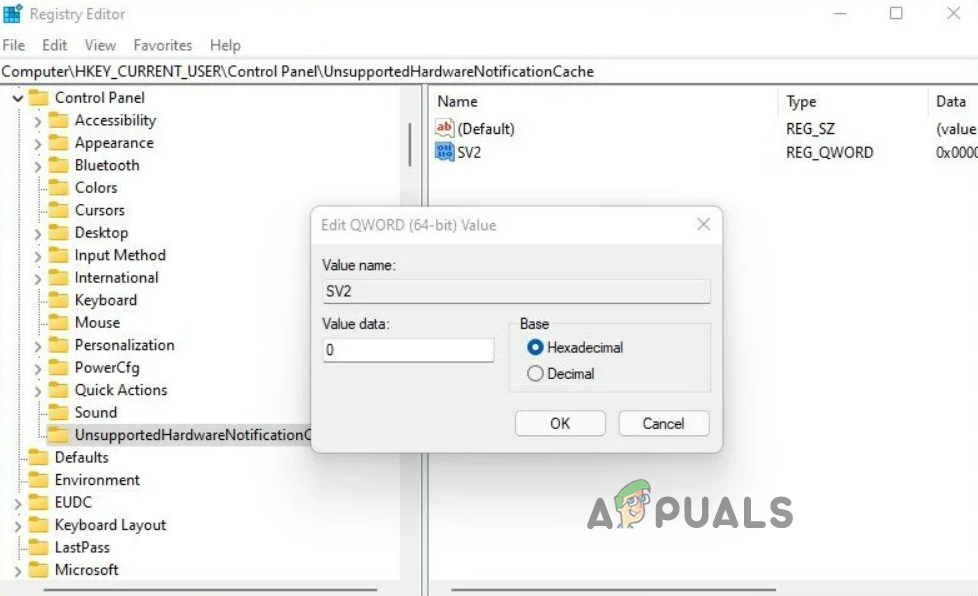
Type the value 0 - Next close all the tabs and restart the PC.
- If there is no UnsupportedHardwareNotificationCache key, then you need to create one. To create a new key, follow the instructions mentioned below:
- Right-click on Control Panel in Registry Editor.
- And click on New and then Key.
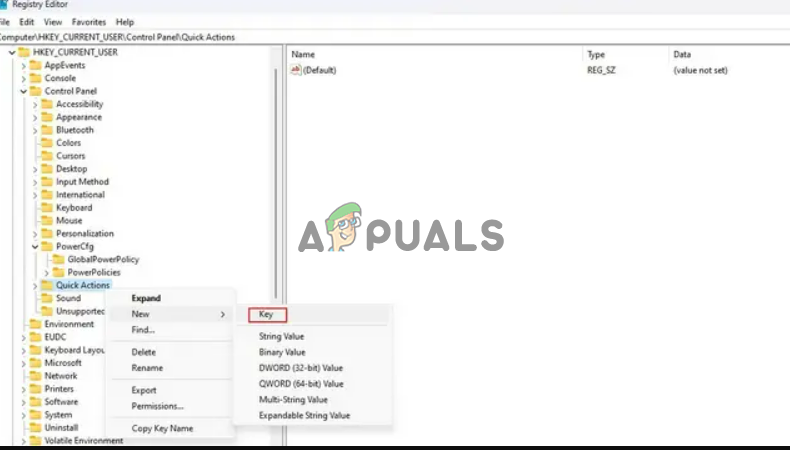
Click on New and then click on the key - Now name the key as UnsupportedHardwareNotificationCache.
- After that, right-click on UnsupportedhardwareNotificationCache and click on New and then click on Dword (64-bit).
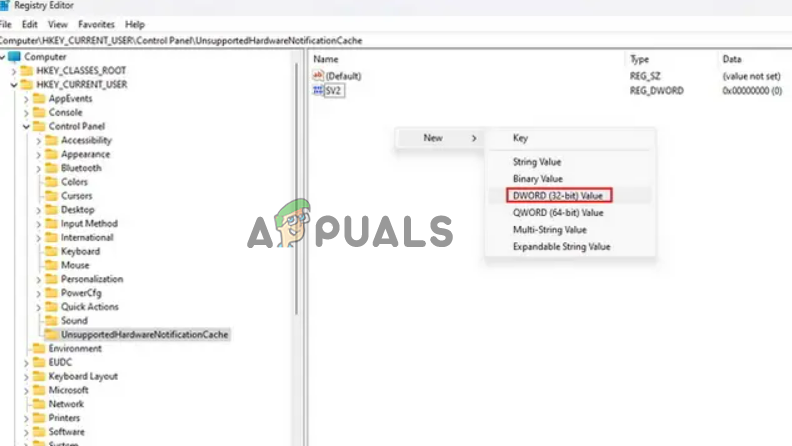
Click on Dword (64-bit) - Now name the value as SV2 and then click on it and set the value to 2.
- Lastly, click Ok and save the changes.
Restart your PC, and the watermark should be gone.
Note: The Watermark can come back with future updates, and you can repeat the method mentioned above to remove it.
So these are the steps that help you to get rid of system requirements not met the watermark on the Windows 11 PC and laptop. And if you can circumvent the TPM secure boot requirement for installing Windows 11, you will likely encounter the System requirement not met watermark on Windows 11 PC. Luckily, modifying the Windows registry entries by following the steps will allow you to remove the watermark in Windows 11 successfully.


