How to Remove a Microsoft Account from Windows 10
When you create a user account on a Windows 10 computer, you can either create a local user account (which requires a combination of a username and password to log in) or a Microsoft account (which is tethered to the email address you use to create it and which requires the email address you created the account with and the password to log in). Having a Microsoft account on a Windows 10 computer not only guarantees security (you can’t have a Microsoft account on Windows 10 without a password) but also allows for seamless integration with Microsoft products and services.
However, some users would much rather have a local user account on their computer than a user account that is not only tethered to their Microsoft account but also requires their Microsoft account to log in. Fortunately, there is no requirement for you to have a Microsoft account on Windows 10 to be able to use it – you can still use Windows 10 in all of its glory if you have a local user account. That being the case, it is entirely possible to remove a Microsoft account from Windows 10.
Note: This article also targets cases where you don’t have access to the user accounts (also the case where the user account is a work/school account not in your reach).
Solution 1: Disconnect from Work or School Access Tab in the System’s Settings
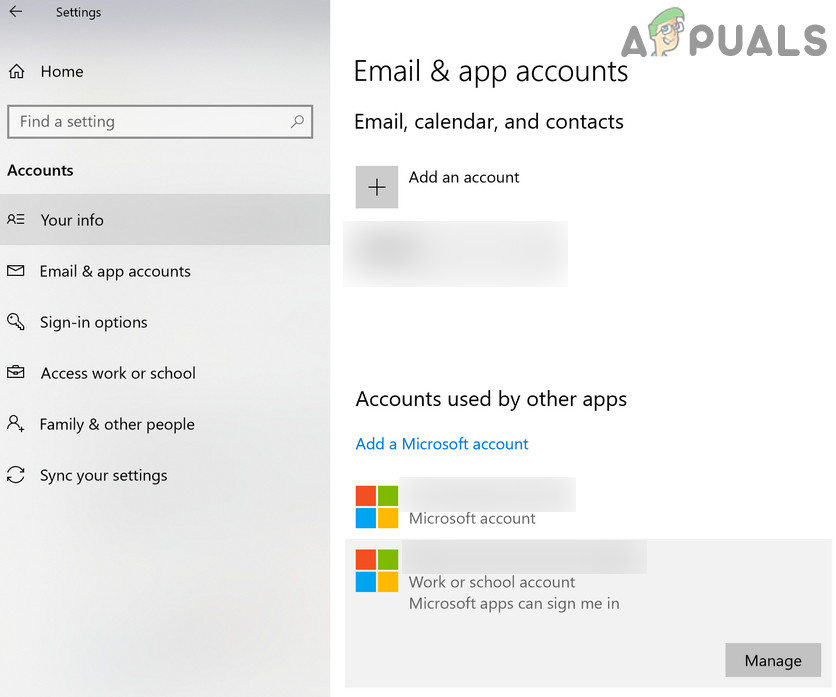
Many users tend to remove the work or school account (they have no access to) from the Email & Accounts tab but that option requires them to sign-in to the account that has to be removed (which is not possible). In this context, disconnecting the problematic account in the work or school access tab may solve the problem (as it will not require sign-in). But this may not work if the problematic account is the only or primary account on the PC.
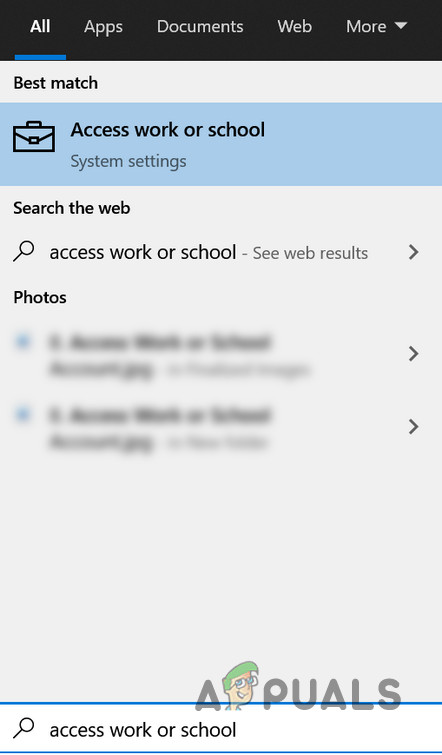
- Hit the Windows key and in the Windows Search, type “Access Work or School” and select it.
Open Access Work or School Settings - Now, in the right pane, expand the problematic account and click on the Disconnect button.
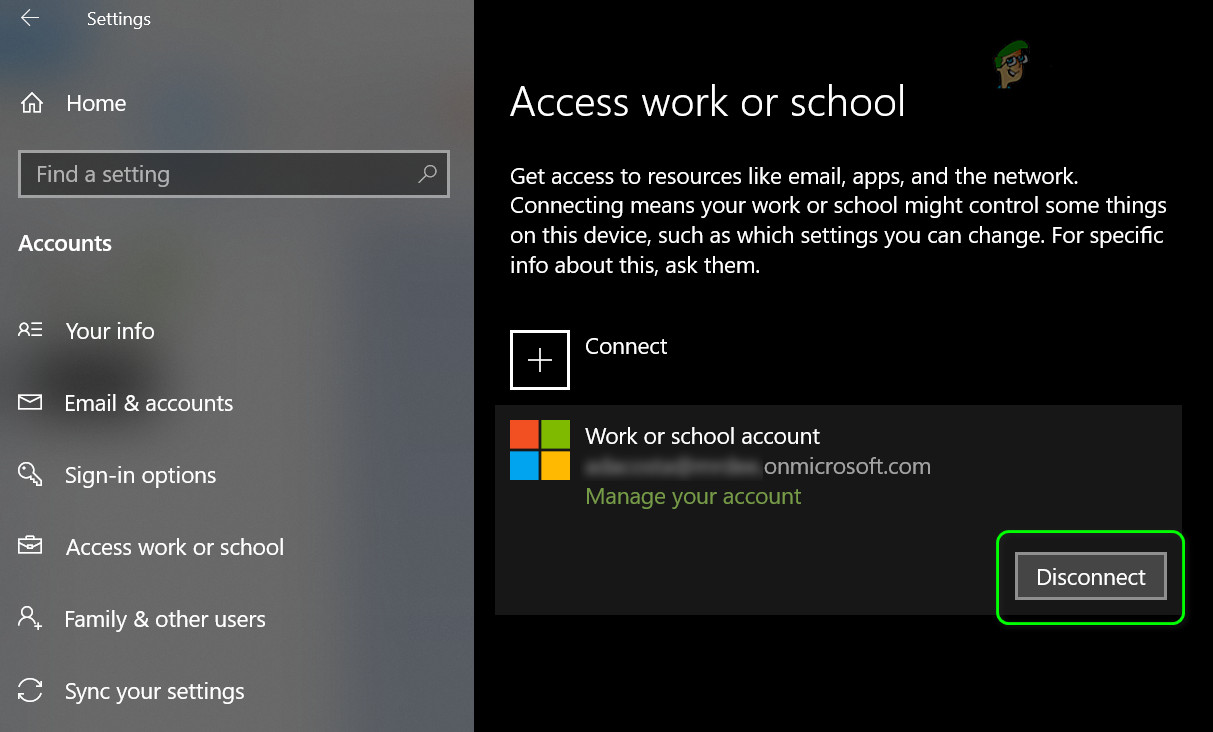
Disconnect Work or School Account - Then confirm to disconnect the account and check if the issue is resolved (you may have to restart your PC).
Solution 2: Reset the Mail App to Defaults
If you could not disconnect the problematic account from the Work or School tab, then resetting the Mail app to its defaults will clear out all the email accounts from the PC and thus solve the problem. But keep in mind that all the app data will be lost.
- Hit the Windows key and type Mail. Then right-click on the Mail app and choose App Settings.
- Then scroll down and click on the Reset button.
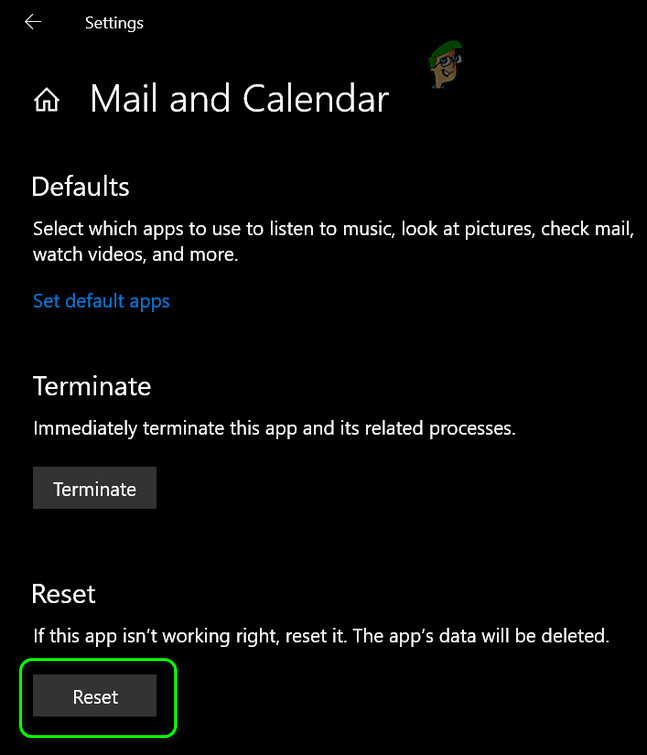
Reset the Mail App to Defaults - Now confirm to Reset the Mail app and then reboot your PC.
- Upon reboot, check if the problematic account is removed from the PC.
- If not, then check if disconnecting the problematic account from the Work or School tab in Settings (solution 1) resolves the issue.
Solution 3: Remove the Problematic Account from the System’s Registry
You may fail to remove the problematic account if the system’s registry entry relevant to that account is corrupt. In this case, deleting the registry entry relevant to the problematic account may solve the problem.
Warning: Proceed further at your own risk as registry editing requires a certain level of proficiency and if done wrong, you may cause everlasting damage to your PC/data.
- Create a backup of your system’s registry.
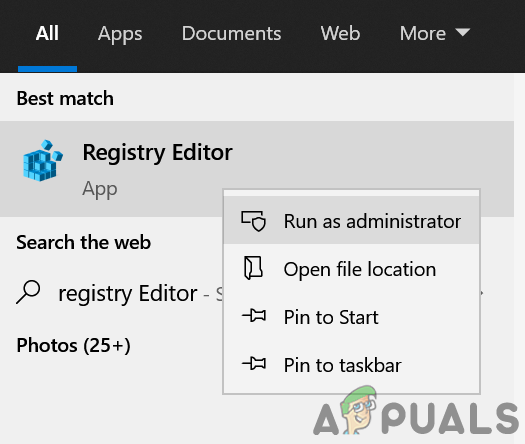
- Hit the Windows key and in the Windows Search bar, type Registry Editor. Then, in the search results shown, right-click on the result of Registry Editor and choose Run as Administrator.
Open Registry Editor as Administrator - Now navigate to the following (you may copy the path and paste it into the address bar of the Registry Editor):
HKEY_USERS\.DEFAULT\Software\Microsoft\IdentityCRL\StoredIdentities
- Then, in the left pane, expand the key of StoredIdentities and right-click on the key related to the problematic account.
- Now, in the context menu, select Delete and then confirm to delete the key.
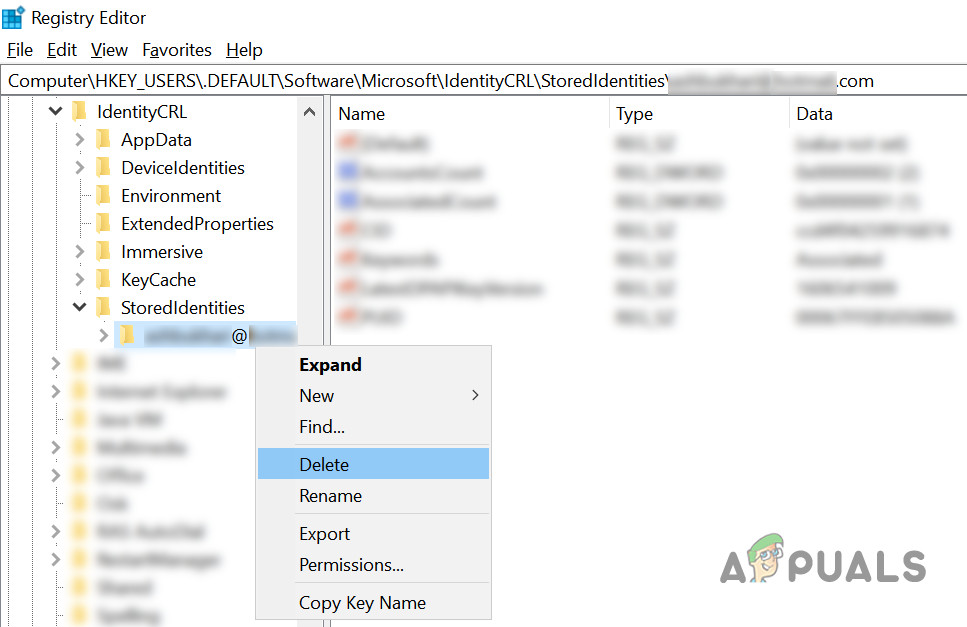
Delete the Problematic Account from the System’s Registry - Then reboot your PC and check if the account issue is resolved.
Solution 4: Convert your Existing Microsoft Account into a Local User Account
An existing Microsoft account on a Windows 10 computer can simply be converted into a local user account. This is the ideal course of action for Windows 10 users with just one Microsoft account on their computers or users who want to remove their Microsoft account from within the Microsoft account itself. To use this method to remove a Microsoft account from Windows 10, you need to:
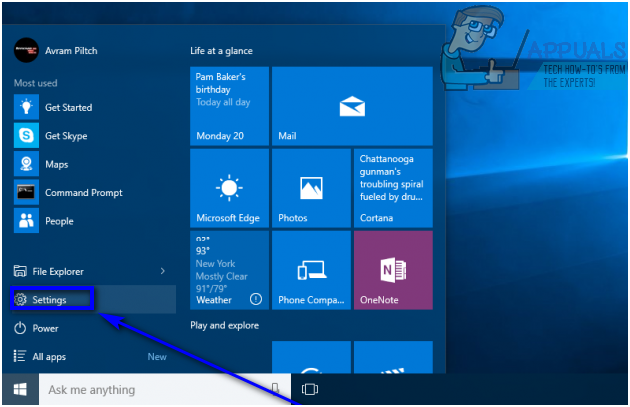
- Open the Start Menu.
- Click on Settings.
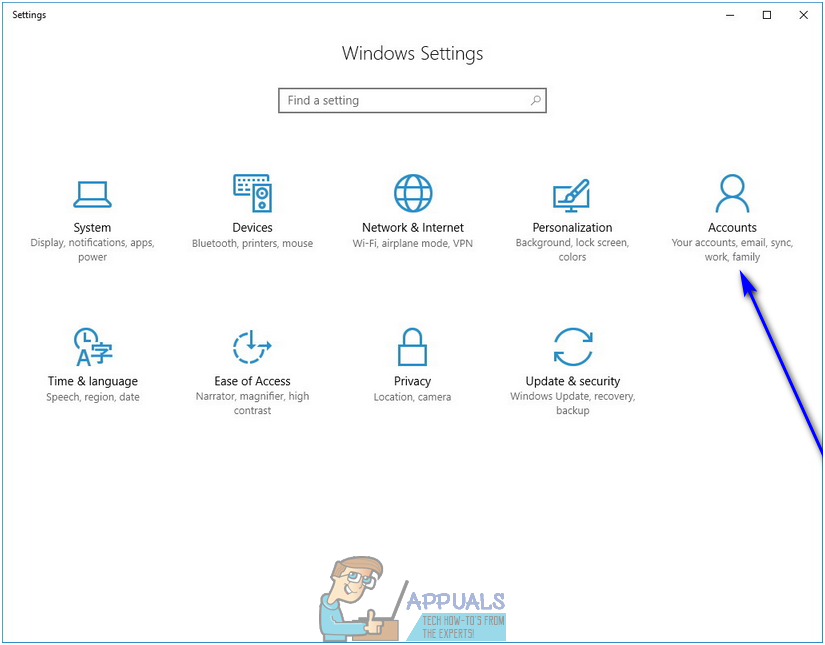
- Click on Accounts.
- Locate and click on Sign in with a local account instead in the right pane of the window.
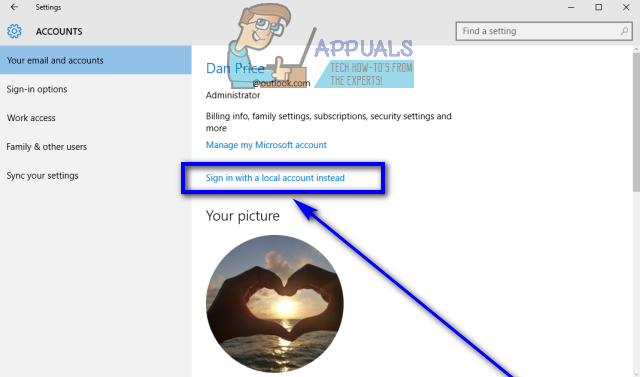
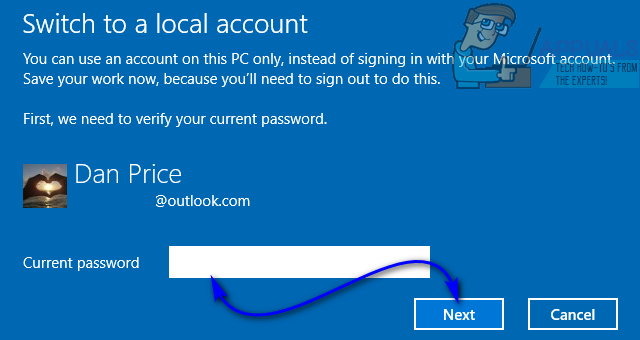
- Type in your password, click on Next and follow the rest of the onscreen instructions to convert the Microsoft account into a local user account.
- Repeat steps 1–3.
- In the right pane of the window, scroll down to the Other accounts you use section and locate and click on the Microsoft account you want to remove from your computer to select it.
- Click on Remove.
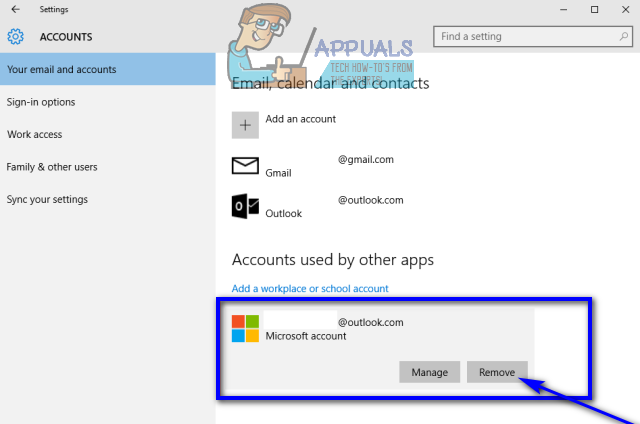
- Follow the onscreen instructions and prompts to remove the Microsoft account from your computer.
Solution 5: Log in to another Administrator account and remove the Microsoft account
You can also remove a Microsoft account from Windows 10 if you simply log in to an account on your computer that is not the Microsoft account you want to remove (any user account – Microsoft account or local user account, doesn’t really matter – will do, as long as it is an Administrator account and not a Standard User account). If you would like to use this method, simply log in to an Administrator account on your computer that is not the Microsoft account you want to remove, and then:
- Open the Start Menu.
- Click on Settings.
- Click on Accounts.
- In the left pane of the window, click on Family & other users.
- In the right pane of the window, locate and click on the Microsoft account you want to remove from your computer to select it.
- Click on Remove.
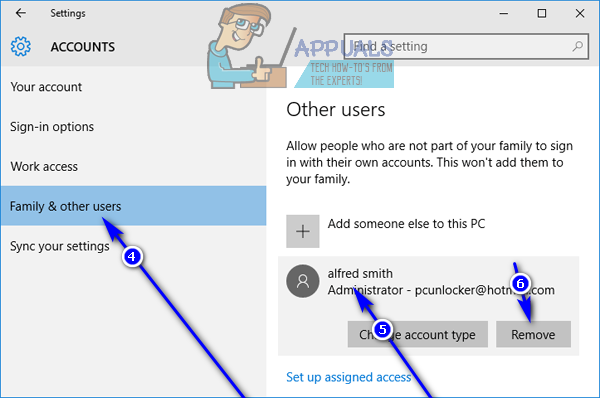
- Follow the onscreen instructions, and on the “Delete account and data?” screen, click on Delete account and data to confirm the removal of the Microsoft account from your computer.
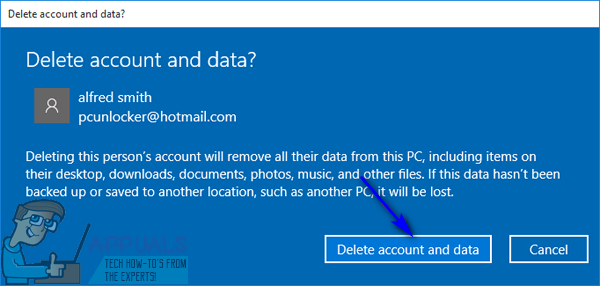
As soon as you do so, the target Microsoft account will be successfully and completely removed from your computer. Be warned, however – the Microsoft account will take all of its secrets to the grave, meaning that any data stored on the account at the time of removal will be gone forever once the Microsoft account has been removed.
Really thanks for sharing this information. I was receiving the error 80090030 when I tried to activate Office365 with my licensed attached to my account and I could solved it with your tuturial. Thanks!