How to remove formatting from Text in Word
If you frequently use Microsoft Word, you may have encountered persistent formatting issues, especially when collaborating on documents that multiple people have created or modified.

Formatting inconsistencies can quickly become time-consuming to correct, often leading to frustration and decreased productivity. Fortunately, removing unwanted formatting in Word is a simple and efficient process. There are two effective methods to resolve these issues: utilizing keyboard shortcuts or the “Clear Formatting” command.
Keyboard Shortcuts for Removing Formatting in Word
To remove formatting from your content, first select the specific text you wish to modify. If you want to select the entire document, press “CTRL+A” on Windows or “COMMAND+A” on Mac.
- To eliminate character-level formatting—such as font styles, bold or italic text, and font sizes—while retaining paragraph-level formatting like indents and line spacing, press CTRL+SPACE.
- To restore only the paragraph-level formatting to the default style of your document, without altering character-level formatting, press CTRL+Q.
- If you need to reset both character-level and paragraph-level formatting to the default (Normal) style, use CTRL+SHIFT+N.
These keyboard shortcuts provide a fast and effective way to resolve formatting challenges in any Word document, saving you considerable time and ensuring consistency throughout your content.
How to Remove Formatting Using the Clear Formatting Command
- Select the text from which you want to remove formatting.
- Navigate to the “Home” tab at the top of your Word window.
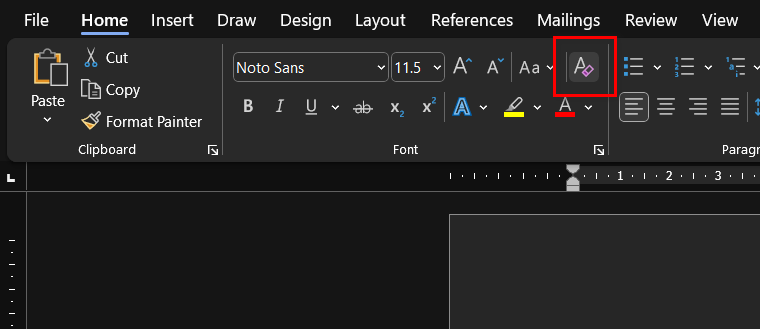
- Click the “Clear Formatting” button, represented by an eraser icon.

Click on the “Clear Formatting” button, which looks like an eraser
This action will remove all formatting from the selected text, including font styles, colors, sizes, bold, italic, and underlining, restoring your content to Word’s default style.


