How to Fix REFRENCE_BY_POINTER BSOD on Windows 11/10?
The Reference_By_Pointer error on Windows is one of the harder types of BSOD (Blue Screen of Death) to diagnose and fix. This issue was widespread on Windows 10 and we are starting to see new user reports of it occurring on Windows 11 too.

Even with the fact that this problem is hard to diagnose, there are a couple of common culprits that you should prioritize when you’re troubleshooting for this particular issue:
- Corrupted Storage sectors – Two of the most common causes that are most likely responsible for this kind of issue are either a storage drive that is beginning to fail or a different kind of storage inconsistencies. If the damage to your drive is minimal, you might be able to alleviate the problem temporarily by doing a CHKDSK scan via the Recovery menu.
- Corrupted data inside the Temp and Prefetch folder – If you are able to boot up your computer and you’re only seeing this type of BSOD during certain actions, you might be lucky enough to see this problem occurring due to some kind of corrupted data that’s currently stored inside the Temp or Prefetch folder. Clearing the contents of this folder should fix the issue in your case.
- System File Corruption – System file corruption can also be responsible for this particular issue. If the issue is superficial, you might be able to fix it by running SFC and DISM scans via the recovery menu. But if you’re dealing with a type of problem that is rooted inside the Kernel data, you will likely need to do a clean install or repair install to fix the system file corruption.
- Outdated Motherboard drivers – If you are typically experiencing this type of issue when your PC has to perform resource-intensive tasks, chances are your current rig is forced to function with outdated motherboard firmware. On laptops, this type of system crash occurs because your motherboard is not configured to provide the correct voltage to your internals. To fix this issue, you’ll need to install the latest available drivers for your motherboard.
- Outdated / Incompatible NIC drivers – This might look like an unlikely culprit, but the Network Interface Card driver (NIC) is a confirmed culprit for this type of BSOD. Fortunately, fixing this particular scenario is as simple as updating your NIC driver to the latest version available.
- 3rd party Antivirus Interference – Norton and a couple of other 3rd party antivirus suites are sometimes blamed for this BSOD. Most likely, the critical system crash occurs because a kernel file is blocked due to a false positive by the active AV. To test out this type of interference, you’ll need to temporarily disable or uninstall the 3rd party antivirus and see if the BSOD stops occurring.
- Different 3rd party Interference – Besides potentially-interfering Antivirus Suites, there are also other program categories known for causing this issue. System Optimizers and generally any type of overlay software are known to cause this type of BSOD. The best way if identify this type of issue is to perform a clean boot procedure.
- Different configuration (for VMs) – If you’re experiencing this issue when booting up a Virtual machine (VM), and you recently made some adjustments to your system configuration, you might be able to resolve this issue quickly by forcing the virtual OS to restart with the last good configuration.
- Corrupted Hyper-V integration services (for VMs) – If you’re a virtual machine through Hyper-V, another potential culprit (if you get this BSOD inside a virtual machine) are the Hyper-V integration services. In this case, you can fix the issue by updating every Hyper-V service via Device Manager (inside your Virtual Machine).
Now that we went over every potential cause that might be responsible for this problem on both Windows 10 and Windows 11, let’s go over several fixes that other affected users have successfully used to fix the Reference_By_Pointer error:
1. Perform a CHKDSK scan from the Recovery menu
Before you move on to more comprehensive repair strategies, you should start this troubleshooting guide by making sure that you’re not encountering the Reference_By_Pointer BSOD due to a failing drive.
Fortunately for you, if the damage is superficial and the drive is only beginning to fail, you might avoid the need to purchase a new drive by deploying a CHKDSK scan and seeing if the Check Disk Utility is able to identify any failing sectors and replace them with unused equivalents.
But since you might not be able to boot reliably (or at all) due to the Reference_By_Pointer BSOD, we recommend triggering a CHKDSK scan via the Advanced Recovery menu on Windows 11 and Windows 10:
Note: The screens you’ll see will vary a little if you’re on Windows 10, but the steps are generally the same for both operating systems.
- Press the Windows key to open up the Start button.
- Next, click on the power icon and hold the Shift key while clicking on Restart.
Note: This will force Windows to restart directly into the Advanced Recovery menu. - Once your PC boots into the Advanced Recovery menu, click on Troubleshoot from the available options.
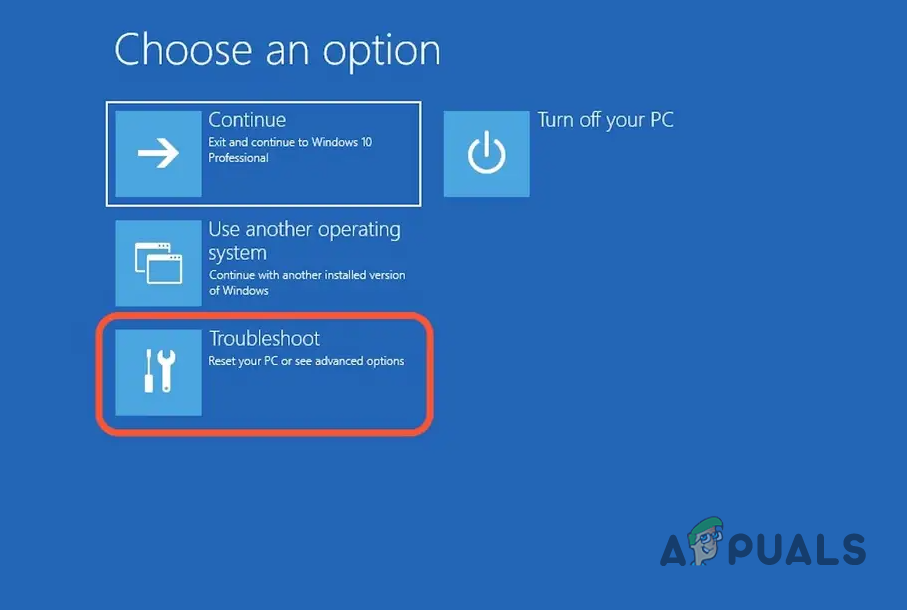
Open the Troubleshoot tab - Inside the Troubleshoot tab, click on Command Prompt.
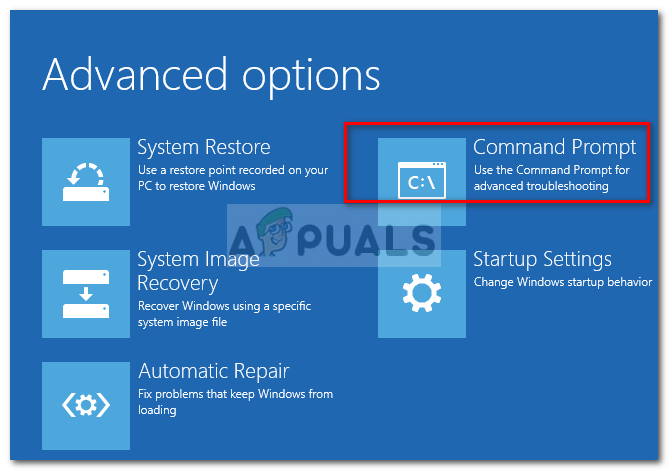
Open up the Command Prompt menu Note: While in the recovery menu, CMD will open with admin access, so there’s no need for any special instructions.
- Inside the elevated Command Prompt, type the following command to deploy a CHKDSK scan:
chkdsk /r /v C:
Note: Change C to the appropriate letter if your operating system is installed on a different location.
- Wait until the operation is complete, then reboot your PC and see if the problem is now fixed.
If you’re still dealing with the same Reference_By_Pointer BSOD even after running this utility, move down to the next potential fix below.
2. Clear Temp and PreFetch folder (if applicable)
If you’re experiencing this issue sporadically and you are able to boot normally, you should turn your attention towards the two directories that are used by Windows to store temporary files – TEMP and Prefetch.
Deleting the contents of these directories (not the directories themselves) is completely safe and won’t cause an underlying issue with your system.
All you’re essentially doing is forcing your system to let go of any temp files that are currently in use by the various Windows components active during every boot.
However, you will likely not be allowed to delete these folders unless you boot in Safe Mode.
Follow the instructions below to clear the Temp and preFetch folders from Windows 10 or Windows 11 and see if that fixes the Reference_By_Pointer BSOD:
- First things first, follow this guide to boot in Safe Mode.
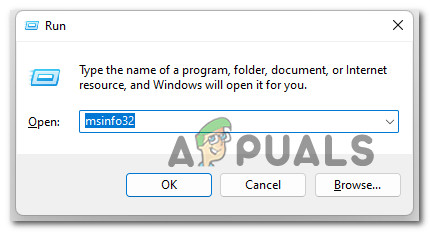
- Once your PC boots in Safe mode, press Windows key + R to open up a Run dialog box.
- Inside the newly appeared dialog box, type ‘%TEMP%‘ and press Enter to open up the Temp folder of your Windows installation.

Open up the Temp folder - Once you’re inside the Temp folder, press Ctrl + A to select everything inside, then press the Delete key and confirm by clicking Yes to delete the contents of the Temp folder.
Delete the contents of the Temp folder - Once the contents of the Temp folder have been cleared, press Windows key + R once again.
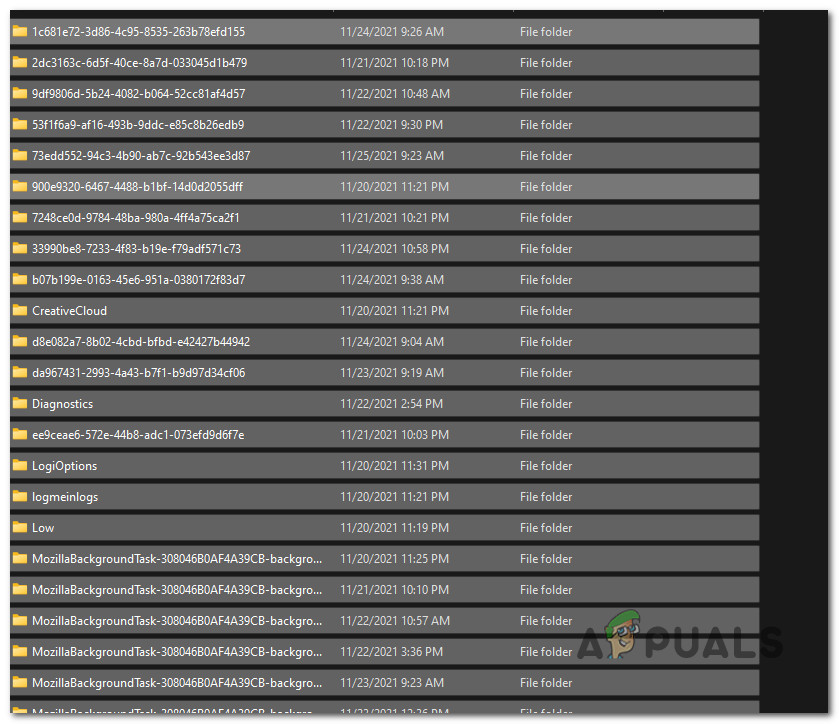
- Inside the new dialog box, type ‘prefetch’ and press Ctrl + Shift + Enter to open up the Prefetch folder with admin access.

Open up the Prefetch folder - Before you’ll be able to view the contents of the Prefetch folder, you’ll need to click on Continue, then accept the UAC (User Account Control) prompt.
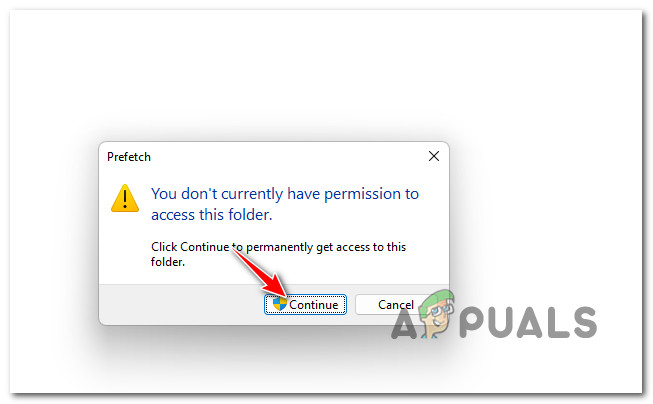
Accepting the admin access - Once you finally receive access to the Prefetch folder, press Ctrl + A once again, then press the Delete key and confirm to delete the contents of the folder.
- Now that the contents of both the Prefetch and Temp folders have been cleared, reboot your PC to exit safe mode, then utilize your PC normally and see if the same BSOD returns.
If you’re still experiencing critical reference_by_pointer crashes even after you cleared both of these folders (or you’re unable to boot), move down to the next potential fix below.
3. Deploy SFC and DISM Scans via Recovery Menu
If none of the methods above have proven to be effective in your case as you’re still experiencing the same Reference_by_Pointer BSOD constantly, you should start considering a type of system file corruption that’s causing this type of issue.
If you haven’t tried this already, you should proceed by deploying SFC and DISM scans in order and see if this allows you to fix the critical system crash that is currently affecting your system.
Note: Keep in mind that due to the fact that you might not be able to boot or you run the risk of the Reference_by_Pointer crash occurring while you’re in the middle of the scan, we recommend that you do this via the Advanced Recovery menu.
Follow the instructions below for step-by-step instructions on how to do this:
- Press the Windows key to open up the Start menu.
- Next, click on the power icon, then keep the Shift key pressed while clicking on Restart.
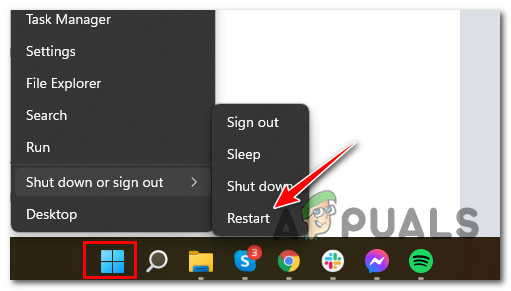
Restart while the Shift key is pressed - Wait until your PC restarts directly into the Advanced Recovery menu.
- From the Advanced Recovery menu, click on Troubleshoot from the context menu that just appeared.

Accessing the Troubleshoot menu - From the multitude of options available inside the Troubleshooting tab, click on Command Prompt to open a CMD window with admin access.

Open up the Command Prompt - Once you’re inside the elevated CMD prompt, type the following command and press Enter to deploy an SFC (System File Checker) scan:
sfc /scannow
Note: This type of scan will replace every corrupted file it finds with healthy files stored locally (on the OS partition). Don’t interrupt this operation after you started because you run the risk of creating additional logical errors.
- Once the SFC scan is complete, type the following command and press Enter to deploy a DISM (Deployment Image Servicing and Deployment) scan (regardless of the outcome):
DISM /Online /Cleanup-Image /RestoreHealth
Note: DISM uses a sub-component of Windows Update to download healthy files that will replace corrupted equivalents. If you don’t have access to the Internet, skip the DISM scan altogether.
- Once both of the scans are complete, reboot your PC and see if the problem is fixed once the next startup is complete.
If you’re still dealing with the same type of Blue Screen of death (Reference by Pointer) even after deploying DISM and SFC scans, move down to the next potential fix below.
4. Update all motherboard drivers
As it turns out, you can also expect to deal with this issue in those situations where you’re using an outdated motherboard driver that is not designed to work with your operating system.
Several affected users have confirmed that they managed to fix this problem by updating their motherboard drivers to the latest version available.
Note: Most scenarios where you’ll see this particular problem is when the user recently upgraded to Windows 11 from Windows 10 and the old motherboard driver was simply migrated instead of being updated for the new operating system.
Here’s what you need to do to update all motherboard drivers on your Windows computer:
- Before you can install the appropriate driver, you need to know your motherboard model. This will allow you to ensure that you’re downloading and installing the appropriate drivers.
Note: If you already know your motherboard model, skip these first steps and move directly to step 4. - Press Windows key + R to open up a Run dialog box, then type ‘msinfo32’ inside the text box and press Enter to open up the System Information screen.
Open up the msinfo32 utility - Once you’re finally inside the System Information screen, click on System Summary from the menu on the left, then move over to the right-hand side of the screen and check your motherboard model under BaseBoard Product.
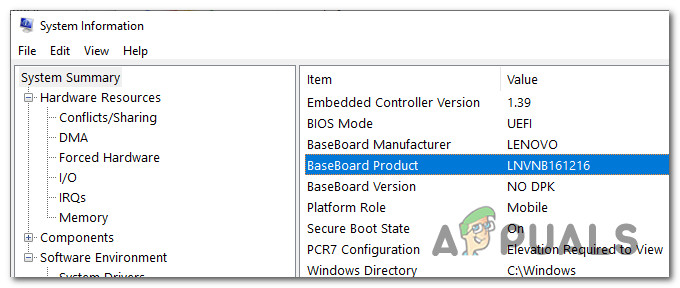
Checking the motherboard model Note: Additionally, you can use a 3rd party tool like Speccy to find out your motherboard model.
- Once you manage to discover your motherboard model, visit the official download page of your motherboard manufacturer and download the latest version of the motherboard driver.
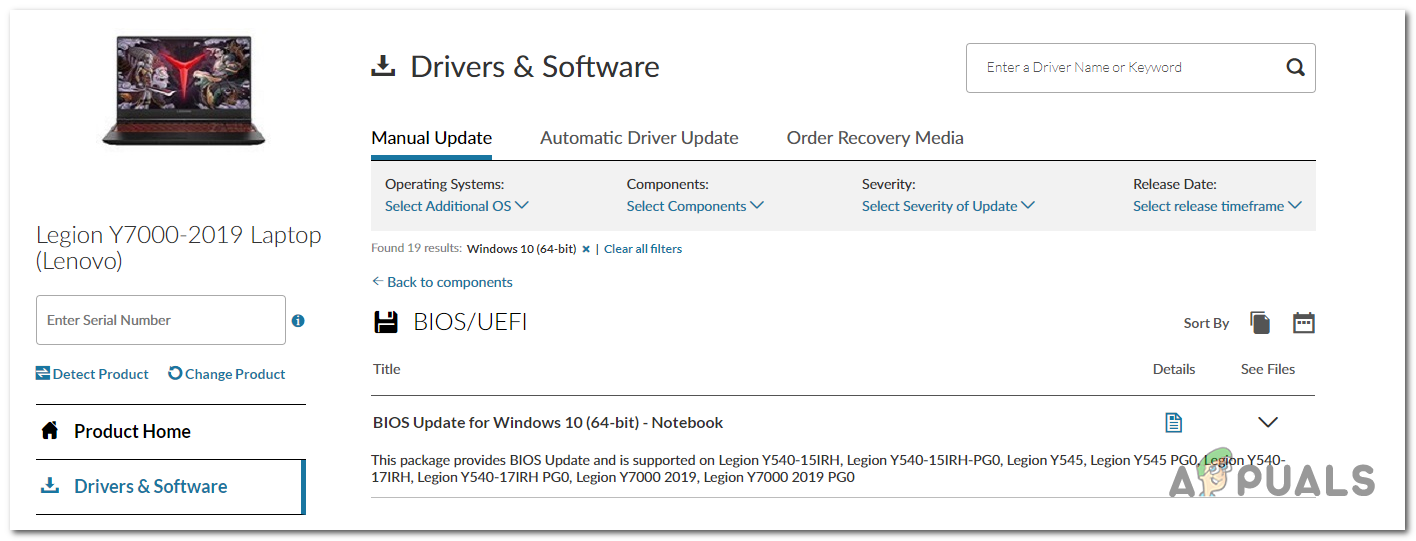
Downloading the latest motherboard driver - Once the latest driver is downloaded locally, double-click on the installer and follow the on-screen prompts to complete the installation of the motherboard driver.
- At the end of this procedure, reboot your PC and see if the problem is fixed once the next startup is complete.
In case you’re still experiencing BSOD crashes with the same reference_by_pointer error after installing the latest motherboard driver (or you already had the latest version), move down to the next potential fix below.
5. Disable or Uninstall 3rd party antivirus (if applicable)
If you’re using a 3rd party antivirus suite, you should not discard it from the basket of potential culprits that might be causing this type of BSOD on Windows 10 or Windows 11.
According to some affected users, you might experience the Reference by Pointer BSOD crash because your antivirus ends up blocking a kernel process due to a false positive – most of the occurrences that we’ve managed to identify were related to Norton Antivirus.
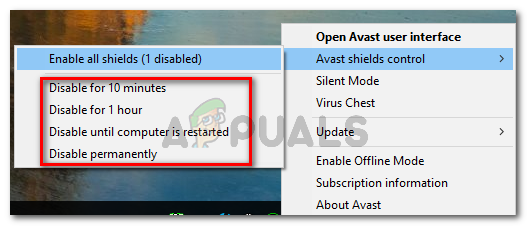
To test if your antivirus is actually causing this type of issue, you should start by disabling the real protection of your antivirus or firewall and utilize your PC normally to see if the crashes stop. Of course, the instructions for doing this will vary from AV to AV, but in most cases, you can do this directly by right-clicking the taskbar icon.
If the BSOD crashes are no longer occurring while you disable the real-time protection of your antivirus (or you’re using a firewall), follow the instructions below to uninstall the interfering security suite and see if the crashes stop completely:
- Open up a Run dialog box by pressing Windows key + R. Next, type ‘appwiz.cpl’ and press Enter to open up the Programs and Features menu.

Open up the Programs and Features menu - If you are prompted by the User Account Control, click Yes to grant admin access.
- Once you’re inside the Programs and Features menu, scroll down through the list of installed applications and locate your 3rd party security suite. Once you see it, right-click on it and choose Uninstall from the context menu.
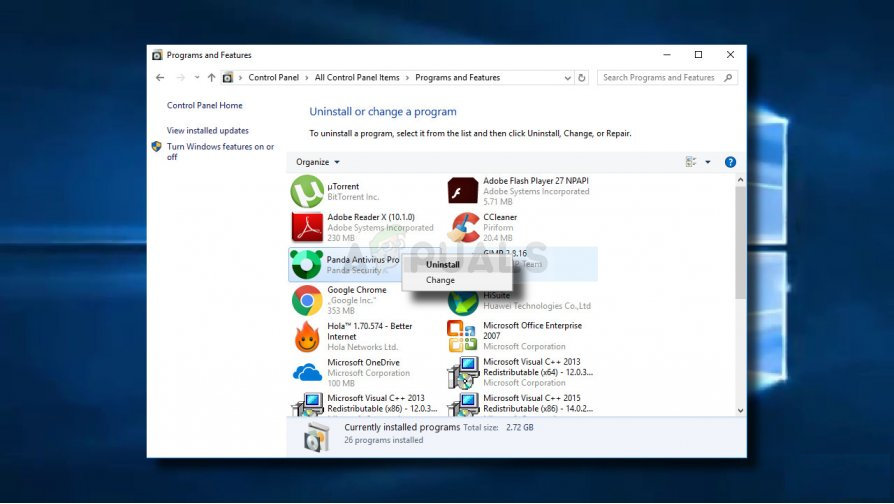
Uninstall antivirus - Follow the on-screen prompts to complete the uninstallation of the AV tool, then reboot your PC.
Note: If you want to make sure you’re not leaving behind any remnant files, follow this guide to clear any files left behind by the antivirus. - Utilize your PC normally and check if the problem is now fixed.
If the reference by pointer BSOD returns even after you uninstalled your antivirus suite, move down to the next potential fix below.
6. Update NIC Driver
This might not seem like a likely culprit, but the Network Interface Card (NIC) driver is often singled out for causing this problem (on both Windows 10 and Windows 11) by tech-savvy users that investigate the crash dumps.
The majority of user reports that we looked into we’re Windows 11 upgrades coming over from Windows 11. So we assume that this issue is mostly caused by a Windows 10 driver that is being migrated to Windows 11 without being updated for the new operating system.
Fortunately, if you’re dealing with the same kind of issue, you can probably fix the BSOD by using Device Manager to update the Network Interface Card driver.
Follow the instructions below for a quick guide on doing this:
- Press Windows key + R to open up a Run dialog box. Next, type ‘devmgmt.msc’ and press Ctrl + Shift + Enter to open up Device Manager with admin access.
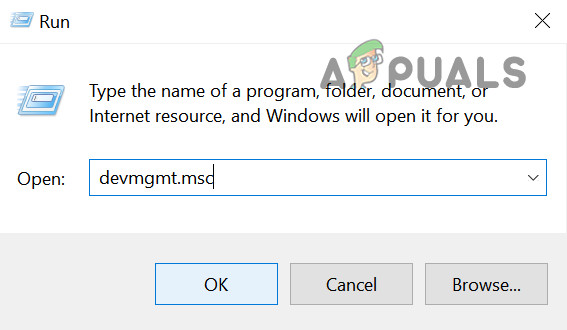
Open up the Device Manager menu Note: When you’re prompted by the User Account Control window, click Yes to grant admin access.
- Next, scroll down through the various device categories and expand the Network Adapters drop-down menu.
- Right-click on the NIC device and choose Update Driver Software from the context menu.
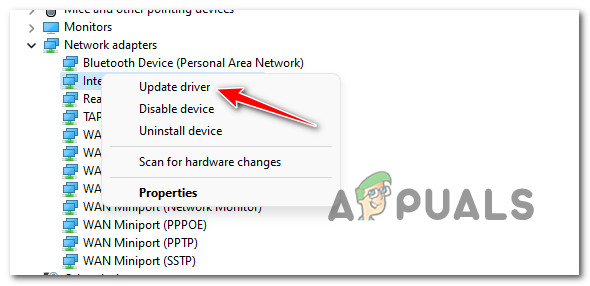
Update the Driver - At the confirmation prompt, confirm the operation, then wait to see if a new driver version is found.
- At the next prompt, click on Search automatically for drivers from the new menu that just appeared.
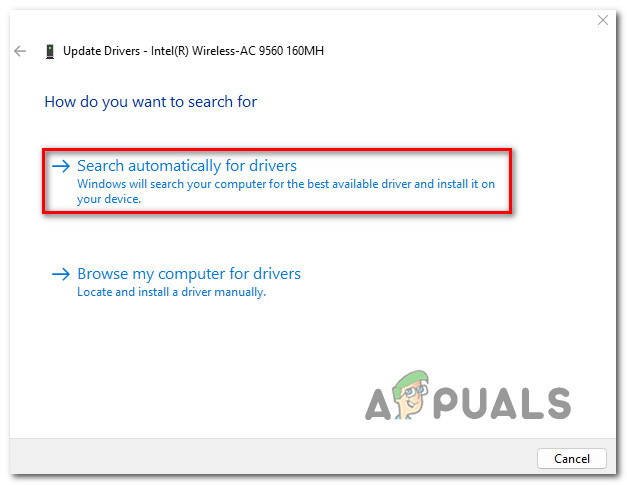
Search for an updated NIC driver - If a new version of the driver is identified, follow the remaining instructions to complete the installation of the new NIC driver version.
In case the same BSOD is still occurring even after you updated the NIC driver, move down to the next potential fix below.
7. Perform a clean boot
Keep in mind that interfering Antivirus suites are not the only 3rd party programs that might ultimately be responsible for the apparition of the reference_by_pointer BSOD.
Looking at some user reports, we’ve discovered system optimizing tools and even optical burning software as potential culprits that might contribute to this critical system crash.
But since there are a lot of potential culprits that might be responsible for this problem, the best course of action would be to go for a clean boot procedure – this will force your Windows to boot up without any type of 3rd party interference (only required startup services and processes will be permitted to run).
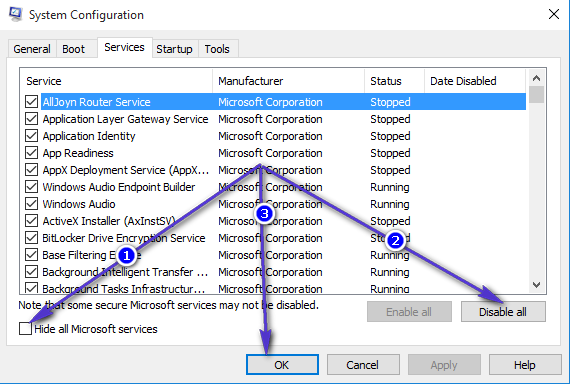
If the problem no longer occurs while you run your PC in a clean boot state, it’s clear that a 3rd party item is causing the critical system crash (reference-by-pointer BSOD).
Here’s how to start your Windows PC in a clean boot state and figure out which culprit is responsible for this issue.
8. Clean install or Repair install your Windows installation
If none of the methods featured above have proven to be effective in your case, it’s almost clear that you’re dealing with some type of software or hardware issue that you won’t be able to fix conventionally.
If it’s a hardware issue, you’ll have to take your PC to a qualified technician to inspect each component and figure out if any component is actually causing this critical crash.
However, if you’re actually dealing with a software issue (corrupted Windows files) a clean install or repair install procedure should get the issue fixed.
A clean install is the easier procedure out of the bunch, since enforcing it won’t require any prerequisites. But the major downside is that you will lose any personal data stored on the OS drive if you don’t make a backup in advance.
On the other hand, if your operating system partition holds important system data that you simply can’t afford to lose, a repair install is the way to go in your case.
In case this problem is only occurring inside your Virtual machine, we have put together two additional methods (check below) that will treat this particular BSOD in these scenarios.
9. Boot with last good configuration (for VMs)
If you’re experiencing this Reference by Pointer Blue Screen of Death inside a virtual machine, chances are you recently adjusted the old configuration of your VM. Doing this might cause your Virtual machine to become unstable and crash with this particular BSOD at every attempted startup.
Fortunately, other users that found themselves in a similar situation have confirmed that they were finally able to boot up their VM normally by forcing the Windows installation to boot with the ‘Last Known Good Configuration”
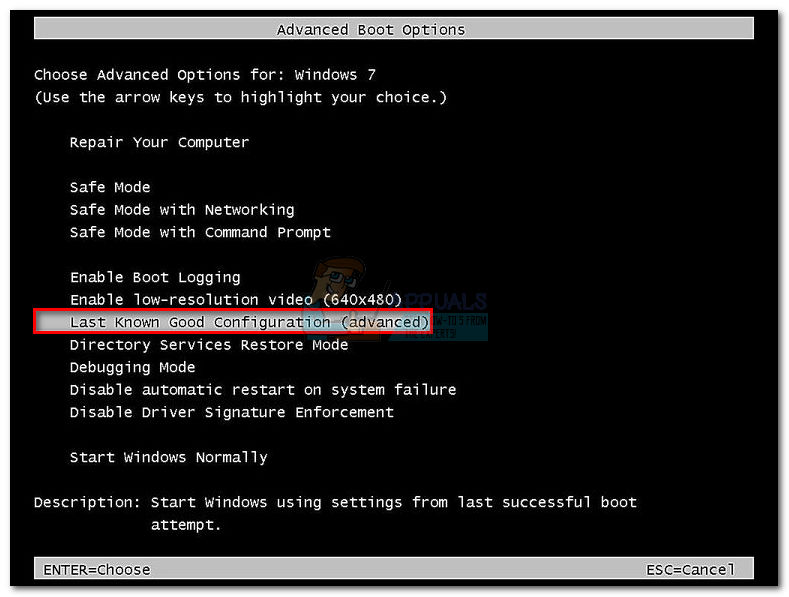
Note: This method should appear automatically after several botched startup attempts.
If forcing your virtual machine to boot up with the old configuration results in the same error, move down to the final potential fix below.
10. Reinstall all Hyper-V devices via Device Manager (for VMs)
Although you might be tempted to think that the involved services are actually identical on a VM installation as on the host machine. But that’s not actually the case. In a VM machine, HyperV services are much more present and considered a key pillar for system stability.
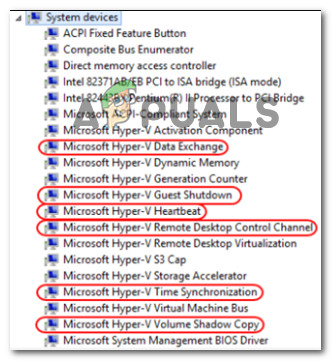
Other affected users that we’re also dealing with this problem (particular network administrators) have fixed the issue on affected virtual machines by uninstalling the following hyper V services and restarting the host machine so that they get reinstalled:
- Microsoft Hyper-V Data Exchange
- Microsoft Hyper-V Guest Shutdown
- Microsoft Hyper-V Heartbeat
- Microsoft Hyper-V Remote Desktop Control Channel
- Microsoft Hyper-V Time Synchronization
- Microsoft Hyper-V Volume Shadow Copy
You can disable all the services mentioned above via the System devices tab of Device Management.
Follow the instructions below for specific instructions on how to do this:
- Press Windows key + R to open up a Run dialog box. Next, type ‘devmgmt.msc’ and press Enter to open up Device Manager. When you’re prompted by the User Control Window, click Yes to grant admin access.

Open Up Device Management - Once you’re inside Device Manager, scroll down through the list of services and expand the System Devices drop-down menu.
- From the insides of the System devices menu, right-click on every Hyper-V service mentioned below and choose Uninstall device from the context menu that just appeared:
Microsoft Hyper-V Data Exchange

Microsoft Hyper-V Guest Shutdown

Microsoft Hyper-V Heartbeat

Microsoft Hyper-V Remote Desktop Control Channel

Microsoft Hyper-V Time Synchronization

Microsoft Hyper-V Volume Shadow Copy
Uninstall Hyper-V services that are potentially corrupted - Once every Hyper-V service has been uninstalled, reboot your VM and see if the problem is now fixed.


After the updating drivers (wifi, graphics, BIOS, etc. etc.) & uninstalling anything that looks like 3rd party, running Dell diag… etc. on a new Dell Vostro beefed-up tower; I backed up & reset back to back to Windows 10 and guess what…. IT WORKS NOW!!!!So -11.) Uninstall Windows 11 & reset back to Windows 10 & turn off Windows Updates