How to Fix Razer BlackWidow Chroma Driver Issue?
Some Windows 10 users are reporting that their BlackWidow Chroma doesn’t get recognized by their computer even after they installed the latest driver that should be compatible with the operating system. Most affected users are reporting that the only time the keyboard gets recognized by their computer is when the Synapse suite is opened.

After investigating this particular issue thoroughly, it turns out that there are several different underlying culprits that might be responsible for the apparition of this error code on Windows 10. Here’s a list of potential culprits that might be triggering this error code:
- Dedicated keyboard driver is not installed – According to some affected users, you can expect this issue to occur due to the fact that the dedicated keyboard driver isn’t installed on the Windows 10 computer. This typically happens with older iterations of BlackWindow Chroma. To resolve this issue, you can try holding the FN key on your keyboard as you are plugging it into your computer in order to force the installation of the keyboard driver.
- Deprecated Razer Synapse version – As it turns out, you can also expect to encounter this error code if you’re trying to run a deprecated version of Razer Synapse that’s not fully compatible with Windows 10. In this case, you should be able to fix the issue by uninstalling the latest version of Razer Synapse before installing the latest build using the official channels.
- Outdated / Glitched keyboard driver – A potential keyboard driver conflict can also be the underlying cause of this particular issue on Windows 10. If this scenario is applicable, you should be able to fix the issue either by updating or rolling back your current keyboard driver using Device Manager.
- Bricked keyboard device – If you’re attempted to spoof your keyboard device or you’ve tried to install an incompatible driver multiple times, it’s also possible for your Razer device to become bricked. In this case, the only way to resolve your issue is to get in contact with a Razer support agent and ask them to mitigate the issue.
- System file corruption – As it turns out, system file corruption can also be responsible for the apparition of this error code. In this case, you can resolve the issue by initiating a clean install or repair install procedure in order to replace the corrupted Windows 10 files with healthy equivalents.
Now that you are intimately familiar with every potential fix that might be triggering this error code, here’s a list of verified methods that other affected users have successfully used to get to the bottom of this issue:
Method 1: Forcing the Firmware menu
If you’re using an older BlackWidow Chroma keyboard model, chances are you’re simply dealing with a firmware issue that is preventing the installation of the compatible driver.
Fortunately, if this scenario is applicable, you should be able to force the installation of the compatible driver by holding on to the FN key as you are plugging in the keyboard.

By holding the FN key while plugging in your keyboard, you’re essentially signaling that you want the USB connection to be used for installing the keyboard driver. Several seconds after you connect the keyboard this way, you should notice a menu pop-up asking you if you want to install the Razer keyboard driver.
When this happens, follow the on-screen instructions to complete the installation of the latest driver version and see if the problem is now fixed.
In case the Razer BlackWidow Chroma driver is still not resolved, move down to the next potential fix below.
Method 2: Reinstalling Razer Synapse
If you’re only encountering this problem with Razer BlackWidow Chroma while the Synapse utility is running in the background, you should start this troubleshooting guide by resolving a potential software conflict.
As it turns out, there is an issue on Windows 10 that can cause this behavior with Razer BlackWidow and Razer Mamba, but fortunately, the issue where patched via a hotfix released for Razer Synapse.
To take advantage of this fix, you should start by uninstalling your current version of Razer Synapse before installing the latest available versions from the official channels.
To do this, follow the instructions below to learn how to uninstall your current version of Razer Synapse before installing the latest build from the official Razer Download page:
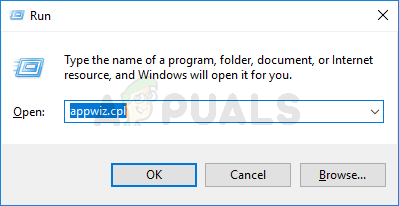
- Press Windows key + R to open up a Run dialog box. Next, type ‘appwiz.cpl‘ inside the run box and press Enter to open up the Programs and Features screen. When you’re prompted by the UAC (User Account Control), click Yes to grant admin access.
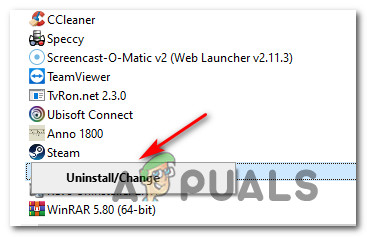
Opening the Programs and Features screen - Inside the Programs and Features screen, scroll down through the list of installed programs and locate the entry associated with Razer Synapse. When you see it, right-click on it and choose Uninstall from the context menu that just appeared.
Uninstalling Razer Synapse - Inside the uninstallation screen, follow the on-screen prompts to complete the uninstallation process, then restart your computer and wait for the next startup to complete.
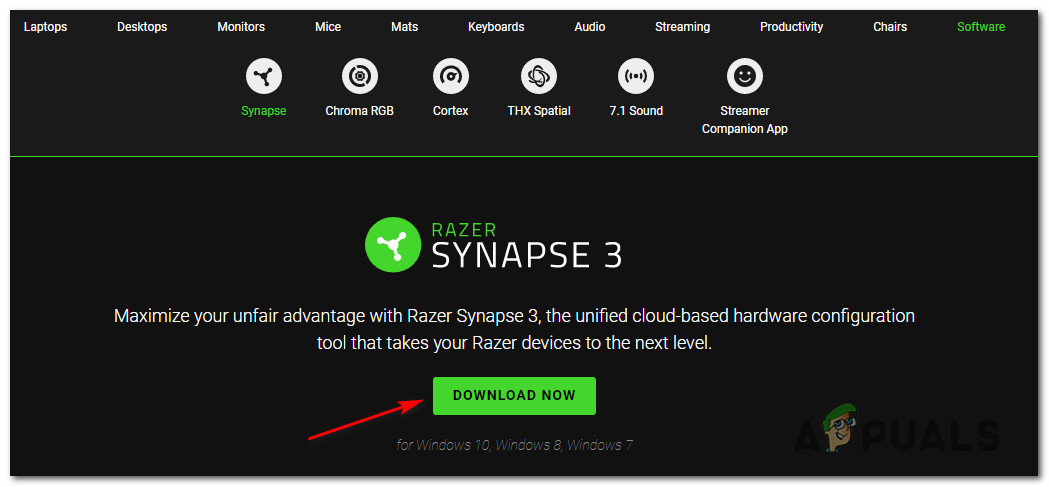
- After your computer boots back up, open your default browser and navigate to the official download page of Razer Synapse.
- Once you are inside the correct page, click on Download Now (under Razer Synapse 3) and wait until the installation executable is fully downloaded.
Downloading the latest version of Razer Synapse - After the installer is successfully downloaded, double-click on it and click on Yes at the UAC (User Account Control) to grant administrative access to the installation.
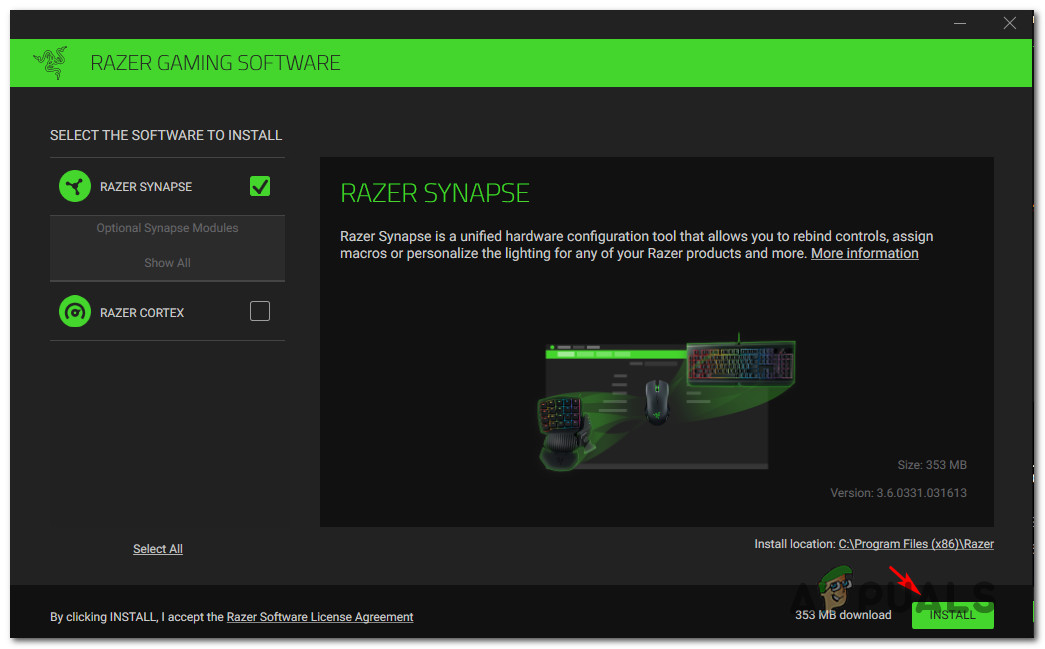
- Inside the installation screen, follow the on-screen prompts to complete the installation process and uncheck every bloatware that you might be encouraged to install.
Installing the latest version of Razer Synapse - After the installation is complete, restart your computer and see if the problem is now fixed.
In case the issue with your Razer BlackWidow Chroma device is still not fixed, move down to the next potential fix below.
Method 3: Update / Rollback the Keyboard Driver
If the method above (updating the Razer Synapse version to the latest) wasn’t effective in resolving the BlackWidow device driver problem on your Windows 10 computer, you should focus on attention resolving a potential keyboard driver conflict.
Several affected users have reported that they were able to fix the issue by either updating or rolling back the current version of your keyboard driver. If you’re dealing with some kind of corrupted generic keyboard driver, this operation should be enough to allow you to fix the issue.
If you suspect this scenario might be applicable, follow the instructions below to update or roll back the keyboard driver via Device Manager:
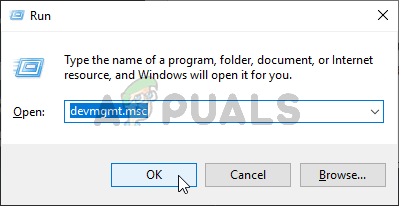
- Press Windows key + R to open up a Run dialog box. Inside the text box, type ‘devmgmt.msc’ inside the text box and press Enter to open up the Device Manager utility. When you’re prompted by the UAC (User Account Control), click Yes to grant admin access.
Opening the Device Manager screen - Inside Device Manager, scroll down through the list of devices and expand the drop-down menu associated with Keyboards.
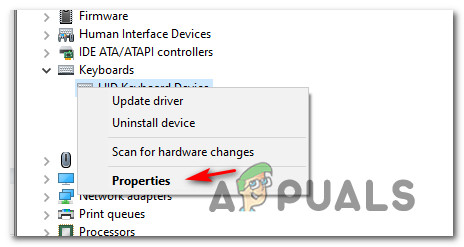
- Once you’re inside the Keyboard tab, right-click on your keyboard driver and then click on Properties from the context menu that just appeared.
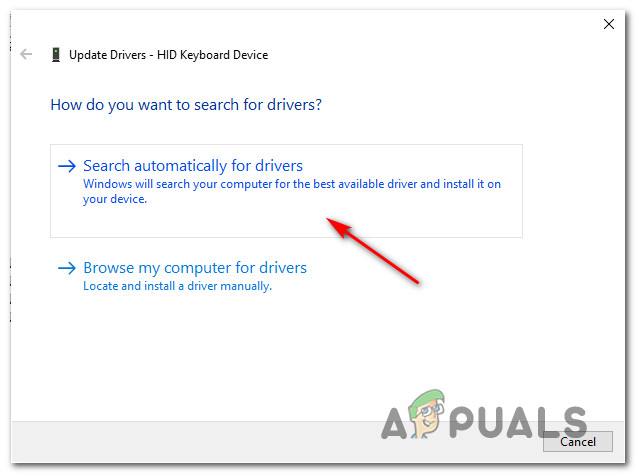
Accessing the Properties screen - Once you’re inside the Properties screen of your keyboard driver, access the Driver tab and click on Update Driver from the list of available options.
- At the next menu, click on Search automatically for drivers and see if a new version of the keyboard driver is identified.
Search Automatically for a newer driver version Note: If a new driver version is identified, follow the on-screen prompts to complete the updating of the keyboard driver before restarting your computer.
- In case a new version of the driver was not identified, you should proceed by trying to roll back to an older driver version. To do this, return to the Driver’s tab and click on Rollback driver and wait for the operation to complete before restarting your computer.
In case you’re still encountering the same kind of issue with your Razer keyboard even after rolling back or updating your keyword driver, move down to the next potential fix below.
Method 4: Get in contact with Razer Support
Keep in mind that the internet is filled with occurrences of people managing to brick their BlackWidow device (especially the 2011 model) after repeatedly uninstalling the managing driver.
To avoid this inconvenience (especially if none of the methods above have worked for you) the next logical step is to get in contact with the official Razer support and ask them to mitigate the issue.
Several affected users have confirmed that getting in contact with a Razer support agent finally allowed them to resolve the issue with their Razer BlackWidow Chroma device.
To get in contact with Razer support, follow the instructions below:
- Open your default browser and visit the official Razer support page.
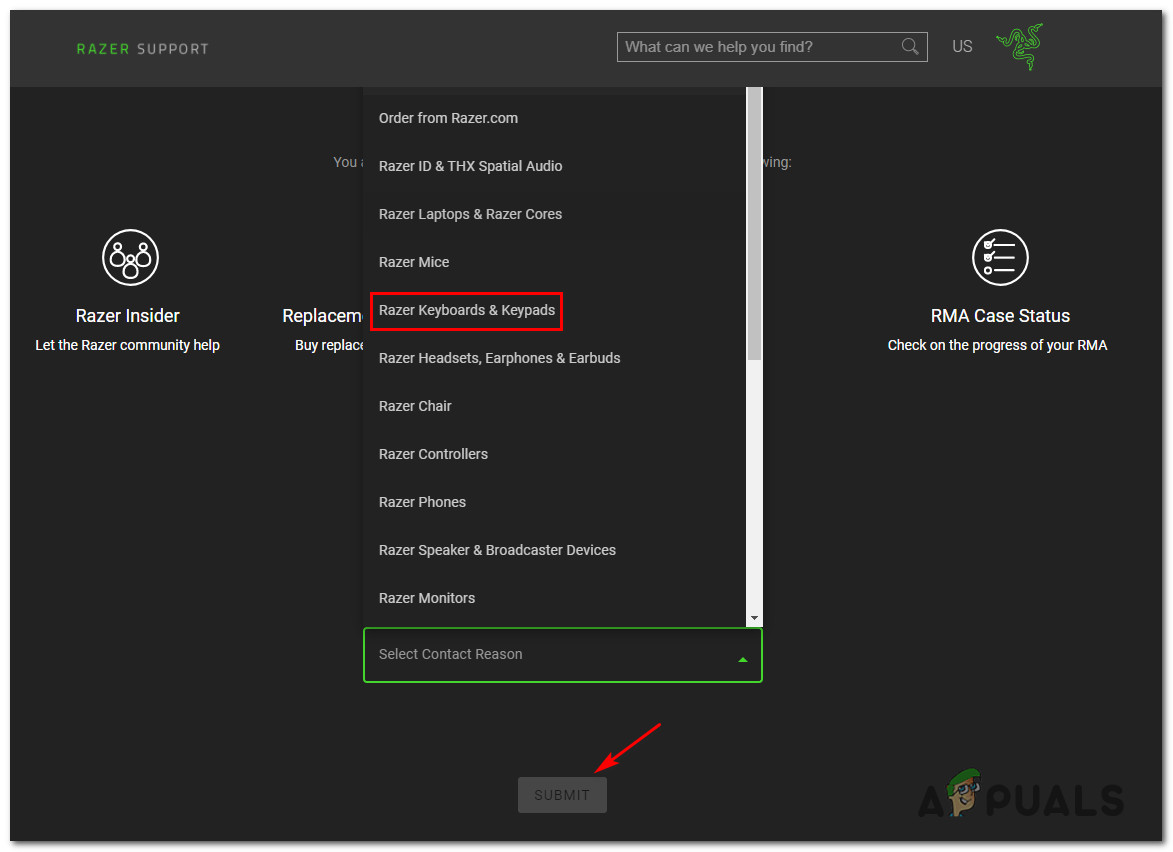
- Once you’re inside the correct page, click on Product Support (under Razer Support).

Accessing Product Support from Razer’s support - Once you get to the next page, click on Keyboard (under Select a product), then select the Razer BlackWidow model you’re encountering issues with.
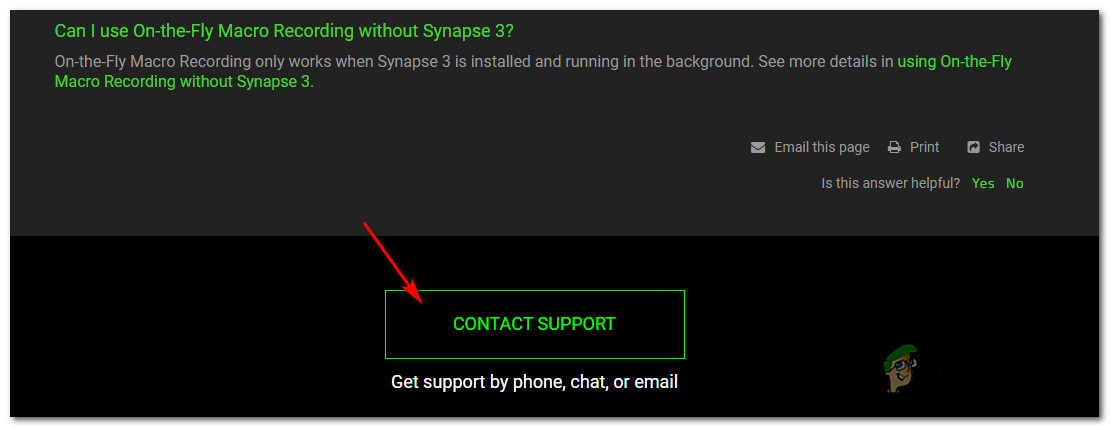
- After you have selected the correct Razer Blackwidow model, scroll down to the bottom of the page and click on the Contact Support button.
Contacting Razer’s support - On the next page, use the Contact Reason context menu to select Razer Keywords & Keypads then enter the Serial Number of your device and click on the Submit button below.
Opening a support ticket with Razer - Finally, go ahead and explain the issue as thoroughly as possible before waiting for a Live agent to get back to you.
Note: Keep in mind that typically, you’ll need to wait over 24 hours for a live agent to get back to you.
Method 5: Resetting every Windows 10 Component
If you tried every potential fix above and you’re still encountering the same kind of issues with your Razer keyboard, chances are you’re dealing with some kind of system file corruption that is affecting your Razer’s BlackWidow Chroma device.
If none of the fixes above have worked in your case, the next logical step is to reset every Windows component with a procedure like a clean install or install repair (in-place repair).
The easiest procedure out of the bunch is a clean install. But unless you’ll back up your data in advance, you can expect to lose all your personal data present on your OS driver. But the major advantage of this method is that you will not be required to use compatible installation media.
However, if you’re looking for the focused approach that will leave your personal files alone, you’ll need compatible installation media to initiate a repair install (in-place repair procedure).
This operation is considerably more tedious than clean installing, but the main advantage is that you’ll be able to refresh every potentially corrupted component without losing data from your apps, games, documents, and personal media that’ currently stored on your OS drive.


