Troubleshoot PuTTY X11 proxy: unsupported authorization protocol
PuTTY X11 is a mechanism to gain remote access to applications and servers by forwarding the display and control of these applications to the local host machine. It enables the user’s local machine to interact with the GUI/SSH of remote machines which helps in easy access.

However, sometimes trying to access the servers or applications, the user can run into the PuTTY X11 proxy: Unsupported authorization protocol error. This error can be caused by a number of reasons which include:
- Wrong ownership of the Xauthority file (and Locked Files)
- Corrupt Xauthority file
- Invalid configuration of PuTTY
- Incorrect authorization settings Firewall
- X11forwarding is not configured in SSH config
This article demonstrates the methods to solve the unsupported authorization error for PuTTY.
Solution 1: Change Xauthority file ownership
The Xauthority file is the main component to use PuTTY because this file stores the cookies and credentials for the Xserver for the purpose of connection authentication. An unsupported authorization protocol error occurs when the Xauthority file is missing or the user is not the owner of the file. Let us follow the steps and solve this error.
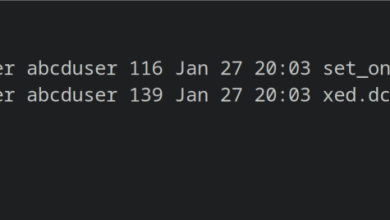
- Use the given list command to find the Xauthority file and confirm its ownership:
ls -al .Xauthority

Find the Xauthority file The Xauthority file is currently owned by the root user, let’s Access the server using PuTTY to see how it responds to this ownership issue:

Unsupported authorization protocol The above output shows that it is necessary for the user to have control over the Xauthority.
- Shift the ownership of the Xauthority file to the logged-in user and to do that execute the following command:
Note: Write the username that you want to use instead of “linux-user” given in the command:sudo chown linux-user .Xauthority

Change Xauthority ownership - Once the unsupported authorization protocol error occurs, the Xauthority file is often locked. When this file is locked, having the correct ownership will also not resolve the issue. Therefore, the user needs to check for the locked files and remove them. run the ls -al command to check if Xauthority-c and Xauthority-l files exist:
ls -al
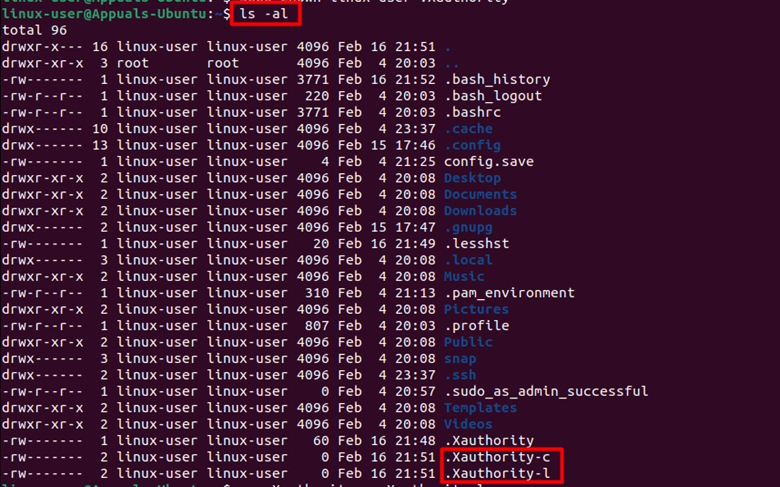
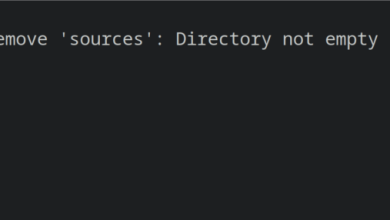
Show list to find Xauthority files If these files exist then remove the Xauthority-c and Xauthority-l files by using the following command:
rm .Xauthority-c .Xauthority-l

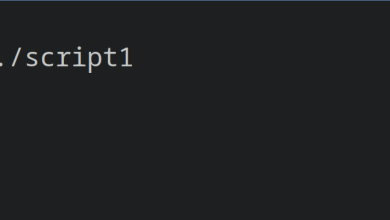
Note: Restart your machine and PuTTY connection for the changes to take effect. - Reconnect to the PuTTY server and call “xclock” to test the server:
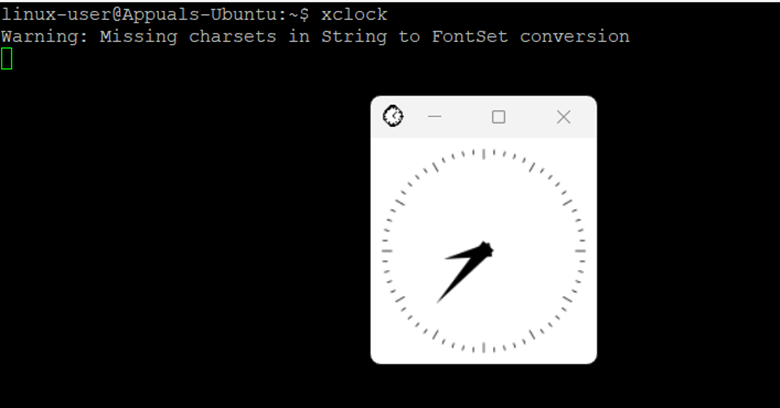
Connected to PuTTY The authorization error has been successfully resolved.
Solution 2: Replace Xauthority corrupt file
In some cases, the Xauthority file can be corrupted and due to that, access to the server is not authorized. To solve this issue you will need to do the following steps
- Run the “ls – al” command to check if our Xauthority file exists:
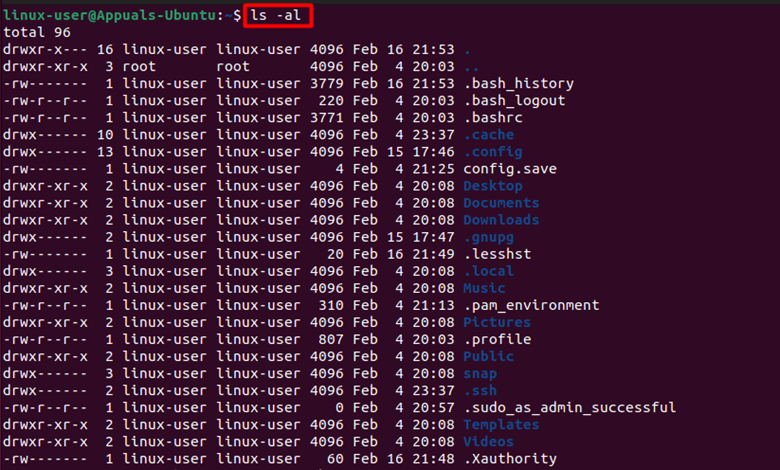
- To remove the Xauthority file, use the following command:
rm .Xauthority

Remove Xauthority file - Once you have deleted the Xauthority file reconnect the server using PuTTy, this will create your new Xauthority file in the directory, and run the “xclock” command:
Connection established successfully You have successfully logged into PuTTY and accessed the Xclock.
Solution 3: Reconfigure the Invalid configuration of PuTTY
Setting up your PuTTY is also essential and sometimes, users make mistakes while configuring or setting up their PuTTY. To solve this basic error, follow the steps provided below:
- Open up PuTTY on your PC, click the Default Settings file, and load it:
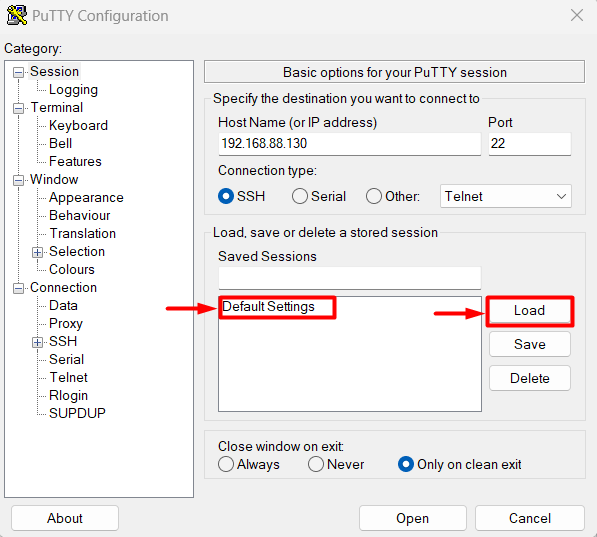
Load default settings - Now, locate the SSH tab and click on the X11 option. Enable the X11Forwarding and set “X display location” to “localhost0”:
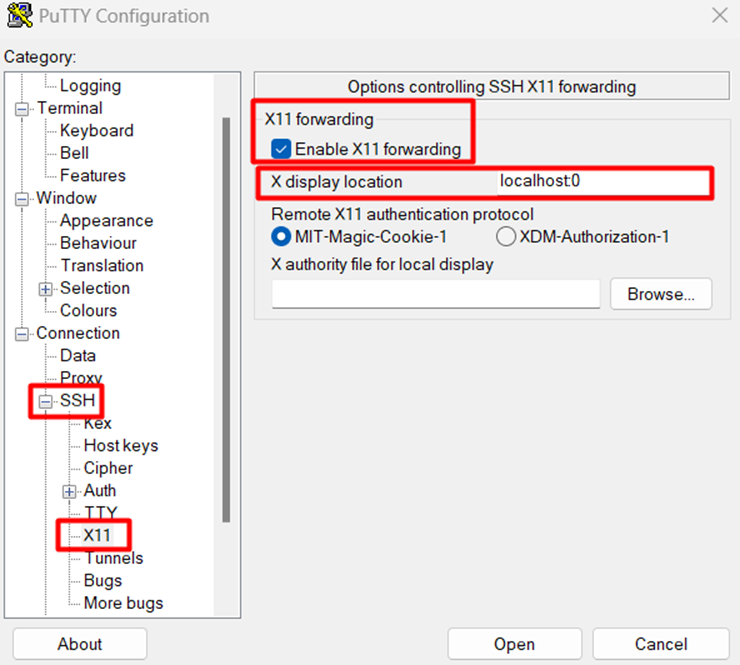
Configuring X11 forwarding in PuTTY - Now you will need to input the IP address or Host Name of the server you are going to access. After setting the Hostname or IP address, set the Port to 22 (or whatever port you have set for SSH) and then save the“Default File”:
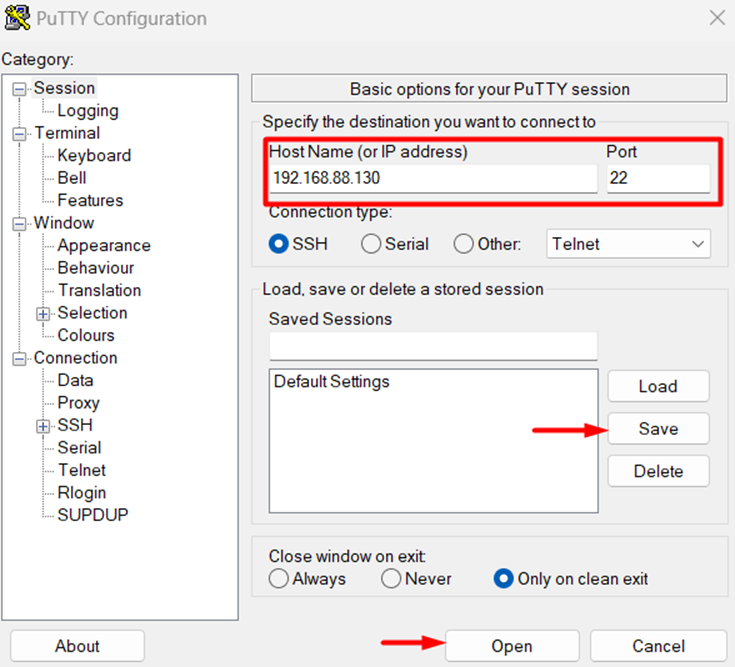
- Click the Open button and you will see the PuTTY terminal:
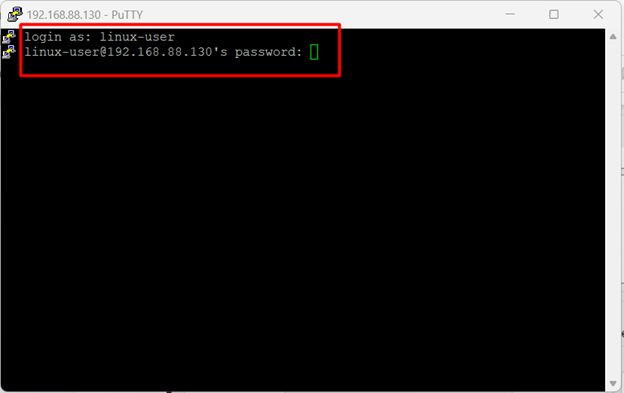
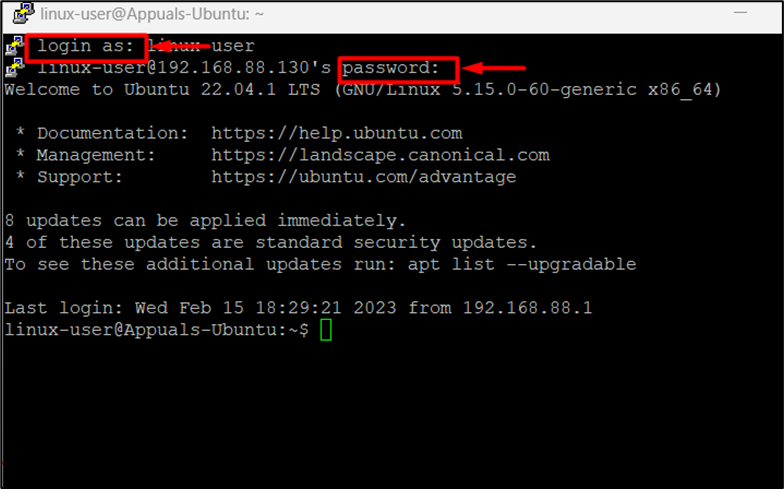
PuTTY login In the PuTTY terminal, you will have to input the Username and the password of the server you are going to access. Once you pass these two arguments you will gain access to the remote server:

PuTTY accessed server As you can see you have successfully set up PuTTY and accessed the server.
Solution 4: Allow Firewall configuration for port 22
To use the X11Forwarding and PuTTY, you will need to configure the Firewall and enable Port 22. Here, the UFW utility is used to configure the Firewall:
- Execute the following command in your terminal to allow the SSH server to gain access to port 22 through the Firewall:
sudo ufw allow ssh
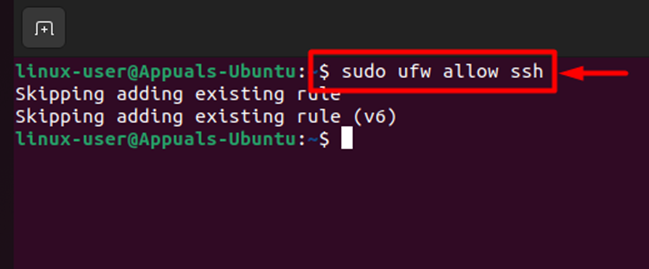
Give access to SSH server through Firewall - Enable the Firewall using the following command:
sudo ufw enable
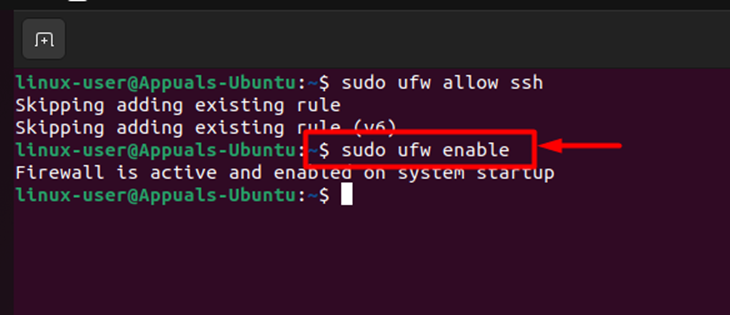
Enable Firewall - Check the Firewall status with the following command:
sudo ufw status
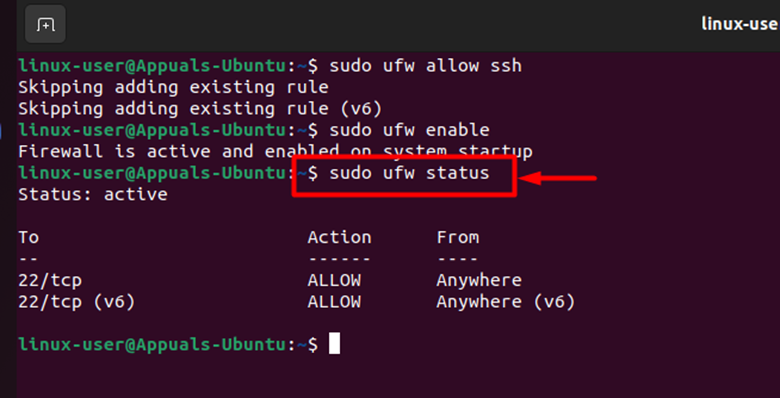
Check Firewall status As we can see that both 22/tcp and 22/tcp (v6) are now enabled.Once we have completed these steps, reconnect the PuTTY X11 and see if the error is resolved. To connect to the PuTTY server, input the remote system login name and password to access the server.
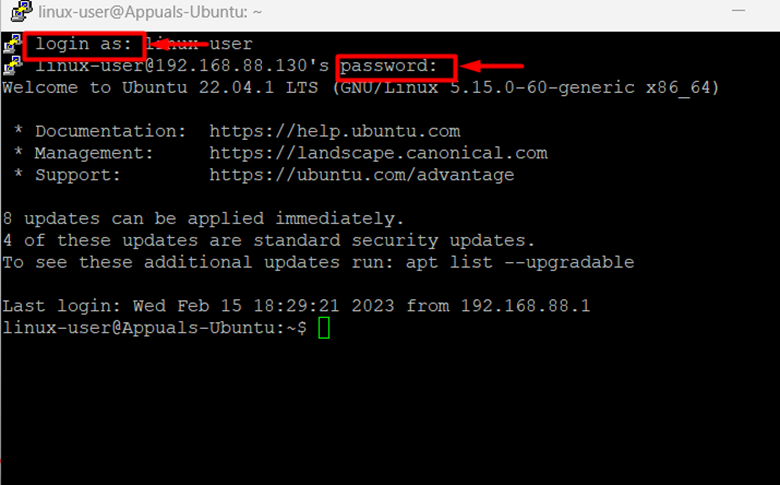
PuTTY server access You have successfully resolved the error and gained access to the remote server.
Solution 5: Configure X11Forwarding in SSH Server config
Another configuration error due to which PuTTY X11 authorization is denied is the invalid configuration of the SSH server. To configure the SSH server you will run the following command in your terminal.
sudo nano /etc/ssh/sshd/config
- By running this command you will gain access to the SSH server’s config file:
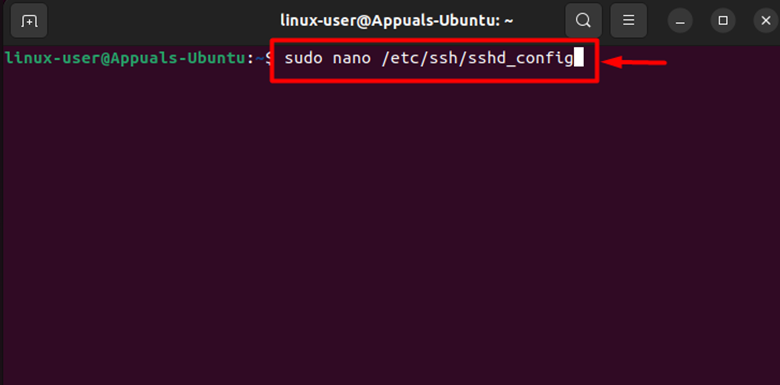
Access SSH server - In the SSH configuration, find X11Forwarding, then uncomment it to enable it. Set the X11Forwarding parameter to “yes”:
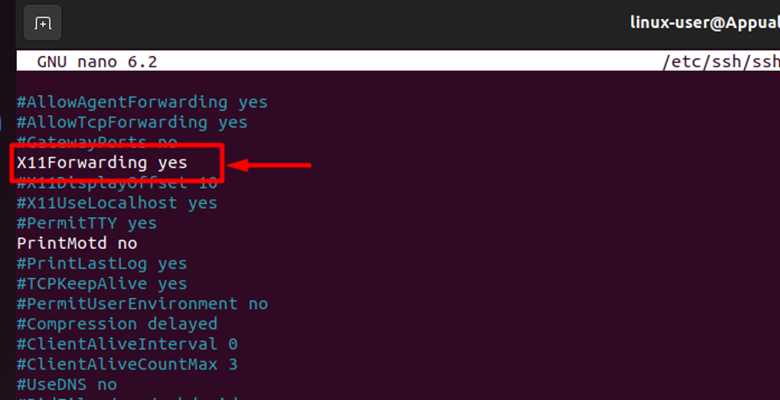
Enable X11Forwarding - After that find “X11Displayoffset” also enable this setting and set the display to “10”:
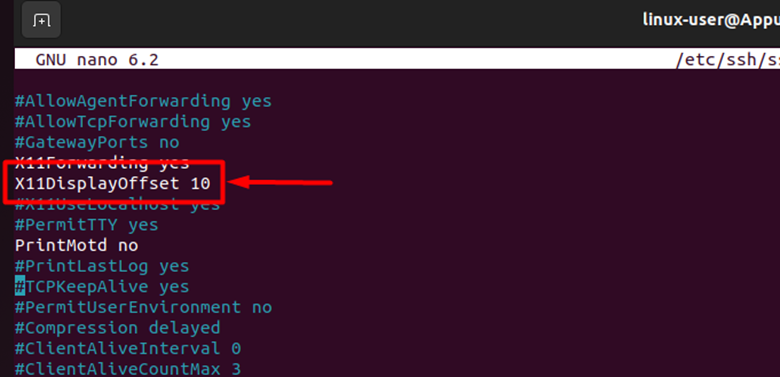
Enable X11Displayoffset - After enabling the above settings enable the set “X11UseLocalhost” to “no”:
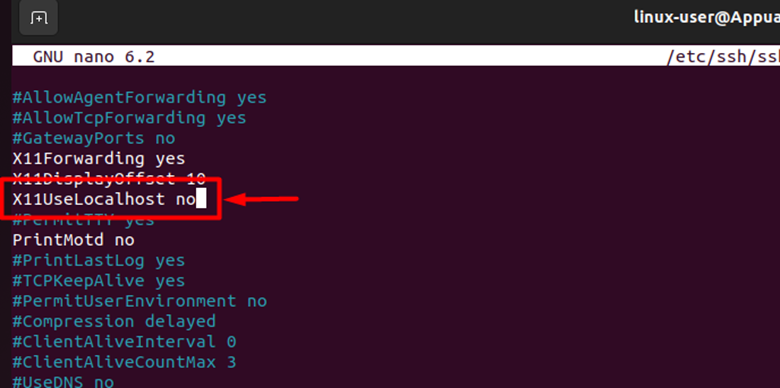
Set X11UseLocalhost to no - Furthermore, enable and set the “PrintMotd” setting to “no”:
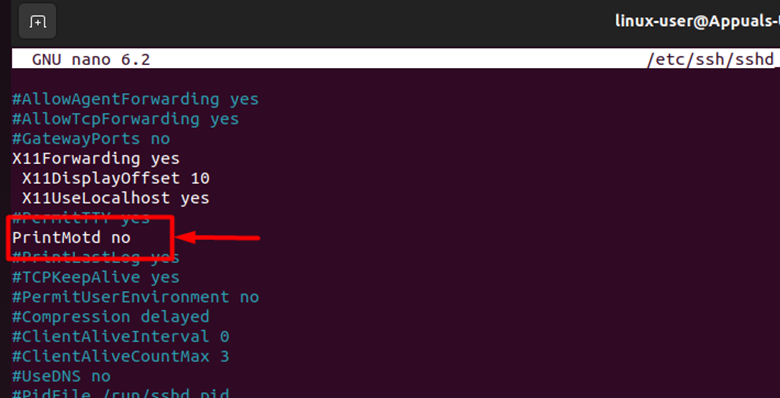
Set PrintMotd to no - After completing all the above steps, save the settings by using CTRL+O and then exit the config file by using CTRL+X. After that, try to reconnect to the server using PuTTY:
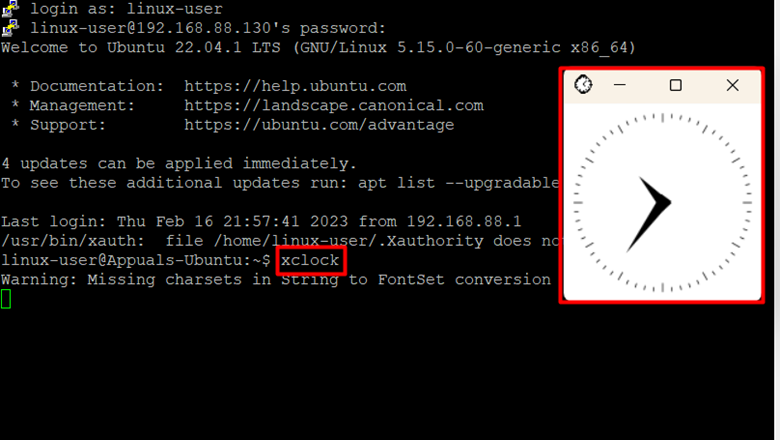
PuTTY connected to server - You have successfully logged into the server. Try and access the xclock by using the following command in your PuTTY terminal:
xclock
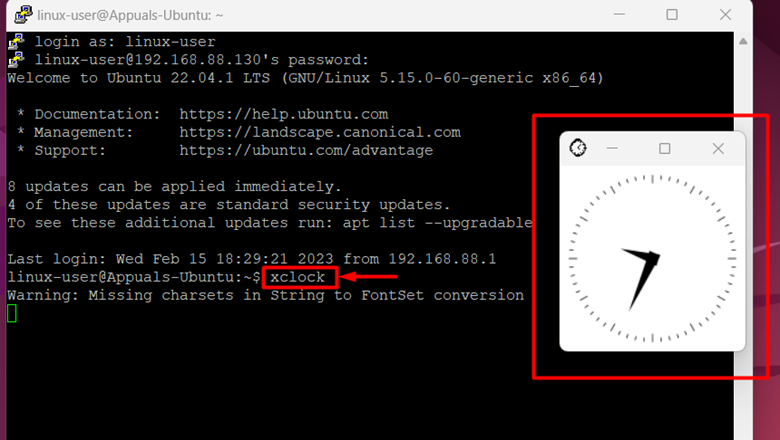
PuTTY connected and xclock accessed You have successfully solved the error and gained access to the remote machine.
The PuTTY X11 proxy: unsupported authorization protocol error is where you can’t gain access to the remote server using PuTTY. The reasons for this error to occur have been mentioned in this post along with their solutions.