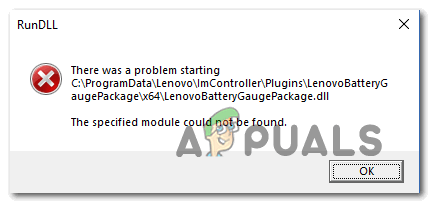
[FIX] Problem Starting LenovoBatteryGaugePackage.dll
Some Windows users are reporting an error associated with LenovoBatteryGaugePackage.dll at every computer startup. The default location of this file is C:\ ProgramData \ Lenovo\ImController \ Plugins \ LenovoBatteryGaugePackage \ x64 \ LenovoBatteryGaugePackage.dll. In most documented cases, this problem appears after a botched BIOS update or after the installation of certain drivers.
When troubleshooting for this particular issue, start by checking which Lenovo Supporting tools you’re using. If you’re still on Lenovo Vantage and Lenovo System, replace them with the new equivalents (Lenovo System Update and Lenovo Service Bridge) in an attempt to fix the issue.
In case you are still using the old Lenovo Vantage Toolbar and you have no intention of upgrading, you can apply the Lenovo-released script in order to fix a selection of broken Registry keys with the potential of causing this particular issue.
However, this problem can also be caused by a permission issue. In this case, you will be able to fix the problem by giving every user Full Control over the LenovoBatteryGaugePackage.dll file.
In the event that you started seeing this error after a botched BIOS update, you should be able to fix the problem by reinstalling the latest firmware version supplied by Lenovo using the Lenovo System Update tool.
Method 1: Uninstalling Lenovo Vantage and Lenovo System Interface Foundation
As it turns out, you can expect to see this particular issue if you still have installed legacy components like Lenovo Vantage and Lenovo System Interface Foundation. These two utilities were already replaced with Lenovo System Update and Lenovo Service bridge respectively.
Lenovo Vantage and Lenovo System Interface Foundation have a track record of botching updates – Some affected users have confirmed that they managed to fix the issue by uninstalling these two utilities and replacing them with their newer equivalents.
If you’re not sure on how to do this, follow the instructions below:
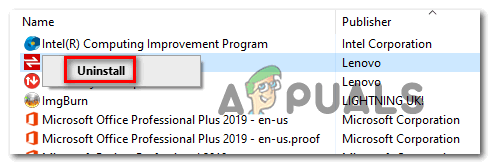
- Press Windows key + R to open up a Run dialog box. Next, type ‘appwiz.cpl’ inside the text box and press Enter to open up the Programs and Features menu.

Type appwiz.cpl and Press Enter to Open Installed Programs List - Once you’re inside the Programs and File menu scroll down through the list of installed applications and locate Lenovo Vantage (LV). When you see it, right-click on it and choose Uninstall from the newly appeared context menu.
Uninstalling Lenovo Vantage - Inside the Uninstallation window, follow the on-screen prompts to complete the operation.
- Next, return to the main Programs and Features screen and repeat the step above with the remaining software – Lenovo System Interface and Foundation.
- Once both Lenovo utilities have been uninstalled, restart your computer and download Lenovo System Bridge and Lenovo System Update.
- Follow through and install both utilities, then install every pending update until every Lenovo component is fully updated.
Installing every pending Lenovo update - Restart your computer and see if you’re still seeing startup errors associated with the LenovoBatteryGaugePackage.dll file.
In case the same problem is still occurring, move down to the next potential fix below.
Method 2: Applying the Lenovo Fix
If you’re using Lenovo Vantage Toolbar and you have no plans on updating, it’s very likely that you’re seeing this error pointing towards LenovoBatteryGaugePackage.dll file due to a glitch that affects Windows 7, Windows 8.1 and Windows 10.
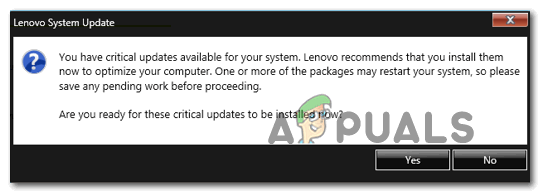
Fortunately, Lenovo already released a hotfix for this issue. It involves running a script with admin access in order to fix the registry problem that is causing the problem.
If this scenario looks like it could be applicable, follow the instructions below to apply the fix provided by Lenovo:
- Download the Battery Gauge fix from the official download page.
- After the download is complete, use a utility like Winzip, WinRar or 7Zip to extract the contents of the archive.

Download the battery gauge fix - Once the files have been successfully extracted, right-click on Fix-Battery_Gauge.bat and choose Run as administrator from the context menu. At the User Account Control (UAC), click Yes to grant administrative privileges.
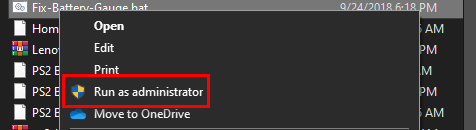
Running fix as administrator Note: This is very important since this script requires admin rights in order to be deployed successfully.
- After you successfully apply the fix, restart your computer and see if the problem is fixed at the next system startup.
In case you are still seeing a startup error pointing towards the LenovoBatteryGaugePackage.dll, move down to the next potential fix below.
Method 3: Giving Everyone Full Control over LenovoBatteryGaugePackage.dll
If the two fixes above weren’t applicable, there’s a high chance that you are actually dealing with a permission issue that is actually preventing some user accounts from accessing the functionality provided by the LenovoBatteryGaugePackage.dll.
In this case, you should use File Explorer to navigate manually to the location of LenovoBatteryGaugePackage.dll and modify the permission so that it’s available for everyone.
Here’s a quick step-by-step guide that will walk you through the whole process:
- Open File Explorer (My Computer) and navigate to the following location:
C:\ ProgramData \ Lenovo\ImController \ Plugins \ LenovoBatteryGaugePackage \ x64 \
- Once you get to the correct location and you can see the LenovoBatteryGaugePackage.DLL, right-click on it and choose Properties from the context menu.
- Inside the Properties screen, select the Security tab from the vertical menu at the top, then click on the Edit button under Group or User names.
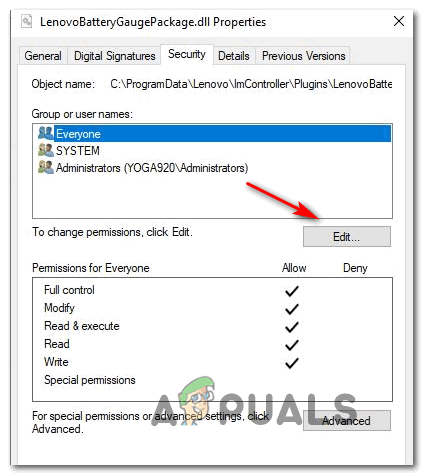
Editing the current permissions - Next, in the permission screen, click on the Add button and type Everyone inside the Text box before pressing Ok, then click Apply to save the changes.

Adding the Everyone Group as Permission option - Next, scroll down to Permissions for Everyone tab and check the Full Control box associated with Allow.
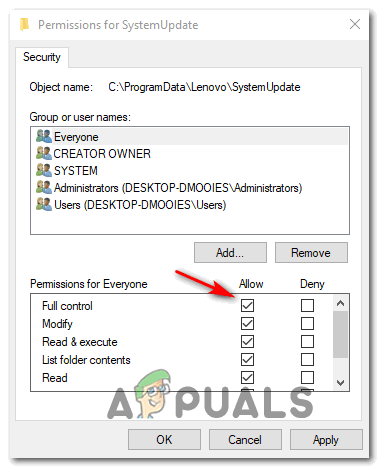
Giving Full Control to LenoboBatteryGaugePackage - Once you have successfully given Full control to the Everyone group for LenovoBatteryGaugePackage.DLL, restart your computer and see if the problem is fixed at the next computer startup.
In case the same problem is still occurring, move down to the next potential fix below.
Method 4: Update BIOS on Lenovo
Another fairly common cause that will ultimately cause this error is a botched BIOS update that failed to install completely for various reasons. Keep in mind that when this happens, you are left behind with a mix of old and new files, which might end causing various issues including errors pointing towards the LenovoBatteryGaugePackage.dll.
If this scenario is indeed applicable, you should be able to fix the issue by updating your BIOS version properly in order to replace the collection of BIOS related files.
Fortunately, the installation of new BIOS versions on Lenovo is handled through a proprietary app called Lenovo System Update Tool. This is way easier to handle for non-technical persons as it minimizes the risk of a botched update.
To update your BIOS version on your Lenovo computer, follow the instructions below:
- Open your browser and access the official Lenovo System Update page.
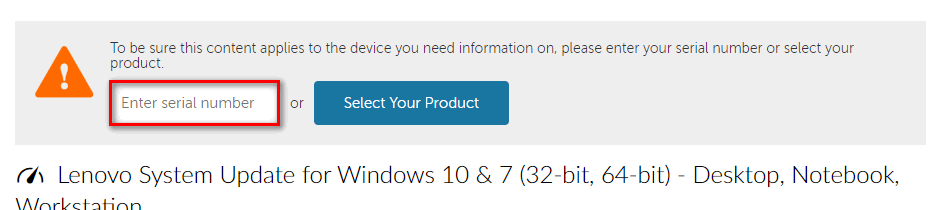
- Once you get to the correct location, scroll down to the Where to download section and click on Download tool now.

Downloading the Lenovo System Update tool - At the next screen, enter the serial number of your Lenovo PC in the box at the top of the screen to allow the utility to identify the correct download according to your particular model.
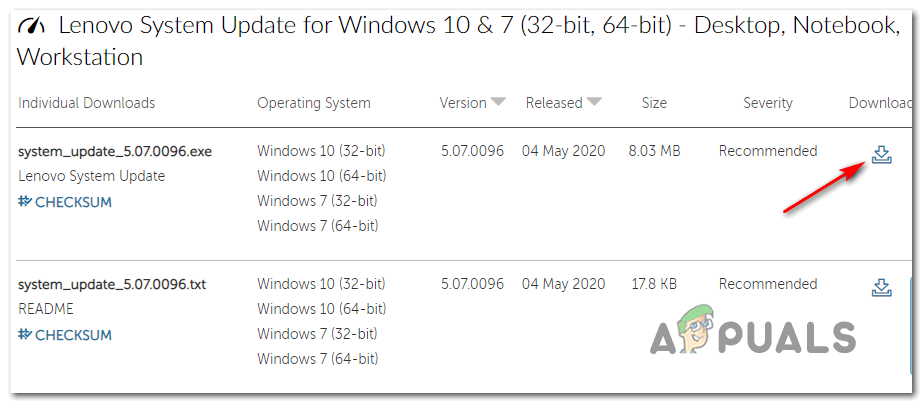
Enter Serial number - Once you allowed the utility to discover your PC configuration, click on the System Update download button compatible with your Windows version and wait for the download to complete.
- Once the download is complete, open the installer and click Yes at the User Account Control prompt, then click on Yes to grant administrative privileges.
- Next, follow the on-screen prompts to complete the installation of the utility, then install every pending update (including the BIOS update).
- At the end of this operation, your computer will restart and the new BIOS version will be installed.