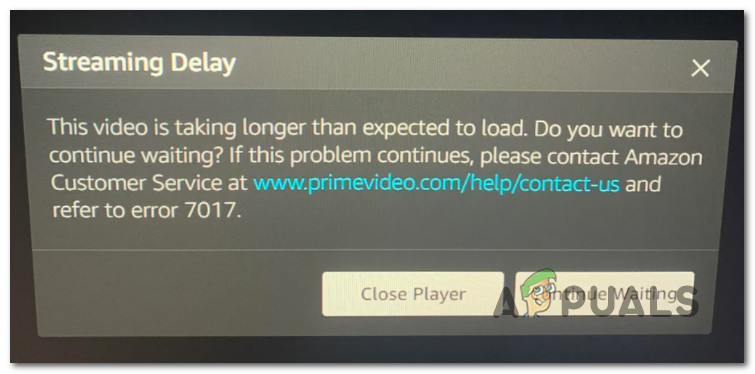
Amazon Prime Error 7017 ‘Video is taking longer than expected’ Solutions
Some Amazon Prime users are reporting that they regularly see the Streaming Delay (Error 7017) when attempting to stream a movie or show as part of their subscription. This issue is reported to occur on both PC/macOS browsers and on Smart TVs.
After investigating this particular issue thoroughly, it turns out that there are several different underlying issues that might lead to the apparition of the 7017 error code. Here’s a list of potential culprits that might be responsible for the error:
- The browser version doesn’t pass DRM requirements – If you’re only seeing this issue while attempting to stream content from your browser, it’s likely that you’re seeing this error because your browser is not updated to pass the latest DRM requirements. In this case, you should be able to fix the problem by updating your browser version to the latest.
- Smart TV OS glitch – Several users seeing this error on a smart TV have managed to get this error fixed by performing a power cycling procedure. This supports the theory that the error can also be caused by some type of OS glitch.
- You don’t have enough free bandwidth – This streaming delay error can also be a symptom that your internet connection is not strong enough to withstand the bandwidth requirements according to the device you’re streaming Amazon Prime content from. To verify if this is true, you’ll need to do an Internet connection test.
- Amazon Server Issue – Another fairly common issue that might end up causing this error code is a widespread Amazon server error. In this case, you can check if the problem is actually caused by an outage facilitated by the Amazon Web Service by checking the status page and by doing a ping test from a CMD window.
- The connection gets rejected due to VPN or Proxy – Amazon Prime is known for being extra protective when it comes to users attempting to use cloaking solutions like VPNs or Proxies. If you’re using any of these, try disabling them first before retrying the connection.
Now that you know every potential problem that might cause this error code, here’s a couple of methods that should allow you to fix or bypass the 7017 error code and stream Amazon Prime content normally:
1. Ensure that browser is up to date (if applicable)
If you’re only seeing this error while attempting to stream Amazon Prime content from your PC, chances are the issue is related to your browser.
Most likely, the problem is either caused by a temporary glitch or by an outdated browser that is not updated with the latest DRM security protocols required by Amazon.
If this scenario is applicable, start by restarting your browser before signing into Amazon Prime again and seeing if the error 7017 is still occurring.
Note: If you’re encountering this issue on a Smart TV, go ahead and perform a power-cycling procedure – Physically unplug the power cable and wait for a full minute before plugging it in again and restarting your Smart TV.
In case a simple restart didn’t fix the issue in your case, the next thing you should do is to make sure that your browser is updated.
If you’re using Mozilla Firefox or Google Google Chrome (or a Chromium-based browser), follow one of the sub-guides below to make sure that your browser is up to date:
Update Mozilla Firefox
- Open up Mozilla Firefox and click on the action button in the top-right corner of the screen.
- Once you’re inside the action menu of your browser, go ahead and click on the Help tab to bring up the context menu, then click on the About Firefox entry.
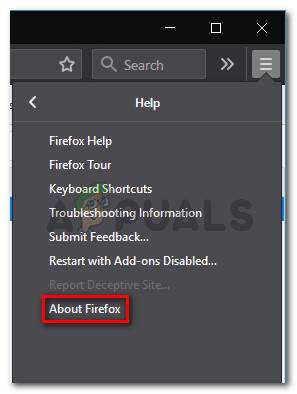
Accessing the About Firefox Tab - In the About Mozilla Firefox menu, click on the Restart button if a new version is available.
- Next, wait until the operation to complete, then click Yes at the User Account Control (UAC) to grant admin access.

Update Firefox to the latest version - Once your browser is updated, restart Mozilla Firefox, load up Amazon Prime once again and see if the problem is fixed.
Update Google Chrome
- Open up Google Chrome and click on the action button (top-right corner of the screen).
- Inside the action context menu, click on the Help submenu then click on About Google Chrome from the list of available options.
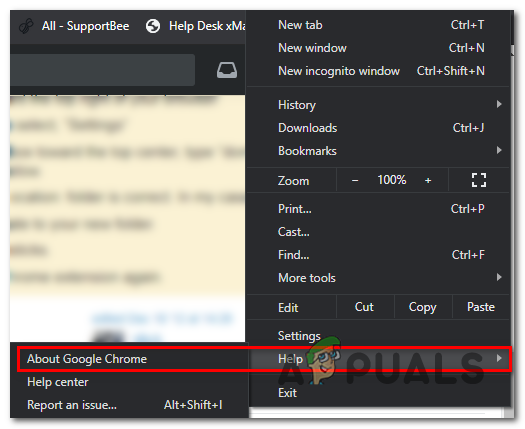
Accessing the About Google Chrome menu - After you’re finally inside the About Google tab, your browser should automatically download and install the latest version if available.
- In case a new version is found, it will automatically replace the current (outdated version) and restart automatically
- Once the installation is complete, open Amazon Prime once again and see if the issue is now fixed.
In case this problem is still not fixed, move down to the next potential fix below.
2. Test your Internet connection
As it turns out, the problem can also occur if your current Internet bandwidth cannot keep up with Amazon Prime’s requirements.
Amazon Prime officially requires merely 900 Kbps to stream content technically, but this only applies to small screens (Android, iOS) and desktops (PC, Mac).
But if you try to stream content from Amazon Prime from a Smart TV natively or using a dongle like Chromecast or Roku, the bandwidth requirement is 3.5 Mbps.
If you’re on a limited plan, there’s a chance that you might be encountering the error code 7017 because your ISP (Internet Service Provider) is not currently providing you with enough bandwidth to use this service – Most likely due to a technical reason (especially if previously you were able to stream normally).
Fortunately, you can check if this is the source of the problem by doing a speed test on your Internet connection and verify whether your data exchanges are fast enough to support Amazon Prime streaming.
Follow the speed test on your Internet connection to see if it meets the minimum requirements:
- Check any other browser tab or application that might be currently hogging your precious Internet bandwidth.
Note: Peer-to-Peer torrent tools are prime candidates for this. - Next, visit the official page of Speedtest from your browser of choice and click on Go to initiate a Speed test.
- Take a look at the results once the operation is complete. If the Download speed is lower than 4 Mbps, you will likely need to upgrade to a better Internet connection in order to bypass the error code 9345.
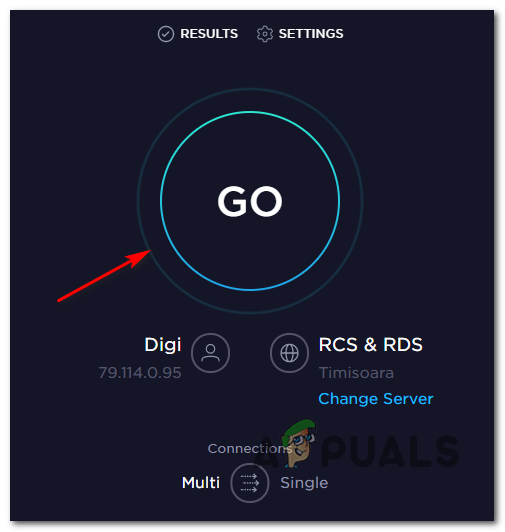
Testing your speed connection
In case your current bandwidth exceeds the minimum requirement of Amazon Prime and you’re still seeing the 7017 error, move down to the next method below.
3. Check the Status of Amazon’s Servers
Now that you’ve ensured that the problem is not related to an outdated browser and it’s not being caused by bandwidth limitation, the next step should be to investigate an ongoing server issue.
In the past, there was a big surge of users reporting the 7017 error code when Amazon’s Web Services (AWS) was in the middle of an outage period.
To make sure you’re not currently dealing with the same issue, start by checking if other people in your area are currently facing the same issue by checking directories like DownDetector and IsTheServiceDown.
Note: If you see a fresh influx of users reporting this issue, it’s clear that Amazon is currently dealing with an ongoing server issue. In this case, there is no fix that you can do locally. Your only choice is to wait for them to fix their server issues.
If you want to be extra sure that you’re actually dealing with a server issue, you should also check the official Amazon Video Twitter account and see if any official announcements have been made.
In case this investigation has returned mixed results, there’s one method of checking if the prime video server is accepting connections or not – You can ping the main server from a CMD prompt and see if you get a pingback or your request gets timed out.
Here’s how to do this:
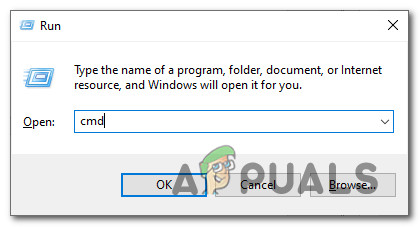
- Press Windows key + R to open up a Run dialog box. Next, type ‘cmd’ inside the text box, then press Ctrl + Shift + Enter to open up an elevated Command Prompt.
Open an elevated Command Prompt Note: When you are prompted by the UAC (User Account Control), click Yes to grant admin access.
- Once you’re inside the elevated Command Prompt, type the following command and press Enter to ping the main Amazon Prime server:
ping primevideo.com -t
- If the ping is successful and you get a reply, you can conclude that the problem is not related to a server issue.
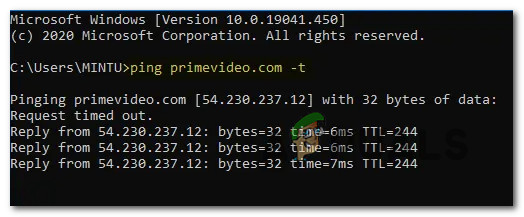
Pinging the Amazon Prime server Note: If you get a Request Timed Out issue without any reply after a couple of minutes, you can conclude that the problem is caused by a server issue – In this case, you can’t do anything but wait for the problem to be resolved by Amazon.
If you’ve confirmed that you’re not actually dealing with a server issue, move down to the final potential fix below to resolve a potential issue caused by your proxy or VPN server.
4. Disable Proxy or VPN Services (if applicable)
According to some affected users, you can also expect to see the 7017 error due to the fact that your network is currently going through a VPN or Proxy connection which Amazon’s web server doesn’t like.
Some users facing the same problem managed to fix the problem by disabling their proxy server or their VPN connection.
To accommodate both potential scenarios (if you’re using a VPN or Proxy server), we created 2 different sub guides that will allow you to disable the proxy server (sub-guide A) or uninstall the VPN client (sub-guide B).
A. Disable Proxy Server
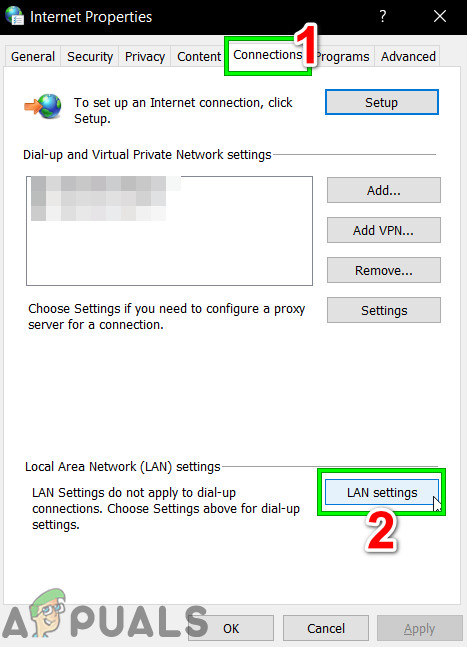
- Press Windows key + R to open up a Run dialog box. Next, type ‘inetcpl.cpl’ inside the text box, then press Enter to open up the Internet Properties tab.

Opening the Internet Options menu - Inside the Internet Properties tab, go over to the Connections tab from the horizontal menu at the top, then go ahead and click on LAN Settings (under Local Area Network LAN settings).
Accessing the LAN settings menu - Once you get to the Settings menu of Local Area Network (LAN), access the Proxy server category and uncheck the Use a proxy server for your LAN box.
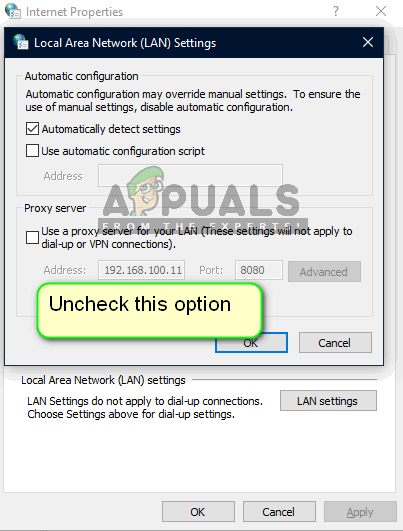
Disabling the Proxy server - After you have successfully disabled the Proxy server, restart your computer and attempt to stream content from Amazon Prime once again once the next startup is complete to see if the problem is now fixed.
B. Uninstall VPN client
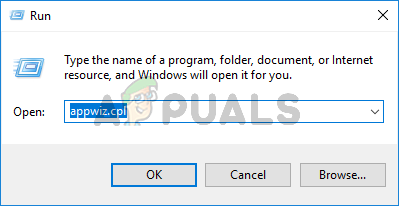
- Open up a Run dialog box by pressing Windows key + R. Next, type ‘appwiz.cpl’ and press Enter to open up the Programs and Features screen. When you are prompted by the UAC (User Account Control), click Yes to grant administrative privileges.
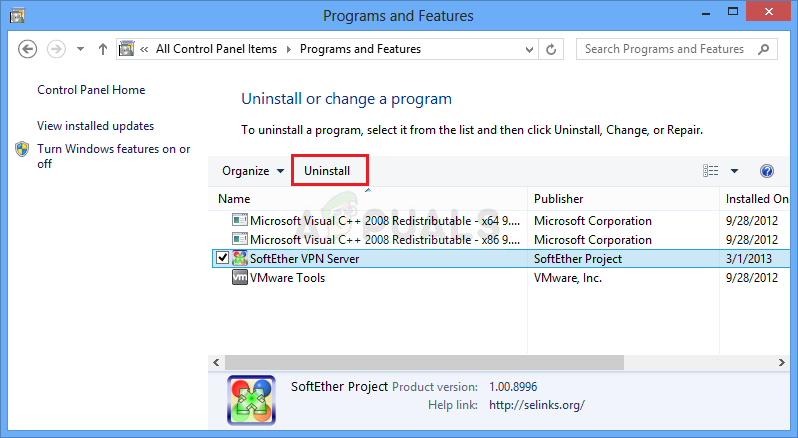
Opening the Programs and Features menu - Once you get to the Programs and Features menu, scroll down through the list of installed programs and locate the system-level VPN. When you see it, right-click on it, then click on Uninstall from the newly appeared context menu.
Uninstalling the VPN tool - Next, follow the on-screen prompts to complete the uninstallation, then restart your computer and see if the Amazon Prime error is fixed after the next startup is complete.