How to Prevent StartMenuExperienceHost.exe Waking up my PC?
Your PC may keep waking up if the system’s scheduled maintenance is powering it on. Moreover, corrupt or wrong configuration of the system’s power settings may also result in the issue at hand.
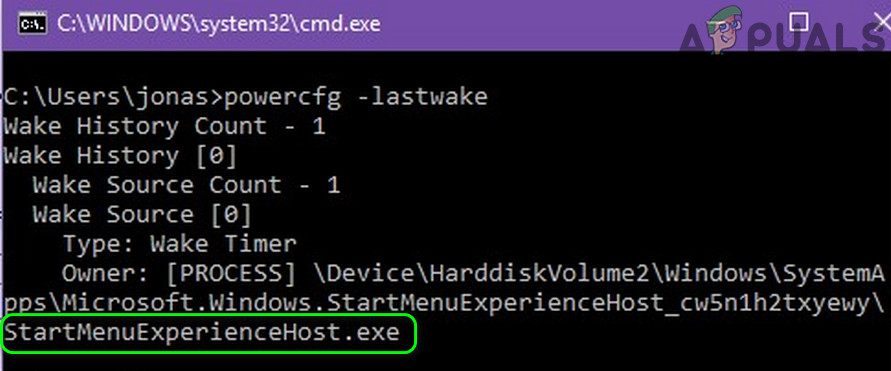
The user encounters the issue when his PC wakes up from sleep at odd times (without any user interference/intention) or the PC just instantly returns from the sleep (when tried to put to sleep). Upon checking, the user finds out that the StartMenuExperienceHost.exe is causing the issue.
Before moving on with the solutions to get rid of StartMenuExperienceHost.exe, make sure your system’s Windows or drivers are updated to the latest build.
Solution 1: Turn Off Scheduled Maintenance of Your System
Your system may wake up automatically at a certain time if the automatic maintenance of your system is configured to perform the maintenance task at a specific time. In this case, disabling the scheduled maintenance may solve the problem.
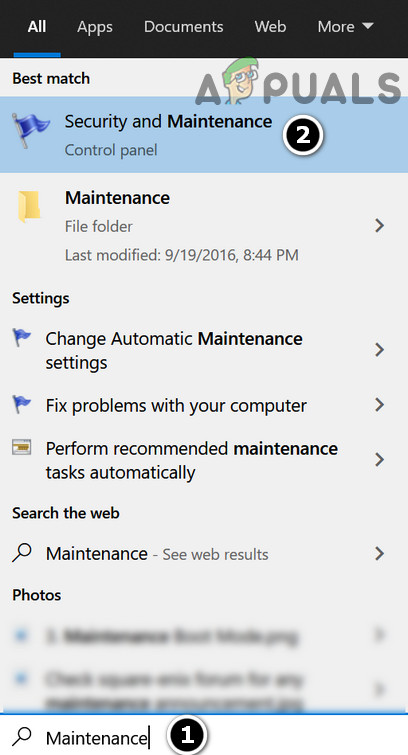
- Hit the Windows key and type Maintenance. Then select Security and Maintenance.
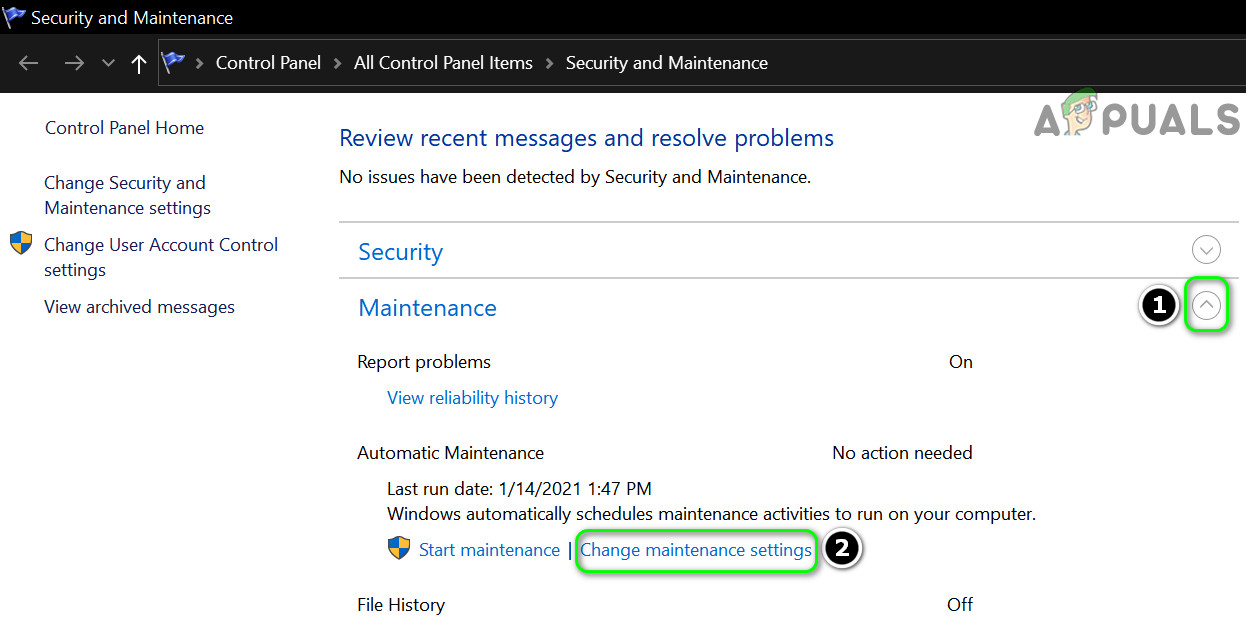
Open Security and Maintenance - Now expand Maintenance and open Change Maintenance Settings.
Open Change Maintenance Settings - Then uncheck the option of ‘Allow Scheduled Maintenance to Wake Up My Computer at the Scheduled Time’.
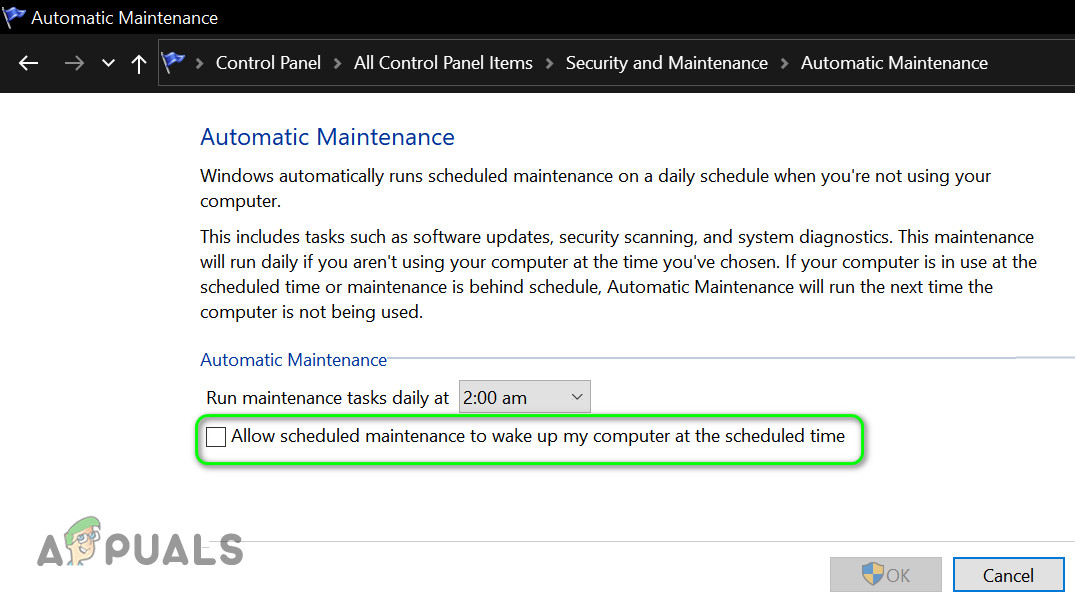
Disable Scheduled Maintenance - Now click on the OK button and then check if the system’s wake up issue is resolved.
Solution 2: Disable Hybrid Sleep
You may encounter the error at hand if the Hybrid Sleep state (which is a mixed state of hibernation and sleep) is enabled as it can create hindrance in the operation of power options of your system. In this context, disabling Hybrid Sleep may solve the problem.
- Hit the Windows key and type Power & Sleep Settings. Then select Power & Sleep Settings.

Open Power & Sleep Settings - Now, under Related Settings, open Additional Power Settings (in the right half of the window).
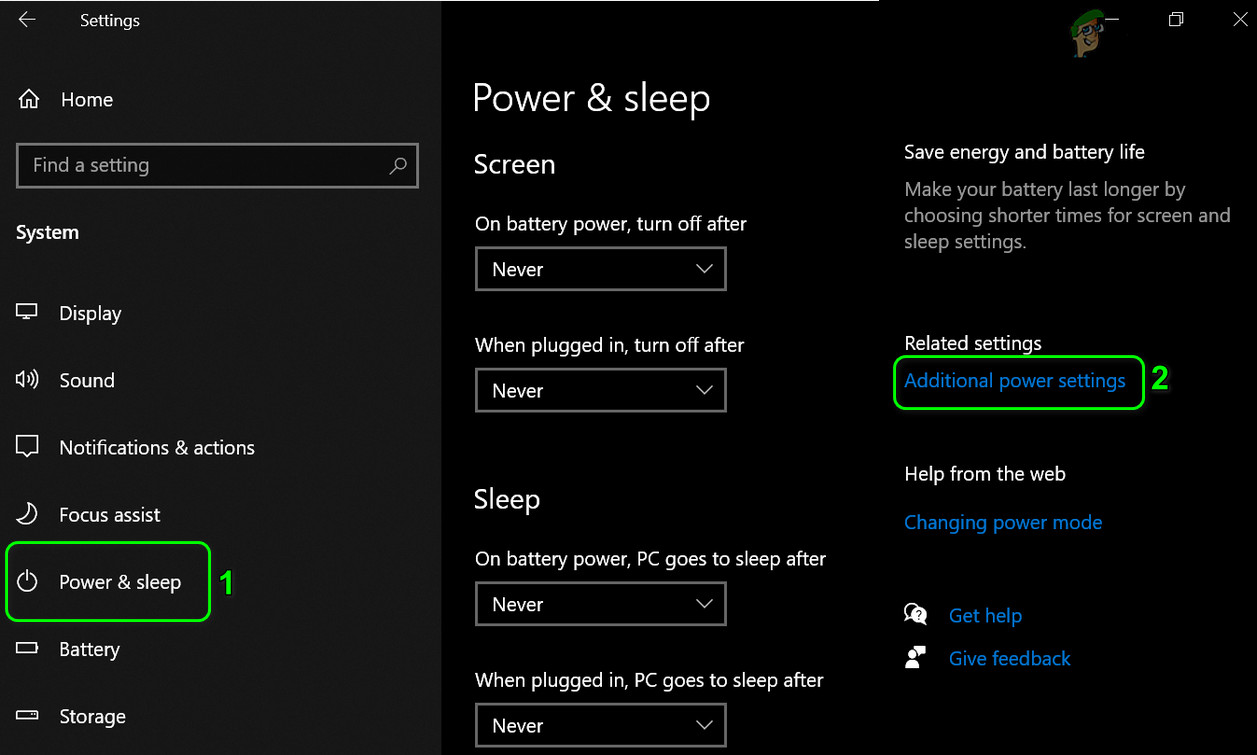
Open Additional Power Settings - Then select Change Plan Settings and open Change Advanced Power Settings.
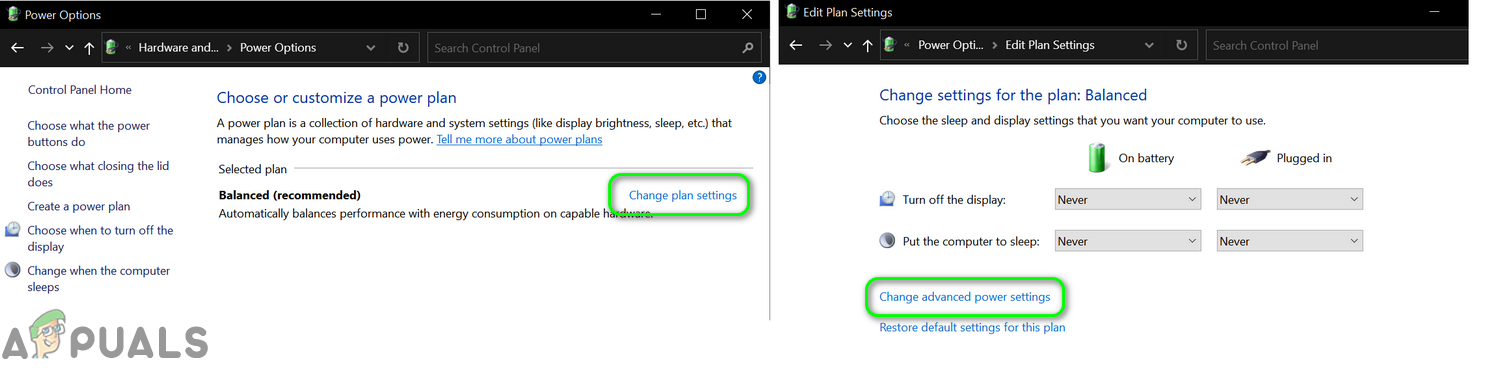
Change Advanced Power Settings - Now expand Sleep and then Allow Hybrid Sleep.
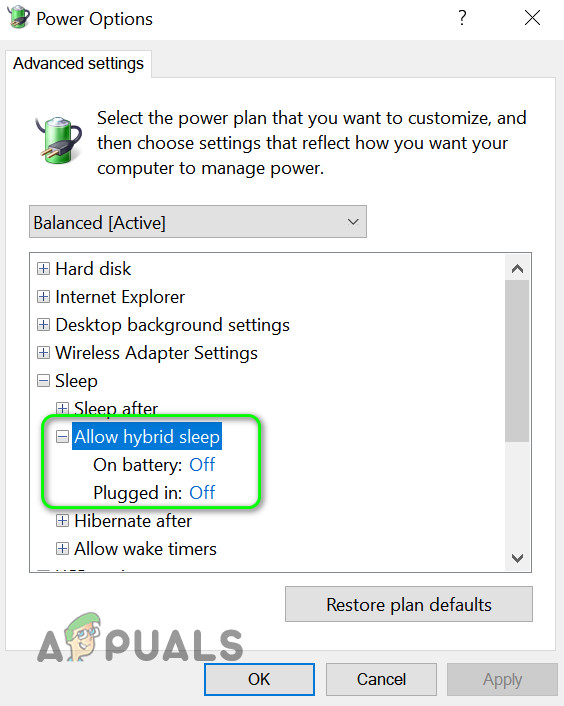
Disable Hybrid Sleep - Then expand the dropdown of On Battery and select Off.
- Then repeat the same to Plugged In and then check if the system’s wake-up issue is resolved.
Solution 3: Run the Power Troubleshooter
Your system may randomly start waking up if the power settings of your system are corrupt or not properly configured. In this case, running the power troubleshooter may solve the problem.
- Hit the Windows key and type Troubleshoot. Then select Troubleshoot Settings.

Open Troubleshoot Settings - Now, in the right pane, open Additional Troubleshooters and expand Power.
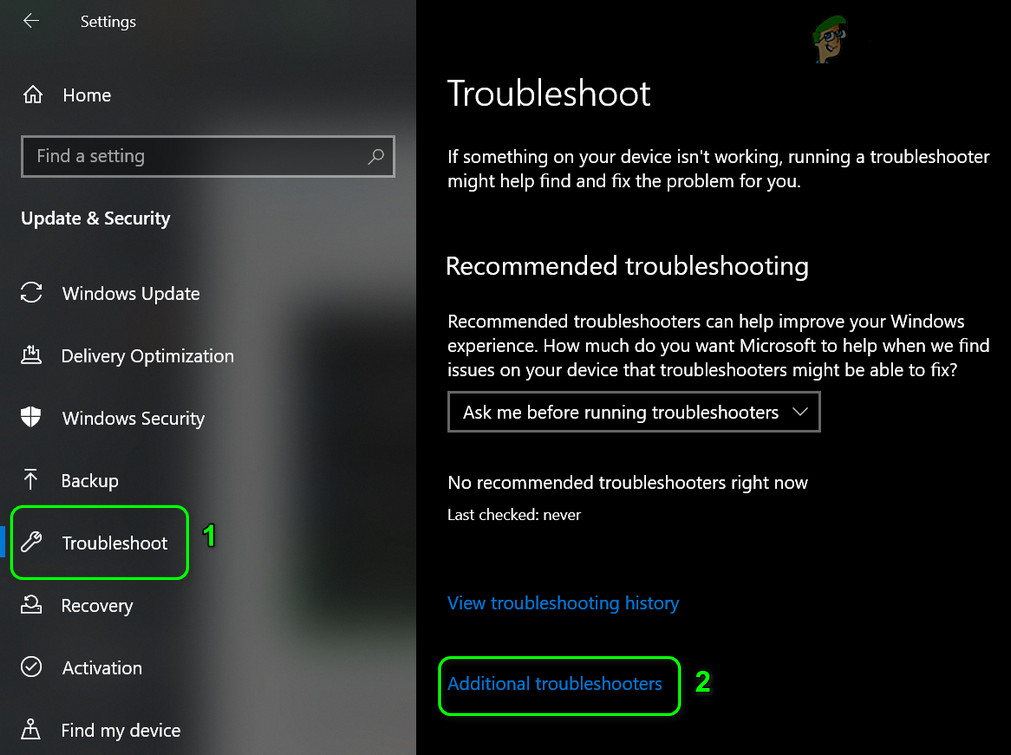
Open Additional Troubleshooters - Then select Run the Troubleshooter and follow the prompts to complete the troubleshooter process (if any issues were found, then try to fix the issue).

Run the Power Troubleshooter - Now check if the system is clear of the wake-up issue.
Solution 4: Turn Off Live Tiles in the Start Menu
Many users tend to use live tiles on the start menu to see information about Weather, Photos, Games, Thumbnails, etc. But these live tiles try to refresh their data after a fixed time and thus cause the error at hand. In this context, disabling the live tiles in the start menu may solve the problem.
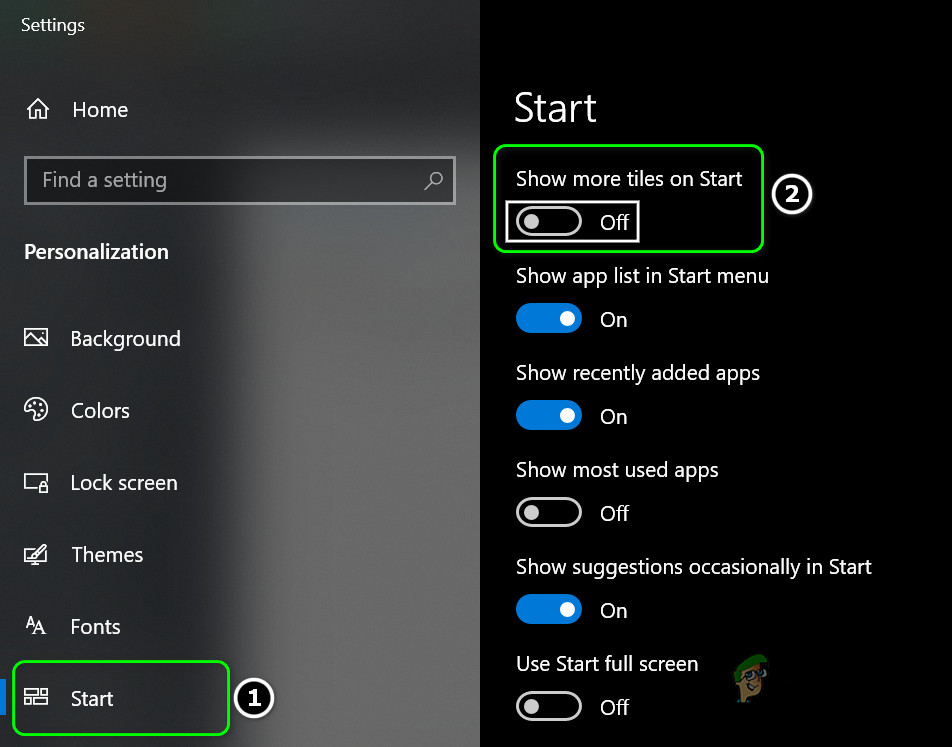
- Hit the Windows key and type Tiles. Now open Show More Tiles on Start.

Open Show More Tiles on Start - Then toggle the switch of Show More Tiles on Start to off position and check if the Wake issue is resolved.
Disable Show More Tiles on Start - If not, then hit the Windows key and right-click on any of the Live Tiles (like Photos, Mail, or Office).
- Then hover over More and click on Turn Live Tile Off.
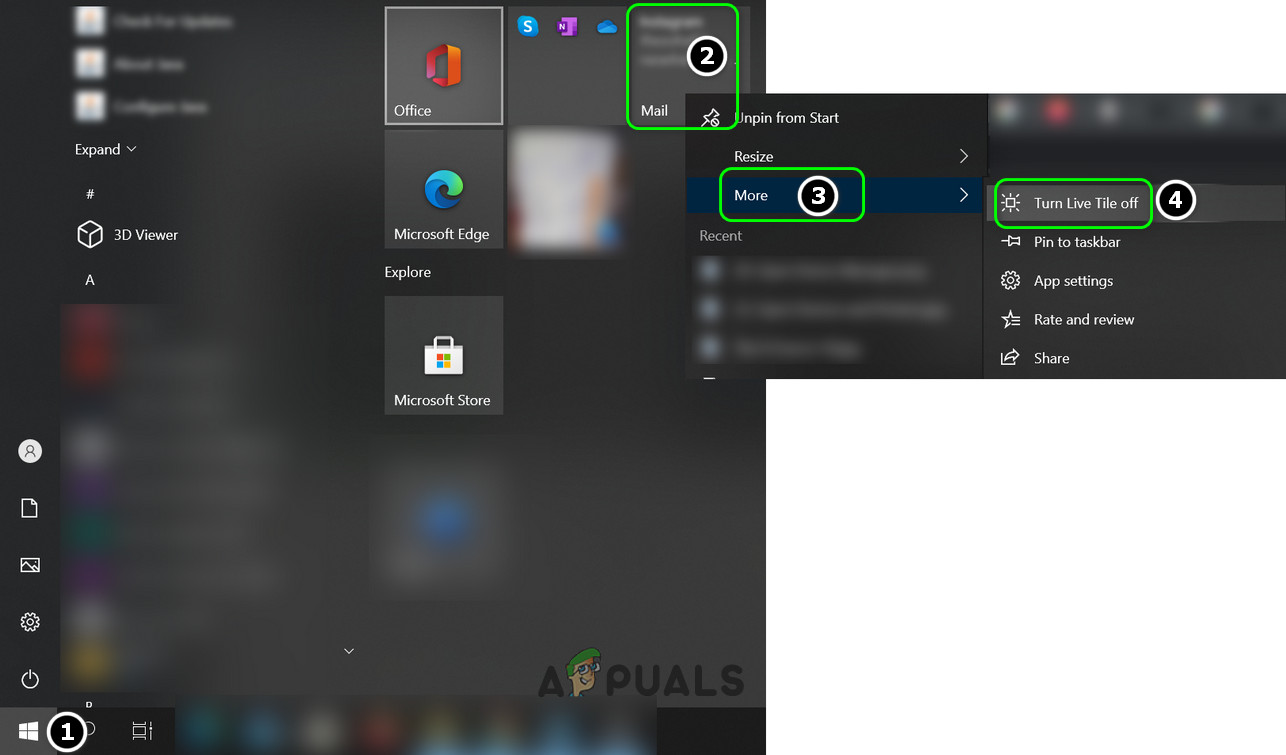
Turn Off Live Tiles in the Start Menu - Now repeat the same on all the Live Tiles and then check if the system’s wake issue is resolved.
Solution 5: Disable Power Management by Windows Update
You may encounter the error at hand if Windows Update is allowed to wake up your computer for updates. In this scenario, disabling the Windows update option to power on your system may solve the problem.
- Hit the Windows key and type Group Policy. Then select Edit Group Policy.

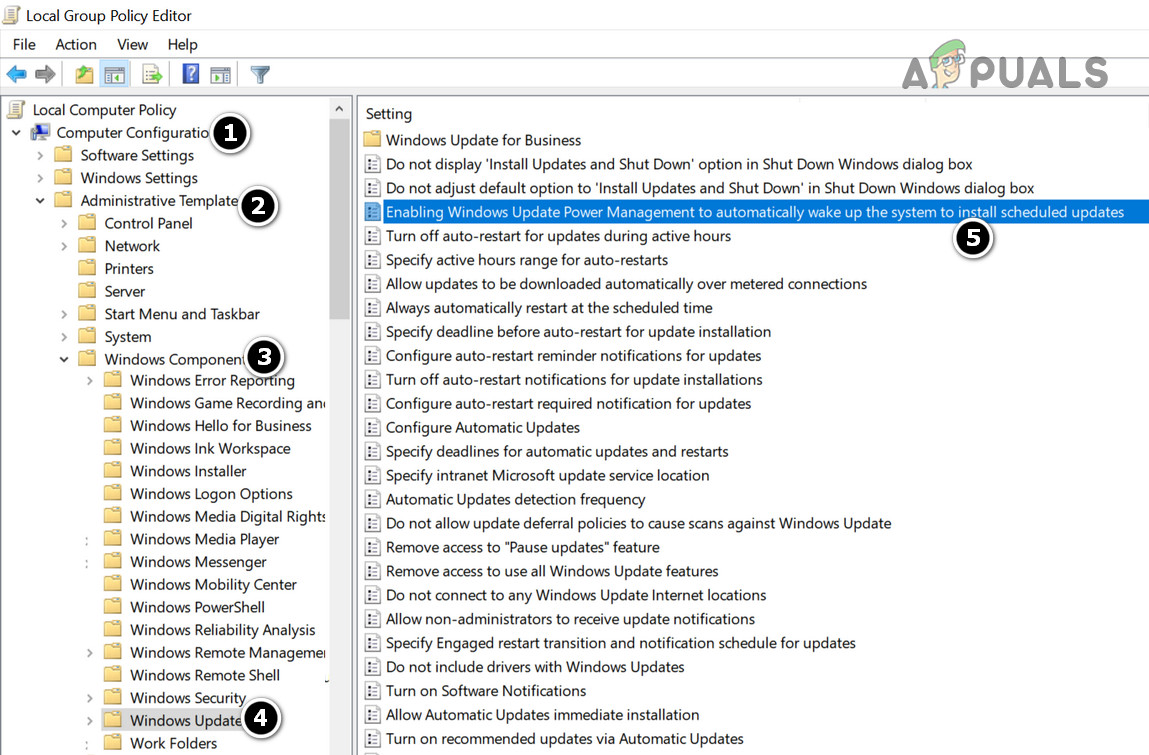
Open Group Policy Editor - Now navigate to the following:
Computer Configuration >> Administrative Templates >> Windows Components >> Windows Updates
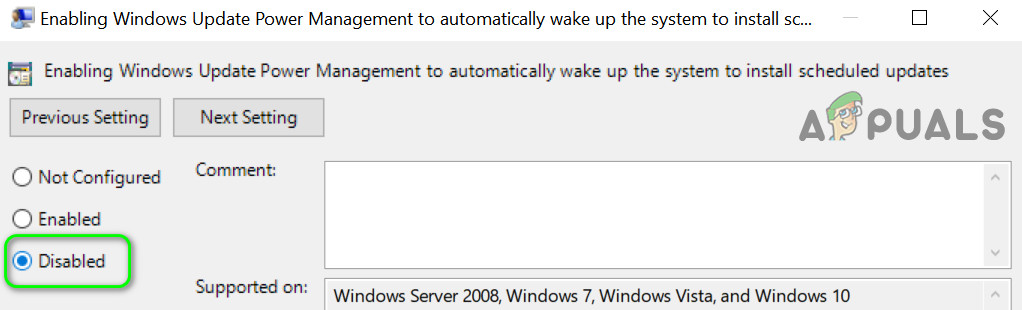
- Then, in the right pane, double click on ‘Enabling Windows Update Power Management to Automatically Wake Up the System to Install Scheduled Updates’ and select Disabled.
Open Enabling Windows Update Power Management in the Group Policy Editor - Then apply your changes and check if the system’s wake-up issue is resolved.
Disable Windows Update Power Management
Solution 6: Turn Off Wake Timers of Your System and Reset the Power Settings to Default
Your system may wake up at times if the wake timers of your system are configured to wake the PC at scheduled times. In this context, disabling the wake timers of your system may solve the problem.
- Hit the Windows key and type Power & Sleep Settings. Then select Power & Sleep Settings.
- Now, under Related Settings, open Additional Power Settings (in the right pane of the window).
- Then select Change Plan Settings (for Selected Plan) and open Change Advanced Power Settings.
- Now expand Sleep > Allow Wake Timers. Then, open the dropdown of On Battery and select Disable.
- Now, open the dropdown of Plugged in and select Disable.
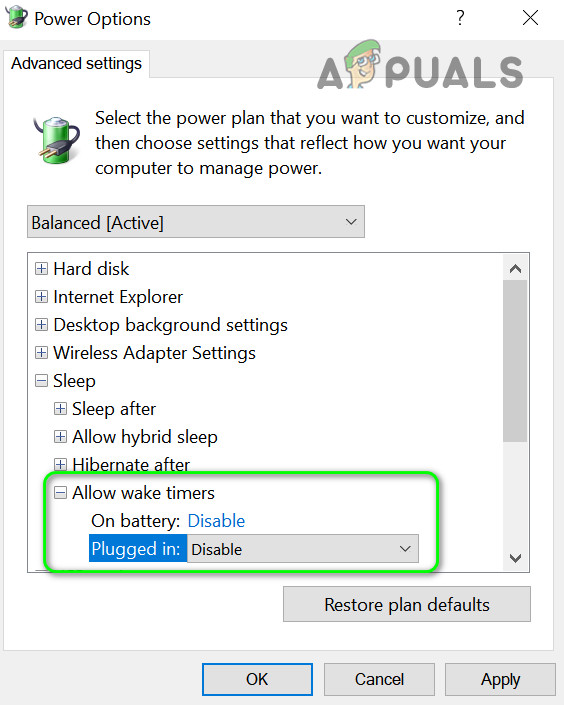
Disable Wake Timers - Then apply your changes and check if the wake-up issue is resolved.
- If not, then open Change Plan Settings (steps 1 to 3).
- Then on the Change Plan Settings window, click on Restore Default Settings for This Plan.
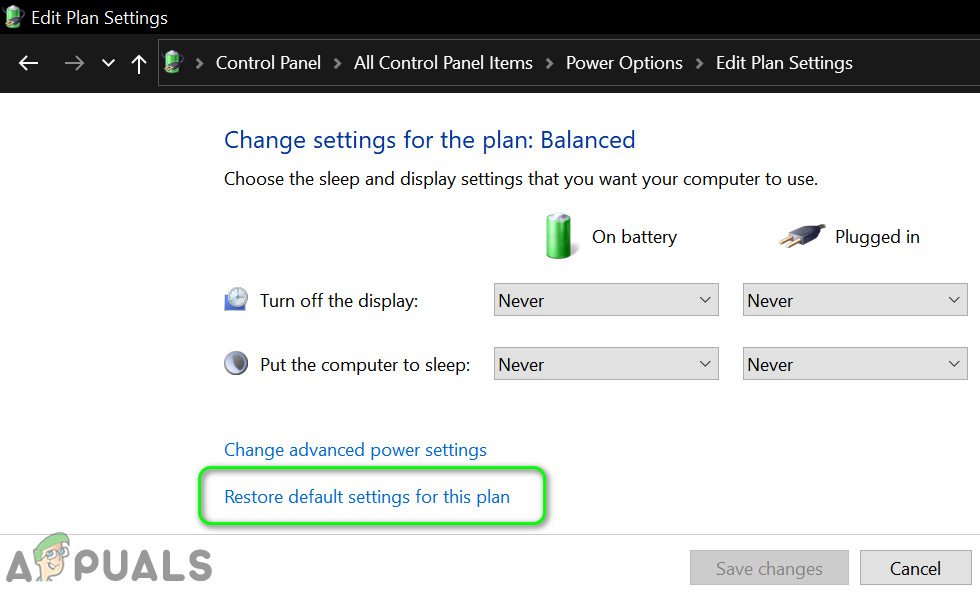
Restore Default Settings for the Power Plan - Then check if the system’s wake up issue is resolved.
Solution 7: Disable ‘Allow This Device to Wake the Computer’ for your Devices
Your system may wake up at odd times if any of your system devices are configured to wake up the system. In this context, disabling the device’s capability to wake your computer may solve the problem.
- Right-click on the Windows button to launch the Quick Access menu and choose Device Manager.
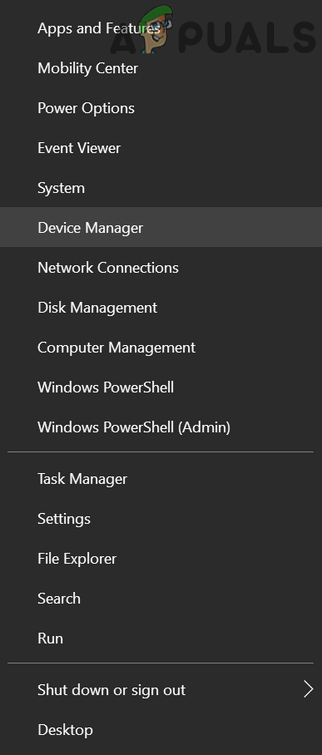
Open Device Manager of Your System - Now, expand Network Adapters and right-click on any of the network adapters.
- Then select Properties and steer to the Power Management tab.
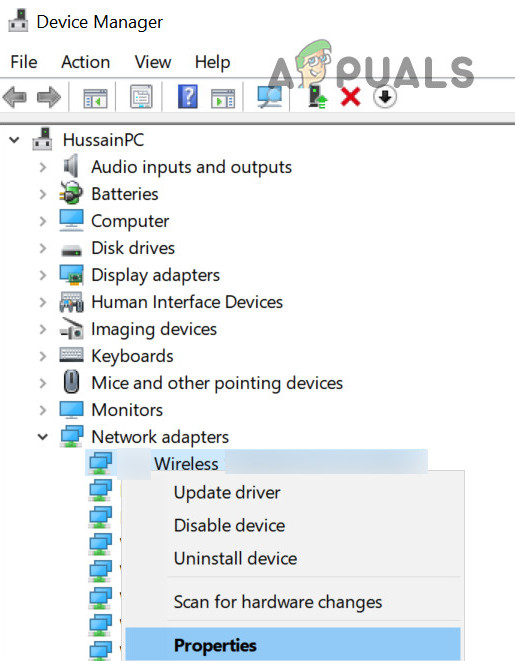
Open Properties of the Network Adapter in the Device Manager - Now uncheck the option of Allow This Device to Wake the Computer and apply your changes.

Uncheck the Option of Allow This Device to Wake the Computer for the Network Adapter - Then repeat the same for all the network cards, mouse, keyboard, USB devices, game controllers, etc.
- Now check if your system is clear of the wake-up error.
Solution 8: Use the Registry Editor
If you are still having the issue, then you can use some Registry edits to sort out the system’s wake up issue.
Warning: Proceed at your own risk as editing your system’s registry requires a certain level of expertise and if done wrong, you may cause everlasting damage to your PC/data.
Before moving on, make sure to create a backup of the system’s registry. Then launch the Registry Editor as administrator and check if the following registry edits resolve the system’s wake up issue.

Set the CsEnabled value to Zero
- Navigate to the following path:
Computer\HKEY_LOCAL_MACHINE\SYSTEM\CurrentControlSet\Control\Power
- Now, in the right pane, right-click in the white area and select New > DWORD (32-bit value).
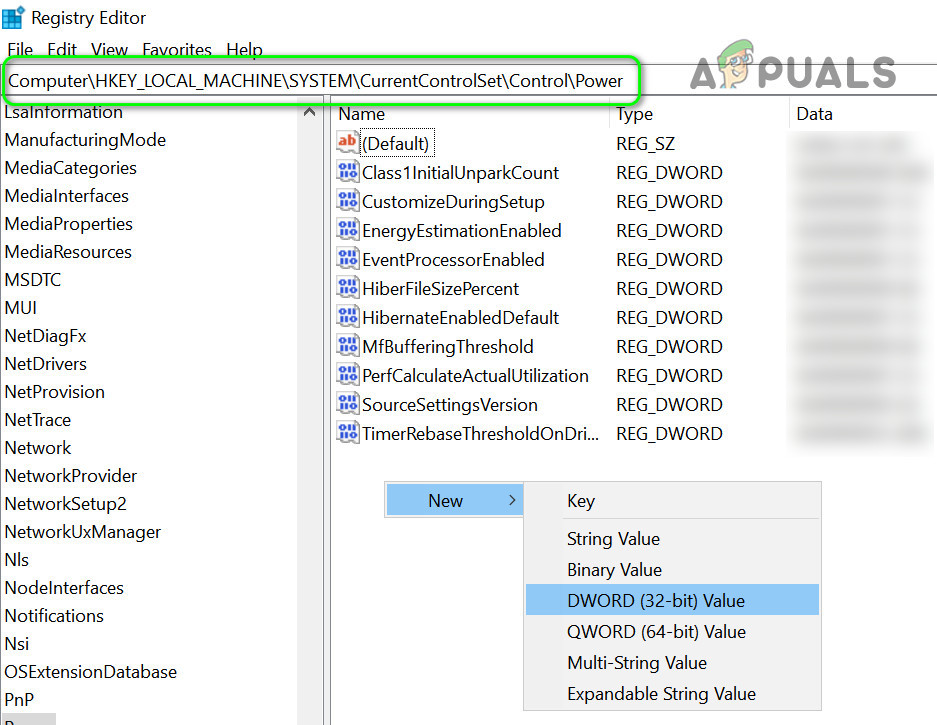
Create a New Dword (32-bit) Value of CsEnabled - Then name the new entry as CsEnabled and set its value to 0.

Set the Value of CsEnabled to Zero - Then exit the editor and check if the system is clear of the wake-up issue.
Create the PlatformAoAcOverride Registry Key
- Press the Windows key and in the Search box, type Command Prompt. Then, in the results shown, right-click on the result of the Command Prompt and choose Run as Administrator.

Open Command Prompt as Administrator - Now execute the following:
reg add HKLM\System\CurrentControlSet\Control\Power /v PlatformAoAcOverride /t REG_DWORD /d 0

Add the PlatformAoAcOverride Key to the Registry - Now reboot your PC and check if the wake-up issue is resolved (you may have to use the S3 power state).
Solution 9: Disable the Scheduled Tasks
The issue may arise if a scheduled task is triggering the wake up of your PC. In this context, disabling the scheduled task (or its ability to wake up your PC) may solve the problem.
- Launch an elevated Command Prompt and execute the following (one by one):
powercfg -lastwake

powercfg /waketimers

powercfg -devicequery wake_armed
- Now check which services/processes are triggering the issue. Then disable the service causing the issue or its ability to wake up your system.
Some users reported that the Update Orchestrator Service caused the issue. . For illustration, we will discuss the process for Update Orchestrator Service.
- Hit the Windows key and in the Windows Search box, type Task Scheduler. Then open the Task Scheduler.

Open the Task Scheduler - Now expand the Task Schedule Library > Microsoft > Windows and then, in the left pane, select Update Orchestrator.
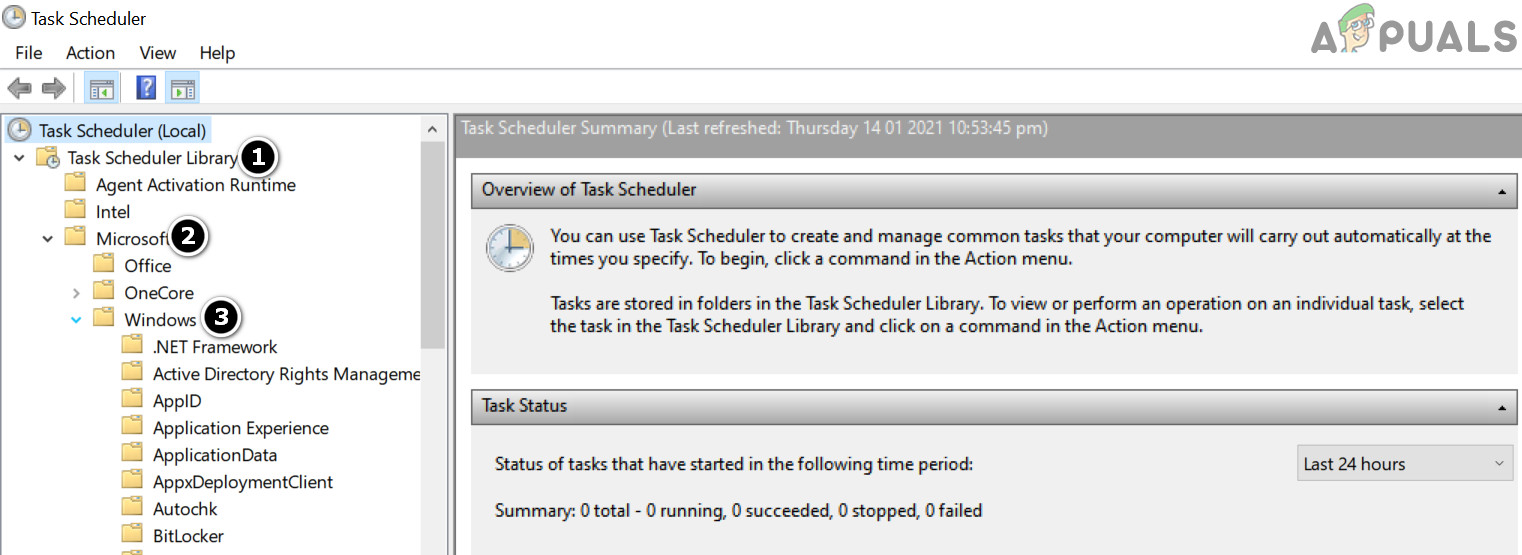
Expand Windows in the Task Scheduler Library - Then, in the right pane, double-click on any of the tasks (e.g., Backup Scan) and navigate to the Conditions tab.
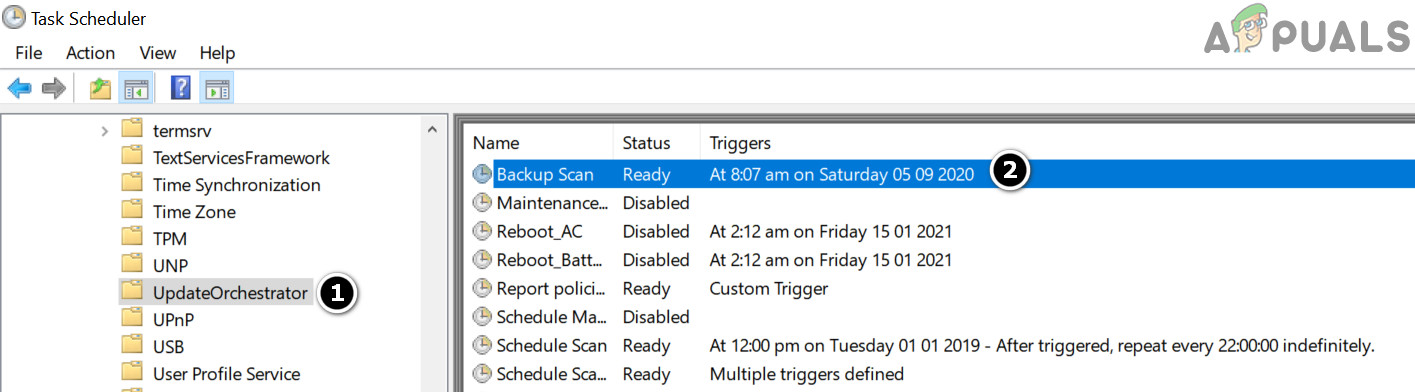
Open the Backup Scan Task in the Task Scheduler - Now uncheck the option of Wake the Computer to Run This Task and click on the OK button.
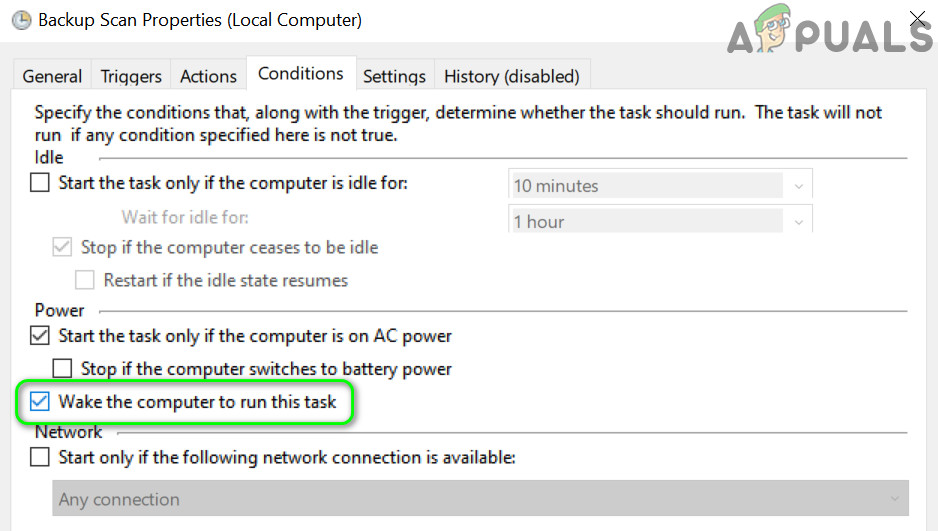
Uncheck the Option of Wake the Computer to Run This Task for the Backup Scan - Then repeat the same to any other task that can wake the computer and check if the system’s wake-up issue is resolved.
If the Wake the Computer to Run This Task is greyed out, then you may have to use a utility like PsTools, PsExec, or PowerRun that can enable a user to launch the Task Scheduler with System or TrustedInstaller privileges.
For illustration, we will discuss the process for the PsExec utility.
- Download the PsExec utility and then extract the contents of the downloaded file to a folder.
- Then launch an elevated Command Prompt and in the Command Prompt, navigate to the extracted folder by using the CD command.
- Now, execute the following in the Command Prompt:
psexec.exe -i -s %SystemRoot%\system32\cmd.exe
- Then a new Command Prompt will be launched with the System account privileges. Now, in this new Command Prompt, execute the following to launch the Task Scheduler with the System account privileges:
taskschd.msc
- Now repeat the process discussed above to disable the Wake the Computer option for the problematic task.
If that did not do the trick and you are tech-savvy, then you may create a scheduled task that executes a Command Prompt/PowerShell script/batch file to stop the task causing the issue.
Solution 10: Edit the System’s BIOS Settings
If none of the solutions has worked for you, then disabling the devices’ ability in the system’s BIOS to wake the PC may solve the problem. But keep in mind that the instructions mentioned below may differ a bit for you.
Warning: Advance at your own risk as editing the system’s BIOS requires a certain level of proficiency and if not done properly, you may brick your system and cause everlasting damage to your data.
- Boot your system into the system’s BIOS and navigate/expand the Power Management tab.
- Now open Auto on Time and disable it.
- Then open USB Wake Support and select Disabled.
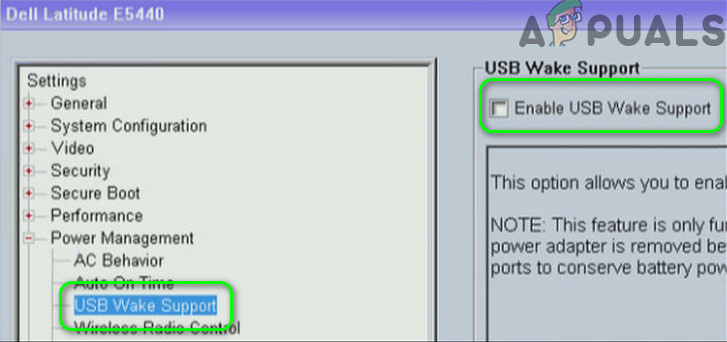
Disable USB Wake Support in the System’s BIOS - Now apply the changes and open Wake on LAN/WLAN.
- Then select Disabled and apply your changes.
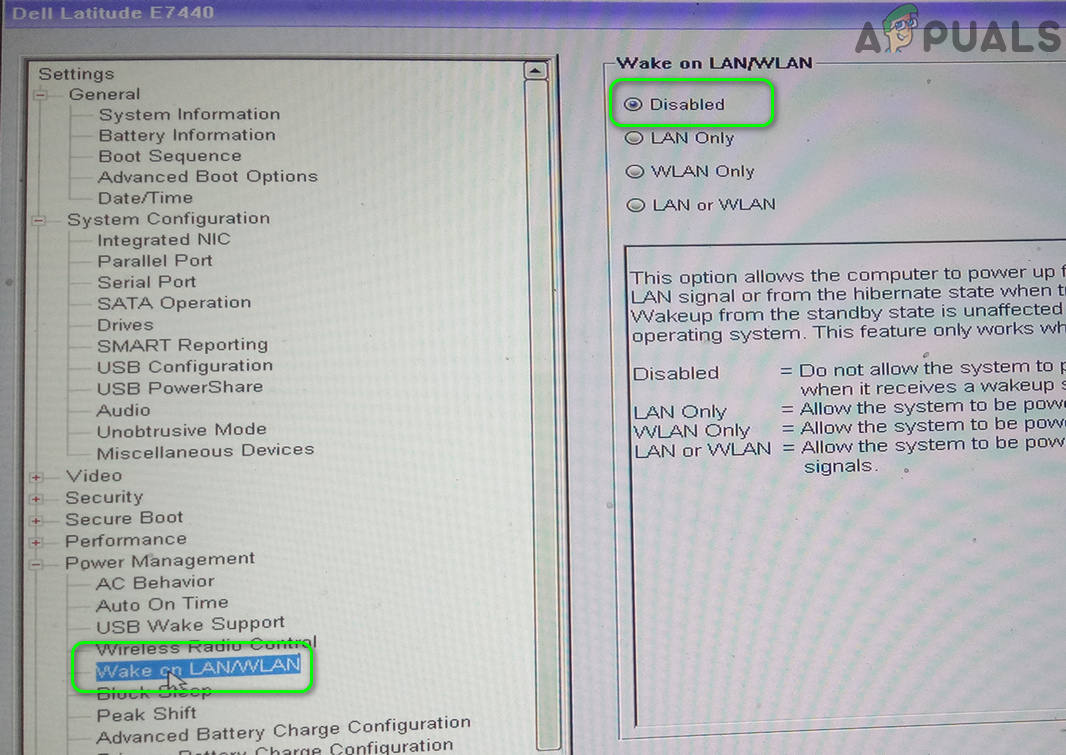
Disable the Wake on LAN WLAN in the System’s BIOS - Now boot your system in Windows and check if the wake-up issue is resolved.
If the issue is still there, then check if switching your monitor’s connection mode from HDMI to analog resolves the issue.


Kudos on a great guide here. I’ve been frustrated over my PC (desktop rig) either not going to sleep according to plan settings or waking up when it felt like it for…. a very long time. Every time I think I have it solved, there’s some other dumb OS level setting causing it. It seems like MS is doing everything in their power to waster power!! Anyway, I went through a lot of these and bookmarked for later in case I need to go to regedit or bios. Thank you!