How to Fix the Destiny 2 BattlEye Error Code “Plum”
There are times when the error code “plum” occurs alongside the error message “Battleye has detected a problem.” This error indicates that the anti-cheat system has detected suspicious activity that violates Bungie’s terms of service.
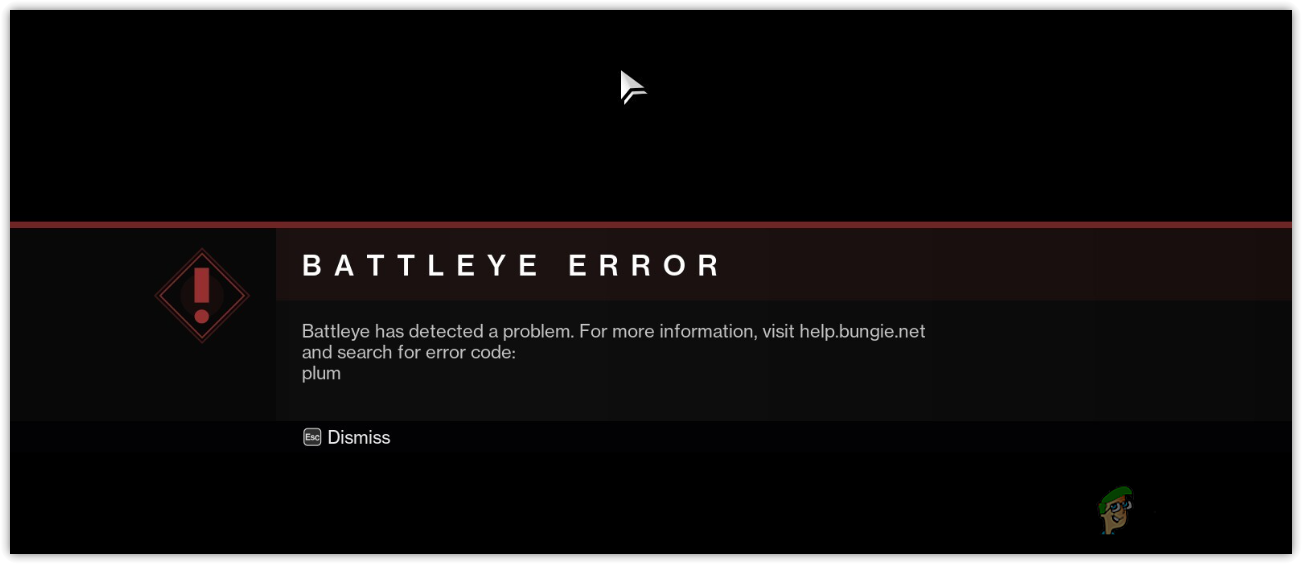
Battleye is designed to monitor processes running in the background. It displays the error code “plum” when it detects any suspicious activity to protect the game and its players from cheaters and hackers. However, this does not always indicate malicious intent, as various factors can trigger this error.
Some of these factors include overlay applications, outdated Windows, corrupted system files, slow internet, and network booster or acceleration applications.
Additionally, if you have recently upgraded hardware components, particularly the GPU, it may be necessary to re-install the GPU driver using the DDU application.
1. Disable Steam Input for Destiny 2
For those using a controller on their PC, it’s recommended to disable it in Steam if Destiny 2 is mistakenly interpreting input from the controller and causing the anti-cheat to detect external activity. Disabling the controller and Steam input for Destiny 2 has resolved the “plum” error for numerous users.
- Open Steam and navigate to Library.
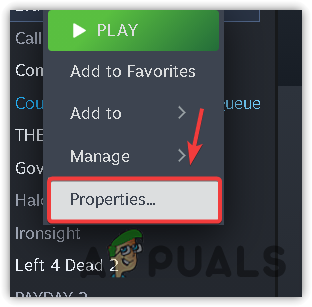
- Right-click on Destiny 2 and select Properties.
- Go to Controller Settings on the left and select Disable Steam input.
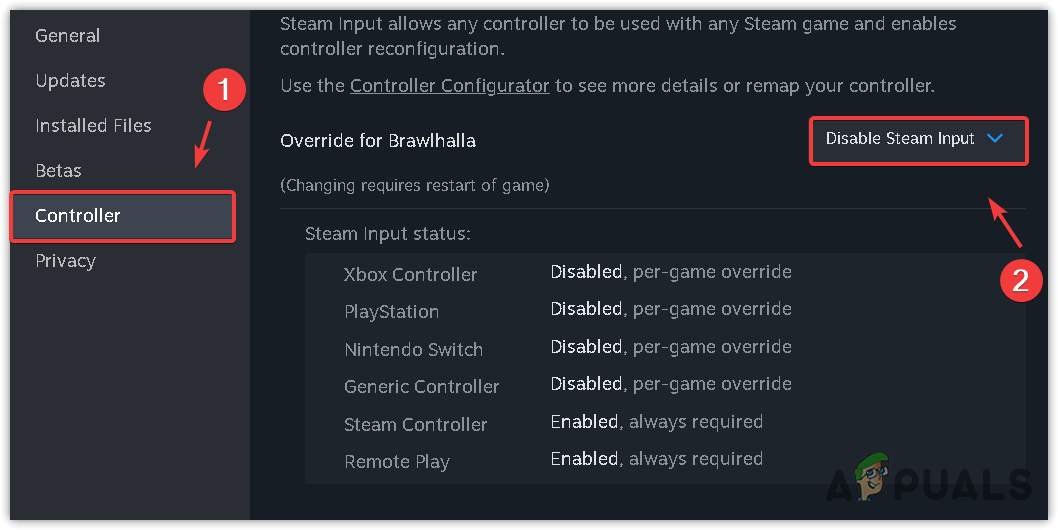
- Deactivate Xbox Configuration Support within the controller settings of Steam.
- Verify if the error has been resolved.
2. Update Windows
Using outdated versions of Windows can lead to compatibility issues with current games and software.
The game’s developers also recommend keeping Windows updated to prevent the “plum” error. Check your Windows version and update it to possibly resolve this issue.
- Press the Win key to access the Start Menu.
- Type in Check for updates and press Enter to open the Windows Update settings.
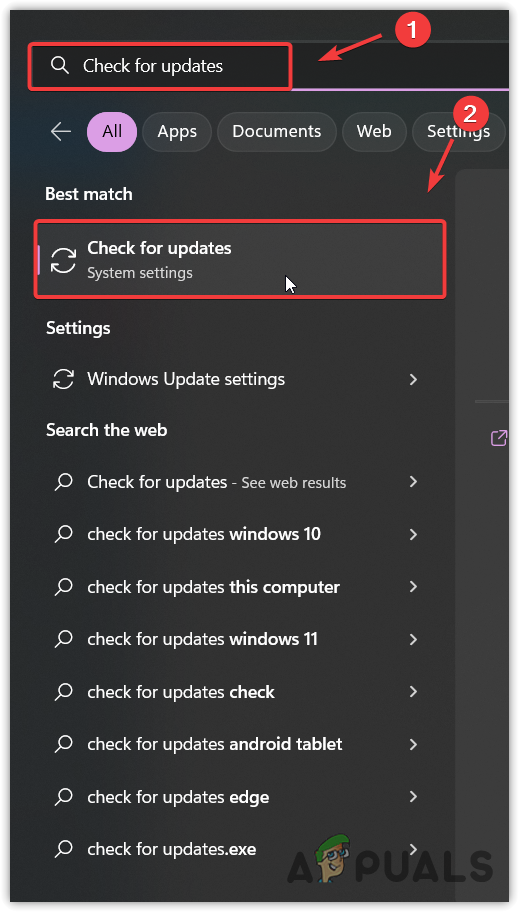
- Click Check for updates. If updates are available, select Download and Install.

- Restart your PC to install the updates.
- Afterward, check whether the error code “plum” is resolved.
3. Reinstall Battleye
If Battleye displays the error code “plum” erroneously, reinstalling it may rectify the problem.
- Open Steam and proceed to your Library.
- Right-click on Destiny 2, hover over Manage, and select Browse local files.
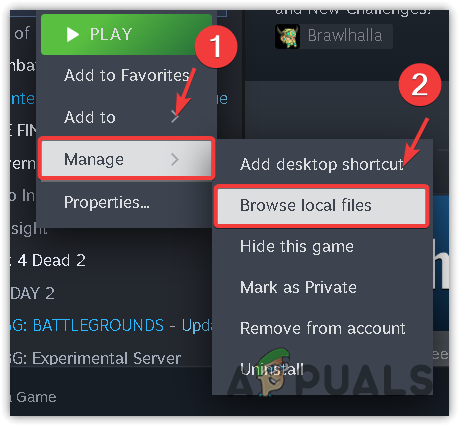
- Navigate to the Battleye folder and run the Uninstall_BattlEye.bat file to remove BattlEye.
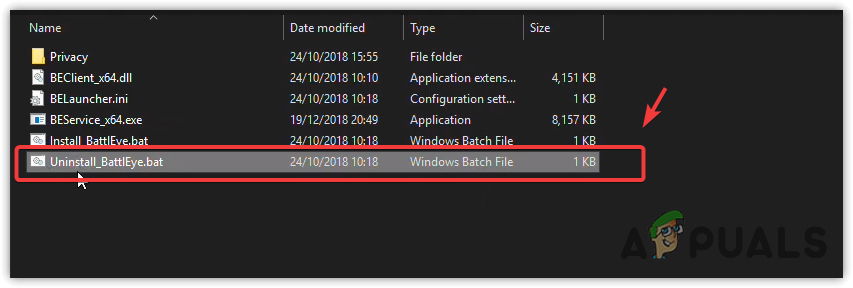
- You may choose to delete the Battleye folder, though using the Uninstall_BattlEye.bat is preferable.
- Launch Destiny 2 to reinstall Battleye. If problems arise, right-click on Destiny 2 in your Library.
- Select Properties, then Installed Files on the left, and click Verify the integrity of game files.
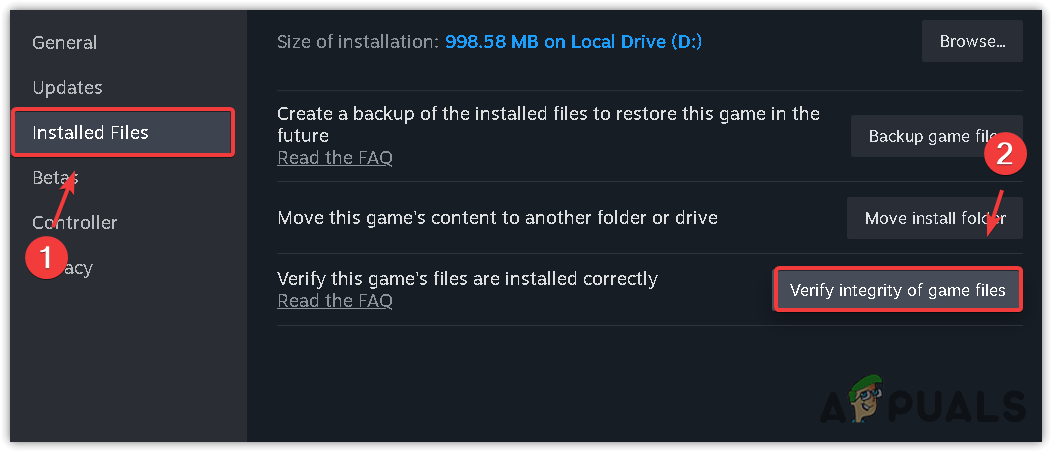
- Finally, start Destiny 2 to see if the issue has been fixed.
3. Run sfc /scannow
The System File Checker (SFC) utility can repair or restore system files that might be causing the “plum” error.
- Press the Win key and enter Command Prompt.
- Right-click on it and choose Run as administrator.
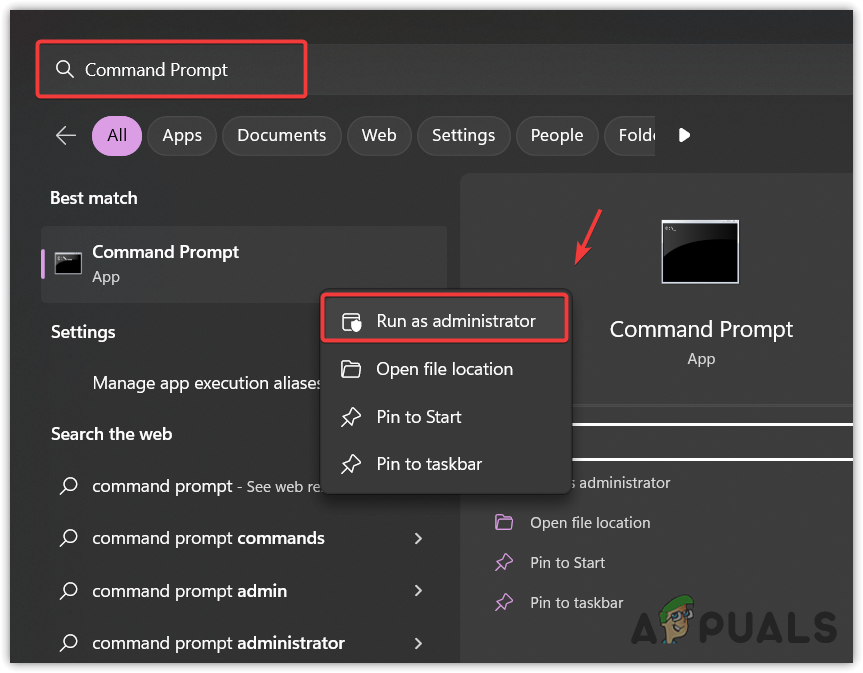
- Enter the following command and press Enter:
sfc /scannow
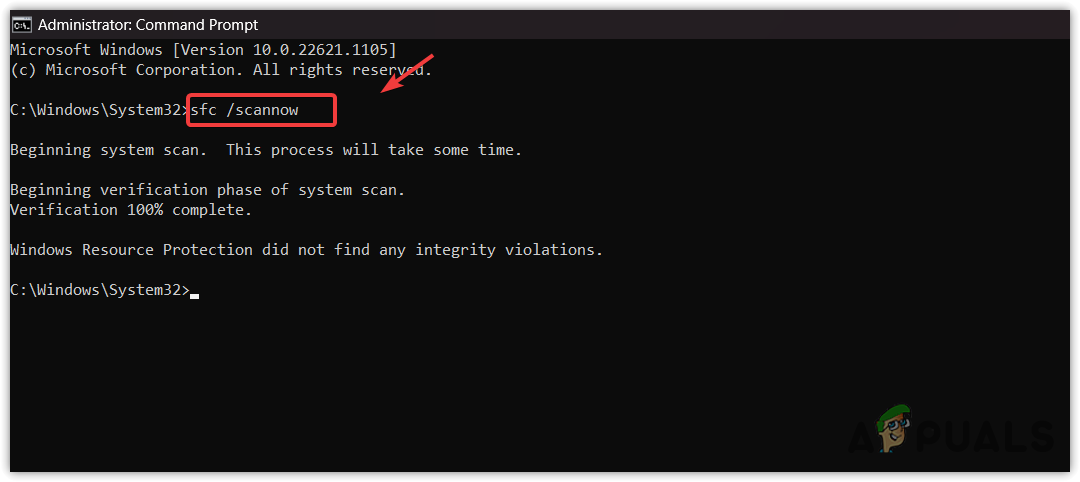
- After the verification is complete, launch Destiny 2 to check if you can play.
4. Run Xbox Networking (Outdated Windows)
For users on older Windows versions who installed Destiny 2 from the Xbox app, running the Xbox networking tool can help with network-related issues that may result in the “plum” error.
- Use the Win + I keyboard shortcut to open Windows Settings.
- Go to Gaming > Xbox Networking.
- Click Fix it to utilize the tool.
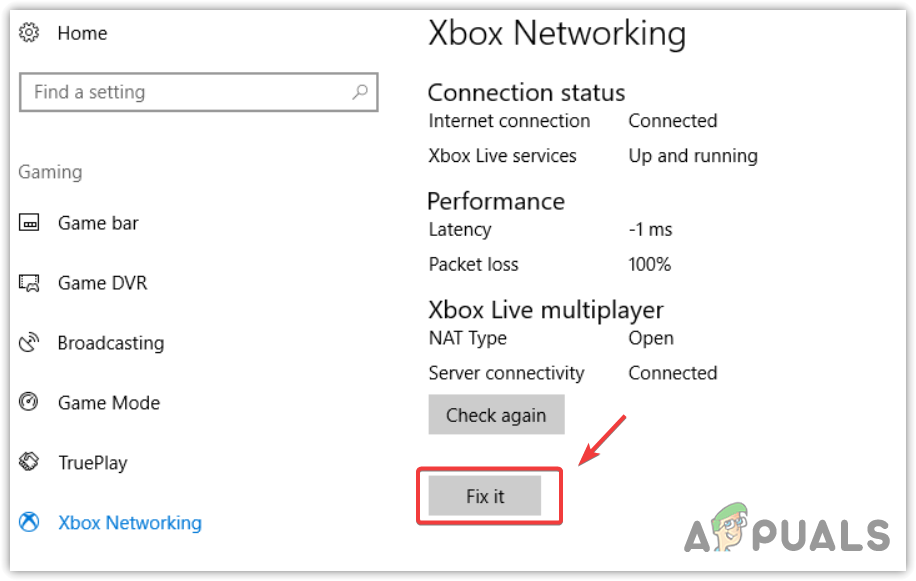
- Afterward, reevaluate the existence of the error.
5. Reset Your Network Settings
Resetting network settings can rectify the “plum” error if it was caused by incorrect network configurations like custom DNS settings.
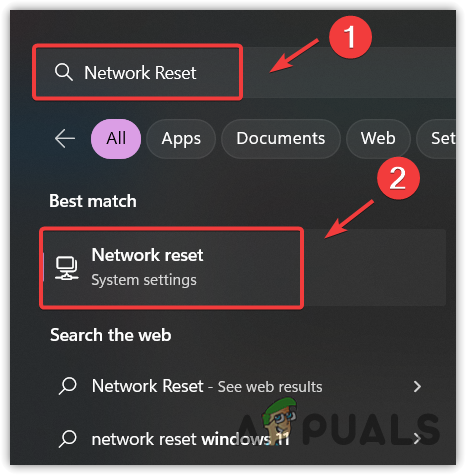
- Type Network Reset into the Windows Search bar.
- Press Enter to reach the settings.
- Click Reset Now to begin the reset process.
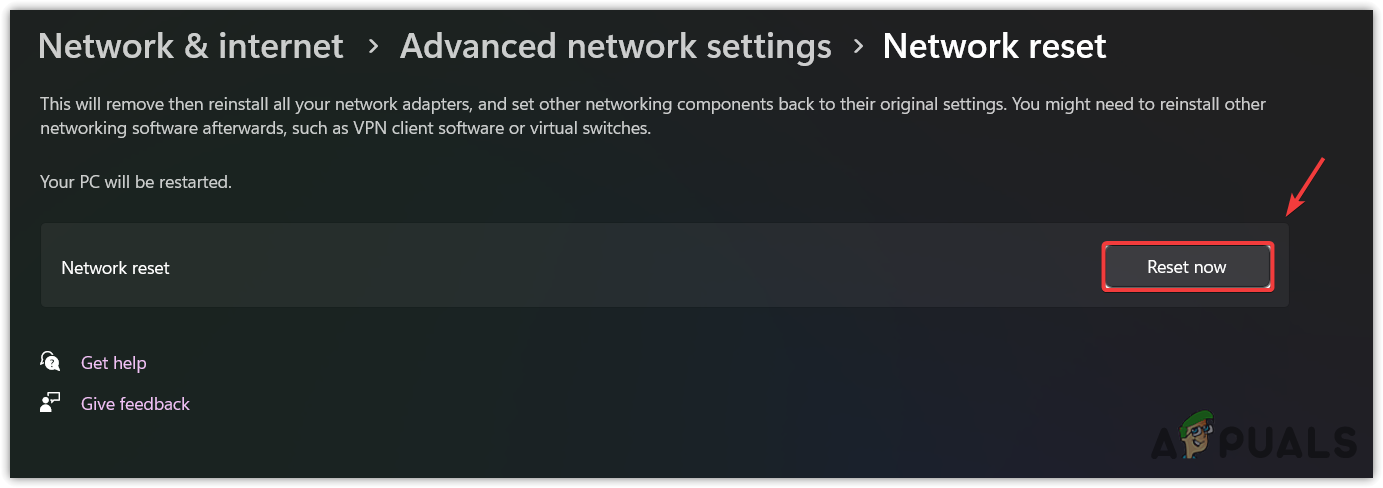
- Then, test Destiny 2 for the error code “plum”.
6. Add the Destiny 2 Executable File to the Exclusion List
Interference from antivirus programs, such as Windows Defender or third-party tools like Avast, may cause the “plum” error.
Adding Destiny 2’s executable to your antivirus program’s exclusion or exceptions list will instruct it to bypass that file during scans, potentially resolving the error.
To add the exclusion, utilize the following instructions based on the antivirus software being used:
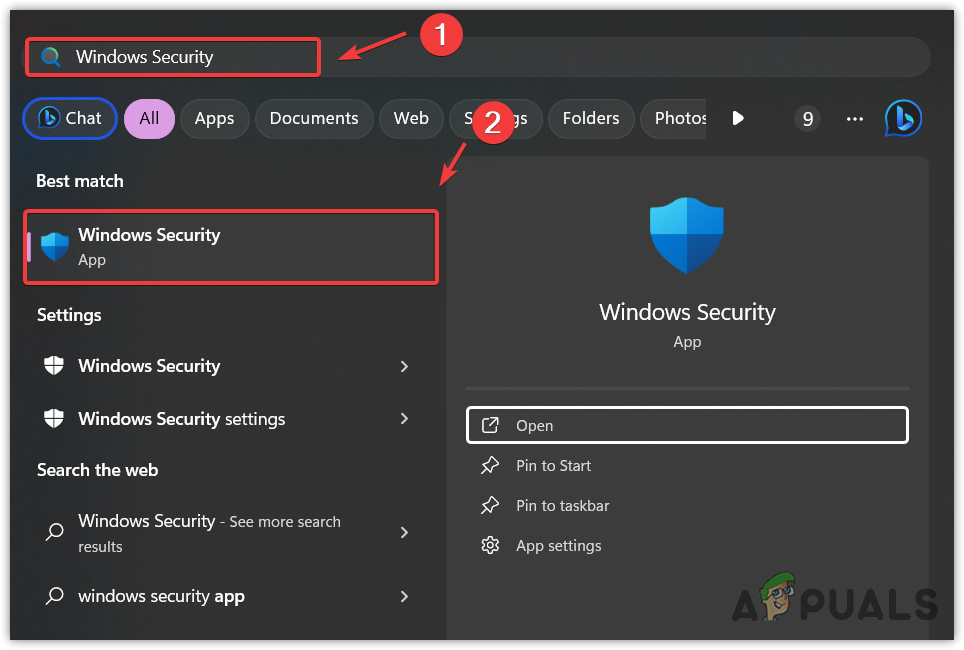
- Open the Start Menu and search for Windows Security.
- Press Enter to open the respective settings.
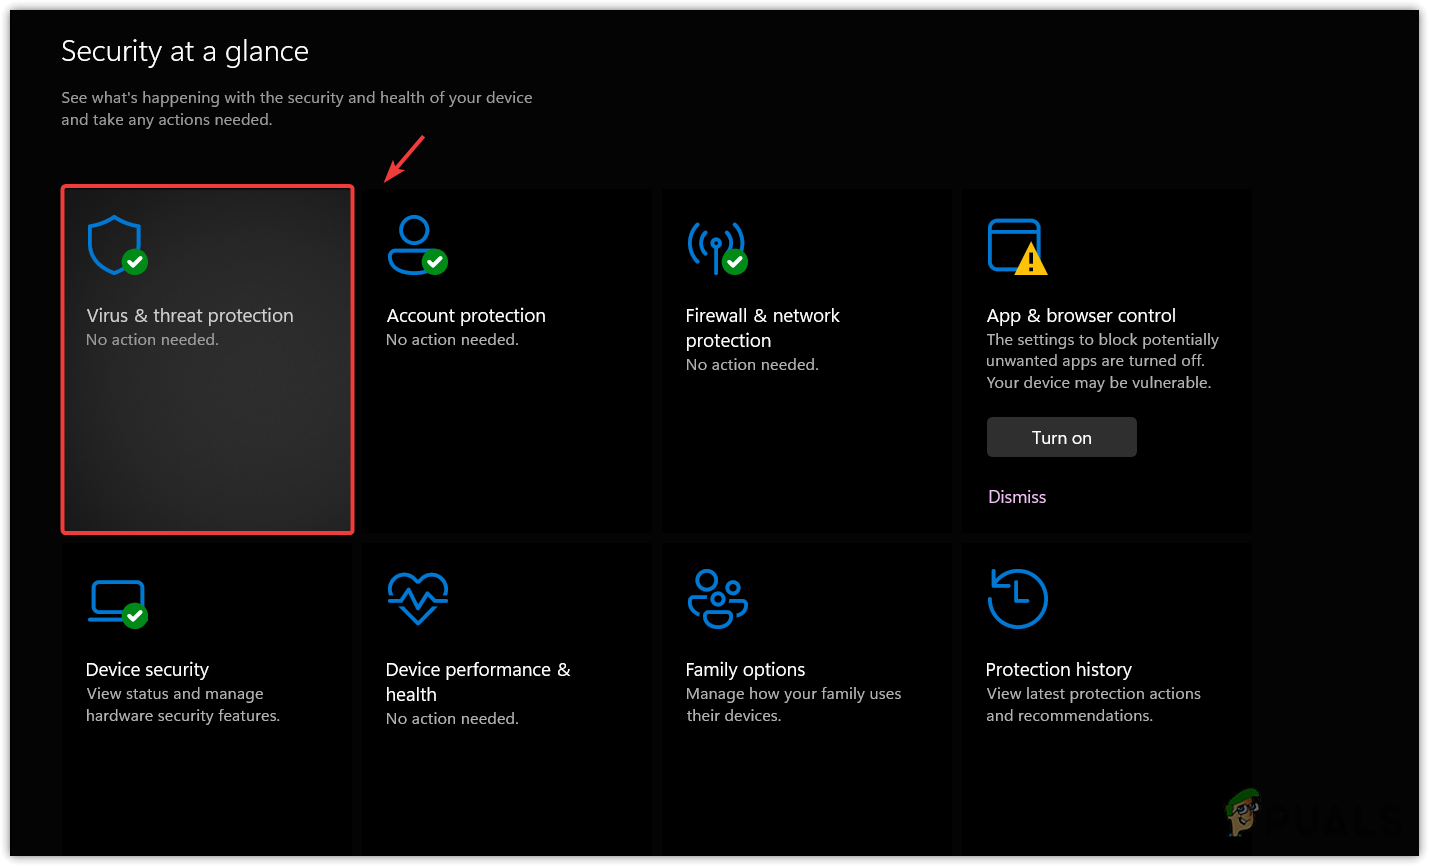
- Choose Virus & Threat Protection.
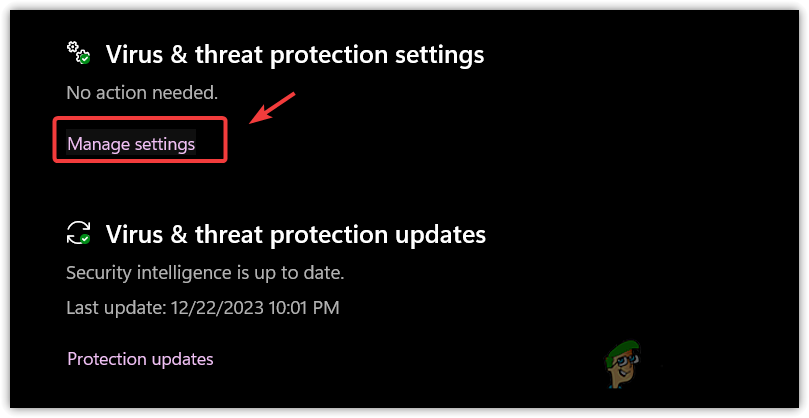
- Select Manage Settings and scroll to the bottom.
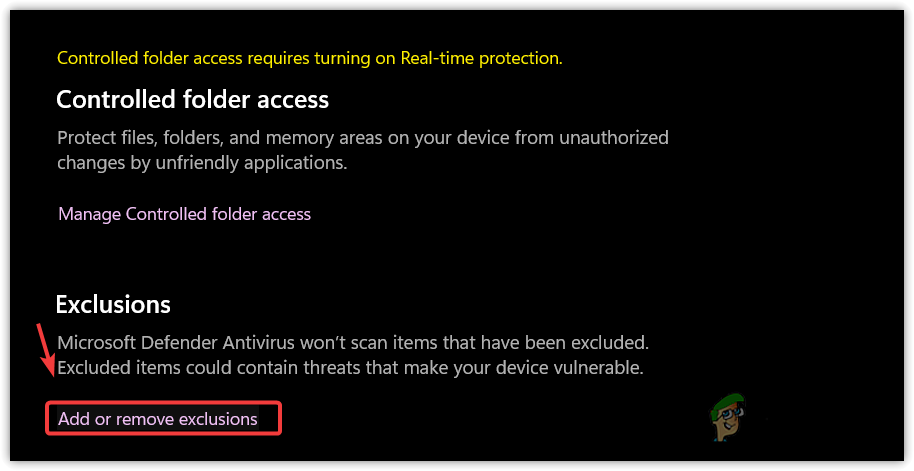
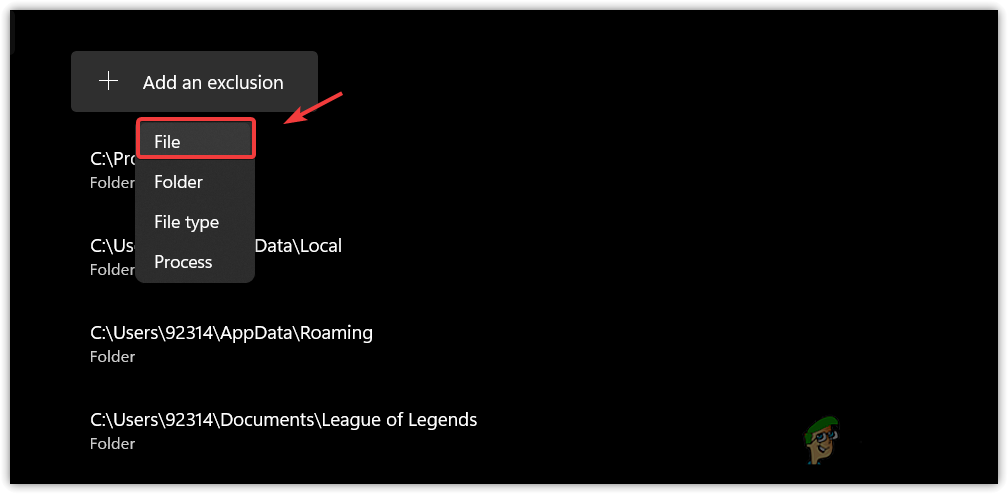
- Select Add or Remove Exclusions followed by Add an Exclusion.
- Choose File, locate the Destiny 2 directory, and pick the game’s executable.
- Finally, start Destiny 2 to confirm if this resolved the issue.
Guidance is provided for Avast antivirus; procedures might differ for other antivirus applications.
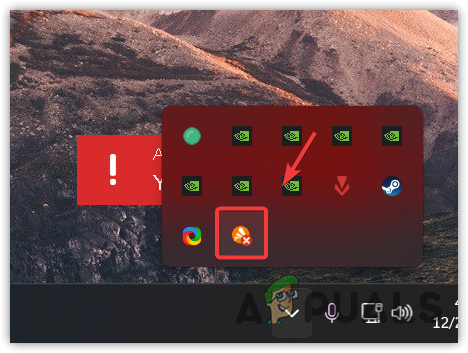
- Open the antivirus interface by double-clicking its icon in the system tray.
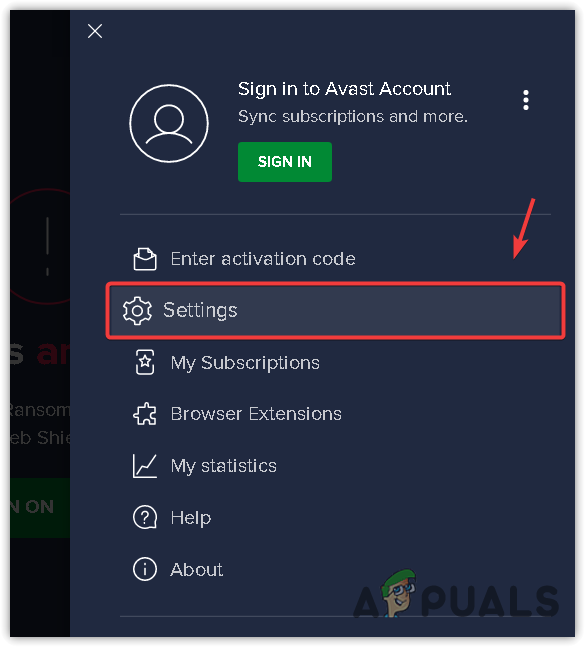
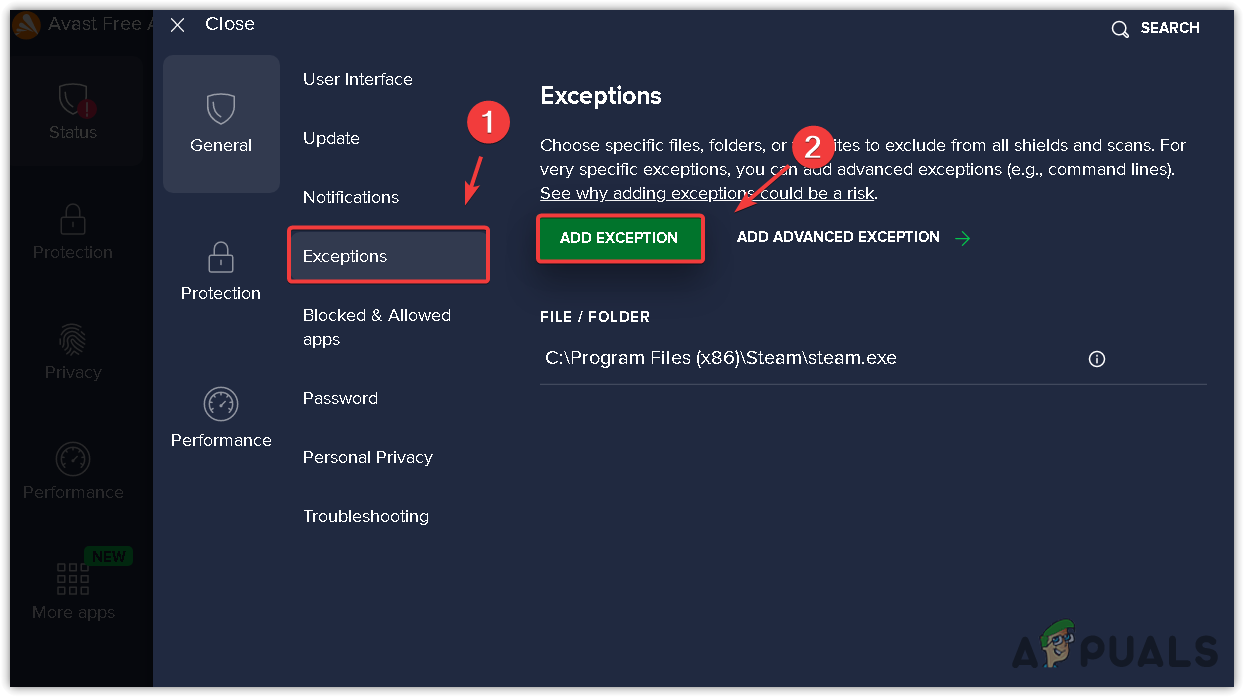
- Navigate to Settings > Exceptions.
- Select Add Exception and then Browse.
- Locate and choose the Destiny 2 executable.
- After adding it, click Add Exception.
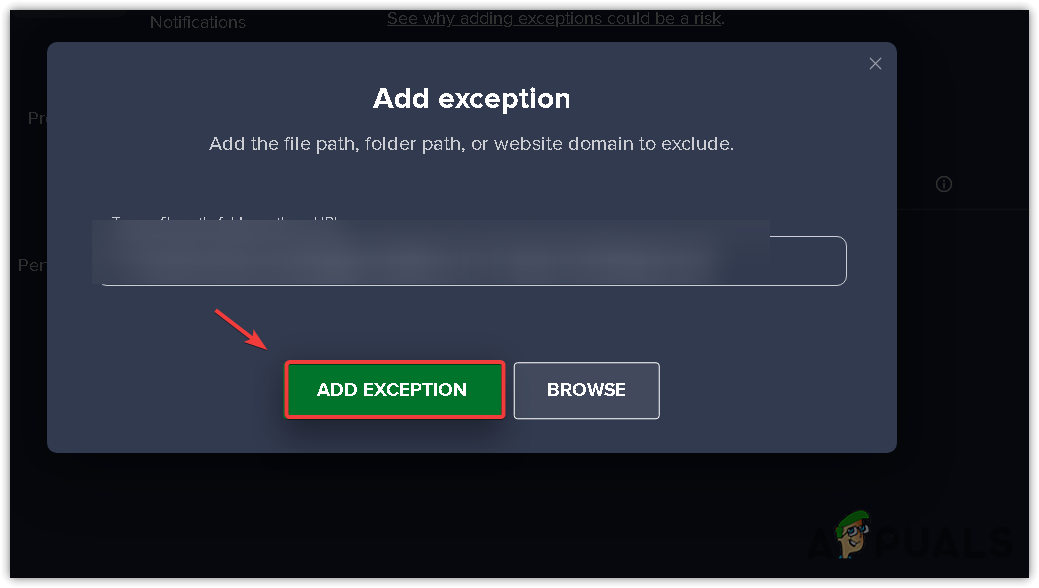
- Relaunch Destiny 2 and assess the presence of the error.
7. Uninstall Network Booster or Accelerator Applications
Network boosting apps, though designed to improve network performance, can introduce complications with gaming. Many anti-cheat systems may prohibit the use of software designed to enhance network performance or minimize ping. Therefore, if you are using any network booster applications, uninstalling them might resolve the “plum” error.
8. Disable Overlay Applications and Other Background Tasks
Overlay applications provide a convenient way to access additional features while gaming, but they can significantly consume system resources and interfere with game files, causing crashes and errors.
Ensure that unnecessary applications, including those providing overlay features, are closed when playing Destiny 2.
We’ve provided instructions for disabling overlays in popular applications like Steam, Discord, and GeForce Experience:
- In Steam, go to your Library.
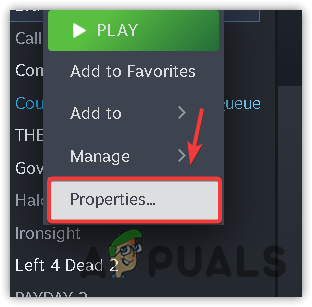
- Right-click on Destiny 2 and choose Properties.
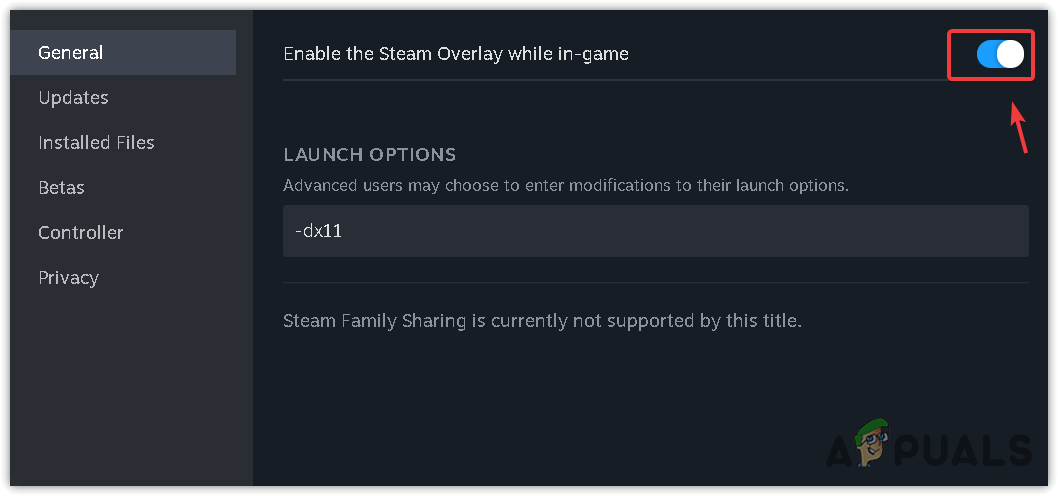
- Uncheck the option Enable the Steam Overlay while in-game.
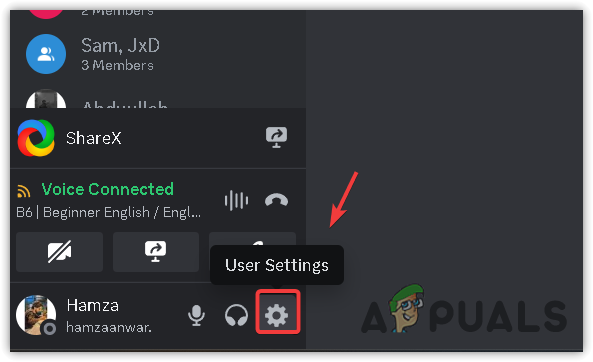
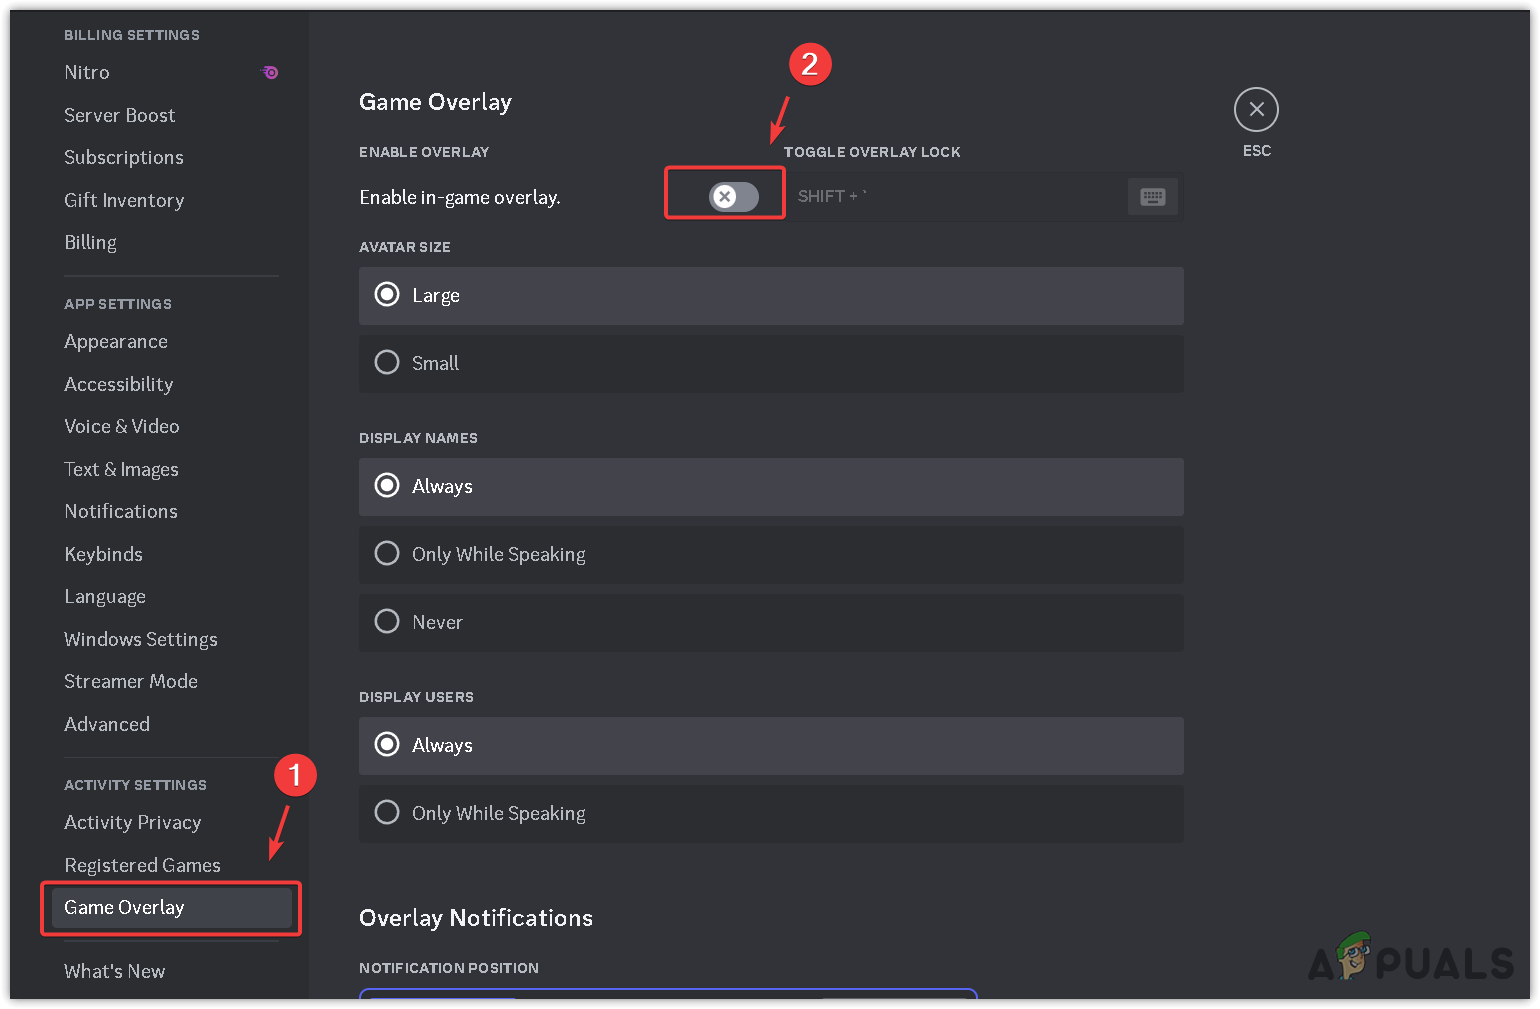
- Navigate to Settings in Discord, located at the bottom left.
- Scroll to Activity Settings and click on Game Overlay.
- Disable the toggle for Enable in-game overlay.
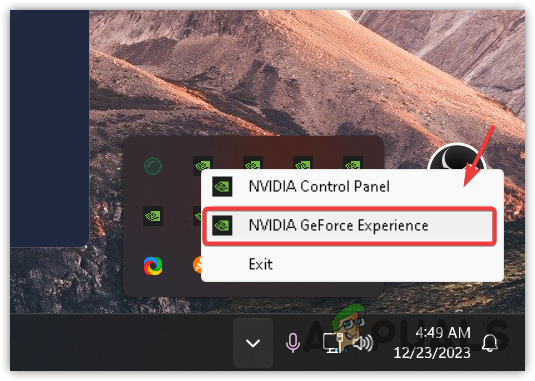
- Right-click the Nvidia icon in the System Tray and choose Nvidia GeForce Experience.
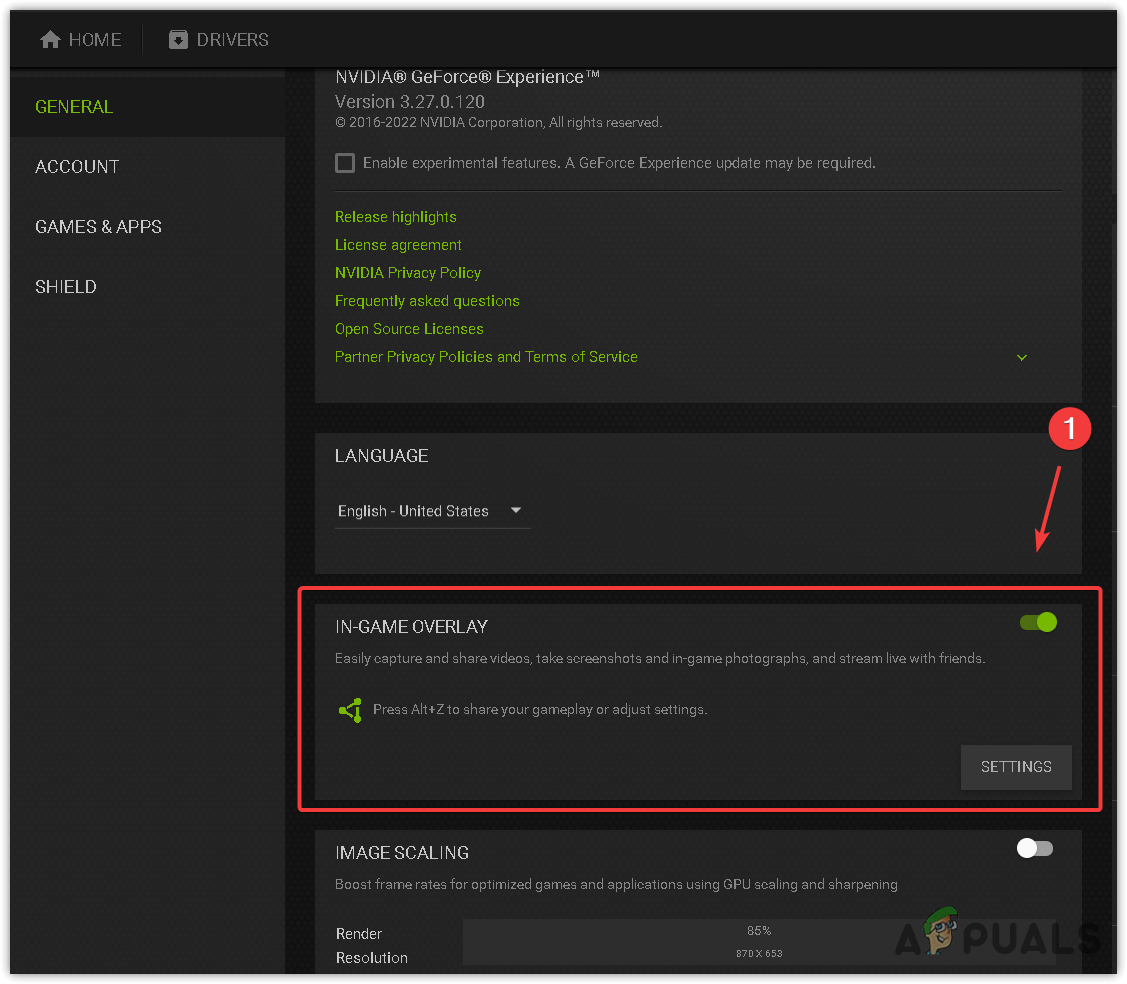
- In the top-right corner, select Settings and turn off In-Game Overlay.
9. Use an Ethernet Connection (If Possible)
A weak Wi-Fi signal or packet loss, even with adequate internet speed, can lead to the “plum” error. For a more stable network connection, it’s advisable to use an Ethernet connection if available.
Throughout this article, we have detailed every solution proven effective for users plagued by this error. Should the “plum” error persist, consider reaching out to Destiny 2’s support team. You can submit a ticket via the provided link and, in the interim, attempt to reinstall the game while you await a response.


