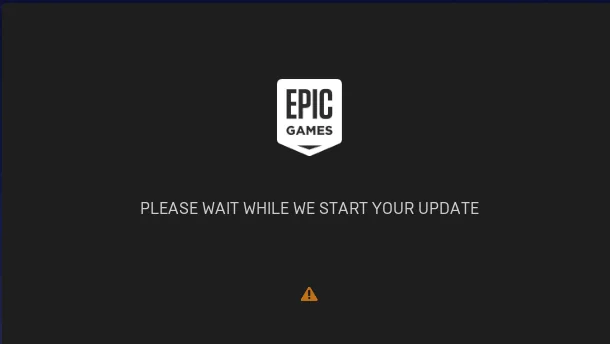
Fix “Please Wait While We Start Your Update” in Epic Games Launcher
When the Epic Games Launcher hangs with the message “Please wait while we start your update”, it indicates that the updater component has failed to begin the installation of required files. Even though the launcher appears to load, it remains stuck and prevents games or updates from proceeding.
The root of the issue is typically a broken or blocked update sequence. This can happen when a local web-cache folder becomes corrupted, network proxy settings interfere with communication to Epic’s servers, or insufficient permissions prevent the launcher from initializing the update process. Many users also encounter this after system updates or when switching networks.
1. Add -http=winnet to Target Options
This command-line parameter forces the Epic Games Launcher to use the Windows native WinINet HTTP system instead of its internal network module. Doing so allows the launcher to rely on Windows’ built-in management of certificates, proxies, and HTTPS connections.
This approach improves compatibility with corporate networks, VPNs, and systems that block Epic’s custom HTTP requests. Adding this parameter often resolves update or startup issues.
- Right-click the Epic Games icon in the system tray and select Exit.
- Now, right-click the Epic Games Launcher shortcut on your desktop and choose Properties.
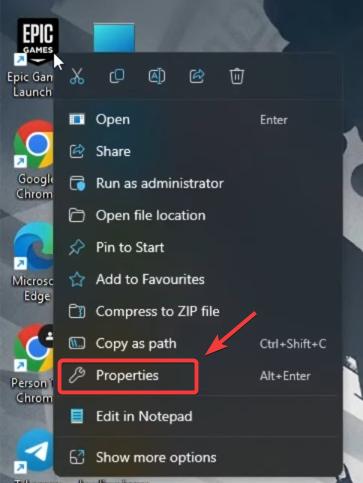
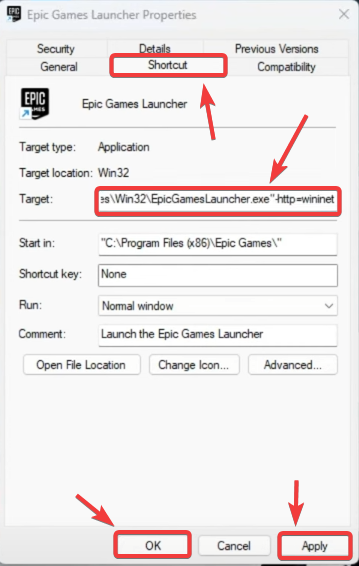
- In the Shortcut tab, locate the field labeled Target.
- At the end of the text inside the Target field, add a space and then type:
-http=winnet
- Click Apply, then OK to save your changes.
- Launch the Epic Games Launcher again and check if the “Please wait while we start your update” message no longer appears.
2. Disable Proxy Settings
Active proxy configurations can interfere with update requests by redirecting or blocking connections. Disabling the proxy ensures the launcher communicates directly with Epic’s servers without a middle layer that might disrupt HTTPS sessions.
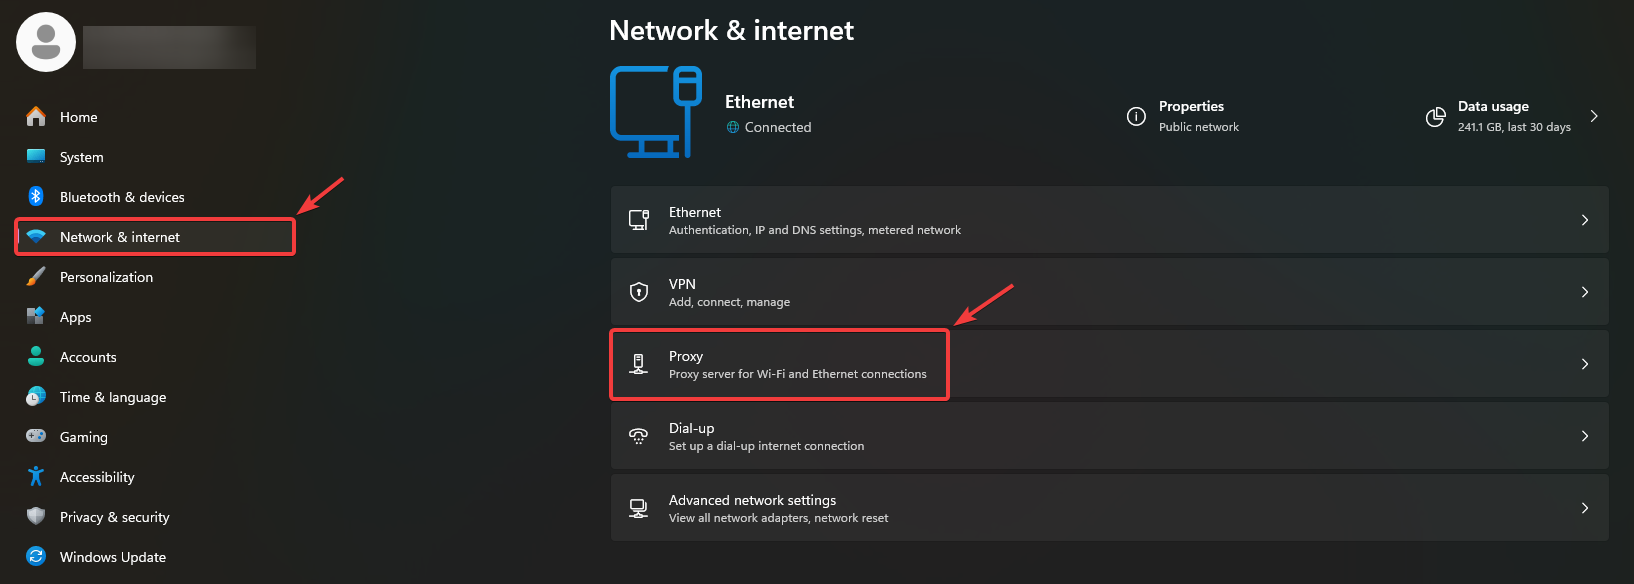
- Press Windows + I to open Settings.
- Navigate to Network & Internet → Proxy.
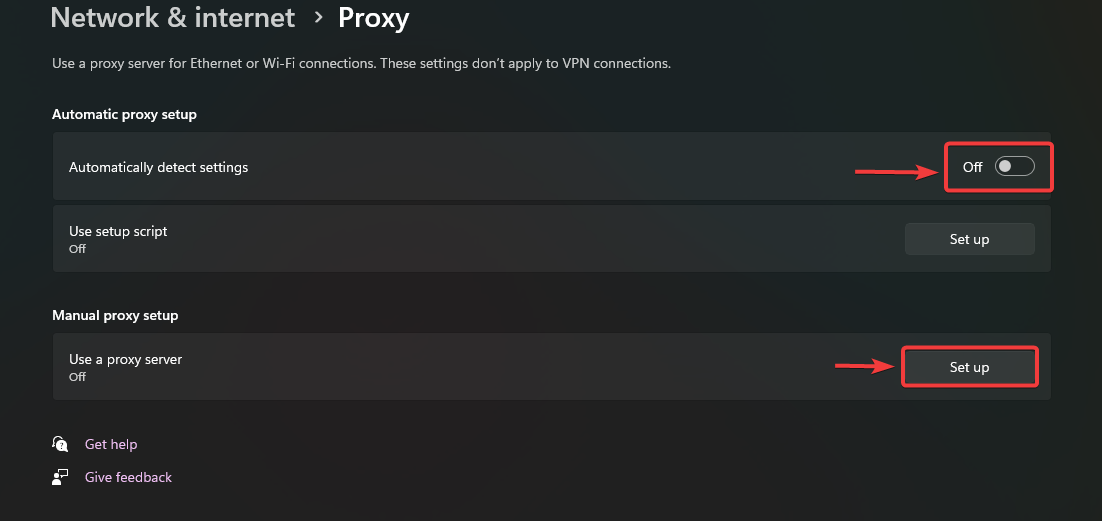
- Under Automatic proxy setup, toggle Automatically detect settings to Off.
- Under Manual proxy setup, ensure Use a proxy server is turned off.
- Restart your PC to apply the changes.
- Once restarted, open the Epic Games Launcher again and verify if it updates successfully.
3. Edit WindowsEngine.ini (or Engine.ini)
This problem can also occur due to SSL verification conflicts or outdated certificates. Adjusting the configuration file to disable SSL-based CDNs helps the launcher bypass certificate validation and use standard HTTP connections instead.
This solution is particularly helpful on networks that filter SSL traffic or contain expired certificates.
- Right-click the Epic Games icon in the system tray and choose Exit.
- Open File Explorer and go to:
C:\Users\<YourUsername>\AppData\Local\EpicGamesLauncher\Saved\Config\Windows
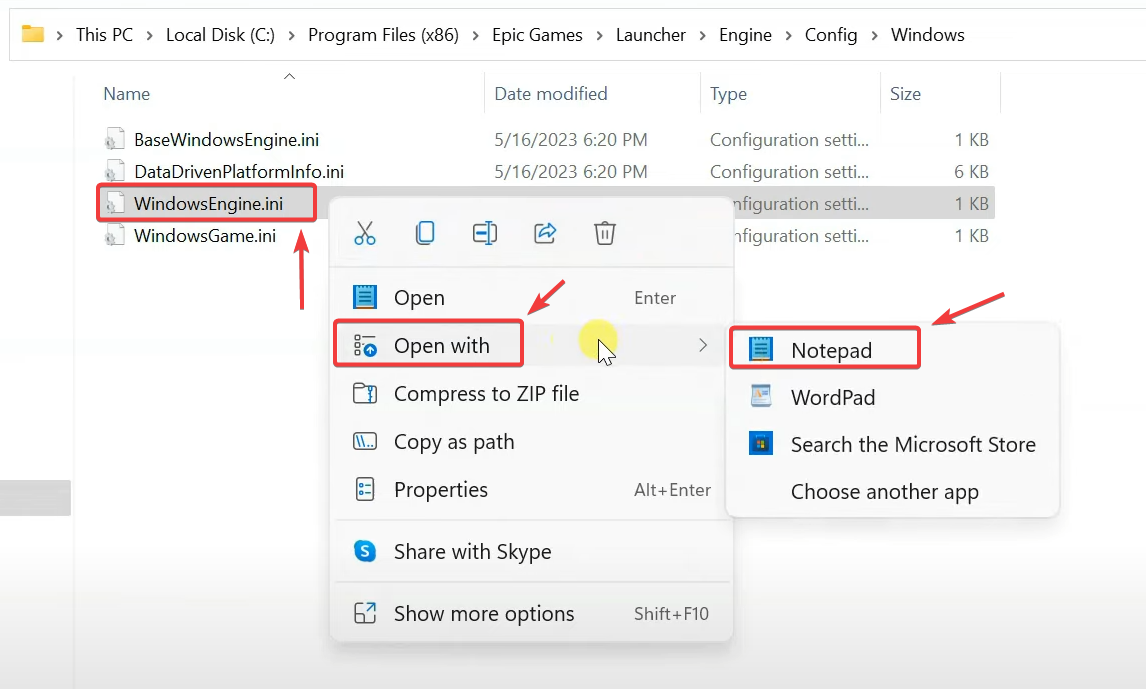
- Locate the file named WindowsEngine.ini.
- Right-click it and select Open with → Notepad.
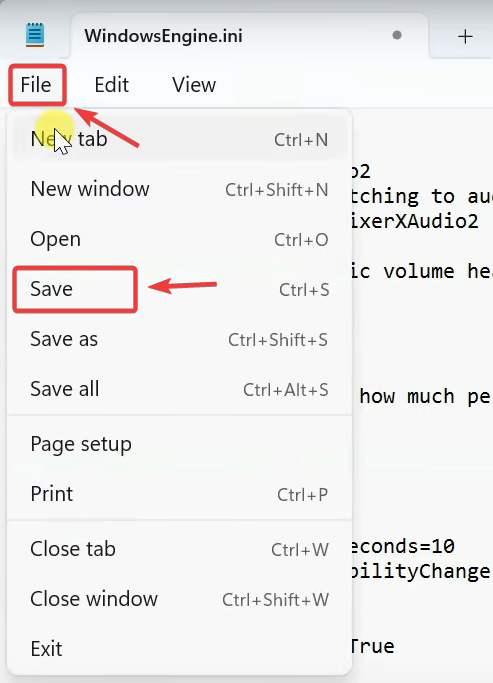
- Scroll to the bottom and add the following lines:
[Launcher] ForceNonSslCdn = false
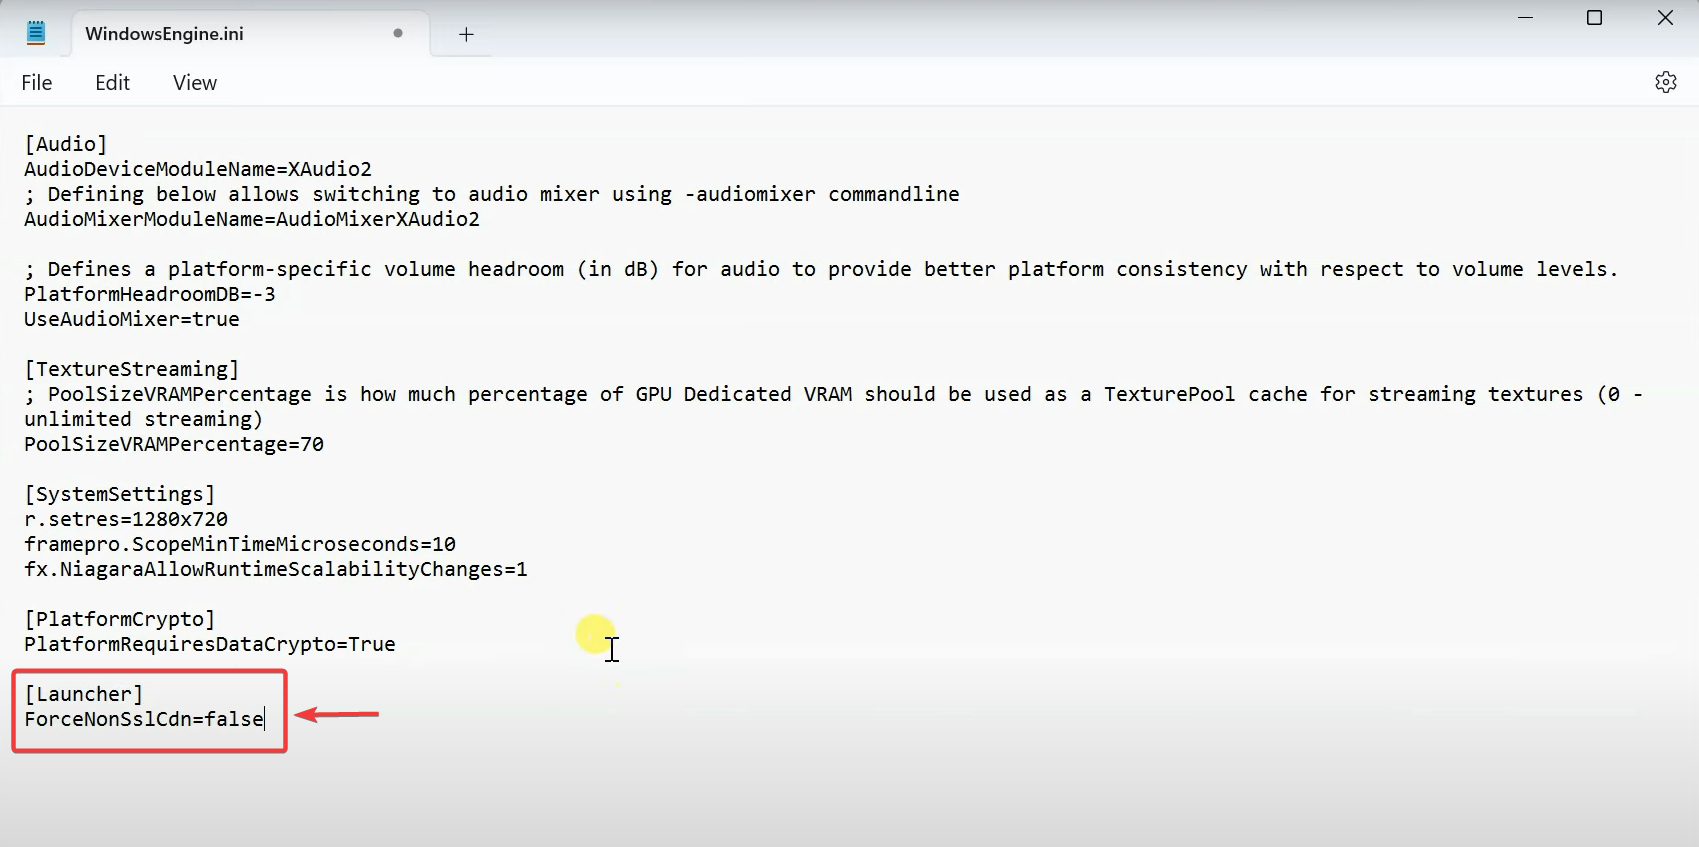
- Save the file (Ctrl + S) and close Notepad.
- Restart your PC and reopen the launcher.
4. Run the Launcher as Administrator / Restart PC
Running the Epic Games Launcher with administrator privileges ensures it can access protected system paths and modify configuration data as needed. This eliminates permission-based blocks that can interrupt update initialization.
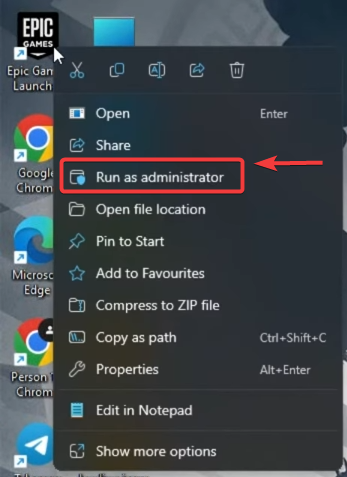
To do this, right-click the launcher and choose Run as administrator.
If the issue continues, restart your computer to reset temporary processes and clear memory locks that might be hindering update execution.
5. Clear Web Cache / Delete Local Launcher Data
A corrupted web cache or outdated configuration data can prevent the launcher from completing its update sequence. Removing this data forces Epic Games Launcher to rebuild new connection entries and fetch fresh configuration files directly from its servers.
- Right-click the Epic Games icon in the system tray and choose Exit.
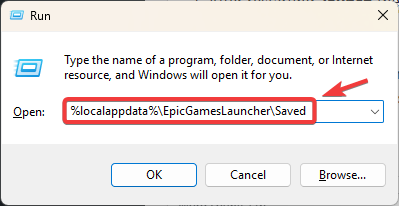
- Press Windows + R to open the Run dialog box.
- Type the following and press Enter:
%localappdata%\EpicGamesLauncher\Saved
- Inside the Saved folder, locate and delete the following:
webcache webcache_4147 (if it exists) logs

- Go back to the EpicGamesLauncher directory and delete the Intermediate folder (if present).
- Restart your computer.
- Once restarted, open the Epic Games Launcher. It will automatically recreate fresh cache and configuration files.
If the issue persists after all the above methods, perform a clean reinstallation of the Epic Games Launcher. This ensures every outdated or corrupted component is replaced with a new one, completely resetting the launcher’s update mechanism.