Phasmophobia Mic Not Working? [Here’s how to Fix It]
In Phasmophobia, players are required to use the microphone in order to complete a lot of objectives. But for some players, an issue is preventing them from using their correctly connected microphone when playing the game.
After investigating this particular issue thoroughly, it turns out that there are several different underlying scenarios that might trigger this particular microphone issue when playing the game. Here’s a shortlist of potential culprits that might be responsible for this issue:
- Incorrect microphone is used by the game – In a lot of situations, the microphone was not working inside the game because the game is defaulting to a different microphone than the one you are trying to use. In this case, you can rectify the issue by using the Audio menu to select the correct microphone.
- The microphone is not set as the Default – You can expect to face this issue if your Windows installation is currently recognizing a different recording device as the default choice. If this scenario is applicable, you should be able to fix the issue by adjusting the Windows Settings for the recording devices.
- Exclusive Mode or Enhancements Enabled – If your recording device is configured to use Exclusive mode or a series of Enhancements in order to adjust the default bitstream, chances are that’s what’s causing the problem with your microphone. In this case, you’ll need to disable Exclusive Mode + any active enhancement.
- Phasmophobia app is not allowed to use the microphone – If you’re using Windows 10, there’s a big chance that Phasmophobia is not permitted to use the microphone. If the voice recognition tech fails due to this reason, all you need to do is re-configure the access page of your microphone to allow Phasmophobia to access the microphone when needed.
- Missing voice recognition drivers – Phasmophobia is unique as a game because it requires a series of voice recognition drivers that are in no way mandatory to the vanilla Windows 10 installation. Fortunately, you can force their installation by accessing the Speech Recognition tab and installing the English (United States) voice pack.
- Outdated Windows 10 build – As it turns out, you need Windows 10 build 2004 or later in order to be able to use the voice recognition tech with Phasmophobia. To ensure this, you’ll need to install every pending Windows update (critical, feature, and security update).
- Steam’s admin breaks the voice recognition tech – We haven’t been able to identify the cause, but it’s proven that Steam’s admin breaks the voice recognition tech on Windows 10 for Phasmophobia and a few other games. In this case, as recommended by the developers, you’ll need to ensure that steam runs WITHOUT admin access to ensure that the voice recognition tech is not affected.
- The game is not installed on the main drive – If you’re trying to enjoy the game in VR, chances are you will need to move the game on the OS drive in before you’ll manage to get the microphone to work with Phasmophobia.
Now that you are aware of every potential instance that might be causing this microphone issue with Phasmophobia, here’s a list of fixes that other affected users have successfully used to fix this problem and play the game normally:
1. Select the correct microphone from the Audio tab
First things first, you should begin this troubleshooting guide by ensuring that the correct microphone is selected from the in-game Audio menu. If you are playing the game on a PC that has an incorporated microphone, the game has a tendency of defaulting it even though you are trying to use a headset.
Several affected users have confirmed that the issue was resolved after they launched the game normally and changed the default Microphone choice from the Audio menu.
If you’re looking for specific instructions on how to do this, follow the steps below to ensure that Phasmophobia is using the correct microphone:
- Launch Plasmophobia from Steam or any other launcher that you’re using and wait until the main menu is loaded.
- Once you’re inside the main menu, make your way over to the Options board and access the Audio tab.
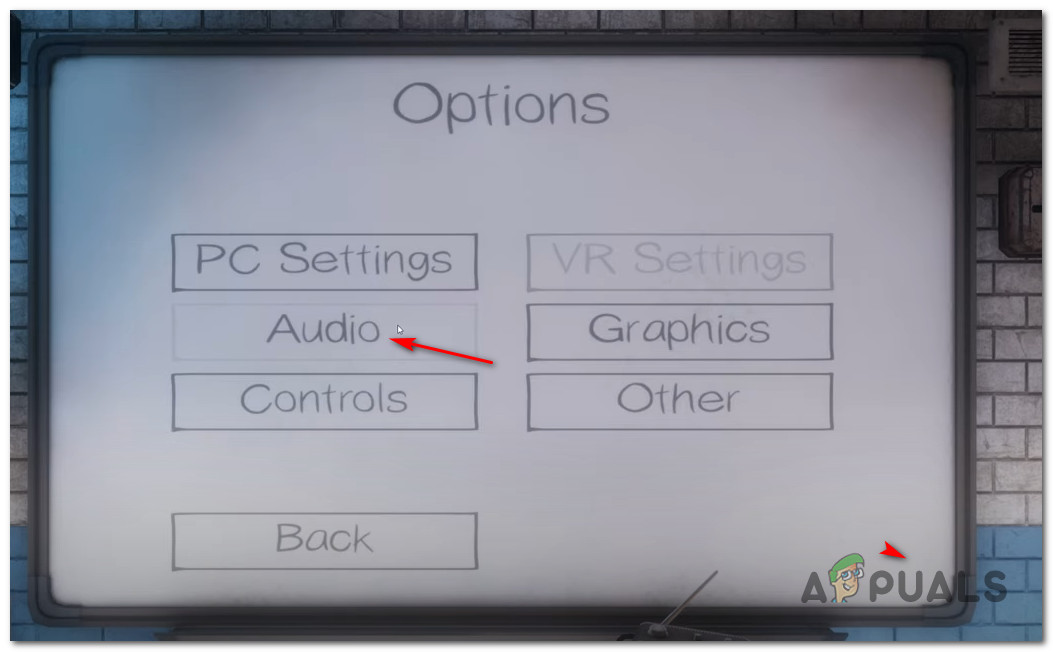
Accessing the Audio tab - Once you’re inside the Audio tab, go ahead and adjust the value of the Microphone until the microphone that you actually want to use is selected.
- After the correct microphone is selected, click Apply to save the changes.
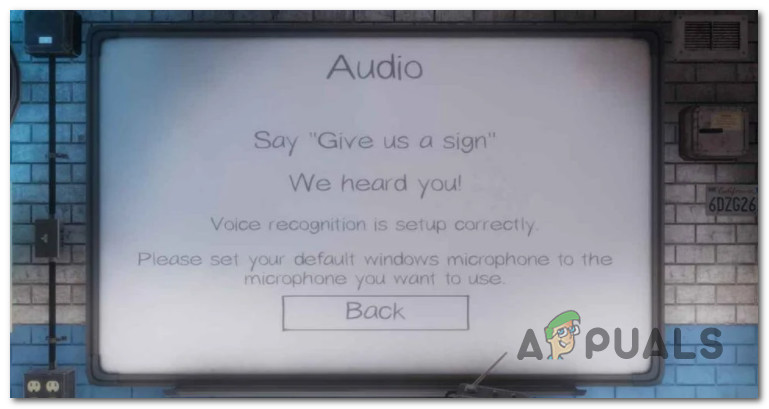
Note: While you’re inside the Options menu, go to the Other sub-menu and ensure that the Language is set to English to match the voice recognition tech. - Restart the game, double-check to see if the correct microphone is selected, then play the game normally and see if the problem is now fixed.
In case you’re still experiencing the same mic issues with Phasmophobia, move down to the next potential fix below.
2. Set the correct recording device as default in Windows Settings
Another fairly common scenario that might produce this error is an instance in which the microphone you are trying to use with Phasmophobia is not set as the default choice in the audio settings of your Windows installation.
A few Phasmophobia that we’re also dealing with this problem have confirmed that once they accessed the Sound menu and changed the default Recording device to the correct one.
Follow the instructions below to learn how to do this:
Note: The instructions below will work on every recent Windows version (Windows 7, Windows 8.1, Windows 10, and Windows 11)
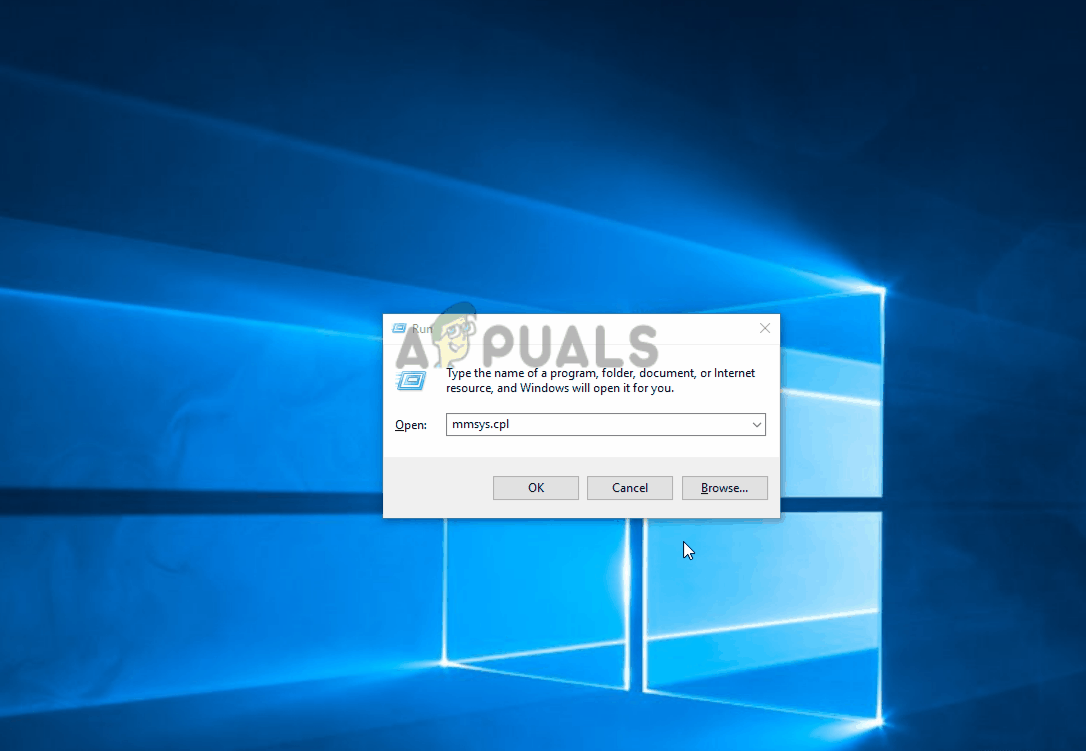
- Start by pressing Windows key + R to open up a Run dialog box. Then, type “mmsys.cpl” and press Enter to open up the Sound menu of the Settings app.
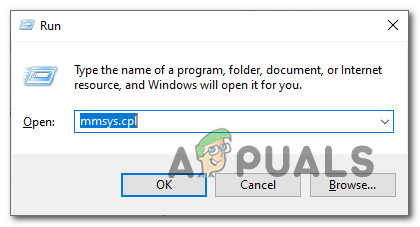
Accessing the Sound menu from Run menu Note: If you’re prompted by the UAC (User Account Control), click Yes to grant admin access.
- Inside the Sound menu, use the ribbon at the top to select Recording.
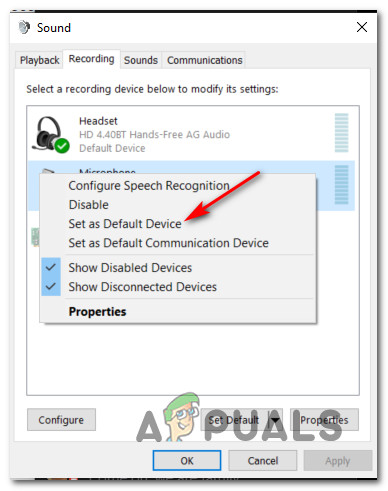
- From the Recording tab, determine which microphone you’re actively using and right-click on it.
- Finally, from the context menu that just appeared, click on Set as Default Device.
Setting the correct Recording device as the default choice - Hit Apply to save the changes, then launch the game normally and see if the problem is now fixed.
If the problem is still not resolved as you’re still unable to complete certain objectives inside Phasmophobia, move down to the next potential fix below.
3. Disable Exclusive Mode and active Enhancements (if applicable)
According to a lot of affected users, you can expect to face this microphone issue with Phasmophobia due to the way the game is developed to pass DTS or DOLBY bitstreams through HDMI / SPDIF. Streams like this cannot be interrupted because the audio is already encoded – No audio can be added to them while they’re making their way to a receiver like a TV.
If you’re using DTS or Dolby bitstreams through HDMI or SPDIF, this is most likely the reason why your microphone is not working while the game is open.
In this case, you should try disabling Exclusive Mode for the Recording device that you’re currently doing and ensure that no enhancements are affecting the audio stream.
For step by step instructions on how to do this, follow the steps below:
- Start by pressing Windows key + R to open up a run dialog box. Then, type ” mmsys.cpl” and press Enter to open up the Sound window. If you’re prompted by the UAC (User Account Control), click on Yes to grant admin access.
- Once you get there, select the Recording tab, then right-click on the playback device that is currently active and choose Properties from the context menu.
Note: It’s important to follow these instructions for the correct Recording device – The device that has a green checkmark near its icon should be your target. - Inside the Device Properties screen, select the Advanced tab from the horizontal menu at the top of the window.
- Next, inside the Advanced tab, go to the Exclusive Mode section and uncheck the box associated with Allow applications to take exclusive control of this device.
- Next, access the Enhancement tab and ensure that the checkboxes associated with Low Frequency Protection, Virtual Surround, Room Correction, and Loudness Equalization are unchecked.
Note: Depending on your microphone model, you might not have this tab present. - Finally, click Apply to save the change, then restart your computer to force the changes to take effect.
- Once the next startup sequence is complete, open the Netflix app again and see if the issue has been resolved.
If you ensured that Exclusive Mode is disabled for your Playback device and no enhancements are currently active, move down to the next potential fix below.
4. Ensure that apps are allowed to access microphone (Windows 10 Only)
According to a lot of users that we’re also dealing with this issue, you can also expect to see this issue in a situation where the Phasmophobia app doesn’t have access to the microphone that the game is attempting to use.
This issue is exclusive to Windows 10 where a privacy setting will prohibit any apps (native or 3rd party) that don’t have the necessary permissions from accessing the microphone.
INFO: This was not standard behavior when Windows 10 launched, but a recent security update is preventing UWP apps from accessing the camera & microphone unless you specifically configure them and grant them access to the active microphone.
If this scenario is applicable to you and you’re suspecting that the Phasmophobia App is prevented from using the microphone, follow the instructions below to make sure that’s not the case:
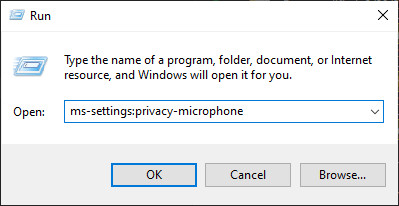
- Press Windows key + R to open up a Run dialog box. Next, type ‘ms-settings:privacy-microphone’ and press Enter to open up the Microphone Privacy window of the Windows Settings app.
Accessing the microphone app - Once you’re inside the Microphone privacy tab, move over to the right-hand pane and enable the toggle associated with Allow apps to access your microphone.
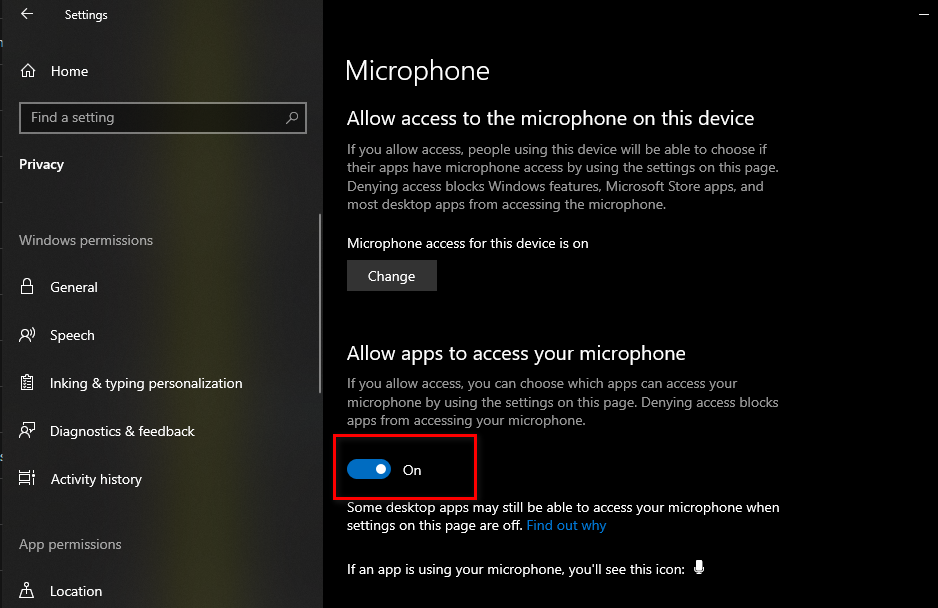
Allowing access to the microphone - As soon as access is granted, scroll down to the list of apps allowed to use the microphone and ensure that the toggle associated with the Phasmophobia game is Enabled.
- Once the setting is On, restart your computer and launch the game once again to see if the problem is now fixed.
In case the same mic issue is still occurring with Phasmophobia, move down to the next potential fix below.
5. Install the required voice recognition drivers
As it turns out, a fairly common cause of this issue on Windows 10 is an instance in which a series of voice recognition drivers needed by the game is missing from your Windows installation.
This is very likely if your computer is configured for a different language than English US.
Several affected users have managed to fix this issue by accessing the Speech Settings menu and forcing the installation of the English (United States) voice package – This action will also install the missing voice recognition drivers.
To make matters easier for you, we’ve put together a series of step-by-step instructions that will walk you through the whole process:
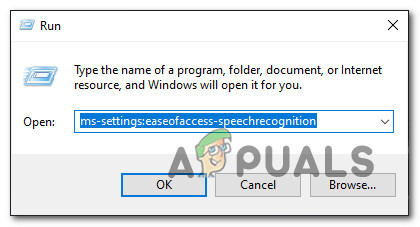
- Press Windows key + R to open up a Run dialog box. Next, type ‘ms-settings:easeofaccess-speechrecognition’ and press Enter to open up the Speech tab of the Settings app.
Opening the Speech tab Note: If you are prompted by the UAC (User Account Control), click Yes to grant admin access.
- Once you’re inside the Speech tab, move over to the right-hand side method and check if Speech Recognition is enabled. If it’s not enabled, change the associated toggle to ON.
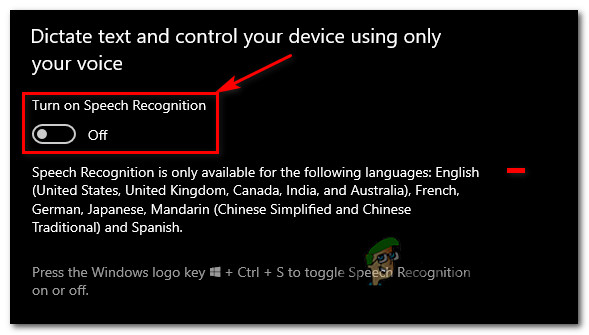
Enabling Speech Recognition Note: If Voice Recognition is already enabled, skip this step and the next and move directly to step 4.
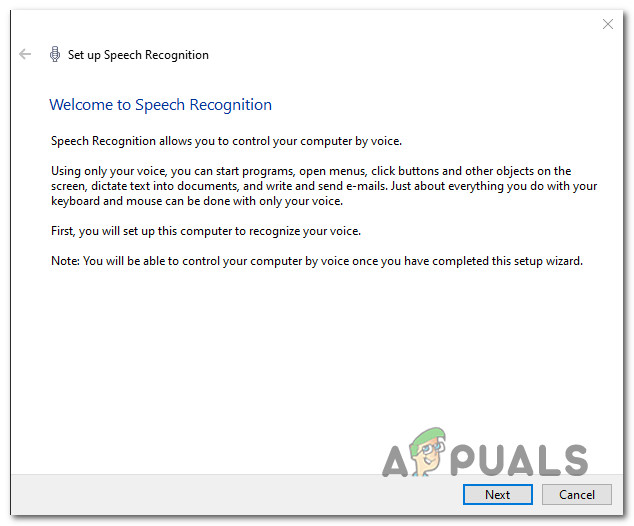
- Next, follow the steps outlined inside the Set up Speech Recognition window that just appeared until the Speech Recognition feature is successfully enabled.
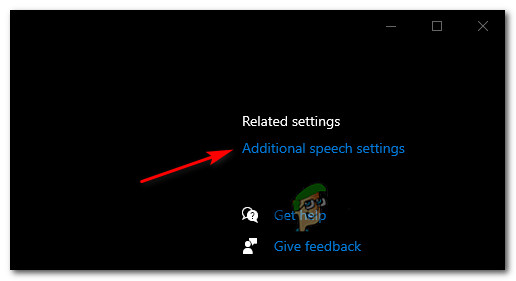
Enabling the Speech Recognition feature - Once Speech recognition is enabled, click on Additional speech settings from the top-right section of the screen.
Accessing the Additional Speech menu - Once you’re inside the Additional speech settings, start by ensuring that the default Speech language is et to English (United States). Additionally, if you’re a non-native speaker, ensure that you check the box associated with Recognize non-native accents for this language.
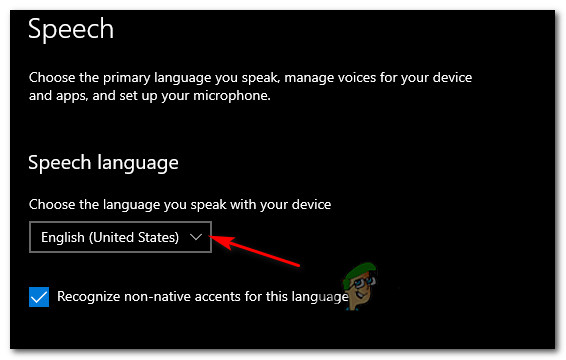
Configuring the speech language features Note: This is not a requirement, but it helps avoid an entire host of mic-related issues when playing Phasmophobia.
- Next, scroll down to the bottom of the screen and see if English (United States) is present under Installed voice packages. If the package is not yet installed, click on Add Voices and add English (United States) from the list.
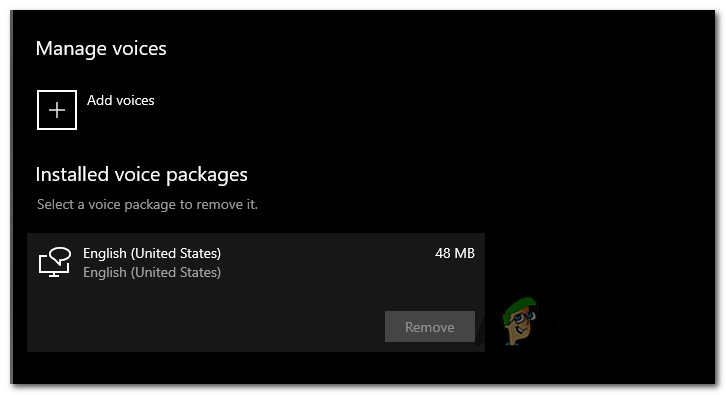
Adding the correct voice pack - Once you’ve ensured that the correct voice package is installed, launch the game once again and check if the microphone issues have been resolved.
6. Update Windows 10 to the latest version (if applicable)
Keep in mind that if you’re on Windows 10, installing every pending update and bringing your OS to build to the latest is crucial.
Phasmophobia’s voice recognition tech will require you to use the latest voice recognition drivers which are only installed once you are on Windows 10 build version 2004 or later.
If this scenario looks like it could be applicable and you have a lot of pending updates, you should be able to fix the problem by installing every pending WIndows update following the official channels.
In case it’s necessary, follow the instructions below to open the Windows Update component and use it to install every pending update until you bring your Windows build up to date:
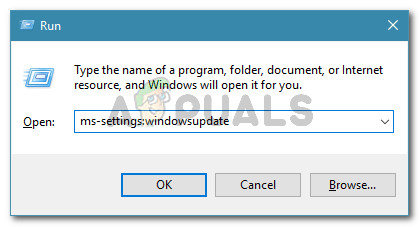
- Open up a Run dialog box by pressing Windows key + R. Next, type “ms-settings:windowsupdate” inside the text box and press Enter to open up the Windows Update tab of the Settings app.
Opening the Windows Update screen - Inside the Windows Update screen, move over to the right-hand pane and click on Check for Updates.
- Next, follow the on-screen instructions to install every pending update.
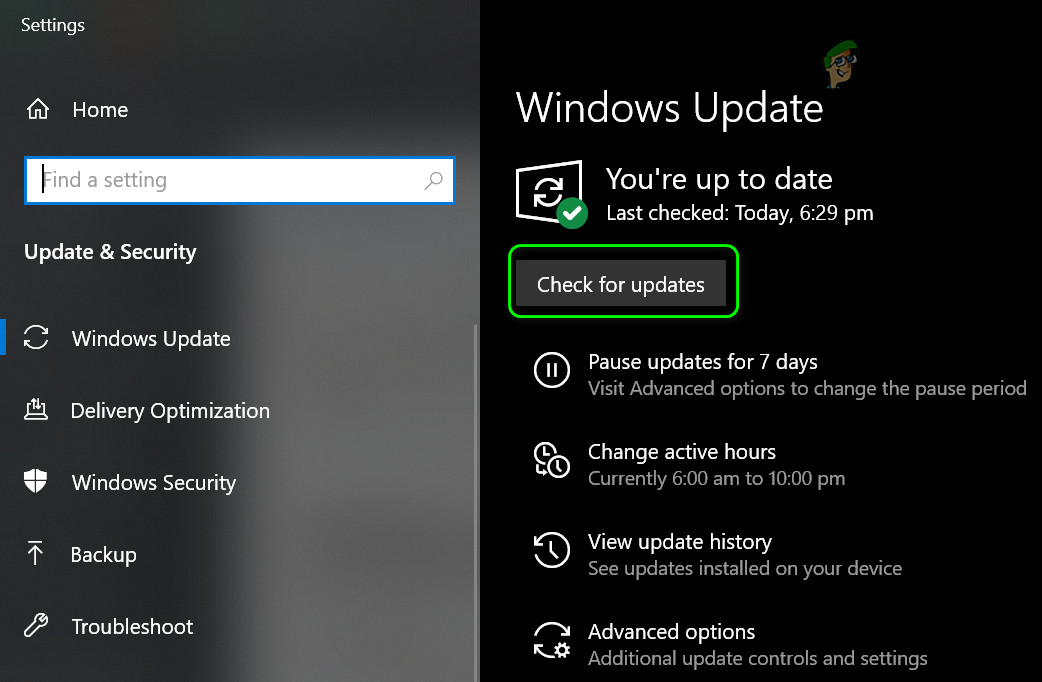
Checking for Updates Note: If there are a lot of pending updates to handle, the WU component will prompt you to restart before you get the chance to bring your Windows 10 build to the latest. If this occurs, restart when instructed, but make sure to return to the same Windows Update screen at the next startup and complete the download & installation of the remaining updates.
- After you manage to installed every pending WIndows update, do one final restart and see if the problem is fixed by launching the game once the next startup is complete.
If the same problem is still occurring, move down to the next potential fix below.
7. Run Steam without Admin privileges (if applicable)
I know this seems like an unlikely culprit, but a lot of affected users have come forward and reported that Steam’s admin privileges end up breaking Phasmophobia’s voice recognition tech – This is even acknowledged by the developers as they recommend running Steam without admin access while playing the game
If you have previously configured Steam to run with admin access, follow the instructions below to remove the elevated access in order to ensure that the voice recognition feature is not affected:
- First things first, ensure that Steam is closed and no associated process is running in the background.
- Next, open My Computer or File Explorer and navigate to the location where you installed Steam. By default, you’ll find Steam installed in the following location:
C:\Program Files (x86)\Steam
- Next, right-click on Steam.exe and then click on Properties from the newly appeared context menu.
- Inside the Properties screen, access the Compatibility tab from the ribbon menu at the top.
- Next, move down to the Settings category and uncheck the box associated with Run this program as an administrator.
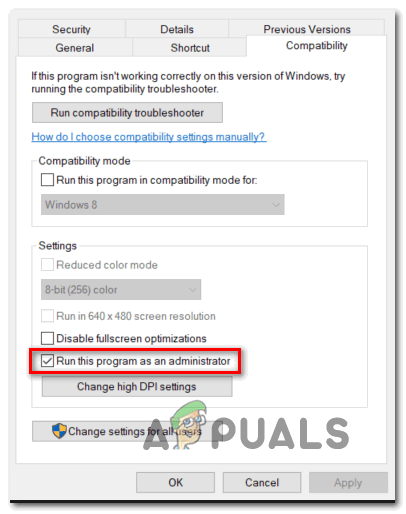
Disable ‘Run this program as an administrator’ - Finally, click on Apply to save the changes permanently before attempting to launch Steam normally (by double-clicking on the executable).
If the problem is still not fixed, move down to the final potential fix below.
8. Move the game to the main drive
According to some users that we’re also launching the game through Steam, you might be also dealing with a permission issue.
Some users have managed to get the issue resolved by manually moving the game to the main drive where Windows is installed (C:/ drive in most cases).
If Phasmophobia is not installed on the C drive, moving the game manually through Steam should be fairly easy to perform.
Follow the instructions below for step by step instructions on moving the game to the main drive:
- Open your Steam installation and log in with your account.
- Next, access the Library tab from the ribbon bar at the top, then right-click on PhasmoPhobia from the menu on the left.
- From the context menu that just appeared, click on Properties.
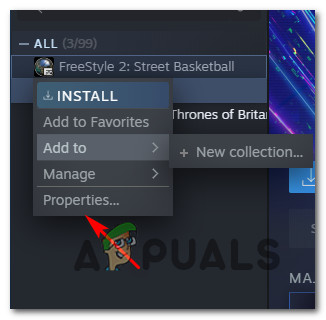
Accessing the Properties menu - Once you’re inside the Properties screen, click on Local Files from the vertical menu on the left, then click on Move Install Folder… from the right pane.
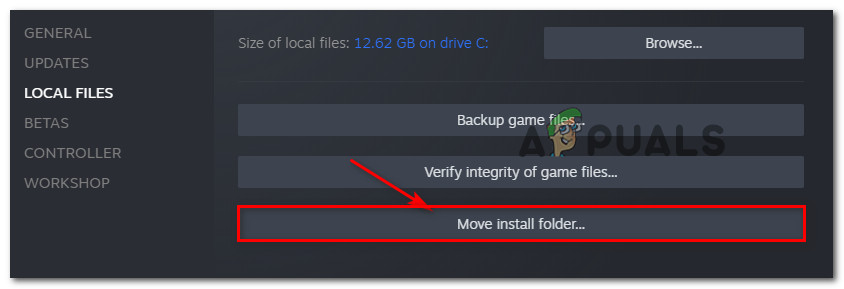
Moving the location of the install folder - From the dialog prompt that just appeared, select a different location somewhere on your main drive and wait for the moving process to complete.
- Launch the game once again and see if the problem is now fixed.


you saved my life