How to Resolve the ‘PDE.plugin Will Damage Your Computer’ Error on Mac
Encountering a pop-up stating PDE.plugin will damage your computer while trying to print or scan documents can evoke concern, as it suggests potential harm to your computer. Rest assured, this is not an indication of malicious software; rather, the error often arises due to incompatible software certificates.
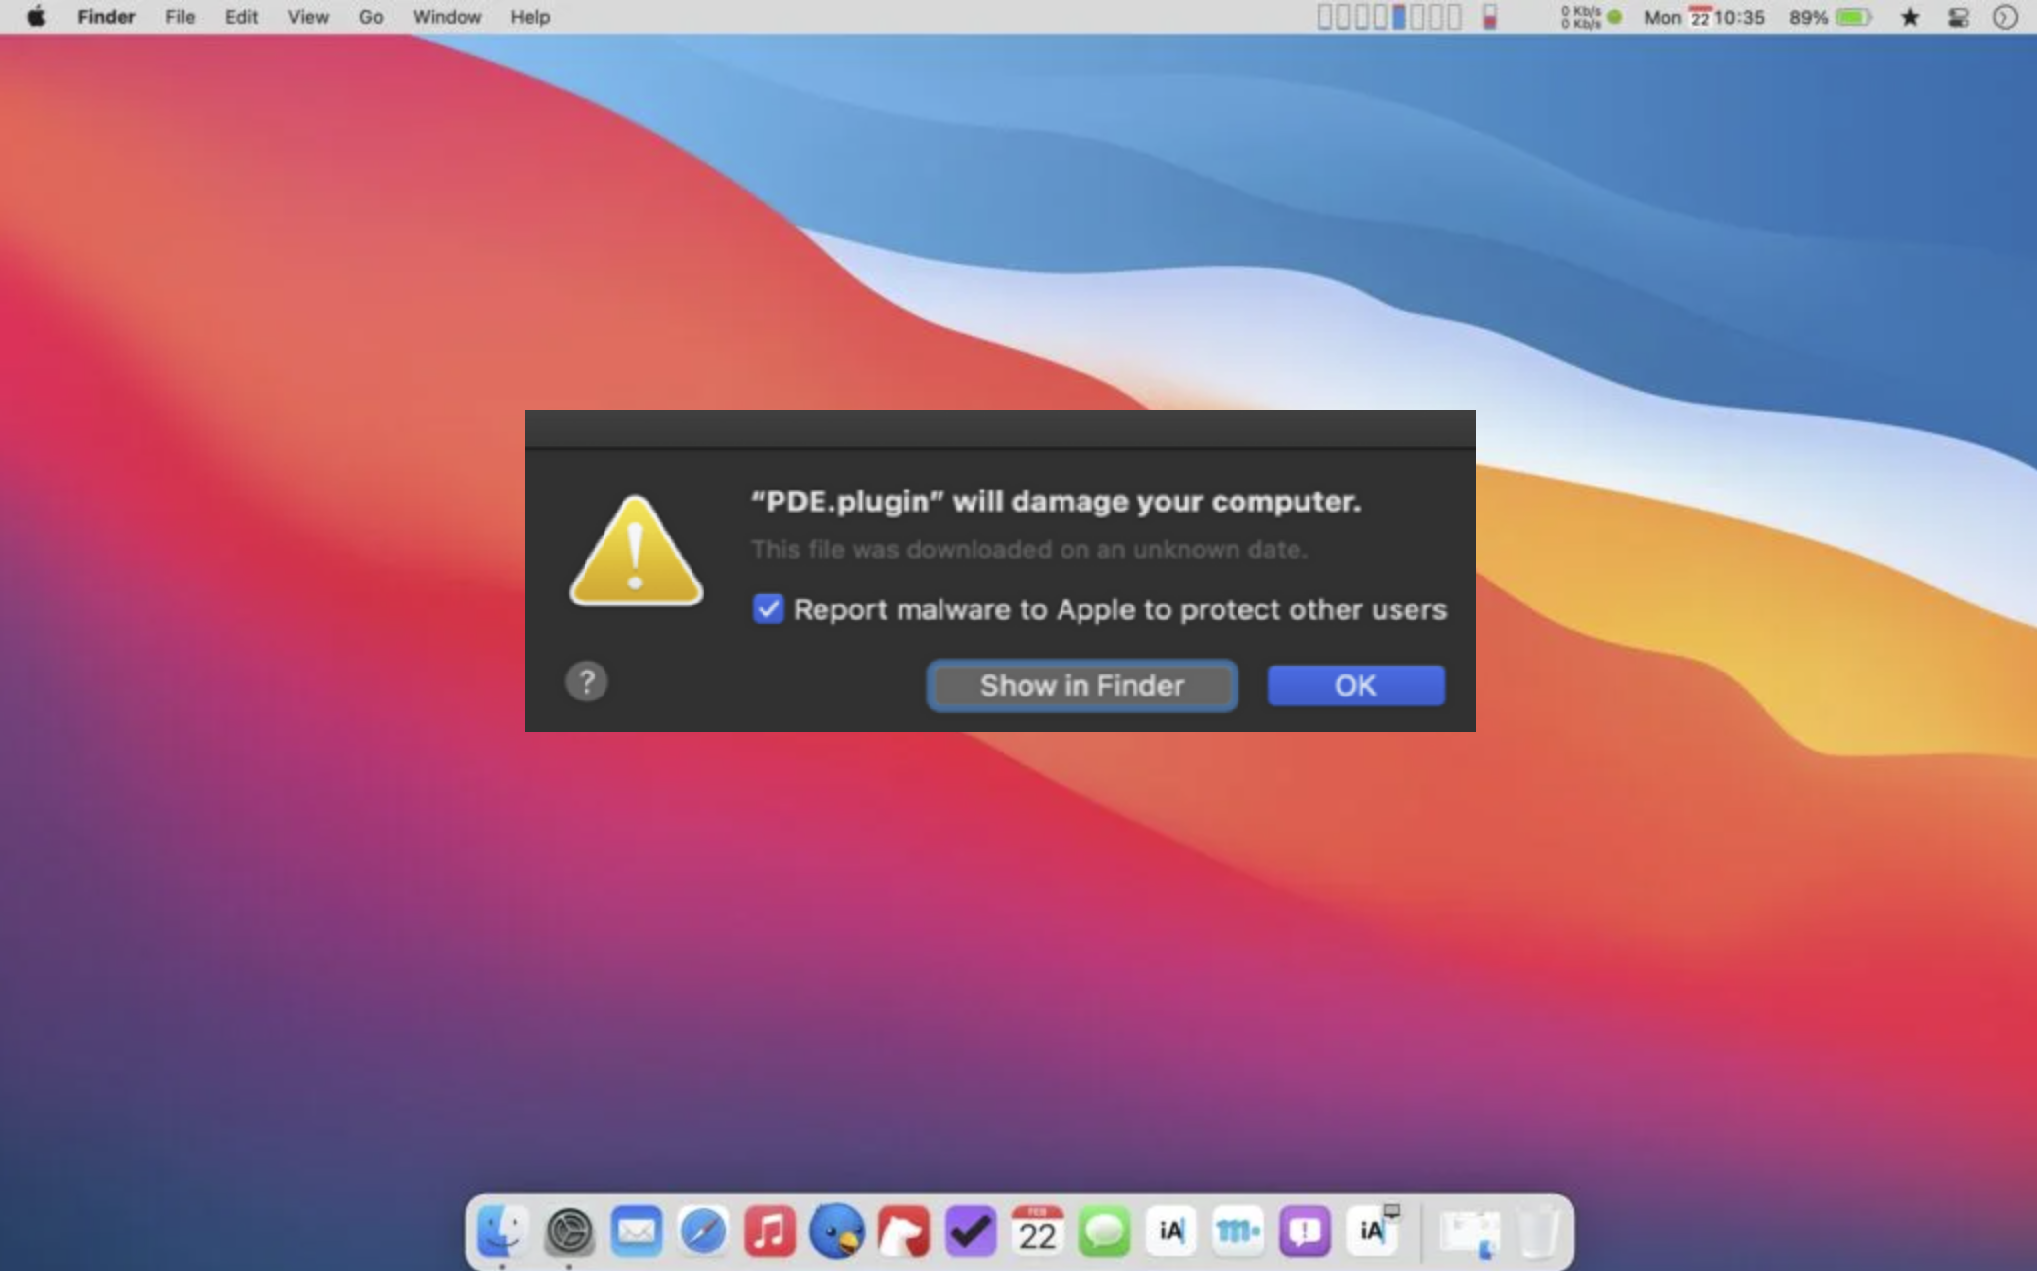
Despite the error being harmless to your computer, it entirely prevents users from using their HP printers. This message pertains to the HP printer driver, but fear not—it can be resolved by implementing certain methods.
Let’s explore the solutions!
1. Use AirPrint
If you encounter the PDE.plugin error, an immediate alternative to print your documents is to use the AirPrint feature. Nearly all Apple devices support AirPrint, which provides the convenience of wirelessly sending files to a compatible printer.
To verify if your printer supports AirPrint, click here.
Remember, successful printing via AirPrint requires both your Mac and printer to be connected to the same Wi-Fi network.
- Make sure Wi-Fi is enabled on your Mac and it is connected to the correct network.
- Restart your printer and verify its network connection. On printers with a touchscreen, access the Wireless icon or Network Settings/Setup menu. Printers without a touchscreen should have a solid (non-blinking) light on the Wireless icon.
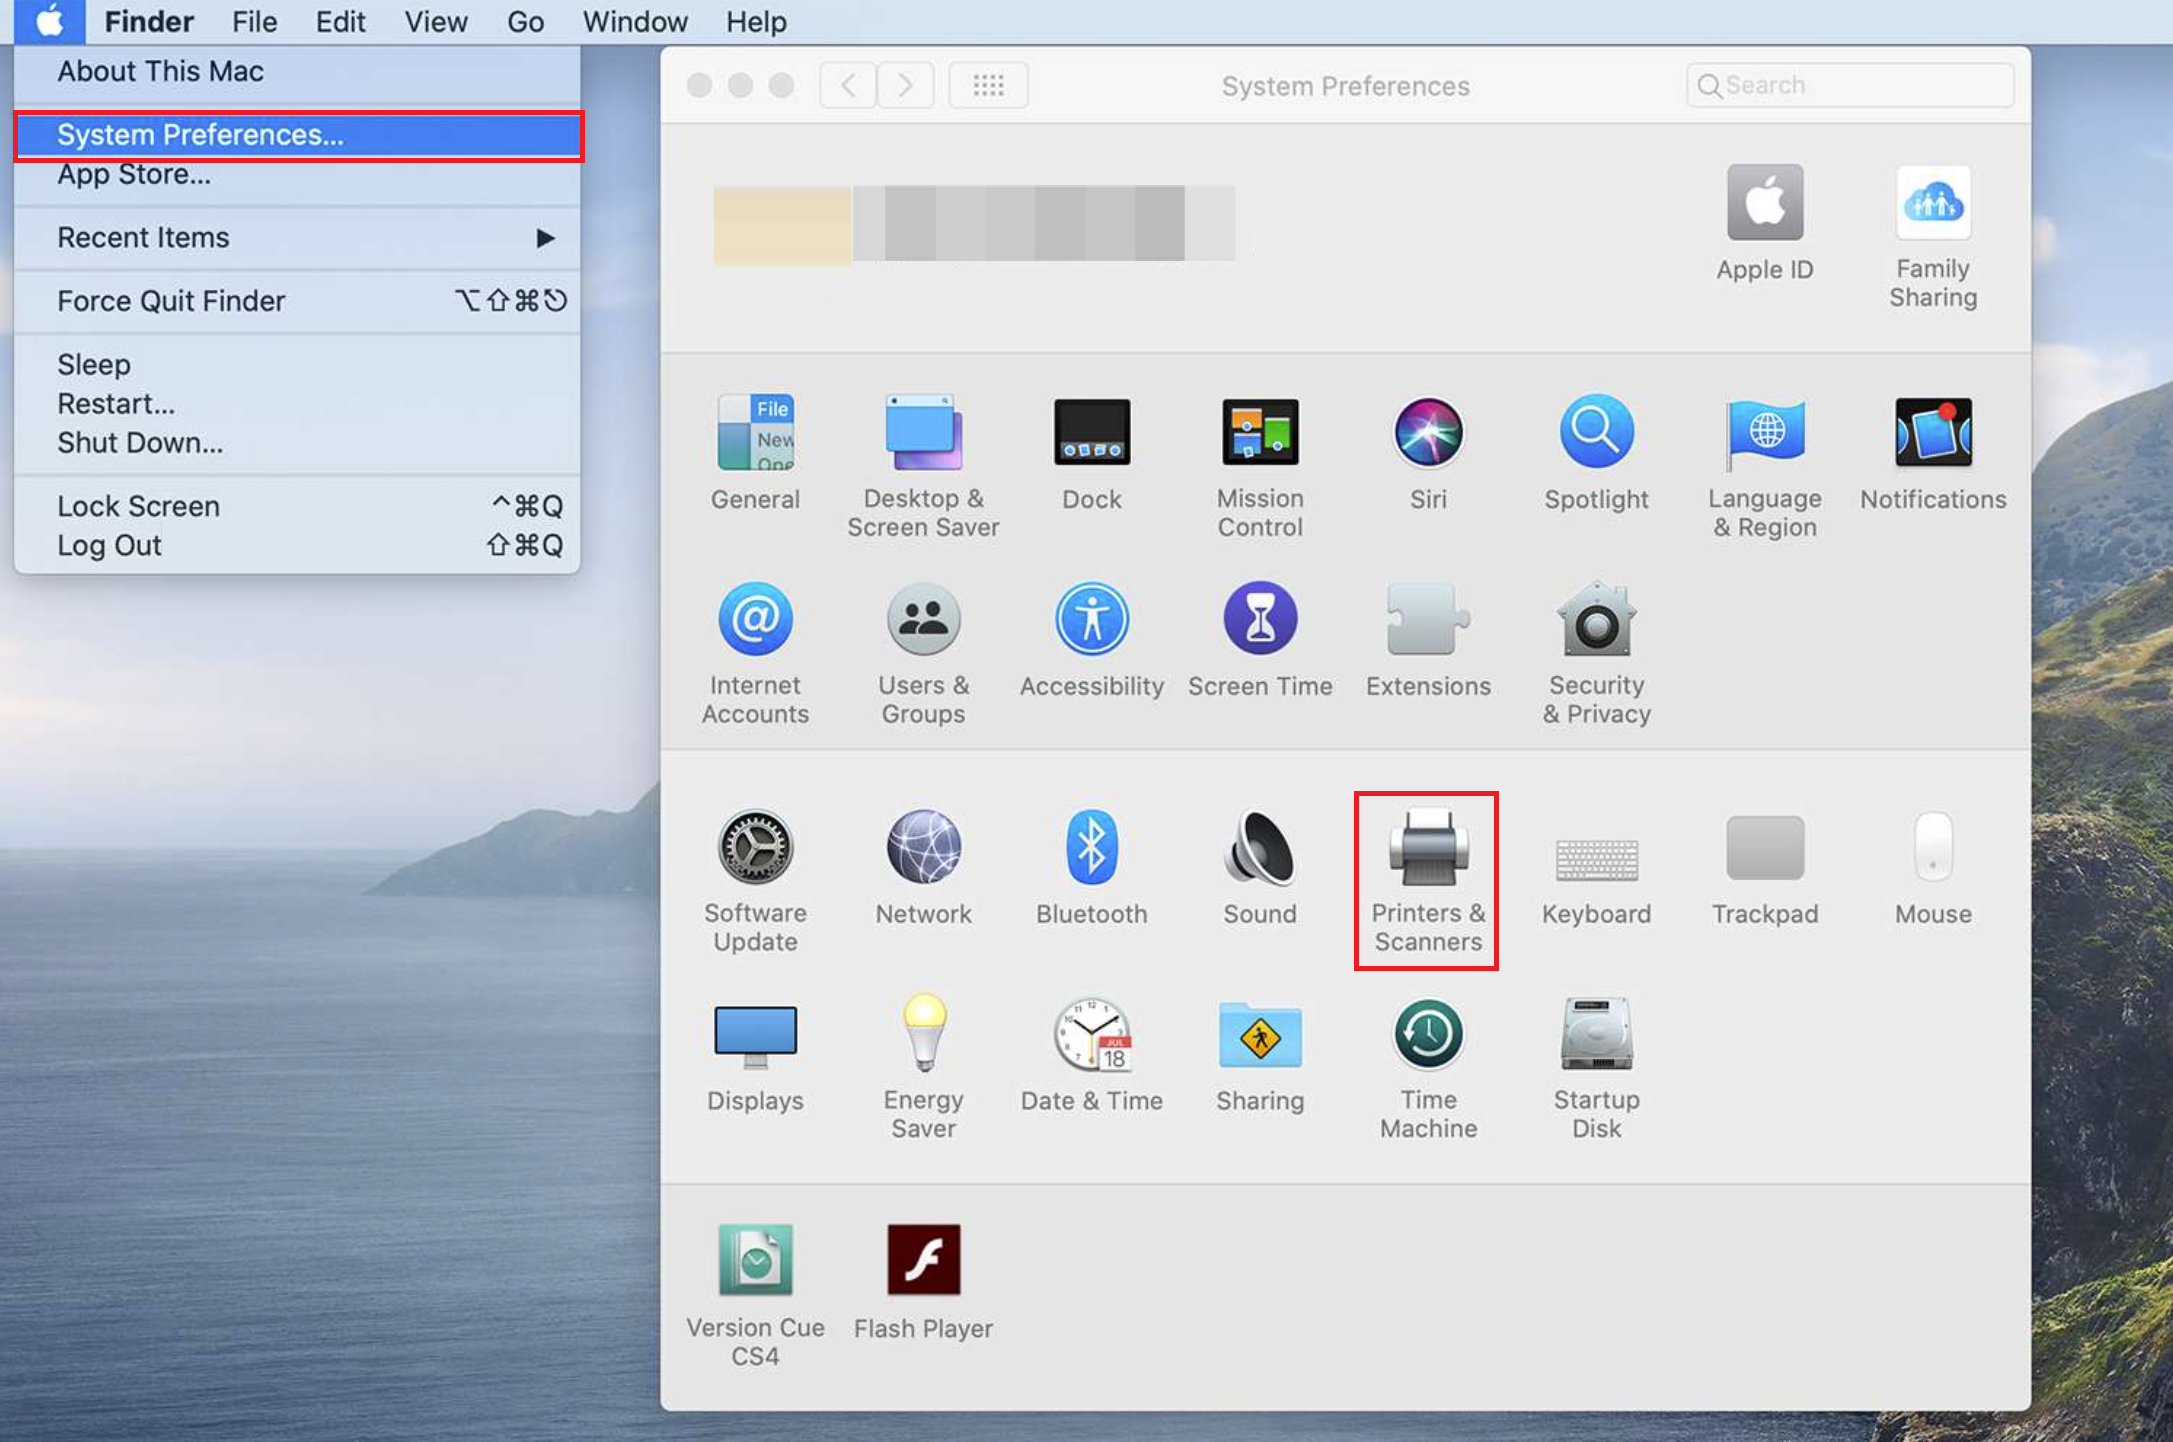
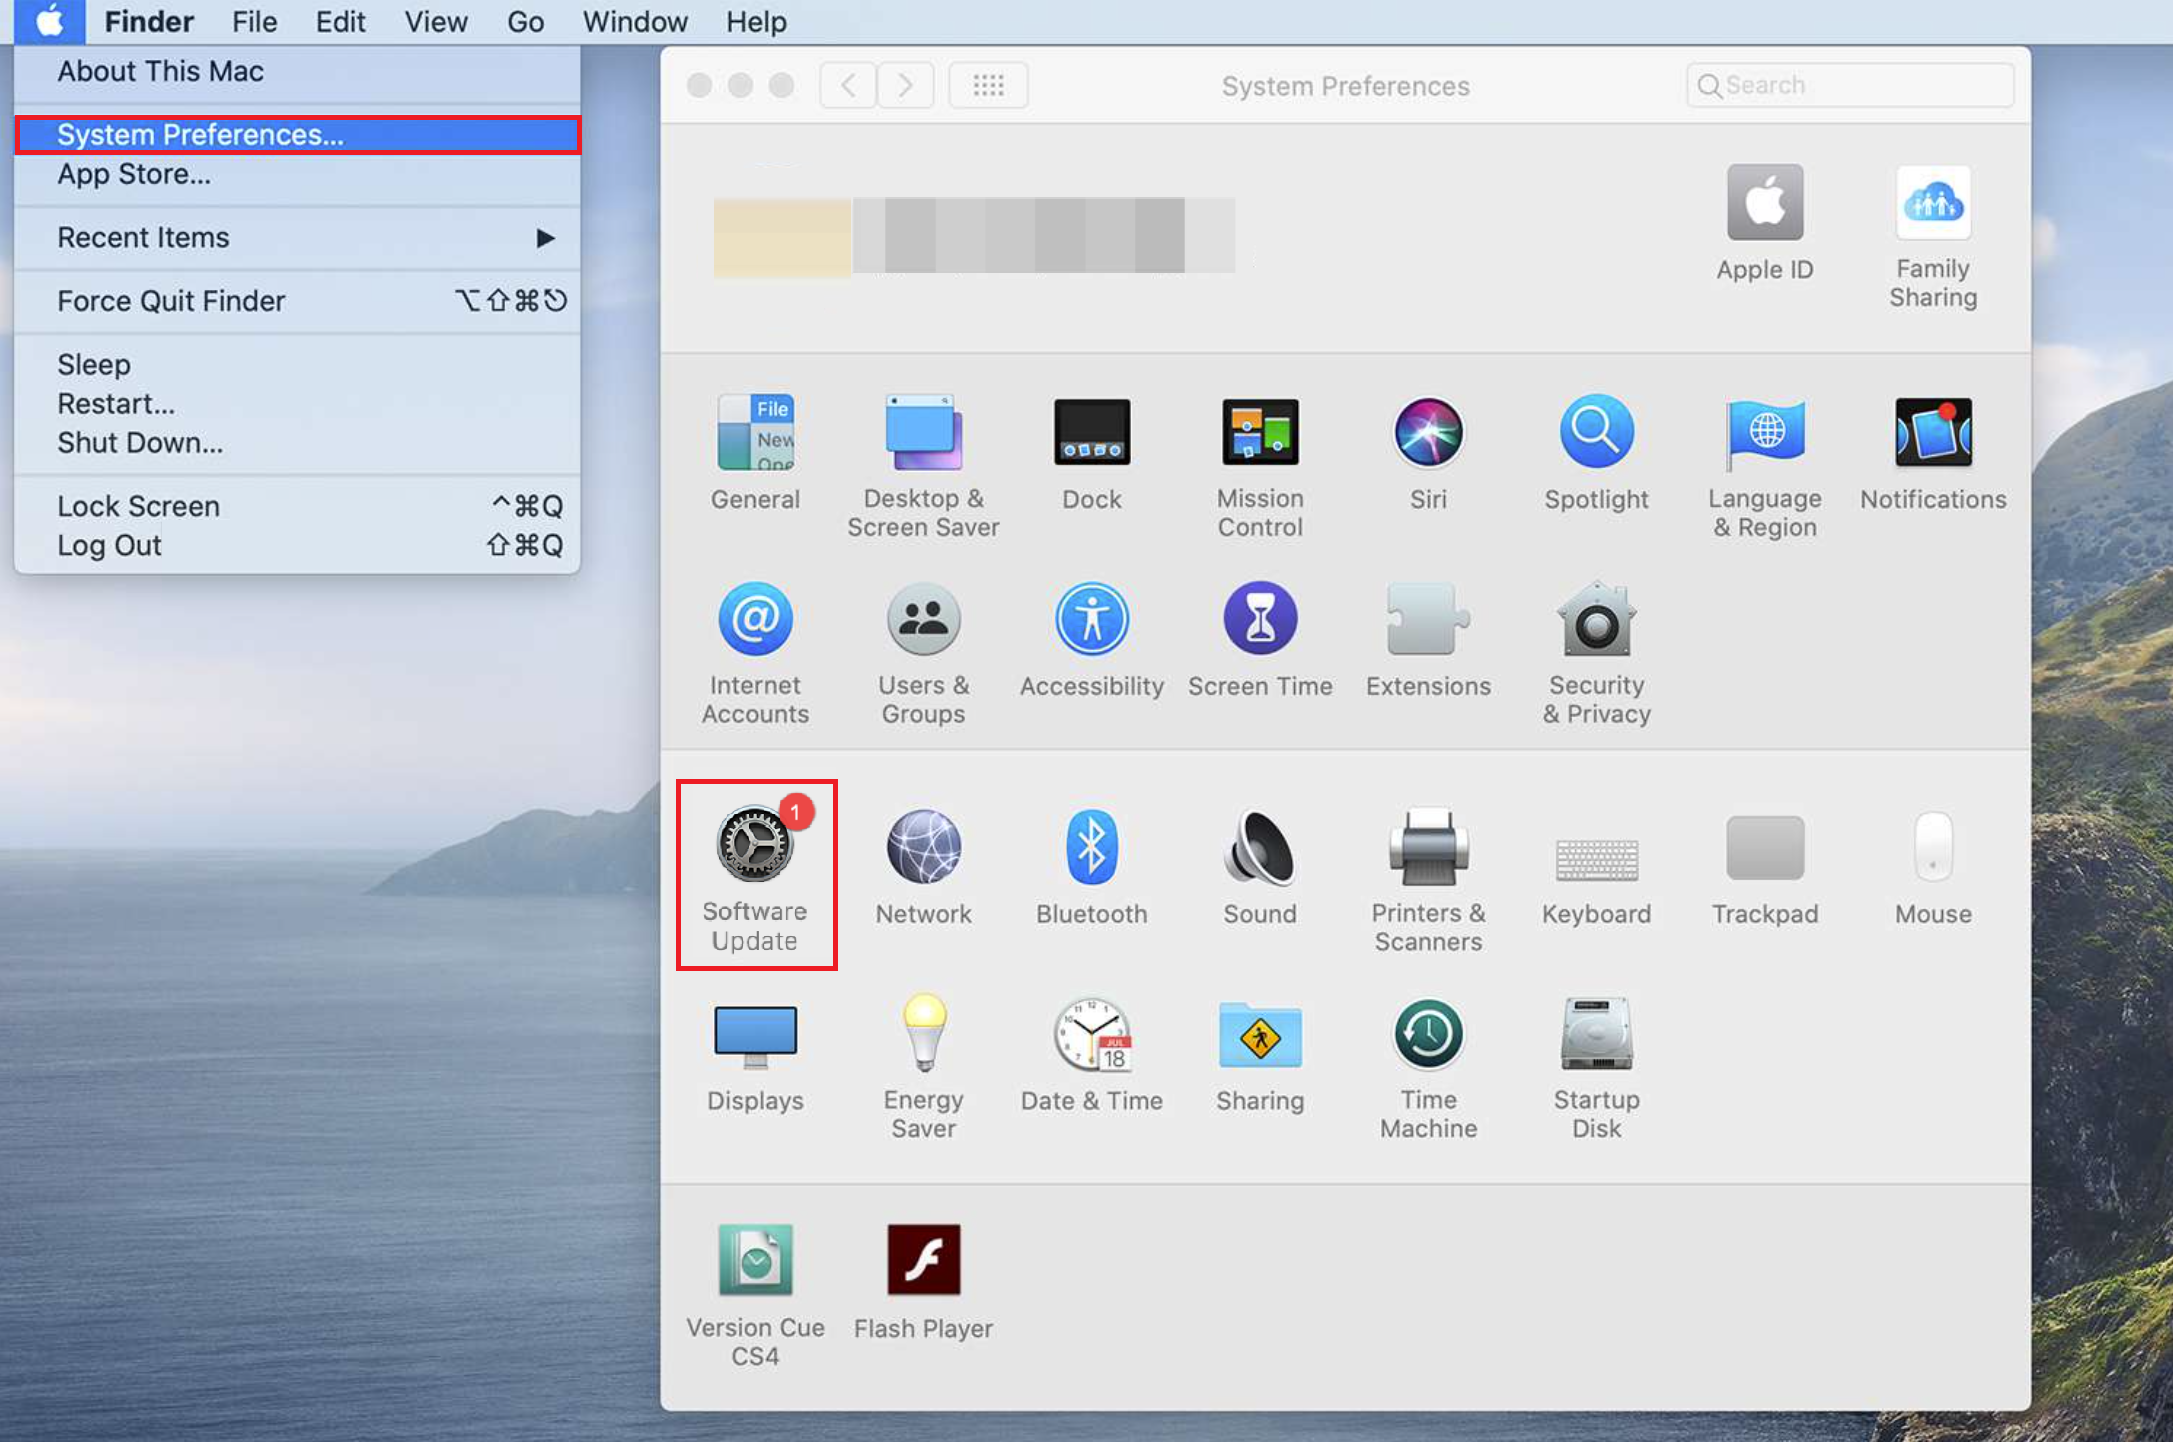
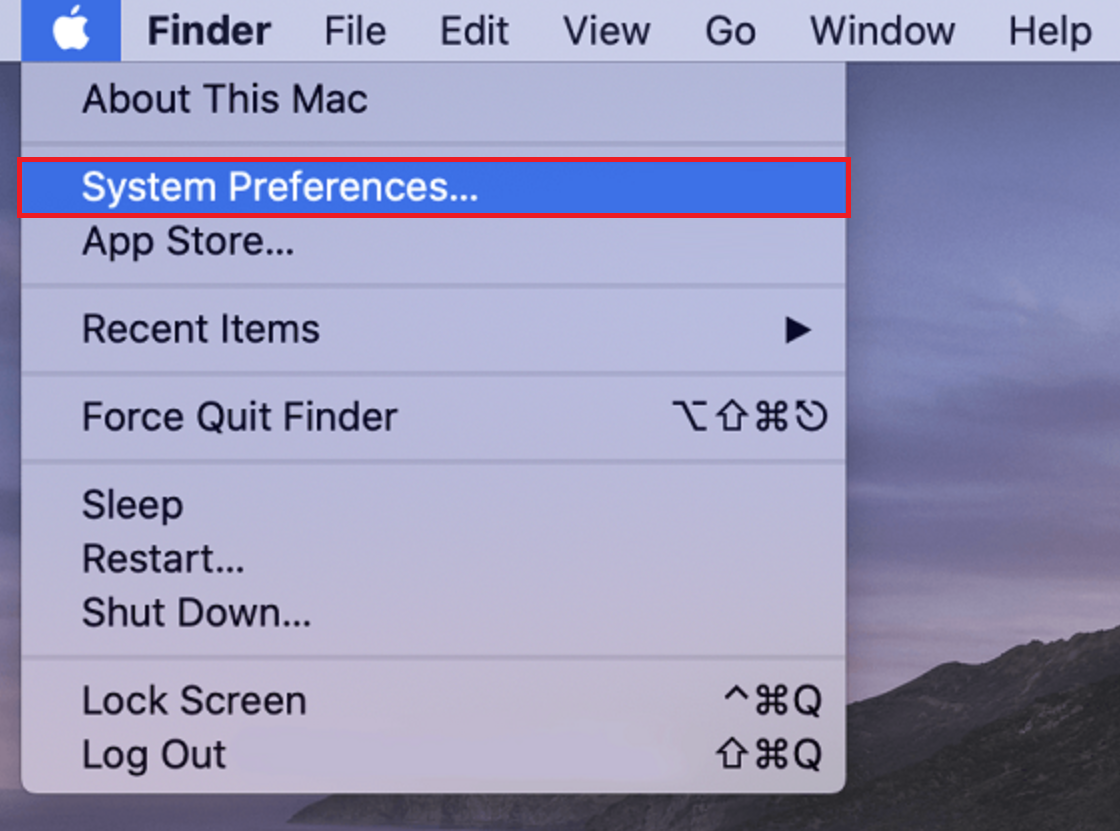
- Select the Apple menu in the top-left corner of your screen and navigate to System Preferences.
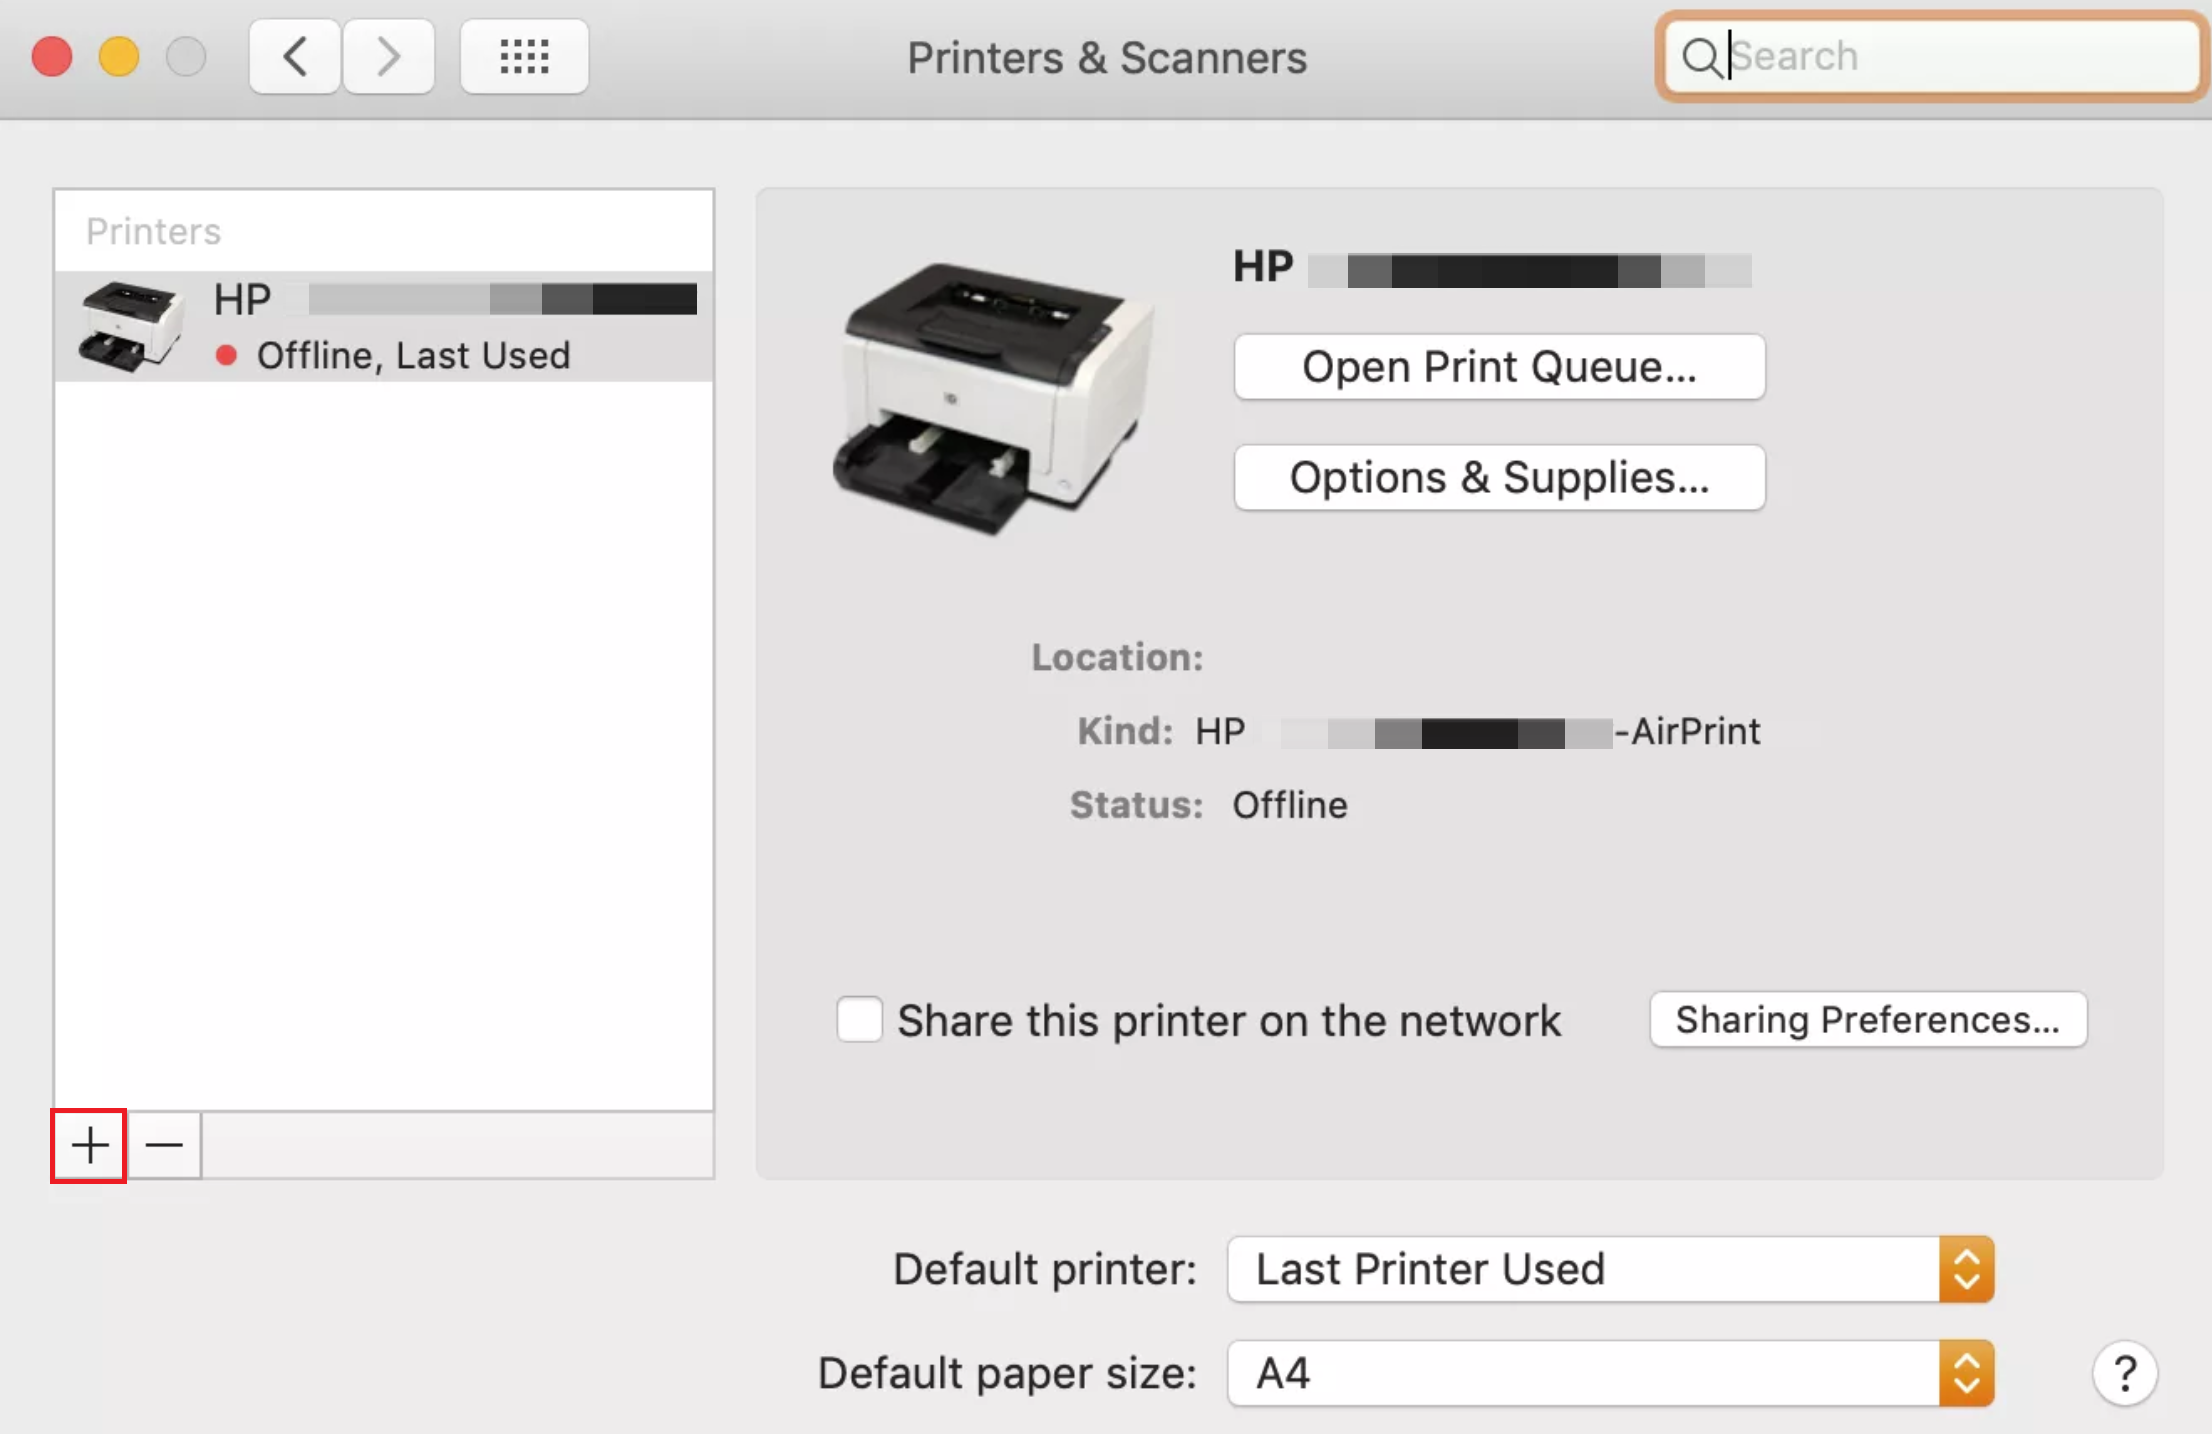
- Go to Printers & Scanners.
- If your HP Printer is on the list, click to select it, then press the – button and choose Delete Printer to remove it.

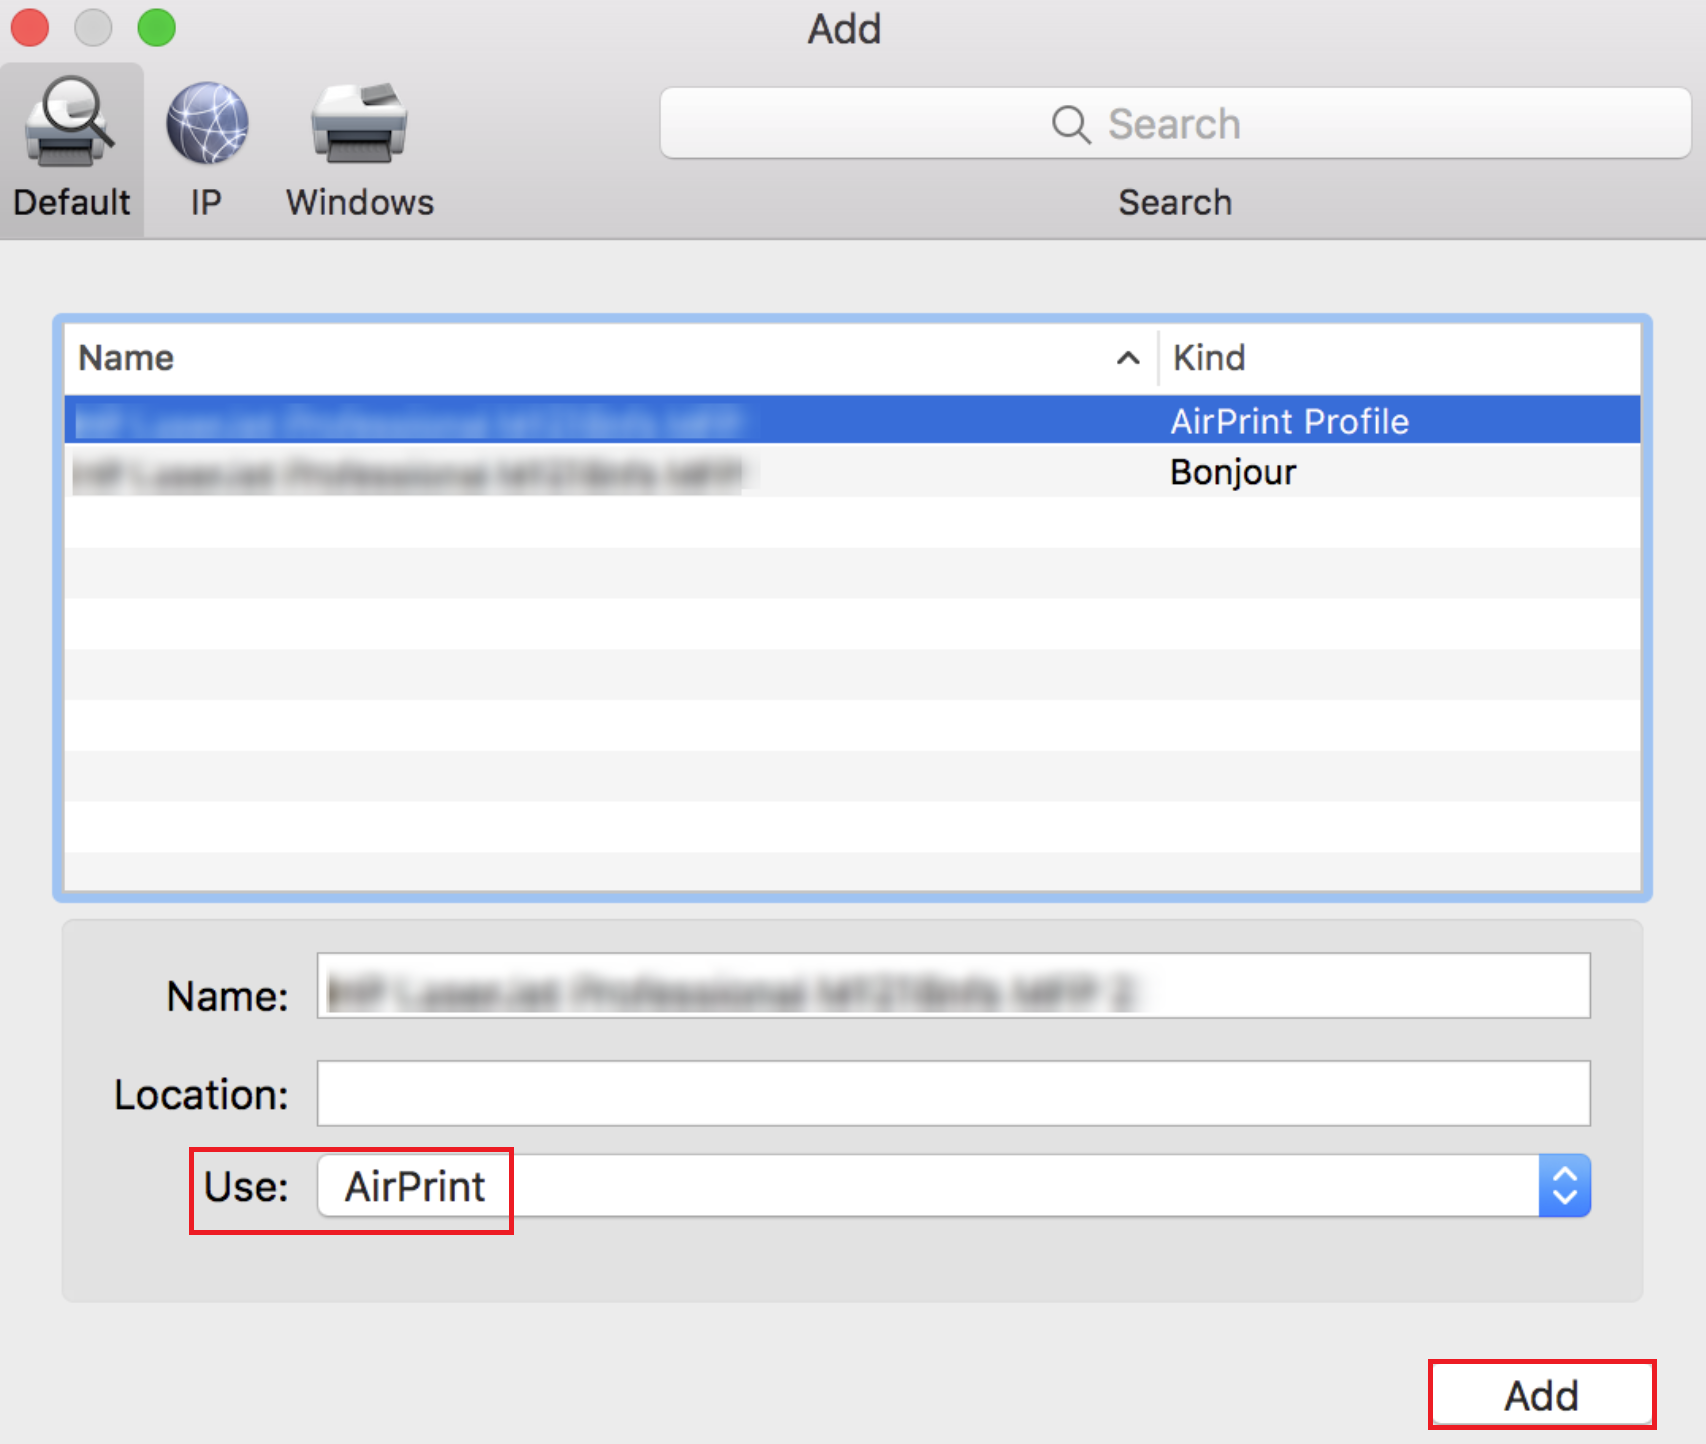
- Proceed to click on the + button.
- Select your printer from the emergent window.
- In the Use menu, pick AirPrint, then click Add to include your printer.
Note: If AirPrint doesn’t succeed, uninstall any existing HP driver software on your Mac and reattempt the process. This software may occasionally interfere with AirPrint.
2. Check For Updates
MacOS Gatekeeper might block HP software by considering it unauthorized. To correct this, verify that all updates, including HP’s patch fix for the PDE.plugin error, are installed.
- Click the Apple menu at the top-left corner of your screen, then select System Preferences.
- Navigate to Software Update.
- Your Mac will search for any available updates. Click Upgrade Now or Update Now to download and install them.
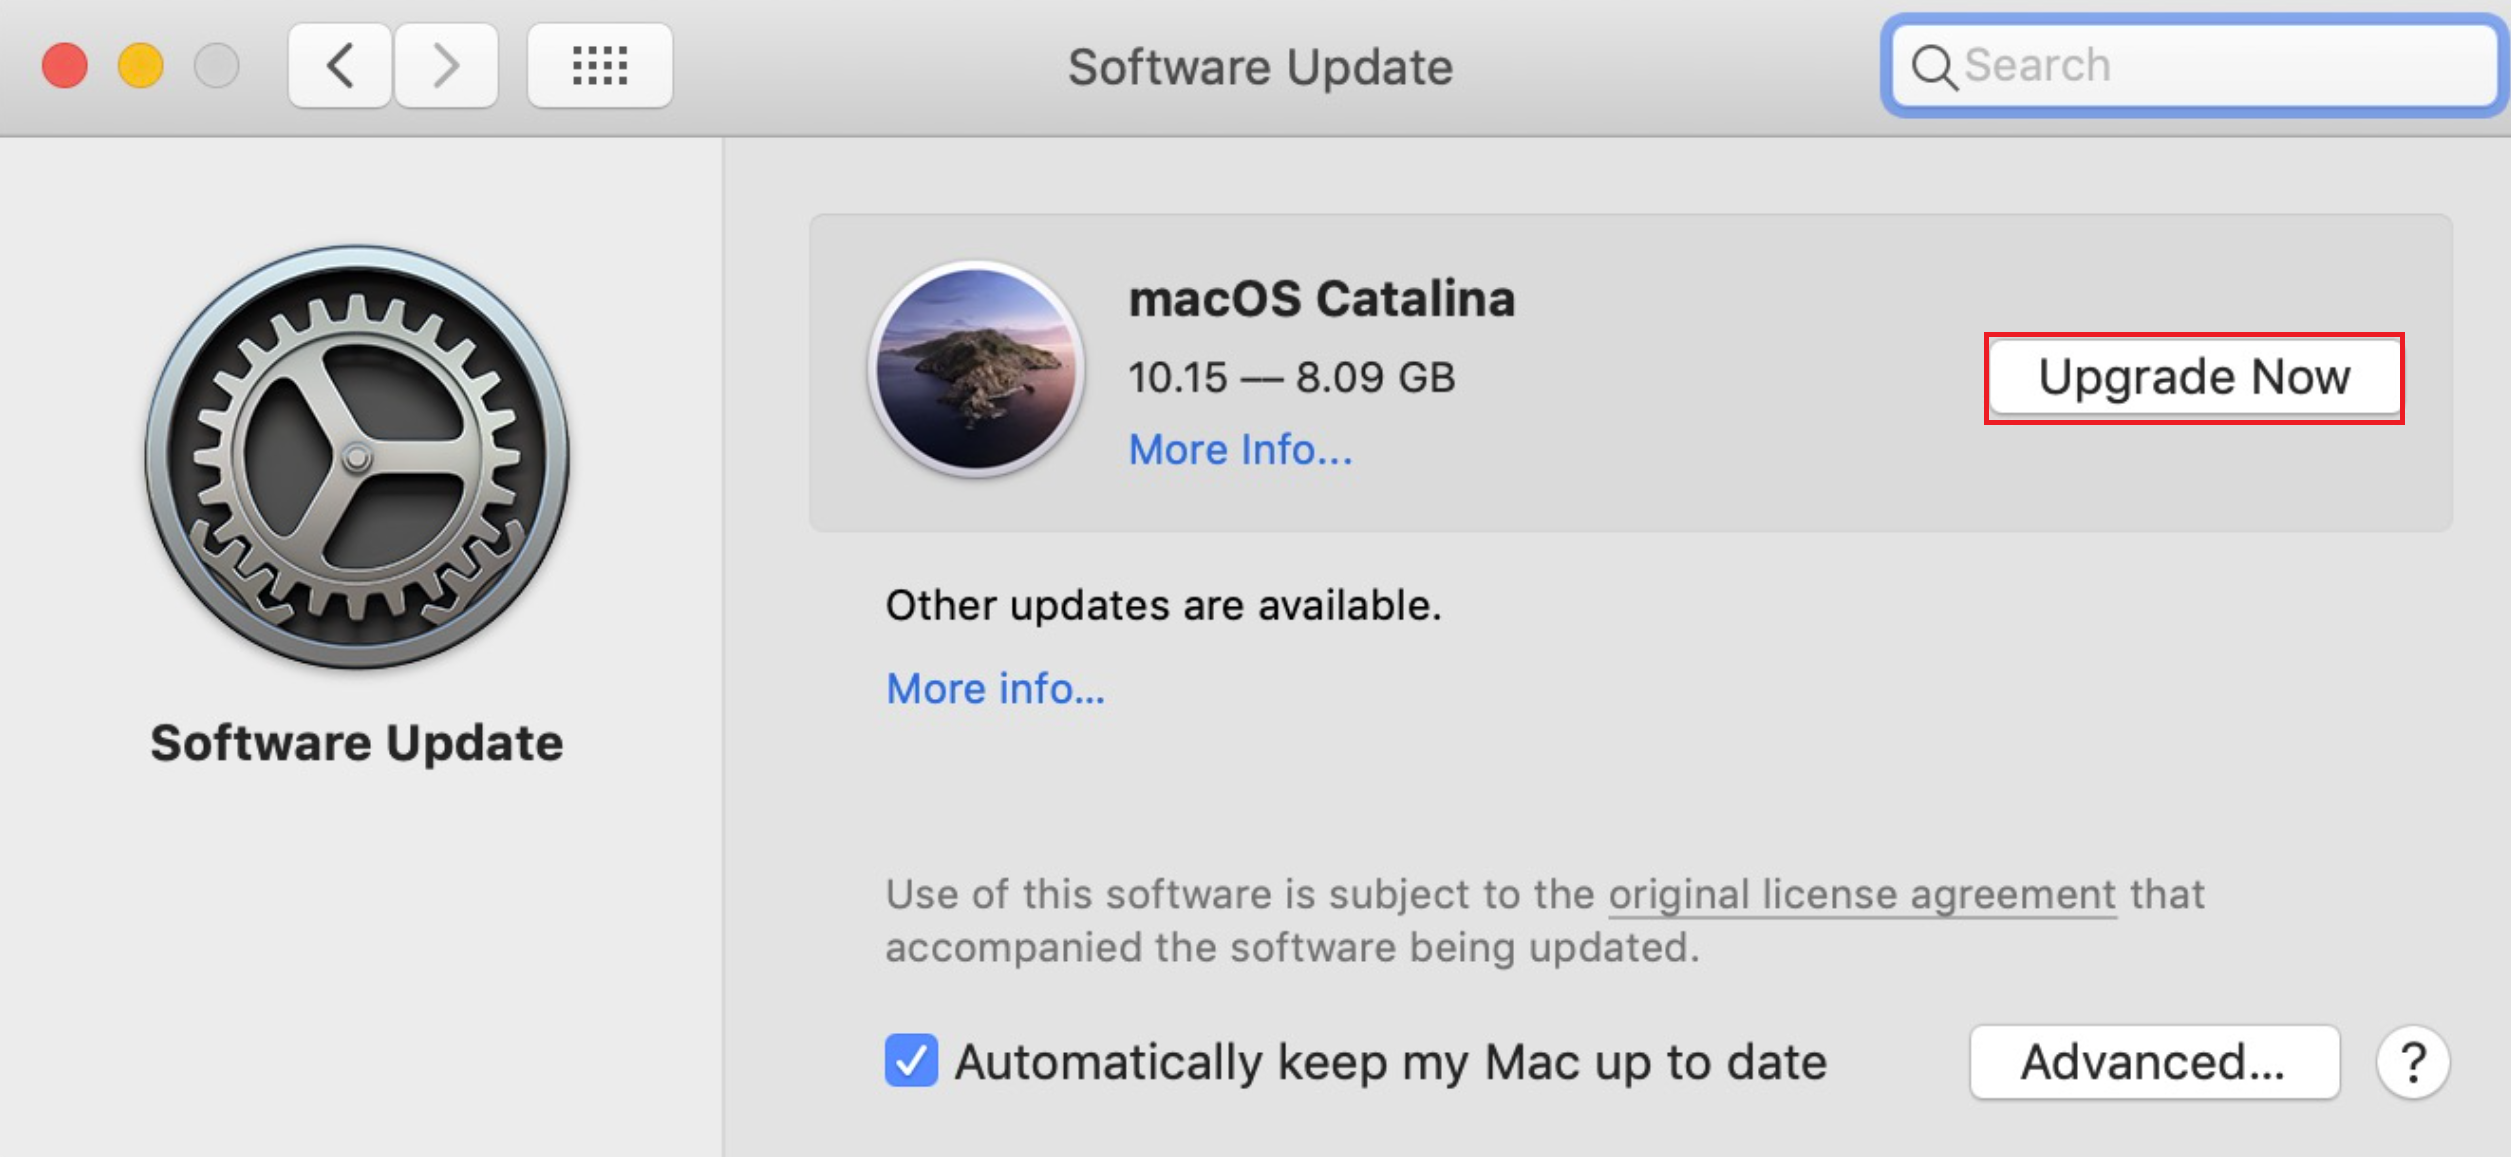
After updating, perform a test print to see if the issue is resolved. If it persists, proceed to the next solution.
3. Delete the Printer and Reinstall HP Printer
Another resolution is to delete and then re-add your HP printer, which can help your Mac recognize the device. Use the latest HP printer software, as your current issue may be due to expired certificates.
- Open System Preferences from the Apple menu at the upper left of your screen.
- Click on Printers & Scanners.
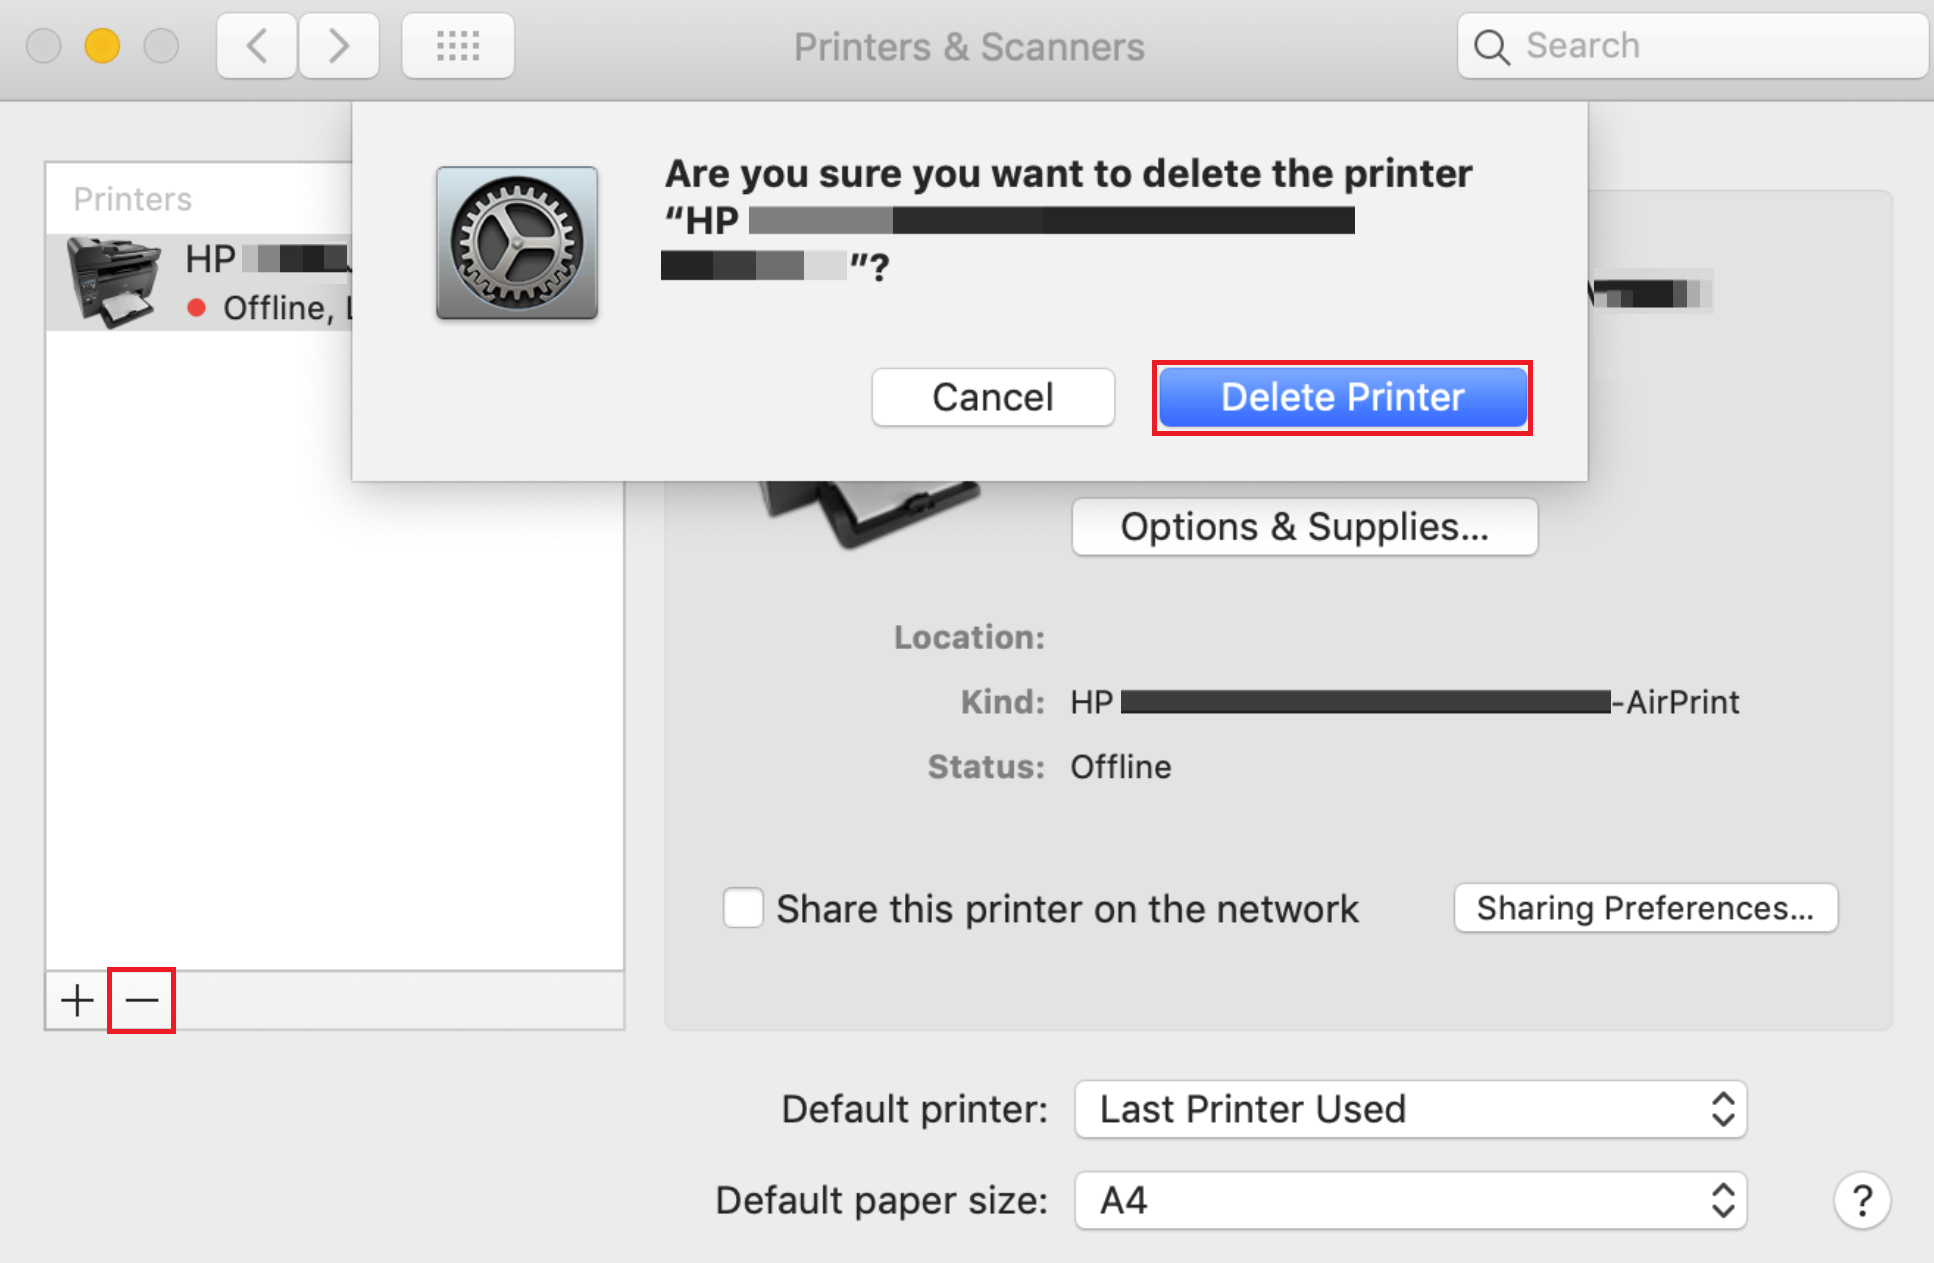
- Select the problematic HP Printer from the list.
- Click the – button to delete it.
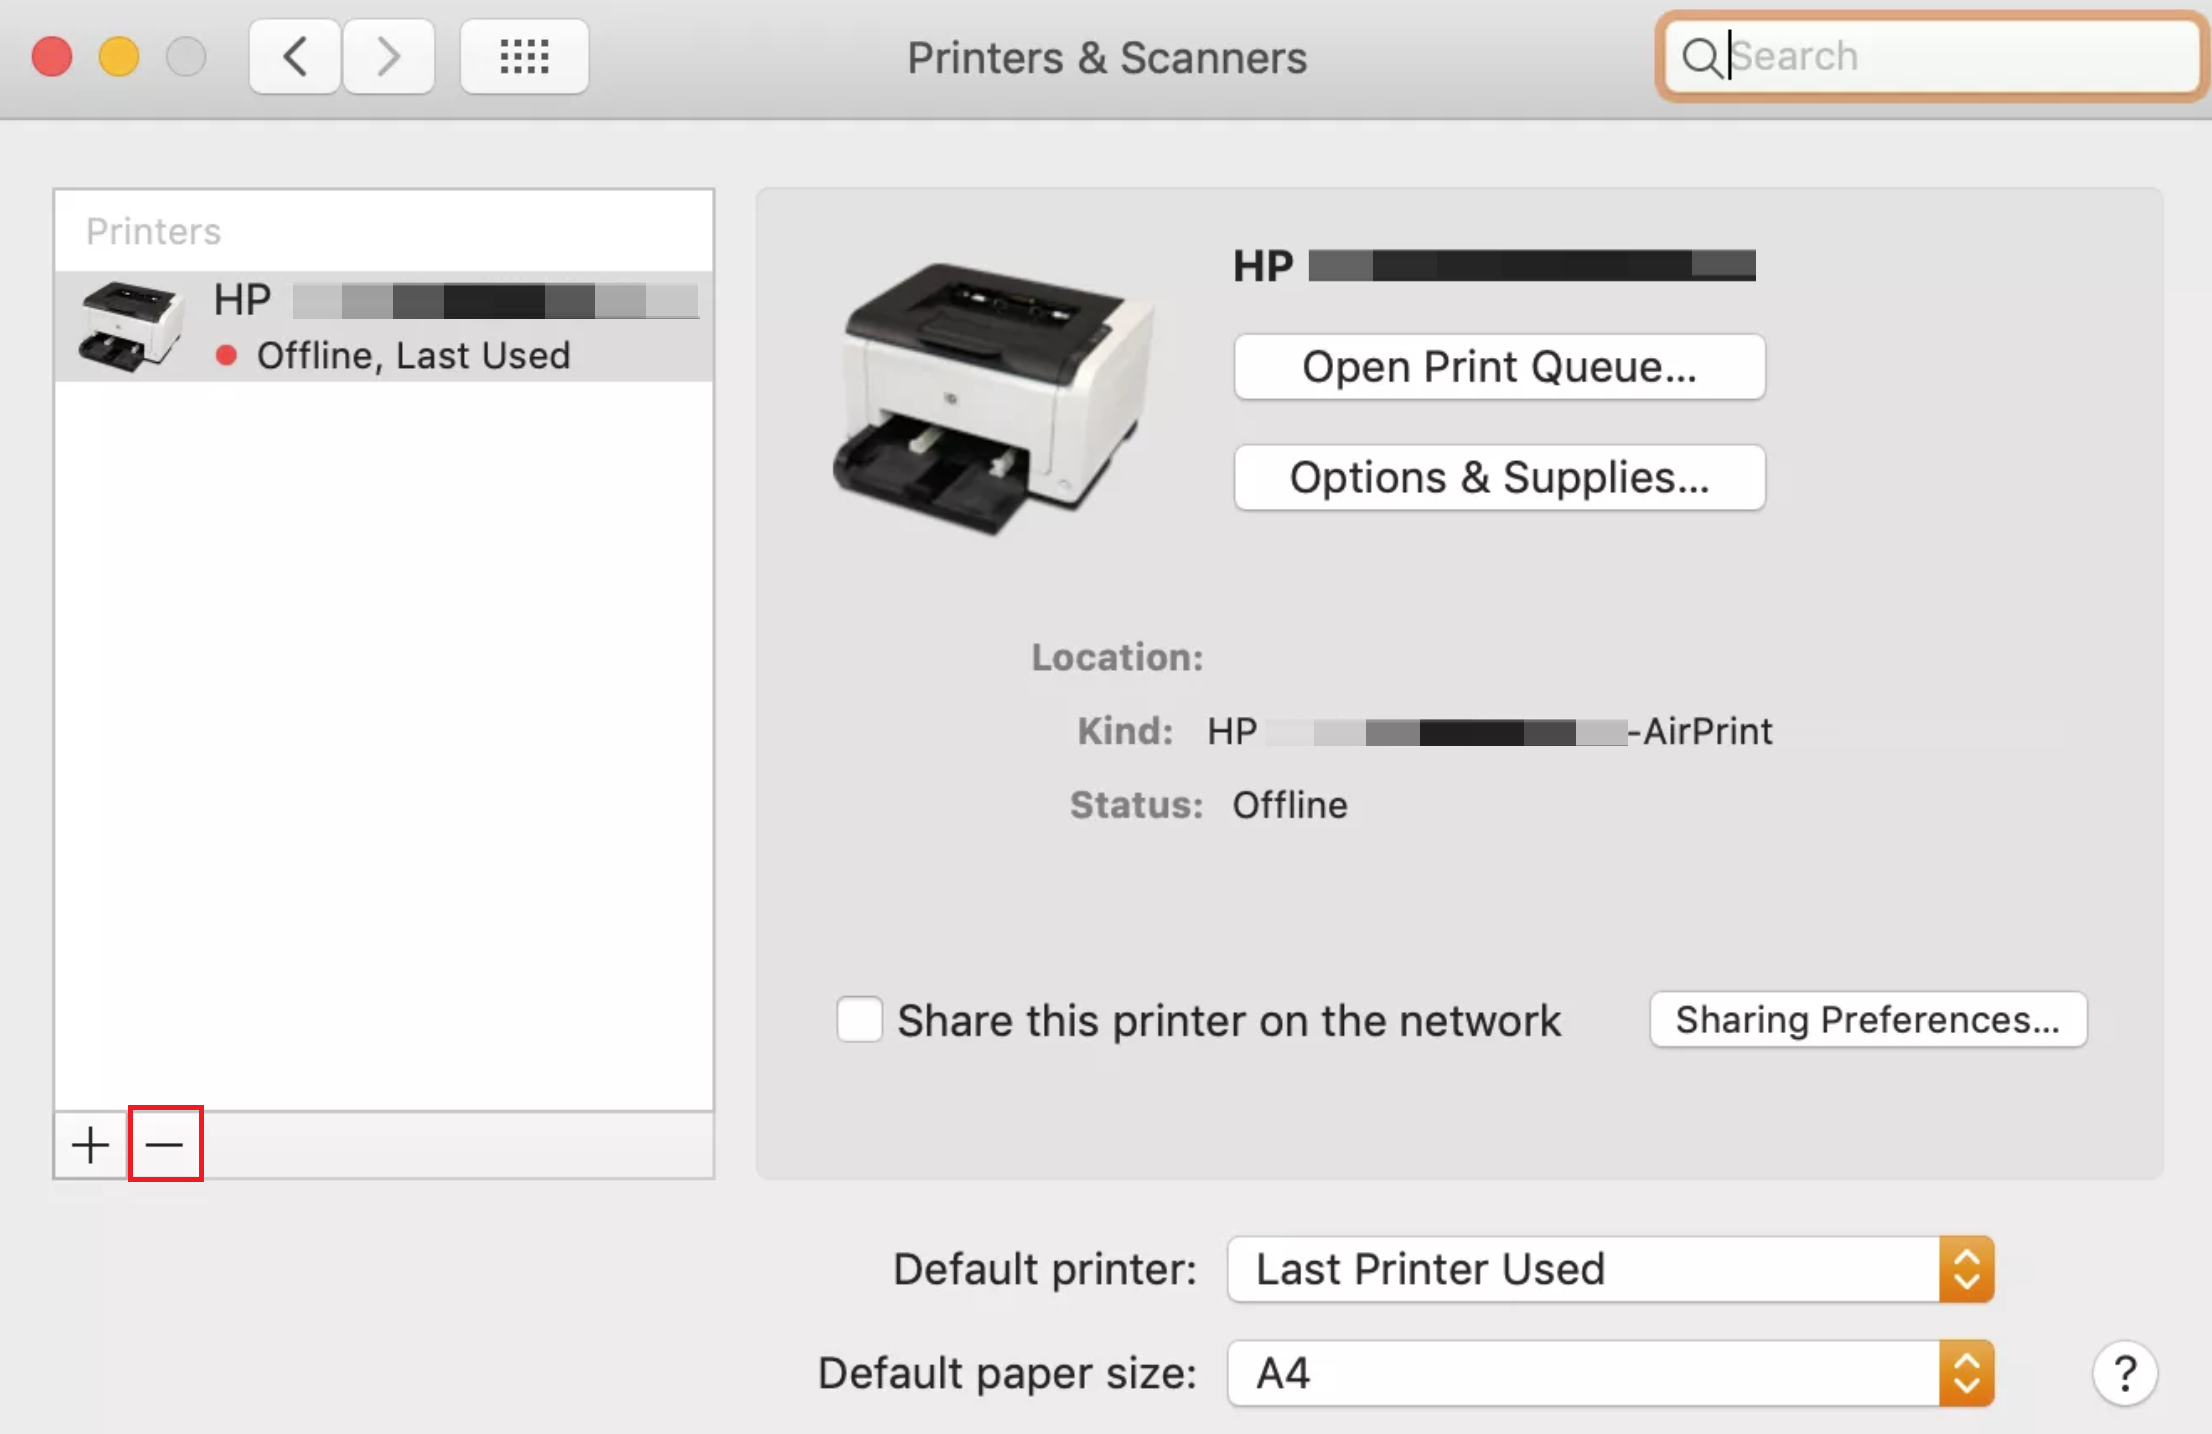
- Confirm removal by selecting Delete Printer.
- Download the newest HP Printer software from the official HP website.
- Return to System Preferences, open Printers & Scanners, and re-add the printer by clicking the + button.
4. Reinstall Printer Driver
Should the aforementioned solutions fail, another trick is to completely uninstall and reinstall the printer driver. This method has proved resourceful for users who continue to face this issue.
- Launch Finder on your Mac.
- Navigate to the Applications folder.
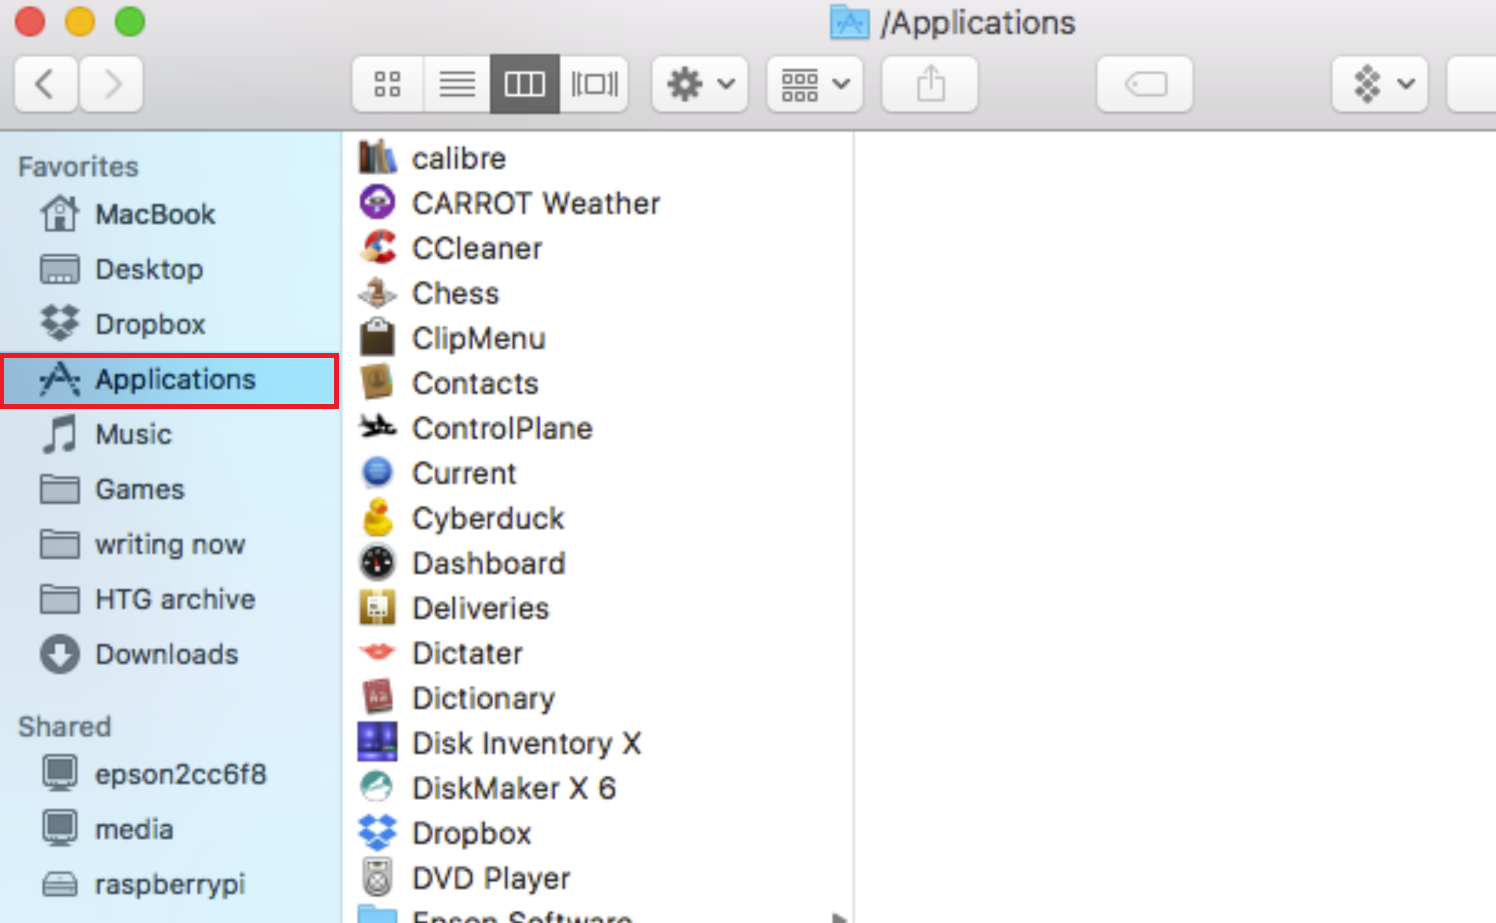
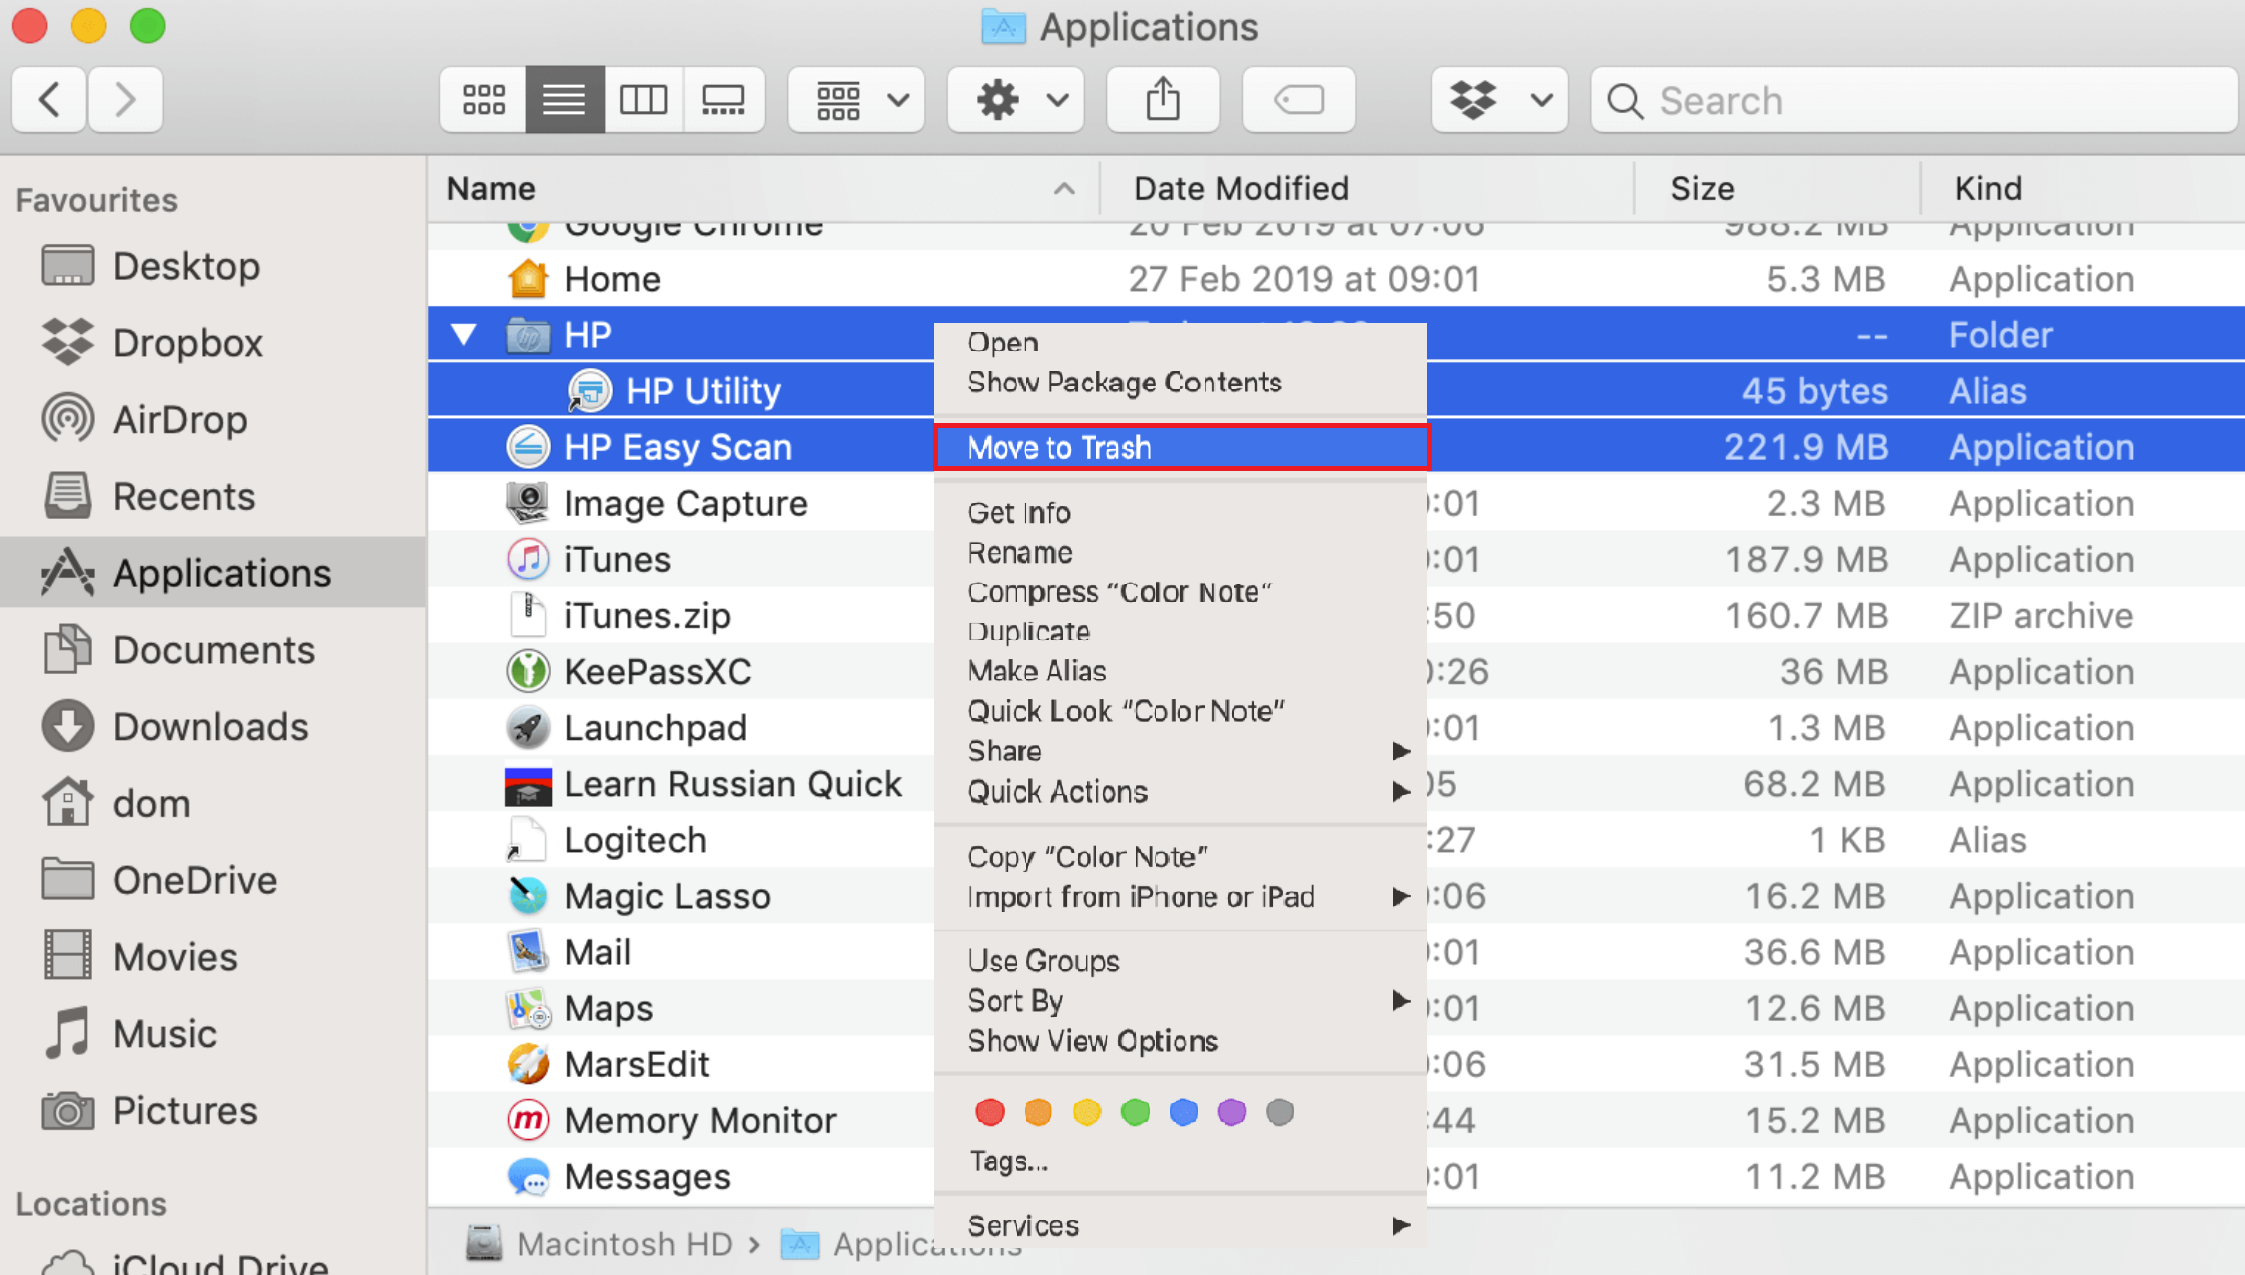
- Search for and open the HP or Hewlett Packard folder.
- Execute the HP Uninstaller, if present, and follow the on-screen instructions.
- If there’s no uninstaller, move the HP application to the Trash.
- Via the menu bar, click Go and select Go to Folder or use the shortcut Command + Shift + G.
- Type ‘/Library/Printers’ in the dialog box and hit Go.
- Press Control and click on the HP folder, then select Move to Trash from the context menu.
Note: Ensure you delete the entire HP folder to remove all traces from your system. Empty the trash after this step. - Go back to System Preferences, access Printers & Scanners, then remove your HP Printer by clicking the – button and selecting Delete Printer.
- Restart your Mac to apply changes.
- Once rebooted, download the latest HP driver from their website.
- Locate the downloaded file and double-click to start installation.
- Follow the instructions provided on the screen.
- Finally, revisit System Preferences via the Apple menu, open Printers & Scanners, and re-add your HP Printer by clicking the + icon.