(Solved) Computer is turning off when playing FIFA 23
FIFA 23 causing your computer to shut down out of the blue could be due to your computer reaching high temperatures which results in windows automatically powering off the system to prevent any permanent damage to the hardware of your computer.

This can be a frustrating matter as the error itself is indistinct, we have compiled a list of troubleshooting tactics that’ll help you get your FIFA 23 back on track.
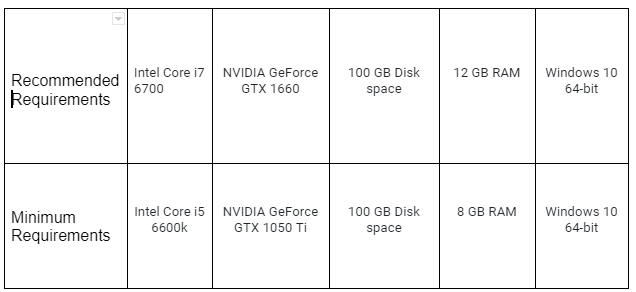
1. Check system requirements
System requirements are a set of minimum and recommended hardware requirements a user’s computer must meet in order to properly run a game or application without any faults. Here are the FIFA 23 system requirements:
2. Run as an Administrator
FIFA 23 will not function properly if the game does not have the required administrator privileges to access the files necessary to run the game appropriately. An application with limited administrator privileges is not able to perform actions that require elevated permission. In such a case, running the game as an administrator will rectify any woes related to the lack of administrator privileges.
Avoid this method if you’re an Epic games user as launching the game results in an ‘LS-0013’ error. Moreover, follow these steps to run the game as an administrator:
- Close the game launcher i.e Steam. EA Play, Origin.
Closing EA Play - Navigate to the FIFA 23 installation folder, or paste the following path to the address bar.
EA play: C:\Program Files\Electronic Arts
Origin Games: C:\Program Files (x86)\Origin
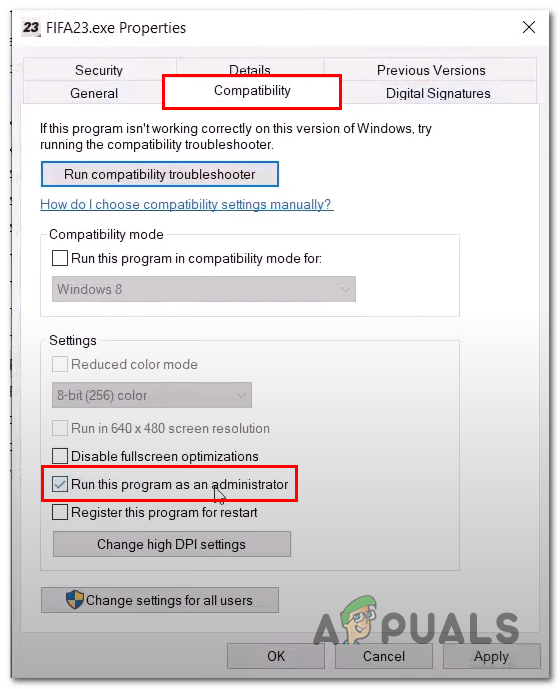
- Right-click on Fifa23.exe and click on the Properties option.
- Click on the “Compatibility” tab and check the “Run this program as an administrator”.
Configuring FIFA 23 to run as an administrator - Launch the game.
3. Perform a clean boot
Clean boot is the process of starting your computer with a minimal set of necessary Microsoft services. This process allows you to determine if a service running in the background interferes with the game. Follow these steps to perform a clean boot on your computer:
- Press the Windows + R keys to open the Run dialogue box
- In the run dialogue box, type MSConfig
- In the newly opened window, click on services located on the navigation menu.
- Uncheck the Hide all Microsoft services check box.
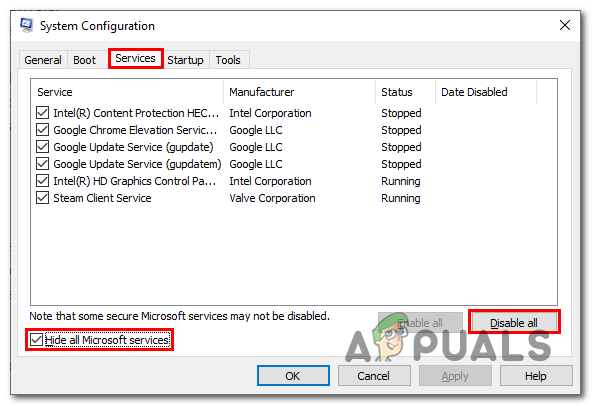
Performing a clean boot - After that, Click on the Disable all button.
Restart your computer after that, and try launching the game. If the problem presumes, continue to the next step.
4. Uninstall third-party Anti-cheats
Third-party Anti-cheats are known to cause disruption with the smooth working of FIFA 23, Third-party anti-cheats such as Vanguard, Faceit etc will cause compatibility issues with FIFA 23 as they are not properly integrated with the FIFA 23’s built-in Anti-Cheat.
Using a third-party launcher can cause problems such as crashes, performance issues etc.
- Press the Windows keys to open the start menu
- In the search bar type “Add or remove program”.
- Search for Faceit, Click on the Uninstall button.
- Once uninstalled, Try launching the game.
If the problem presumes continue to the next step.
5. Increase Virtual Memory
Virtual memory is a computer system’s method of expanding its available memory capacity by using a portion of the Hard disk drive (HDD) as an extension of RAM.
This allows the computer to run programs and applications that require more memory than is physically available in the Computer’s RAM.
Here are the steps to increase virtual memory:
- Press the Windows key to open the start menu.
- In the search bar type “View advanced system setting” and open it.
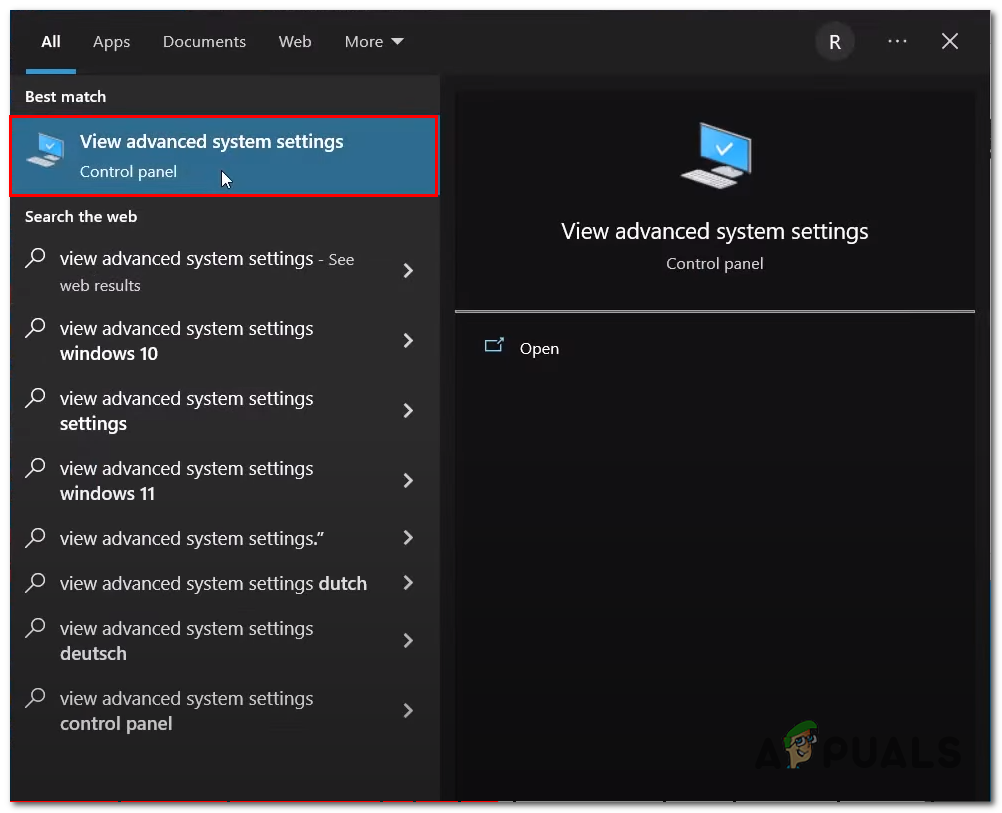
Opening the advanced system settings - Now, Click the settings button under the performance option.
- Click on the Advanced tab.
- Click on the Change button under the Virtual memory settings.
- Un-check the checkbox next to the “Automatically manage paging file size for all drives” option.
- Click on the “Custom size” radio button and follow the next steps carefully.
- Multiply your computer’s RAM in MB by 1.5 and insert the answer in the Initial size (MB) text field e.g 8 x 1024 x 1.5 = 12,288.
- Similarly, Multiply your computer’s RAM in MB by 3 and insert whatever the answer is in the Maximum size text field. e.g 8 x 1024 x 3 =24,576.
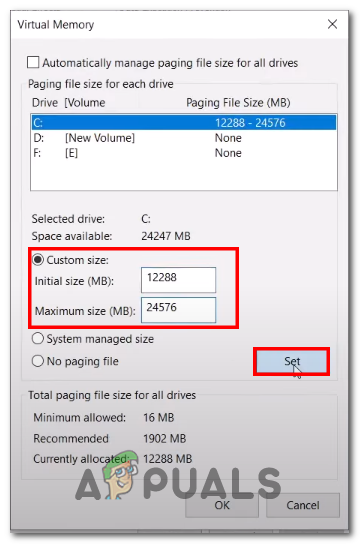
Manually allocating virtual memory in the windows advanced settings - Save the changes.
6. Disable overlay applications
Overlay applications provide great usability but require extra resources to run. Discord, Steam, and many others provide users with the option to run the application on top of their main process, which can then be accessed onscreen while in-game. This practice is resource-intensive and can cause slow down in cases where you don’t have the best hardware.
6.1 Steam
Here are the steps to disable Steam in-game overlay:
- Open the Steam client and navigate to the library
- Right-Click on NFS: Unbound and Click on the Properties button.
- Inside the general section, uncheck the check box next to “Enable the steam overlay while in-game”
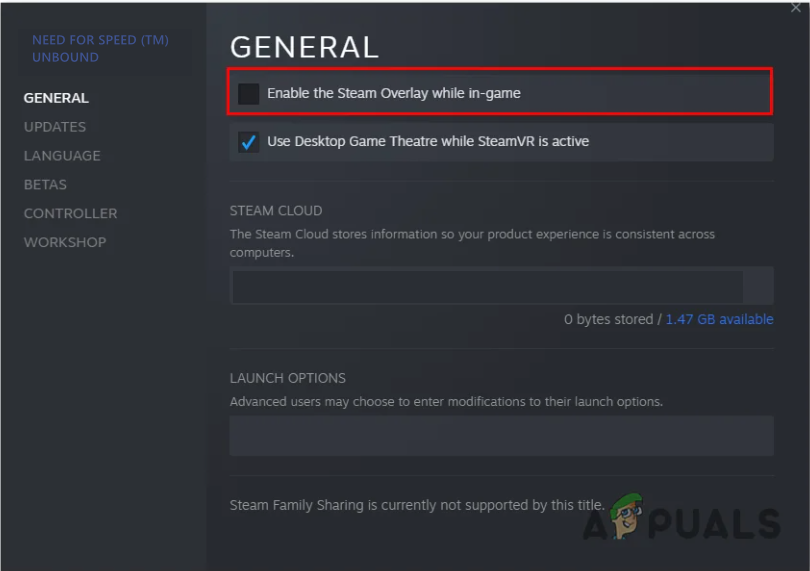
Disabling steam overlay via the steam client
6.2 Discord
Here are the steps to disable the discord game overlay:
- Open the Discord application.
- In the bottom-left, click on the “Settings” icon.
- In the left-hand menu, open the “game overlay” settings
- Toggle the “Enable in-game overlay switch” to off.
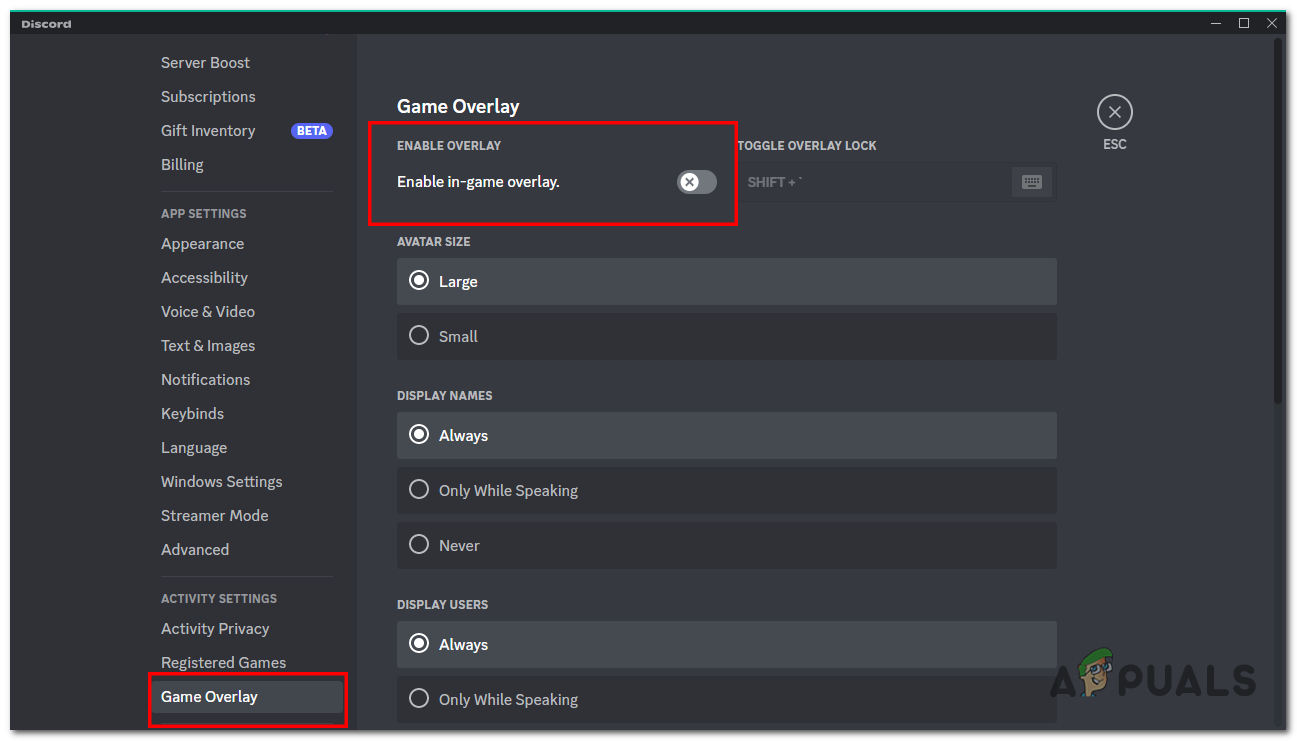
disabling the in-game overlay of the discord - Save the changes.
Opening the settings of the discord application
7. Perform a clean installation of the display drivers
Another reason you could be facing lag or stutter in-game is due to an outdated set of graphic drivers. We’ll be uninstalling and reinstalling new and updated display drivers to cure this problem. We’ll also be utilizing a third-party application that’ll help us uninstall and clear out any empty registry entries, leaving no obsolete files. Here are the steps to do so:
- Click here to download a DDU (Display driver uninstaller).
- Download and install the application. The process is straightforward, Restart your computer.
- Upon restart, Repeatedly hit the “F8” key and enter the safe mode.
- Run the Display driver uninstaller application.
- Select the type and vendor on the right-hand side as shown in the image below.
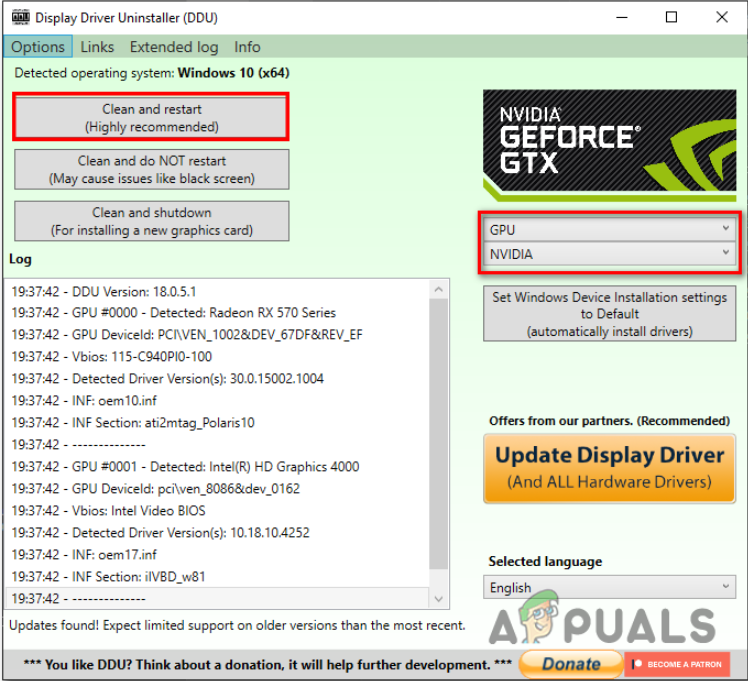
Utilizing Display driver uninstaller - Click on the Clean and Restart button.
- Upon restart, visit your graphic card manufacturer’s website and download and install the latest version of the display drivers for your computer.
7. Lower in-game settings
A quite obvious fix to facing stutter or lag would be lowering the in-game settings. In doing so, you will almost certainly receive an overall performance boost. Follow these straightforward steps to do so:
- Run the game and head to the graphic settings.
- Try “Windowed mode” by changing the screen mode.
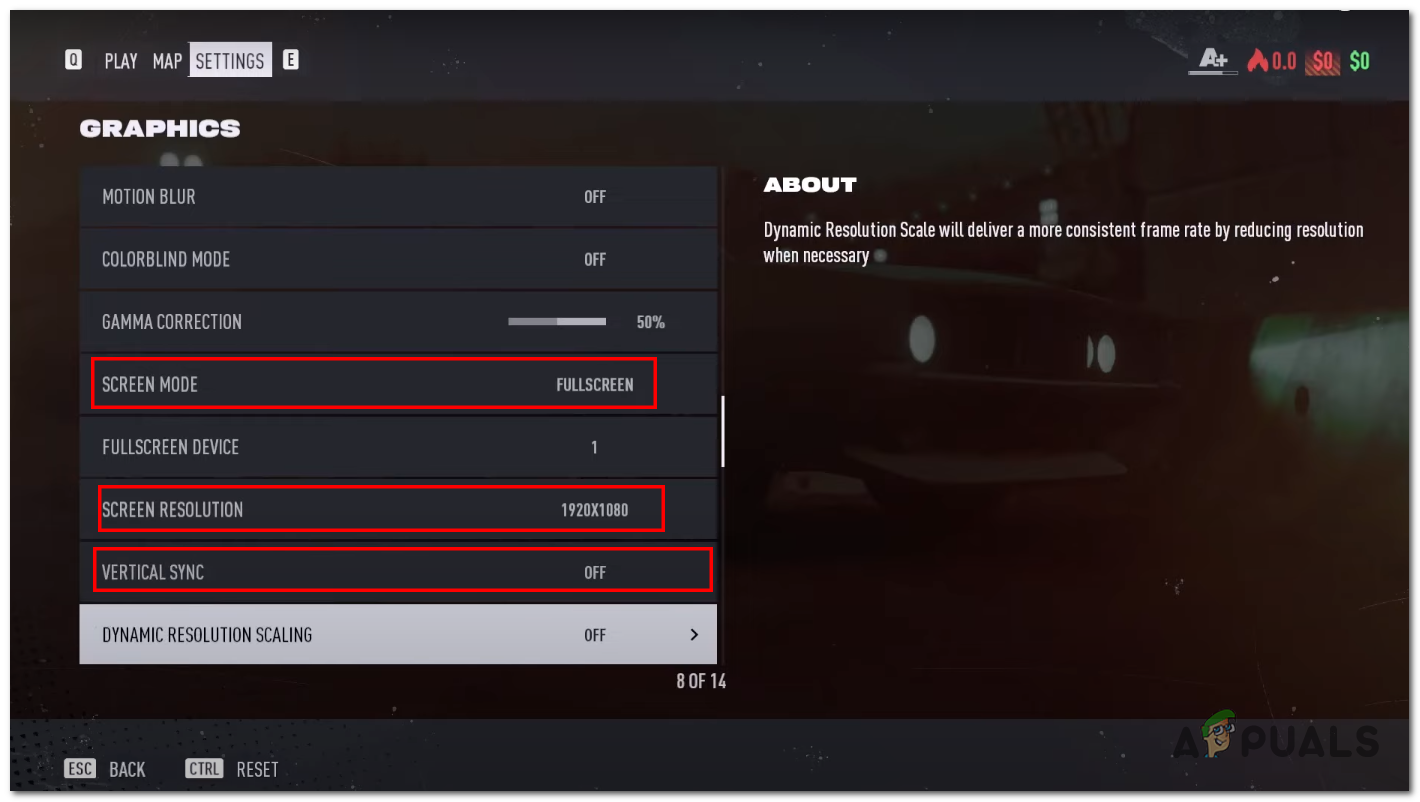
Changing screen mode in NFS mode in-game settings - Turn off the Vertical sync feature and decrease the resolution to 1280*720 or something more suitable to your computer’s specs.
- Similarly, lower the graphics quality in accordance with your computer’s specifications.

Lowering the graphics quality in NFS unbound - Save the changes and try playing the game.
8. Run the game on a dedicated graphics card
Running the game on a dedicated graphics card is important as otherwise, you’re not utilizing your computer’s potential properly. Here are the steps to do so:
- Right-click on the desktop and select “NVIDIA Control Panel” or “AMD Radeon Settings” depending on the type of dedicated graphics card you have.
- In the control panel, navigate to “Manage 3D settings” and select the “Program Settings” tab.
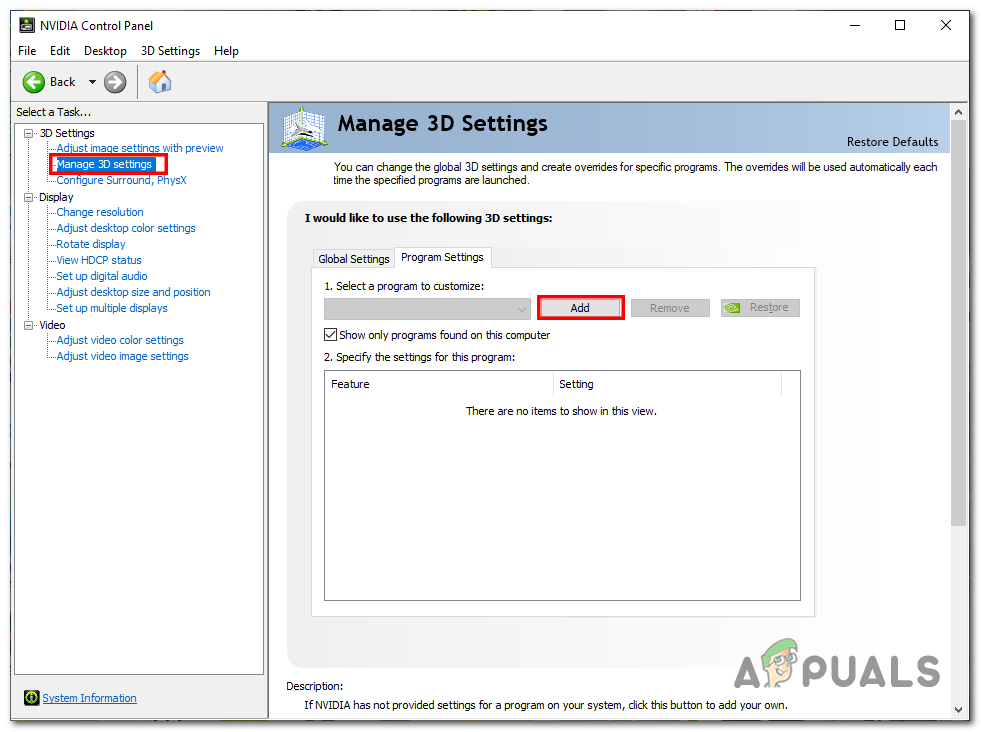
Opening the 3D settings options and manually adding the game - Click on the “Add” button.
- Click on the “Browse…” button, Here’s the default installation path for your ease.
EA Play: C:\Program Files\Electronic Arts\FIFA 23
Origin: C:\Program Files (x86)\Origin Games
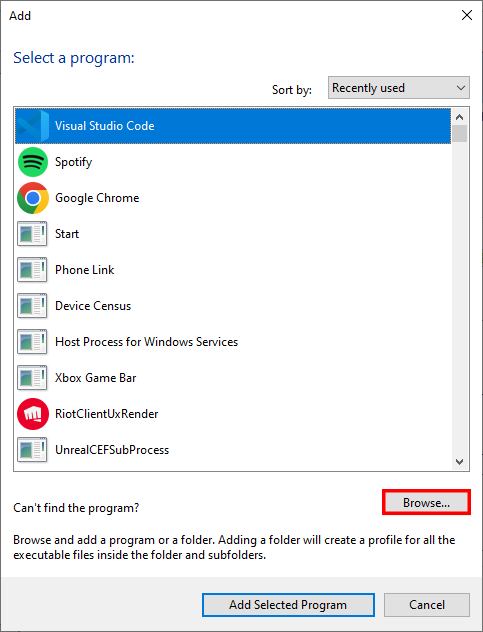
Clicking on the “browse” button to add the NFS: Unbound to the list - Once the game is selected, you can set the preferred graphics processor to “High-performance NVIDIA processor” or “High-performance AMD processor” as appropriate.
- Apply the changes and launch the game.
- Check the in-game settings to ensure that the game is running on the dedicated graphics card.


