[FIX] Overclocking Failed Error Message During Boot
Some PC users are reporting that they see an ‘Overclocking Failed‘ error whenever they try to boot up their PC. The error message is slightly different depending on the motherboard manufacturer. In most cases, affected users are saying that they’ve never overclocked their default frequencies despite the apparition of this message.
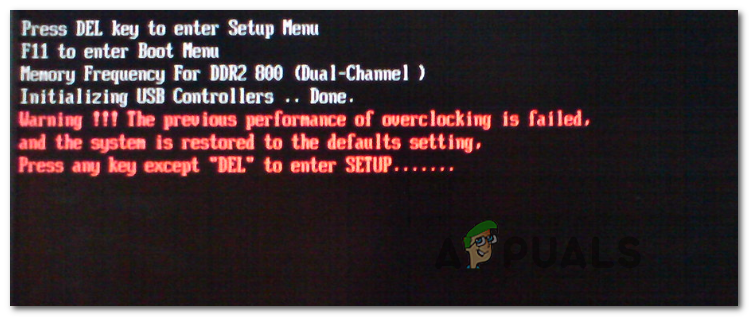
In most cases, the ‘Overclocking Failed‘ error occurs due to a glitch that ends up fooling a series of startup processes that your system is overclocked when in fact you’re running with the default frequencies. In this case, a BIOS / UEFI reset should allow you to fix the issue.
If the glitch is originating from a BIOS / UEFI setting that is maintained by between startups, you’ll need to clear the CMOS battery before being able to boot without issues.
However, this problem can also occur due to a BIOS problem. In this case, updating your BIOS version should allow you to resolve the ‘Overclocking Failed‘ error.
Resetting BIOS Settings
If you’re seeing the ‘Overclocking Failed‘ error during every startup sequence, your first attempt at fixing this issue is to reset your BIOS settings and see if that ends up fixing the issue for you. It’s likely that a BIOS / CMOS glitch ends up telling the processes responsible for the booting sequence that your frequencies are overclocked even if they aren’t.
In case this scenario is applicable, one of the guides below in order to reset your BIOS pr UEFI settings to the default. If you’re using the older BIOS technology, follow Option 1 and if you’re using UEFI, follow Option 2.
Note: Keep in mind that depending on your motherboard manufacturer and the boot technology, some steps and options might be slightly different than the instructions presented below.
Option 1: Resetting BIOS settings
- Power up your computer and start pressing the Setup (Boot key) repeatedly as soon as you see the initial screen. The Setup key should be displayed on the screen, but in case you can’t see it, try pressing on Esc key, F keys (F1, F2, F4, F6, F8 or F12) or press the Del key (on Dell computers) to access your BIOS setup menu.
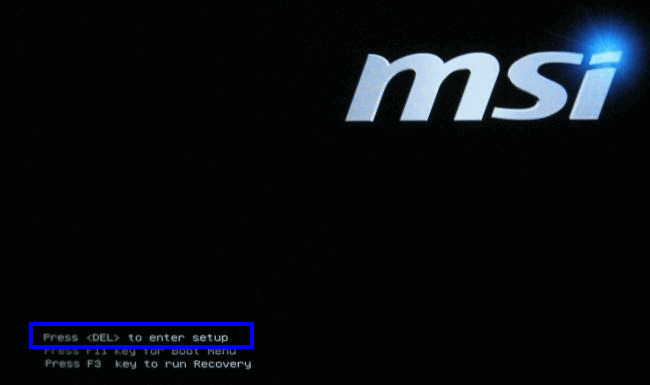
Press [key] to enter setup - Once you’re inside your BIOS settings, look for a setting named Setup Defaults and then click on Load Setup Defaults and follow the on-screen prompts to confirm and save the current configuration.
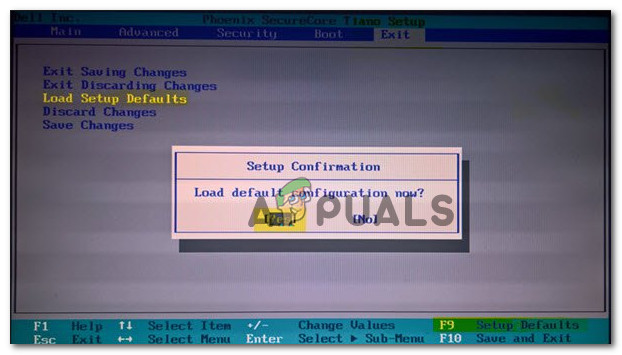
Load default system configuration Note: Depending on your motherboard, you might find this option named Reset to Default, Factory Default or Setup Default. Keep in mind that with some BIOS versions, you can load the default BIOS configuration simply by pressing F9 and confirming by pressing Enter.
- Save the changes, then exit and see if the boot sequence completes without the same ‘Overclocking Failed‘ error.
Option 2: Resetting UEFI Settings
- Insert an installation media that is compatible with your Windows version that you’re currently rocking. As soon as you get past the initial screen, press any key to boot from the installation media.
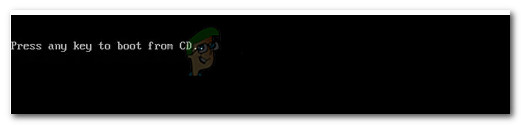
Press any key to boot from installation media Note: If you don’t have a compatible installation media, you can also get to the Recovery menu by forcing 3 consecutive startup fails – You can do this by powering off your computer manually while your OS is engaged in the Booting sequence).
- Once you’re inside the Windows install menu, click on Repair my Computer from the bottom-left section.
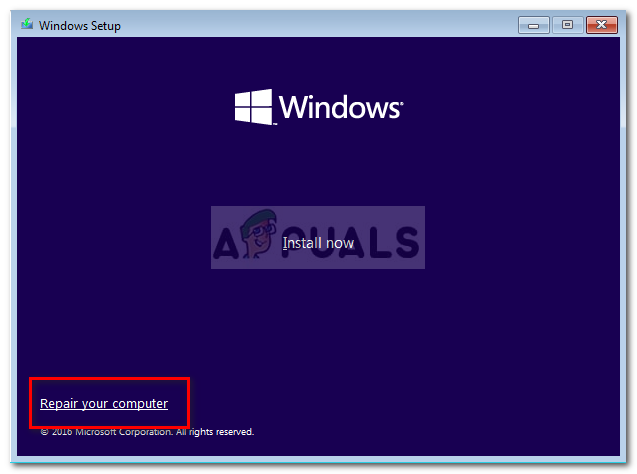
Select ‘Repair my computer’ - Once you get to the Recovery menu, click on the Troubleshoot option from the available options. From there, go to Advanced Options and click on UEFI/BIOS Firmware Settings.
- As soon as you do this, your computer will restart directly into the UEFI settings menu. Once you’re inside, look for an option named Restore Defaults (or similar). Next, complete the operation and save the changes before exiting the UEFI settings.
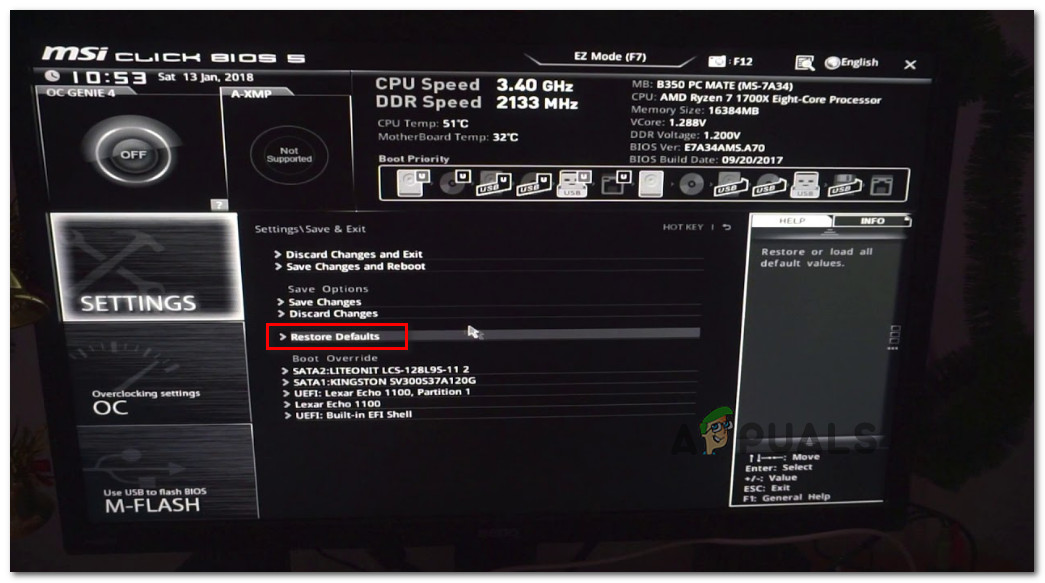
Restore UEFI settings to the defaults - At the next system startup, recreate the operation that was previously triggering the error and see if the same issue is still occurring.
In case the same issue is still occurring, move down to the next potential fix below.
Clearing the CMOS Battery
If the previous method didn’t allow you to fix the issue, it’s very likely that the problem occurs due to some incorrect settings that the CMOS (Complementary Metal-Oxide Semiconductor) battery holds. This component is responsible for storing certain BIOS / UEFI preferences including overclocking information.
Several affected users have confirmed that this operation finally allowed them to complete the booting sequence and get past the ‘Overclocking Failed‘ error.
Here’s a quick step by step guide that will show you how to clear the CMOS Battery in order to relieve any store information that might be contributing to the apparition to this error:
- Start by turning off your computer and unplugging it from its power source.
- After you cut the power to your computer, remove the slide cover and equip yourself with a static wristband in order to ground yourself to the frame and avoid any component damage facilitated by static electricity.
- Once you have a bird’s eye view of your motherboard, identify the CMOS battery (typically located in one of the corners). When you see it, use your fingernail or a non-conductive sharp object to remove it from its slot.
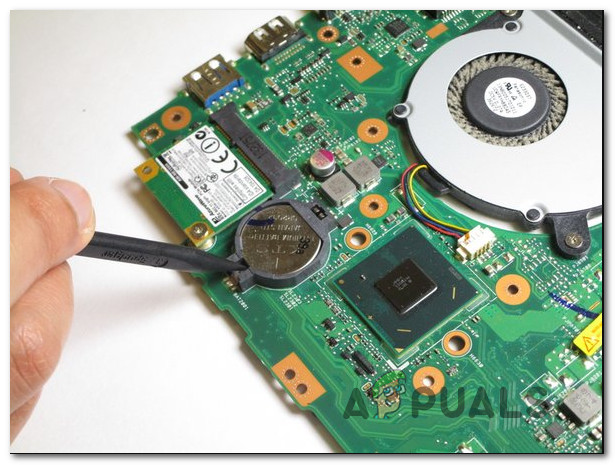
Removing the CMOS battery - After you remove the CMOS battery, wait for a full minute before inserting it back into its slot.
- Put the cover back on, then plug your computer back into a power outlet and boot it up to see if the issue is now resolved.
Updating BIOS Version
If none of the methods above have allowed you to fix the issue, it’s very likely that you’re dealing with a BIOS problem that will not be resolve until you reflash it. Several affected users encountering the same issue have confirmed that they were finally able to fix the ‘Overclocking Failed‘ error after updating the BIOS version to the latest version.
Important: Unless you’ve gone through this procedure before, updating your BIOS is not recommended.
Depending on your motherboard, the steps of updating your BIOS version will be different. Most manufacturers have a proprietary flashing utility that will make the procedure easier – MSI uses MFlash, Asus has E-Z Flash, etc.
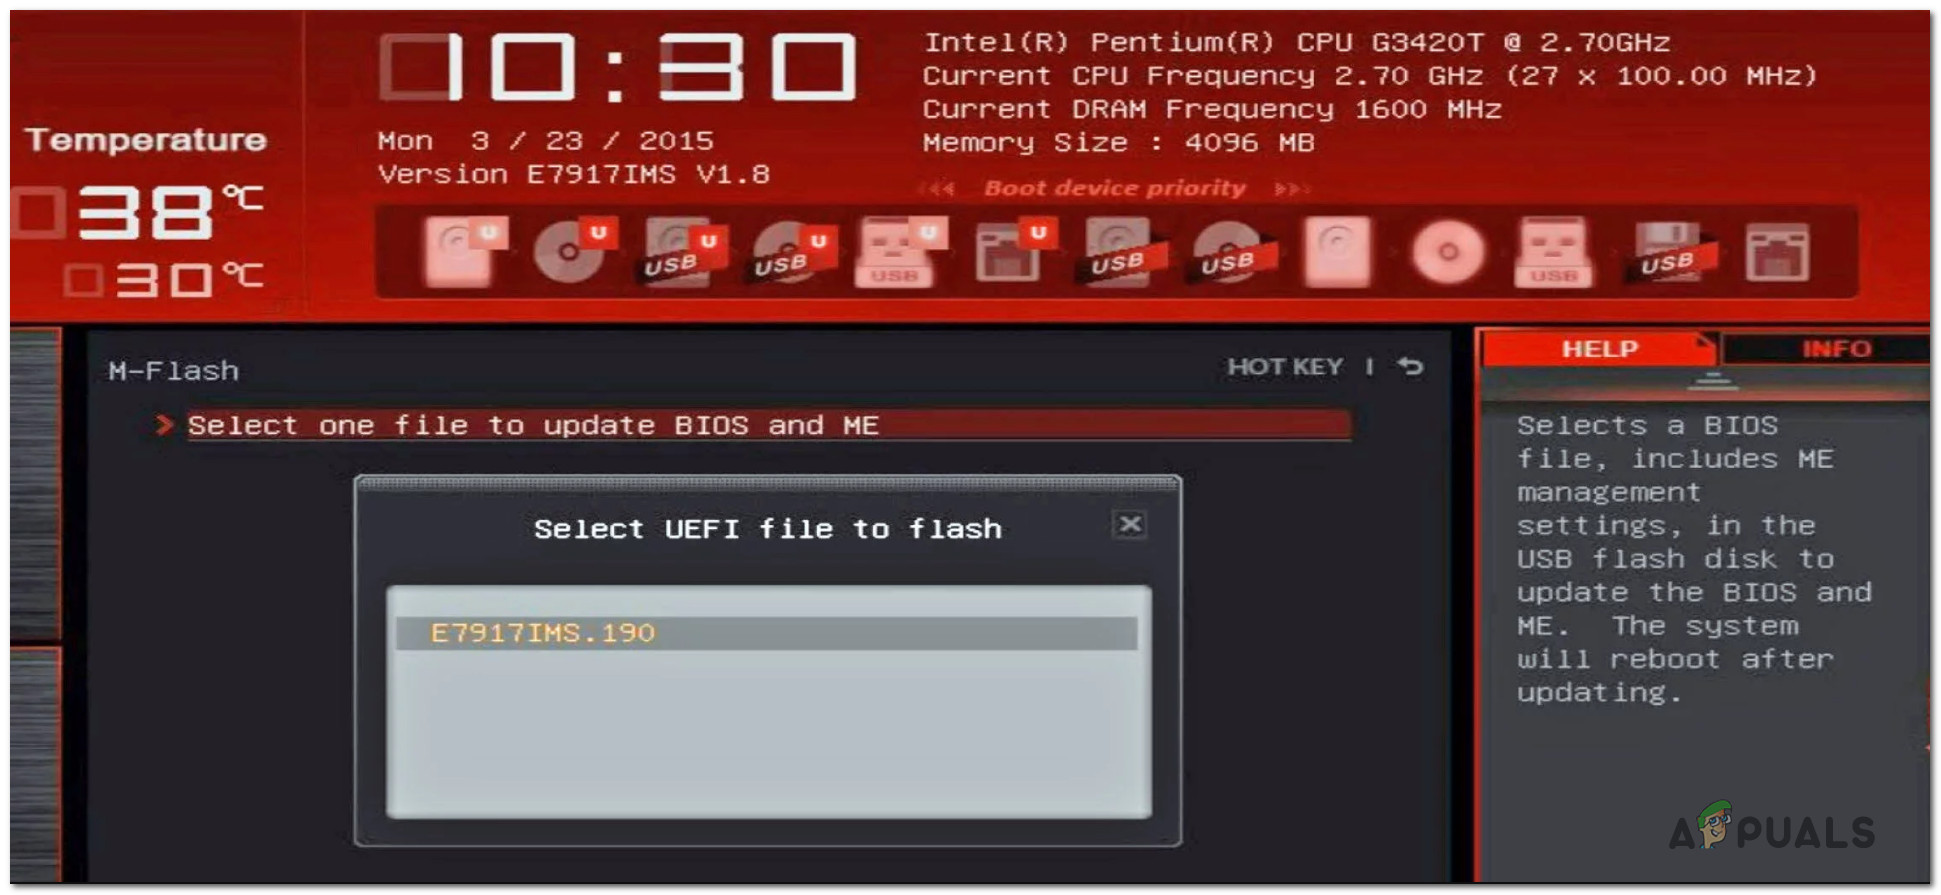
If you want to go through this procedure, look online for specific steps on updating your BIOS based on your motherboard model.
In case you’re not confident in your technical abilities, take your PC to a technician in order to avoid the risk of bricking your system.


