How to Stop Your Mouse from Randomly Moving in Windows?
Some Windows users may occasionally run into issues with their mouse, where the cursor moves or jumps around on the screen unpredictably. This issue can arise from simple causes, such as a spec of dust on the mouse pad, or from more complex issues like malware infections that tamper with the computer’s settings and execute commands in the background, leading to strange cursor behavior.

In this article, we’ve compiled a comprehensive guide of solutions to help you tackle this problem. Please follow each solution step by step to restore proper control of your mouse.
Troubleshooting Prerequisites
- Clean your Mousepad: First, ensure that your mousepad or the surface on which you’re using your mouse is clean. If cleaning the mousepad doesn’t help, proceed with cleaning the bottom surface of your mouse, as debris interfering with the sensor could be the cause.
- Restart and Reconnect: If your computer or laptop has been on for an extended period, give it a fresh start by rebooting. Additionally, disconnect your mouse and reconnect it to see if this resolves the issue.
- Mouse Hardware: If possible, try using your mouse on a different computer to check whether the issue persists. This can also help you identify any potential physical damage to the USB port or sensor that might be causing the problem.
- Wireless Mouse: For those using a wireless mouse, the battery level can directly affect performance. Replace weak or old batteries to ensure your mouse has sufficient power, as low battery levels can cause erratic cursor behavior.
- Touch-screen Laptops: Users with touch-screen laptops sometimes experience the screen registering touches unintentionally, which may cause the cursor to move and click sporadically. If you think this might be happening, consider placing insulation pads to prevent the keyboard from pressing against the screen when the laptop lid is closed.
1. Change the Touchpad Delay (Laptops Only)
For laptop users, the touchpad’s sensitivity might be too high, leading to cursor movement when you’re typing or using the laptop. Adjusting the touchpad delay might help minimize unintended cursor movement.
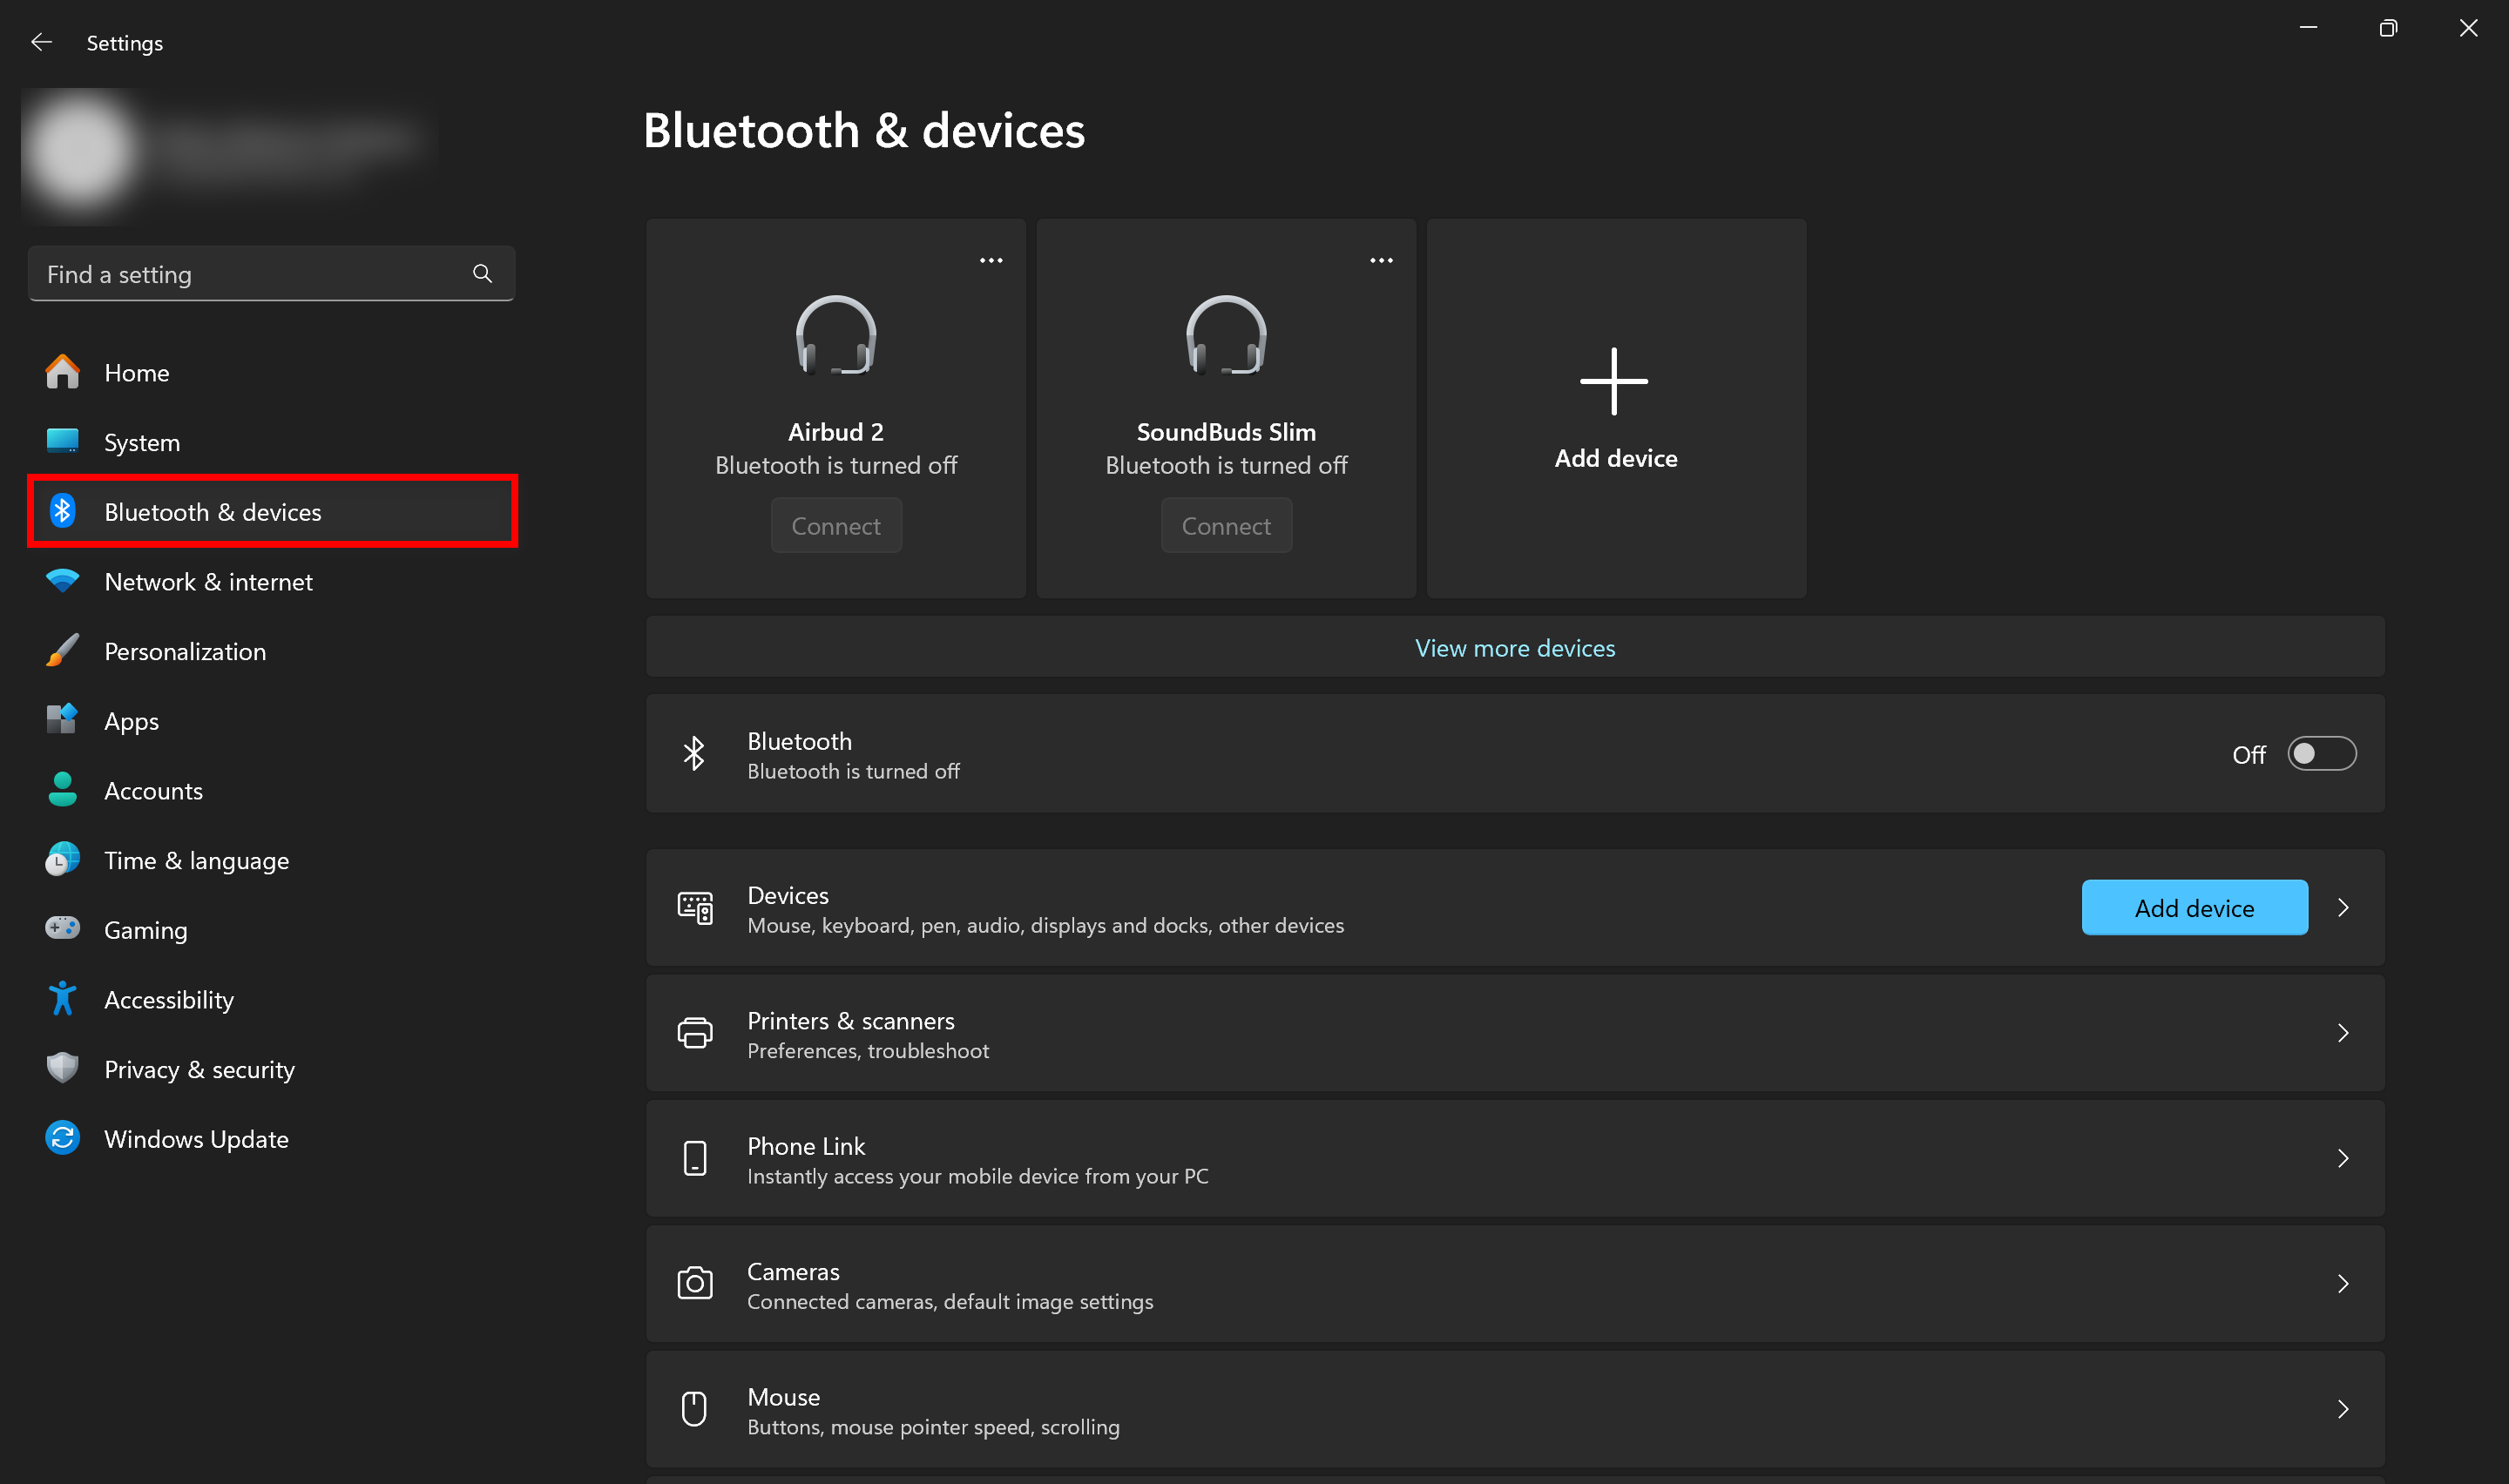
- Open the Settings by clicking on the Bluetooth & devices section.
- In the settings menu, navigate and click on the Touchpad tab.

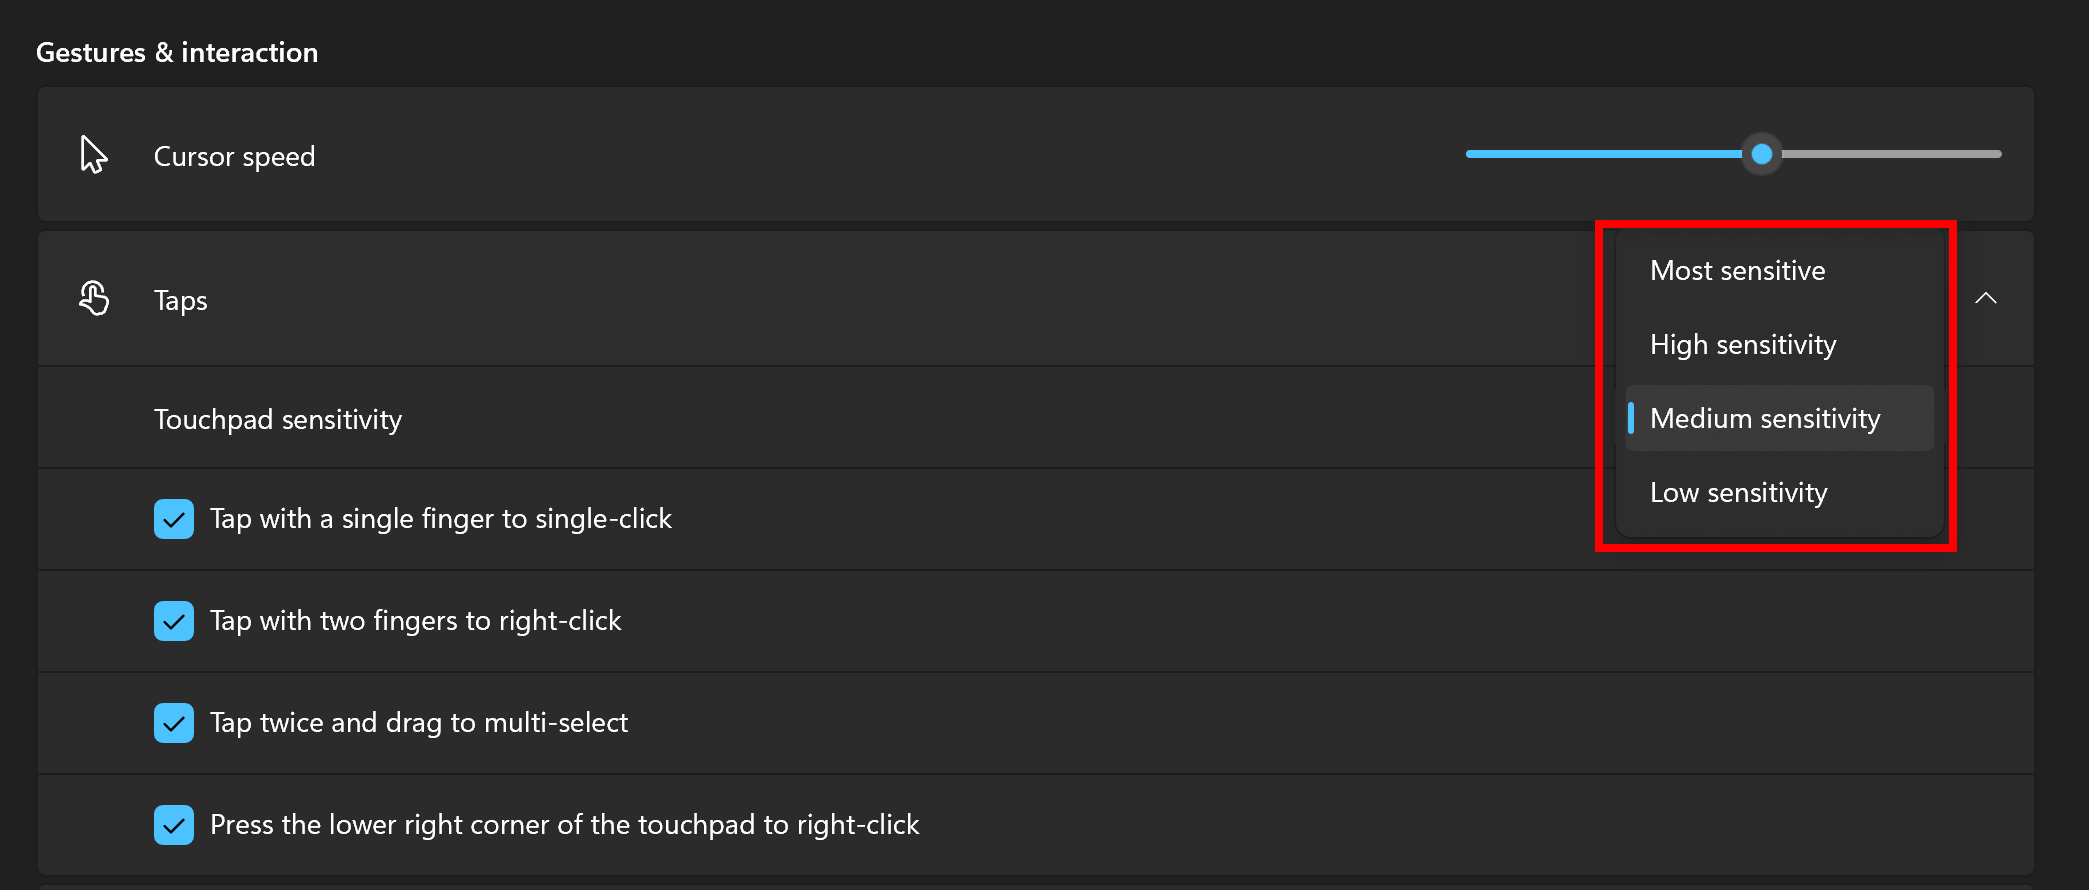
- Click on the Taps option, found under Gestures & interaction.

- Select the desired Touchpad sensitivity that best suits your use case to reduce inadvertent taps and cursor movements.
2. Disable the Touchpad (Laptops Only)
Disabling the touchpad will help you confirm if it’s causing the issue with your cursor. If disabling it doesn’t resolve the problem, you can easily enable it again.
- Go back to Settings and under the Bluetooth & devices category, access the touchpad options.

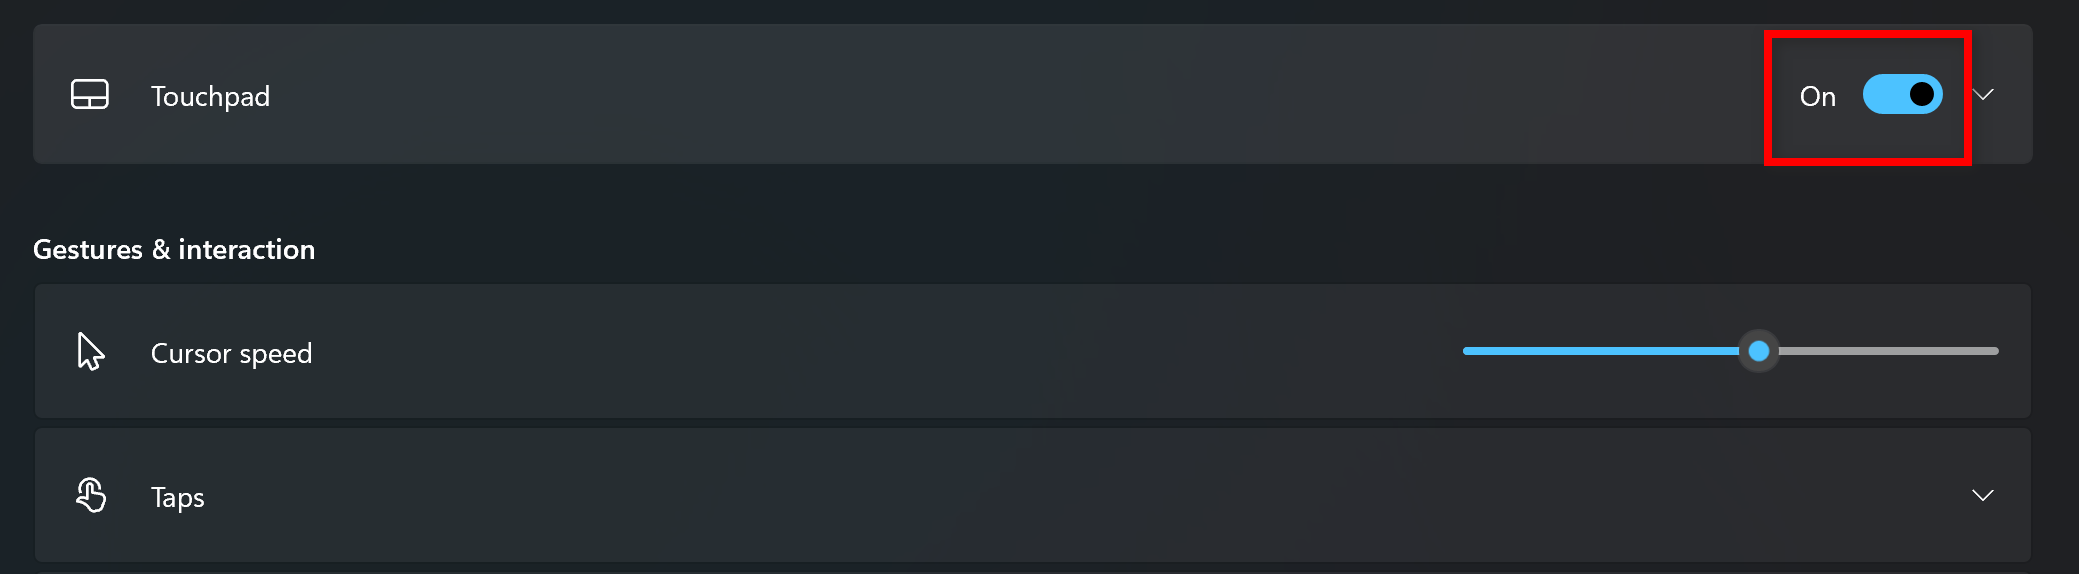
- Click on the Touchpad tab.

- Disable the touchpad by toggling the switch to the off position.
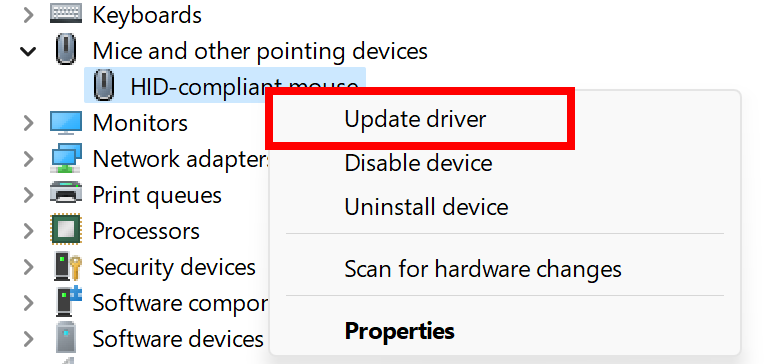
3. Update Your Mouse Drivers
Sometimes, the source of the problem can be outdated or corrupt mouse drivers. If you’ve recently updated to Windows 11 or installed new software, your mouse drivers may need an update or reinstallation.
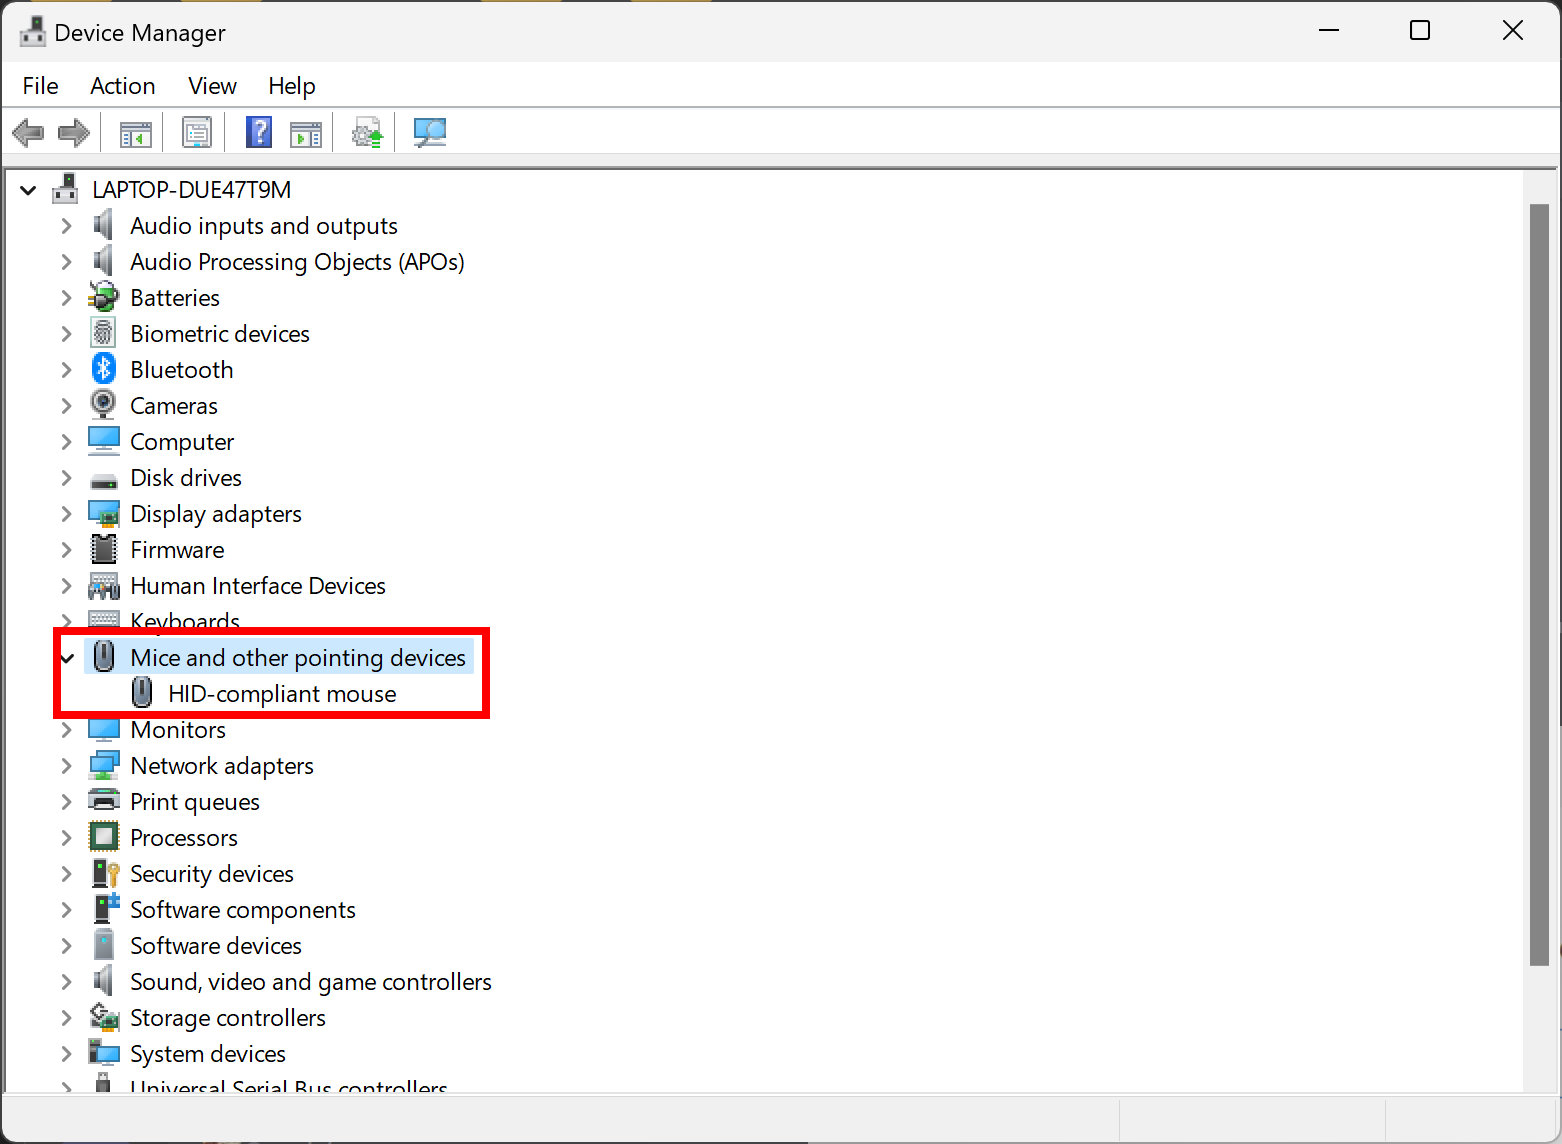
- Use the Run command by pressing Windows + R and type in “devmgmt.msc”, then press Enter.

- In the Device Manager, look for Mice and other pointing devices. A yellow exclamation mark beside a device indicates a problem with the driver.
- Right-click on your mouse and select Update driver.
- Choose to Search automatically for updated driver software. Windows will then search and install the appropriate drivers.
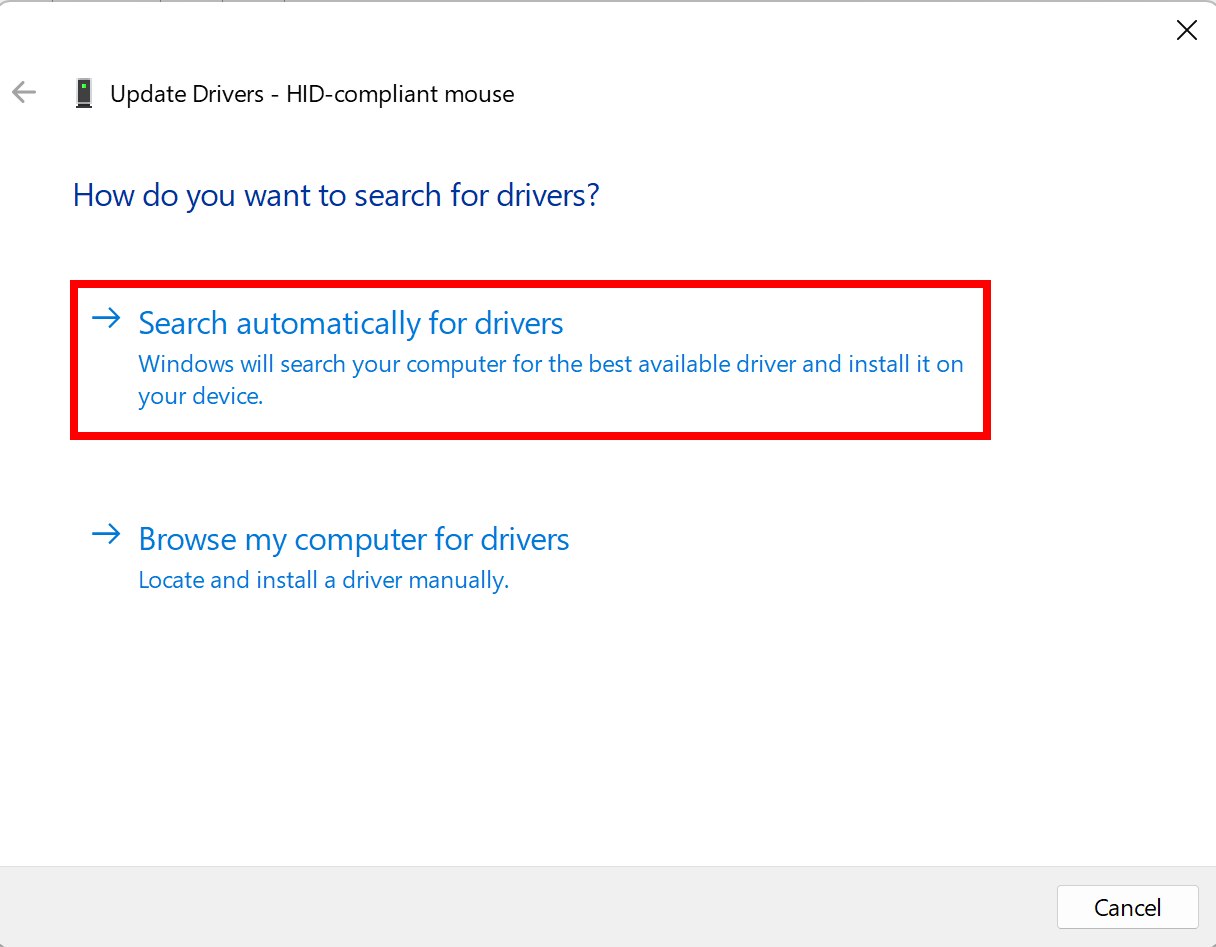
- If the automatic search doesn’t work, visit the mouse manufacturer’s website and download the driver that matches your mouse model.
4. Change the Sensitivity of Your Mouse
A mouse with high sensitivity settings can detect even the slightest movements, which might be interpreted as intentional cursor movement. Adjust the sensitivity to a lower level to see if it helps stabilize the cursor:
- Open Settings and select Bluetooth & devices.

- Proceed to the Mouse tab in the side menu.
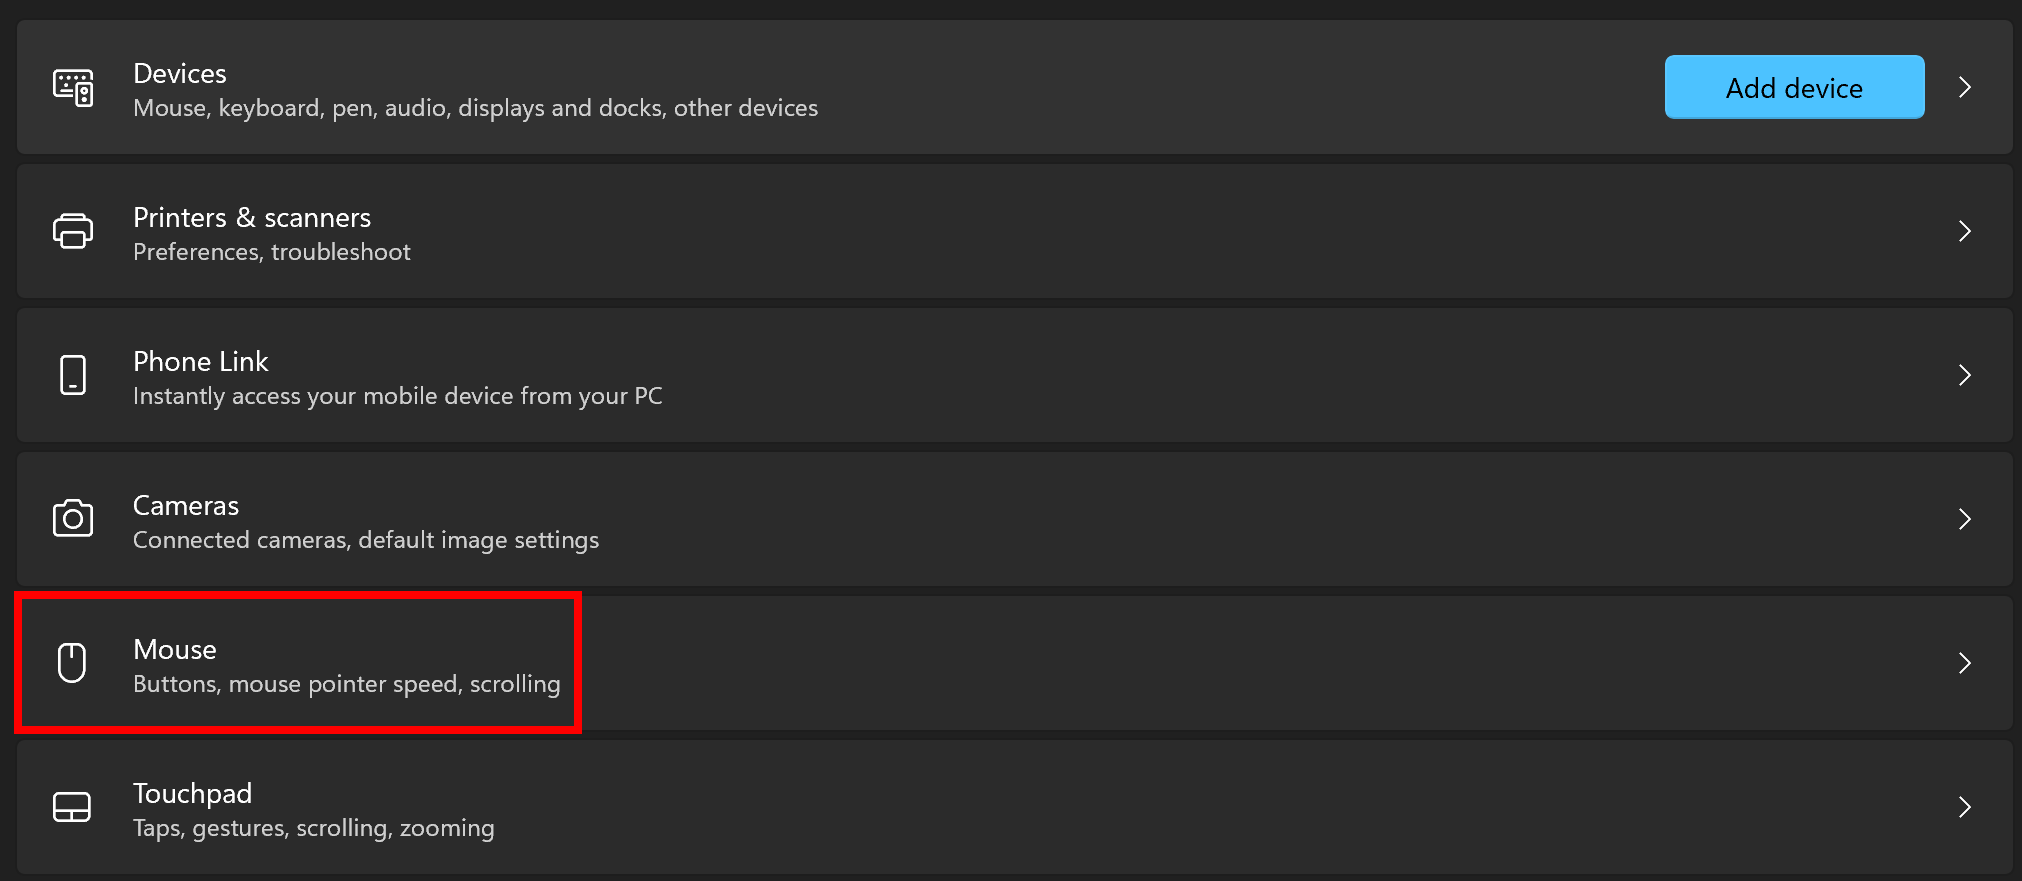
- Under Related settings, click on Additional mouse options.

- In the Mouse Properties dialog, switch to the Pointer Options tab.
- Adjust the slider under the Motion section to slow down the mouse speed and apply the new setting.
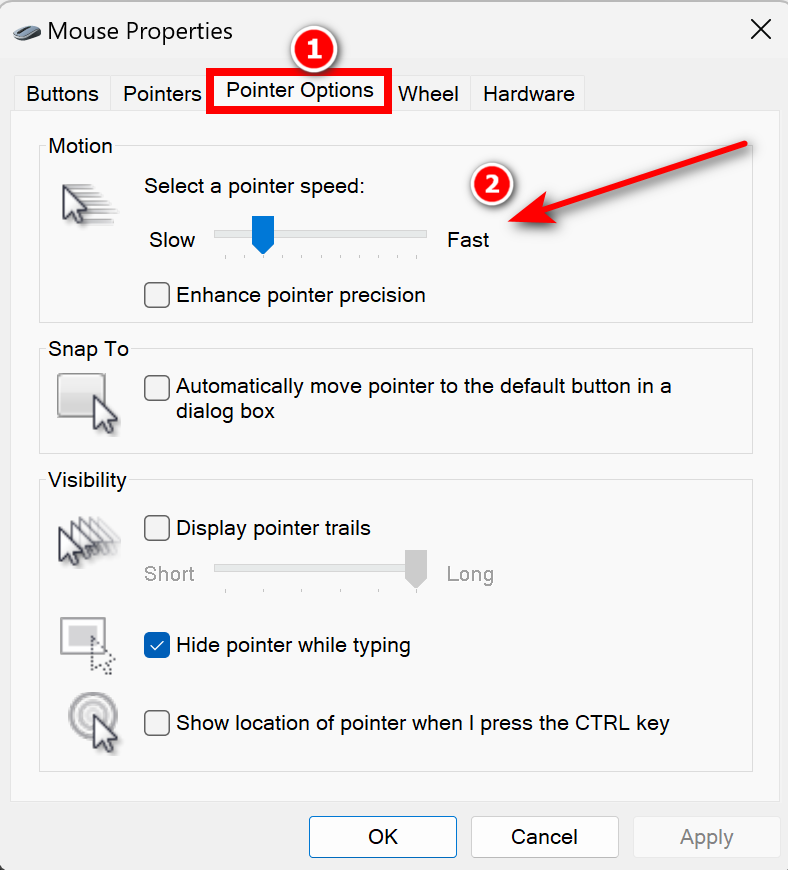
- Click Apply followed by OK to confirm the changes and close the window.
5. Check for Virus or Malware
Computers can be put at risk when regular checks for viruses and malware are ignored. To make sure your issue isn’t caused by malicious software, perform a system scan. You can do this using your antivirus program or the built-in Windows Defender.
- From the Settings pane, access Privacy & Security.

- In the following screen, click on Windows Security.
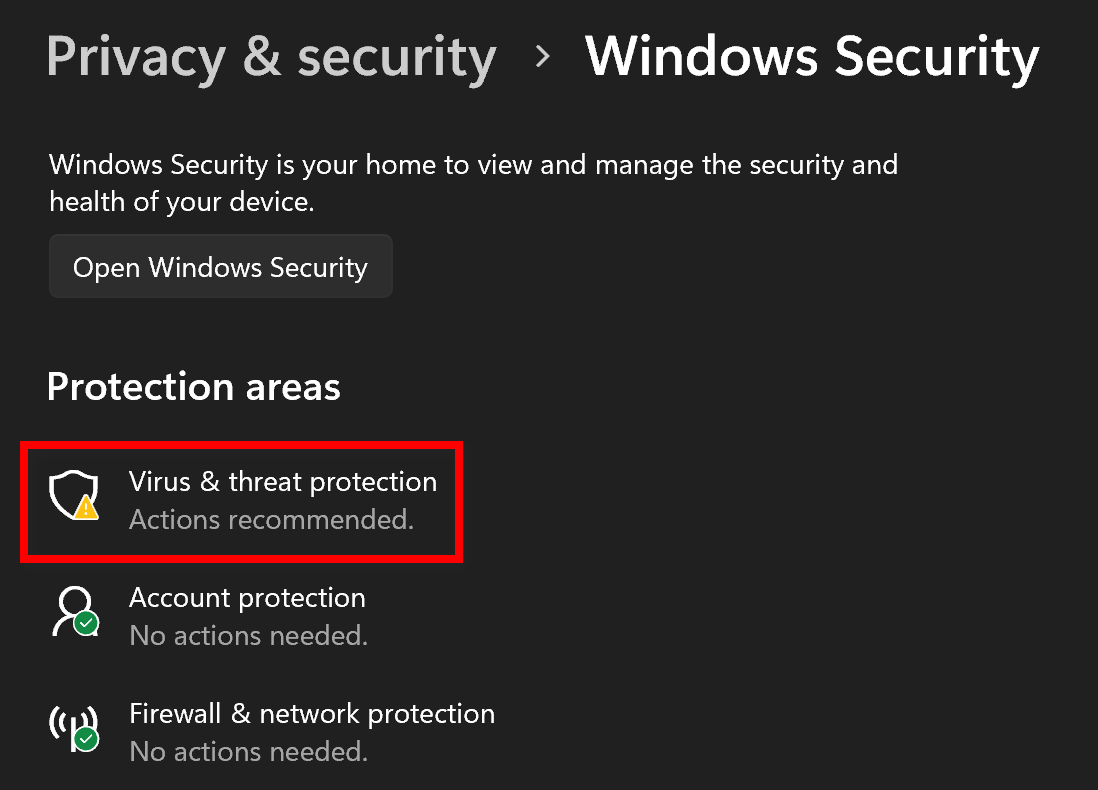
- Opt for Virus & threat protection.
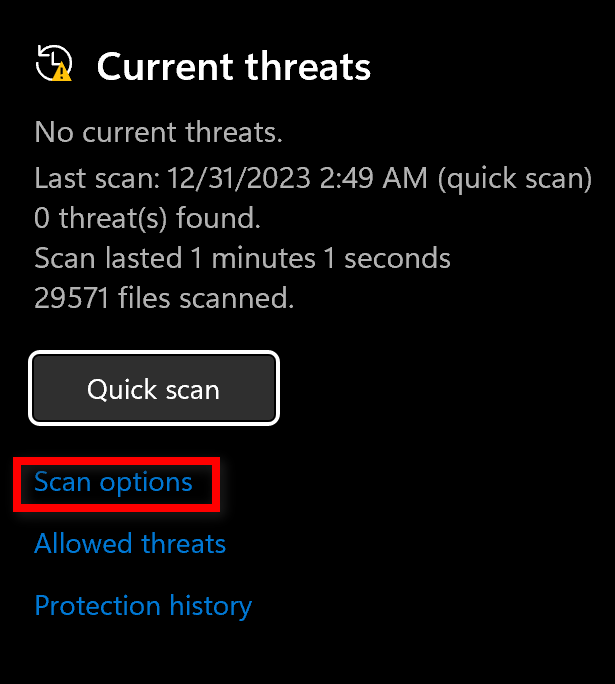
- Under the Quick scan button, select Scan options.
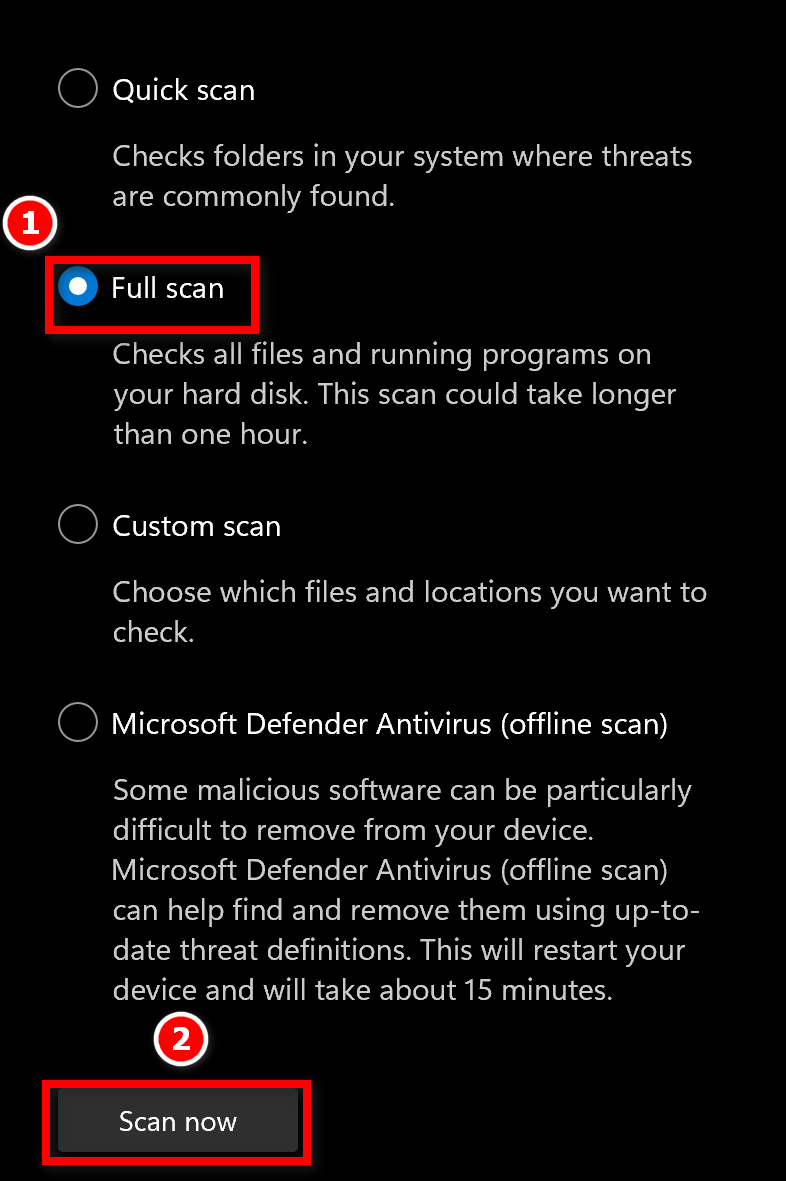
- Pick your preferred scan option and click on the Scan now button to start the process.
6. Check for Other Wireless Devices
Interference from other wireless devices, especially when they are from the same manufacturer, can cause your cursor to move erratically. To test this, remove any such devices from the vicinity of your computer and see if the problem persists. Be aware that wireless frequencies from other devices can sometimes interfere with your mouse’s operation.
Another approach is to bring both mice close to your computer, turn them on, and move each one individually to see if the movements correspond with the cursor on your screen.
7. Disable Controller Programs
Many gamers use controllers for their computer games, and these devices — such as the PS DualShock or Xbox controllers — come with their software programs that might include a mouse control feature. These features could conflict with your mouse’s normal operation.
To determine if this is the cause, disconnect any controller devices from your computer, disable their associated software, then perform a system restart. If the problem was related to controller software interference, this should resolve the issue instantly.
I have Windows 10 on my Acer Laptop. I was loosing my nerves as I couldn’t solve the dancing mouse problem on my laptop. In the end I decided to Reset my laptop (Restart+shift). Then after restart, the problem seems gone ! Then I was just installing Firefox when the mouse went haywire again ! Immediately I stopped the installation of Firefox. The problem seemed gone ! Now I use MS Chrome or Edge. I wonder if the problem is with Firefox ?