How to Fix Minecraft OpenGL Error 65543 on PC?
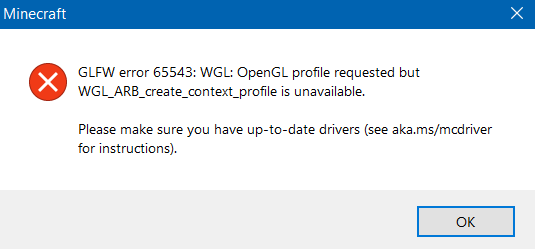
When launching Minecraft (Java Edition), you may get OpenGL Error 65543 and the game won’t start. This happens when Minecraft can’t create the OpenGL graphics context it needs to render.
In simple words: your GPU driver (or the way Minecraft is running) isn’t providing the OpenGL features Minecraft expects, so it fails at startup.
Most common reasons: missing/incorrect graphics driver (often showing as Microsoft Basic Display Adapter), Minecraft running on the wrong GPU (laptops), or running in a limited environment like Remote Desktop or some virtual machines. Less commonly, the GPU is too old for the OpenGL level your Minecraft version requires.
1. Verify the GPU/Driver Windows is Actually Using
This prevents wasted time. If Windows is using a generic display driver, Minecraft will fail its OpenGL check.
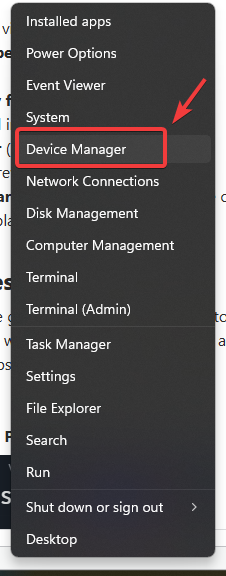
- Press Windows + X → open Device Manager.
- Expand Display adapters.
- If you see Microsoft Basic Display Adapter, go straight to Fix #2.
- Press Windows + R → type dxdiag → open Display tab to confirm GPU/driver.

2. Install the Correct Graphics Driver
This error most often appears when your real GPU driver is missing, outdated, or broken. A proper driver is what exposes OpenGL features to games. Installing the latest driver from the GPU maker (or laptop OEM) fixes the majority of cases.
- Press Windows + X → select Device Manager.
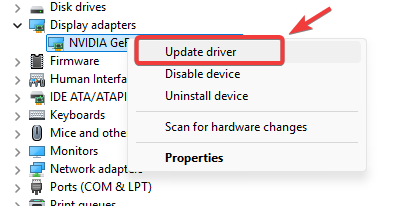
- Expand Display adapters.
- If you see Microsoft Basic Display Adapter, your proper GPU driver is not installed (this fix is very likely to work).
- Right-click your graphics device → Update driver.
- Select Search automatically for drivers.
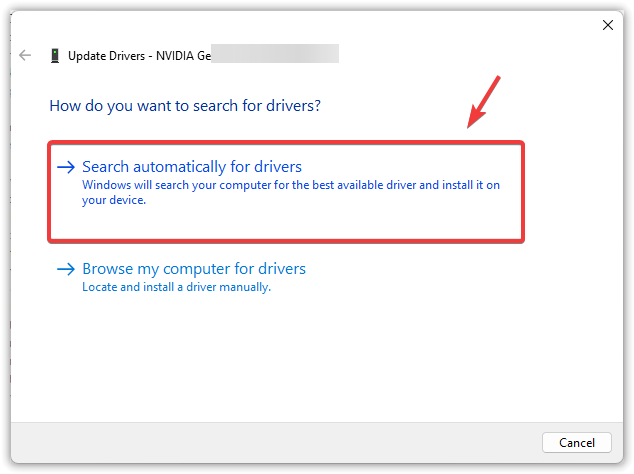
- If Windows says “best driver already installed”: install the latest driver directly:
- NVIDIA: GeForce Driver Downloads
- AMD: AMD Drivers & Support
- Intel: Intel Download Center
- Laptop note: On some dual-GPU laptops, the laptop manufacturer’s driver package can be more stable than generic Intel/NVIDIA drivers. If the newest driver causes issues, try the OEM driver for your exact model.
- Install the driver → restart your PC.
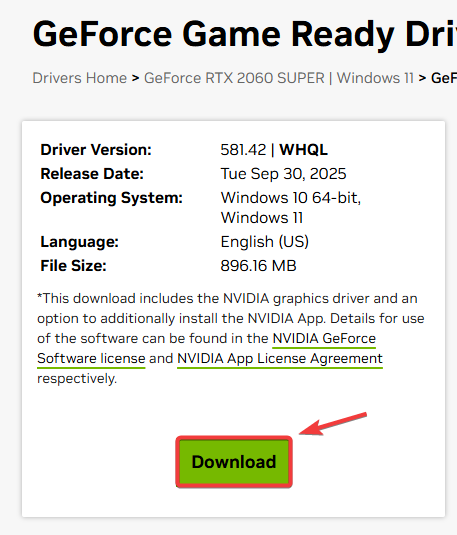
- Launch Minecraft again.
3. Force Minecraft to Use the Correct GPU (Dual-GPU Laptops)
On laptops, Minecraft can launch on the integrated GPU by default. If that iGPU driver is weak/outdated or the wrong GPU is selected, Minecraft can fail the OpenGL check. Forcing the launcher to use the dedicated GPU often fixes it immediately.
- Open Settings → System → Display → Graphics.
- Add Minecraft Launcher (if not listed).
- Click Options → choose High performance.
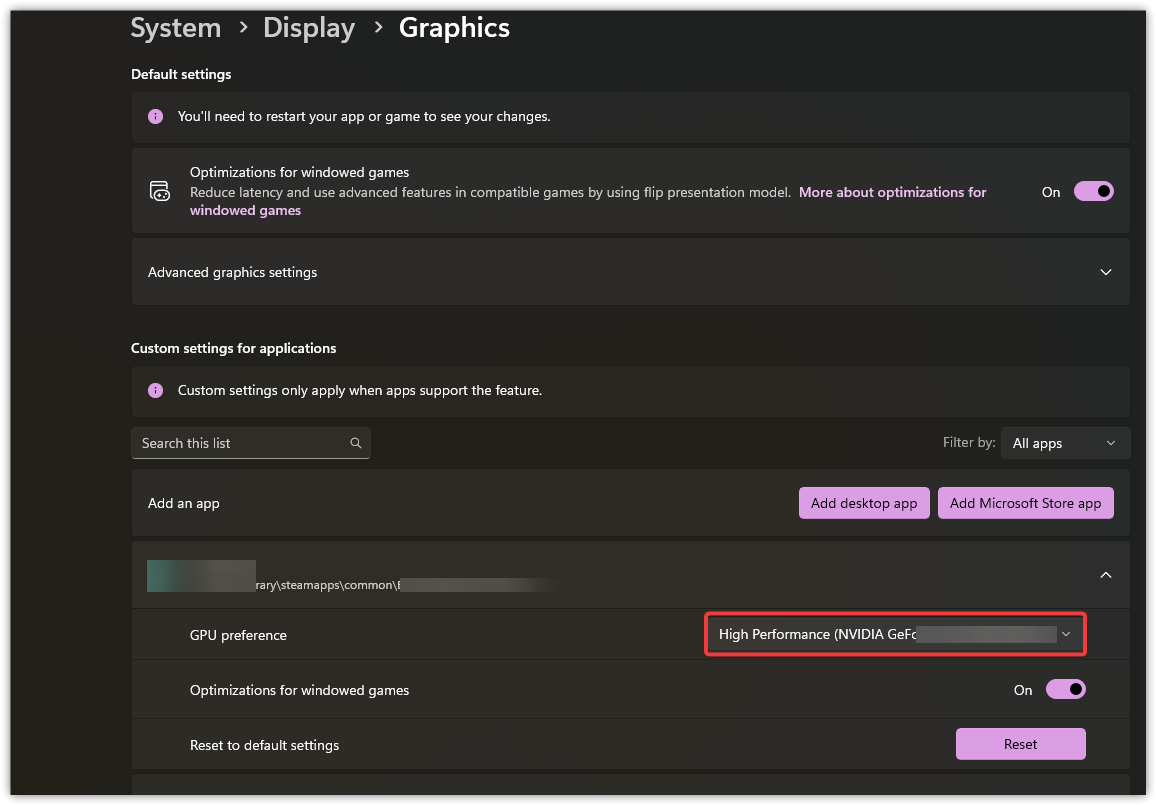
- Restart the launcher → try again.
Also works: Use NVIDIA Control Panel / AMD Software per-app graphics settings if Windows Graphics doesn’t stick.
4. Reset Java Runtime Settings (Java Edition Only)
This won’t fix most 65543 cases (those are driver/GPU-related), but it helps if you changed Java paths, use mods/custom launchers, or your Java runtime setup is messy. The goal is to remove bad Java installs and return the launcher to a working runtime.
- Press Windows + R → type appwiz.cpl → Enter.
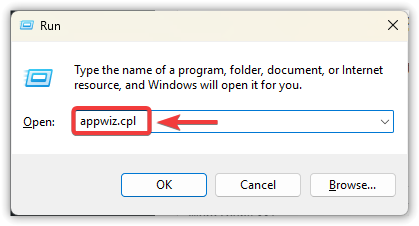
- Uninstall any entries named Java.
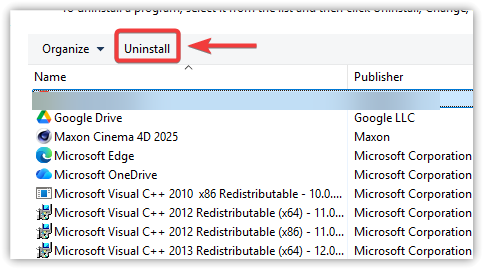
- Restart the PC.
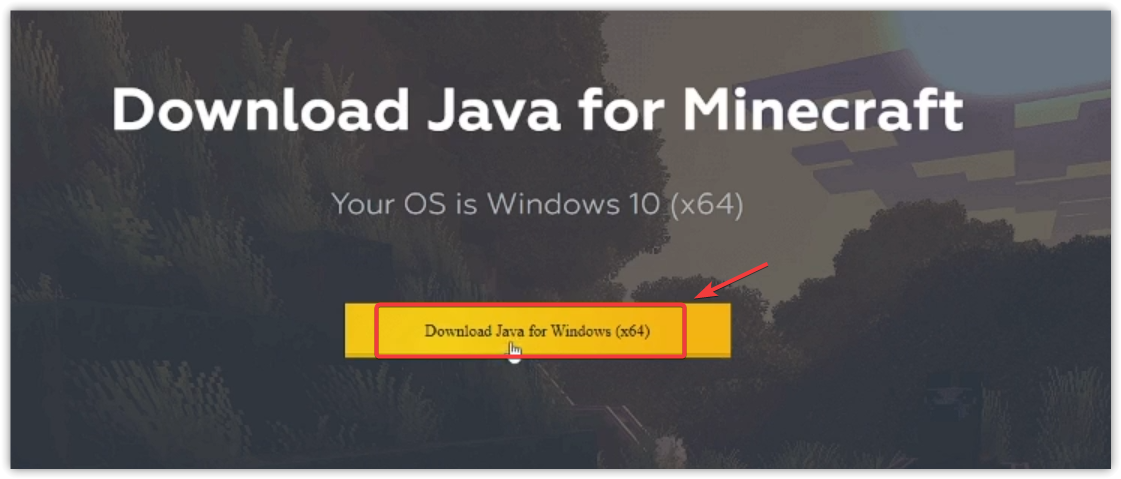
- Install the latest trusted 64-bit Java (or use the launcher’s bundled Java if you previously changed it).
- Restart again.
- In Minecraft Launcher: Installations → your profile → More Options → check Java Executable:
- Use default to rely on bundled Java.
- If using installed Java, ensure it points to the correct javaw.exe.
- Launch Minecraft and test.
5. Repair Windows System Files
OpenGL mainly comes from your GPU driver, but corrupted Windows files can still break how components load. This is safe and worth doing before trying anything risky.
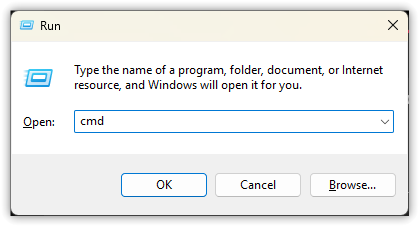
- Press Windows + R → type cmd → press Ctrl + Shift + Enter (Admin).
- Run:
- sfc /scannow
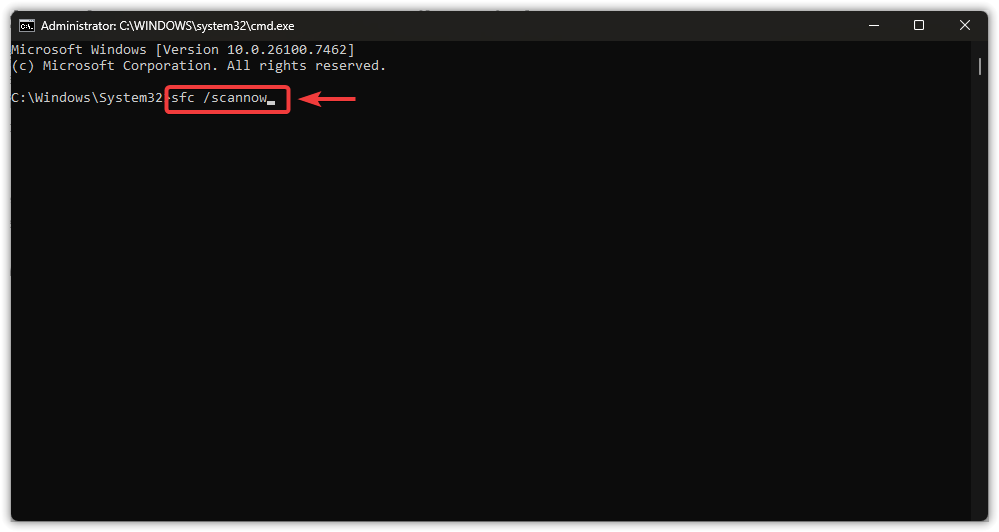
- sfc /scannow
- Restart and test Minecraft.
If SFC can’t repair files: run DISM, then run SFC again.
DISM /Online /Cleanup-Image /RestoreHealth
Warning: Don’t download random opengl32.dll files. Replacing system DLLs won’t add missing driver-level OpenGL support and can introduce malware.
6. Reinstall Minecraft / Launcher
If launcher files, libraries, or configs are corrupted, Minecraft can fail early during graphics initialization. Reinstalling removes bad config and restores clean game files.
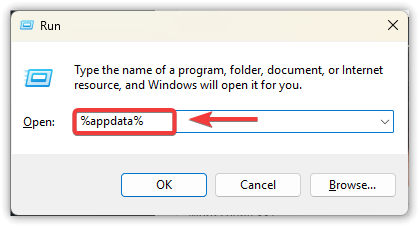
Back up first: If you want to keep worlds/mods, back up %appdata%\.minecraft\saves (and optionally mods, resourcepacks, screenshots).
- Close Minecraft Launcher.
- Press Windows + R → type appwiz.cpl → Enter.
- Uninstall Minecraft Launcher (and Minecraft if listed).
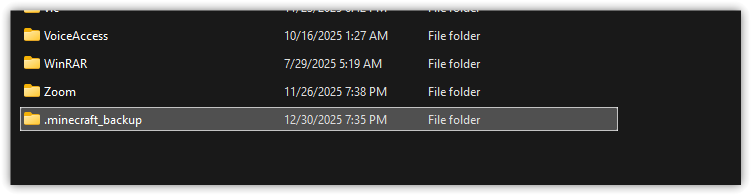
- Press Windows + R → type %appdata% → Enter.
- Rename .minecraft to .minecraft_backup.
- Restart the PC.
- Install the latest launcher from the official Minecraft site or Microsoft Store.
- (Optional) Copy your saves back into the new .minecraft folder.
8. If Nothing Works: Likely Unsupported GPU or Restricted System
If the error persists after driver reinstall + correct GPU selection, the remaining causes are usually:
- Very old/unsupported GPU that can’t expose the OpenGL level your Minecraft version requires.
- Locked-down PC (school/office) blocking proper driver installation.
- Limited environment (RDP/VM) where OpenGL isn’t exposed.
In these cases, the practical fix is using a supported GPU/PC, installing an OEM-approved driver (if restricted), or running locally instead of through RDP/VM.