Microsoft Video Editor Not Exporting? Here’s the Fix!
Microsoft’s native Photos application lets you edit photos as well as edit videos on a basic level. Despite it being helpful for basic video editing, it can be sluggish when exporting videos and sometimes fails to export them at all. Recently, this has been occurring quite a lot, where the video editor does not export the video even when users try using a smaller resolution.

We had a look into the issue and discovered that it can be caused due to an outdated operating system, outdated display driver, hardware-accelerated video encoding, and a corrupt Photos app. Below, we have compiled a list of several effective troubleshooting methods that worked for the users. Proceed with the one that suits your situation the best.
Install Pending Updates
Windows updates make sure your computer is running the most up-to-date version of Windows with the latest innovations and security patches. In addition, they can fix various bugs in the operating system and therefore may help you in getting the video editor up and running again.
Here is how you can install the pending updates on your PC:
- Press Windows + I keys simultaneously on your keyboard to open Windows Settings.
- Inside the Settings window, click on Update & Security.
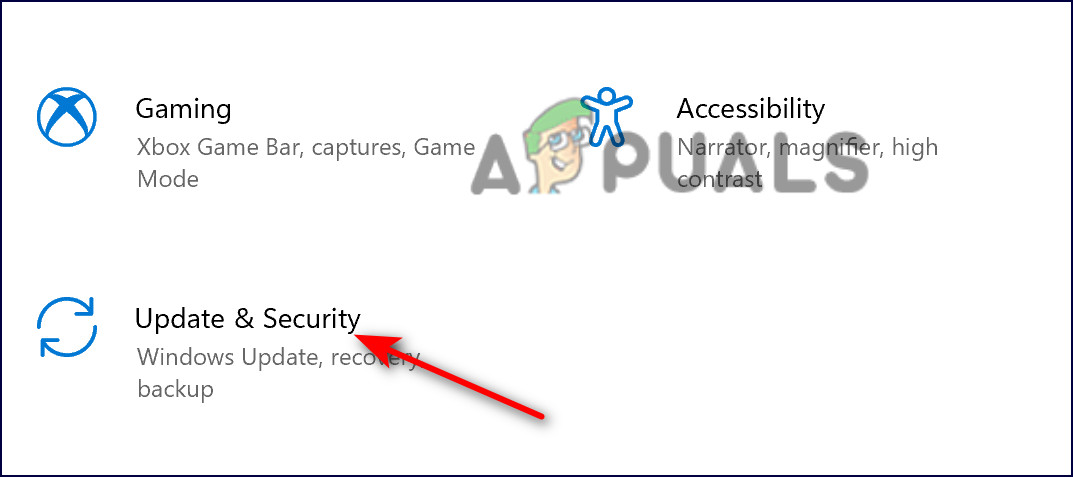
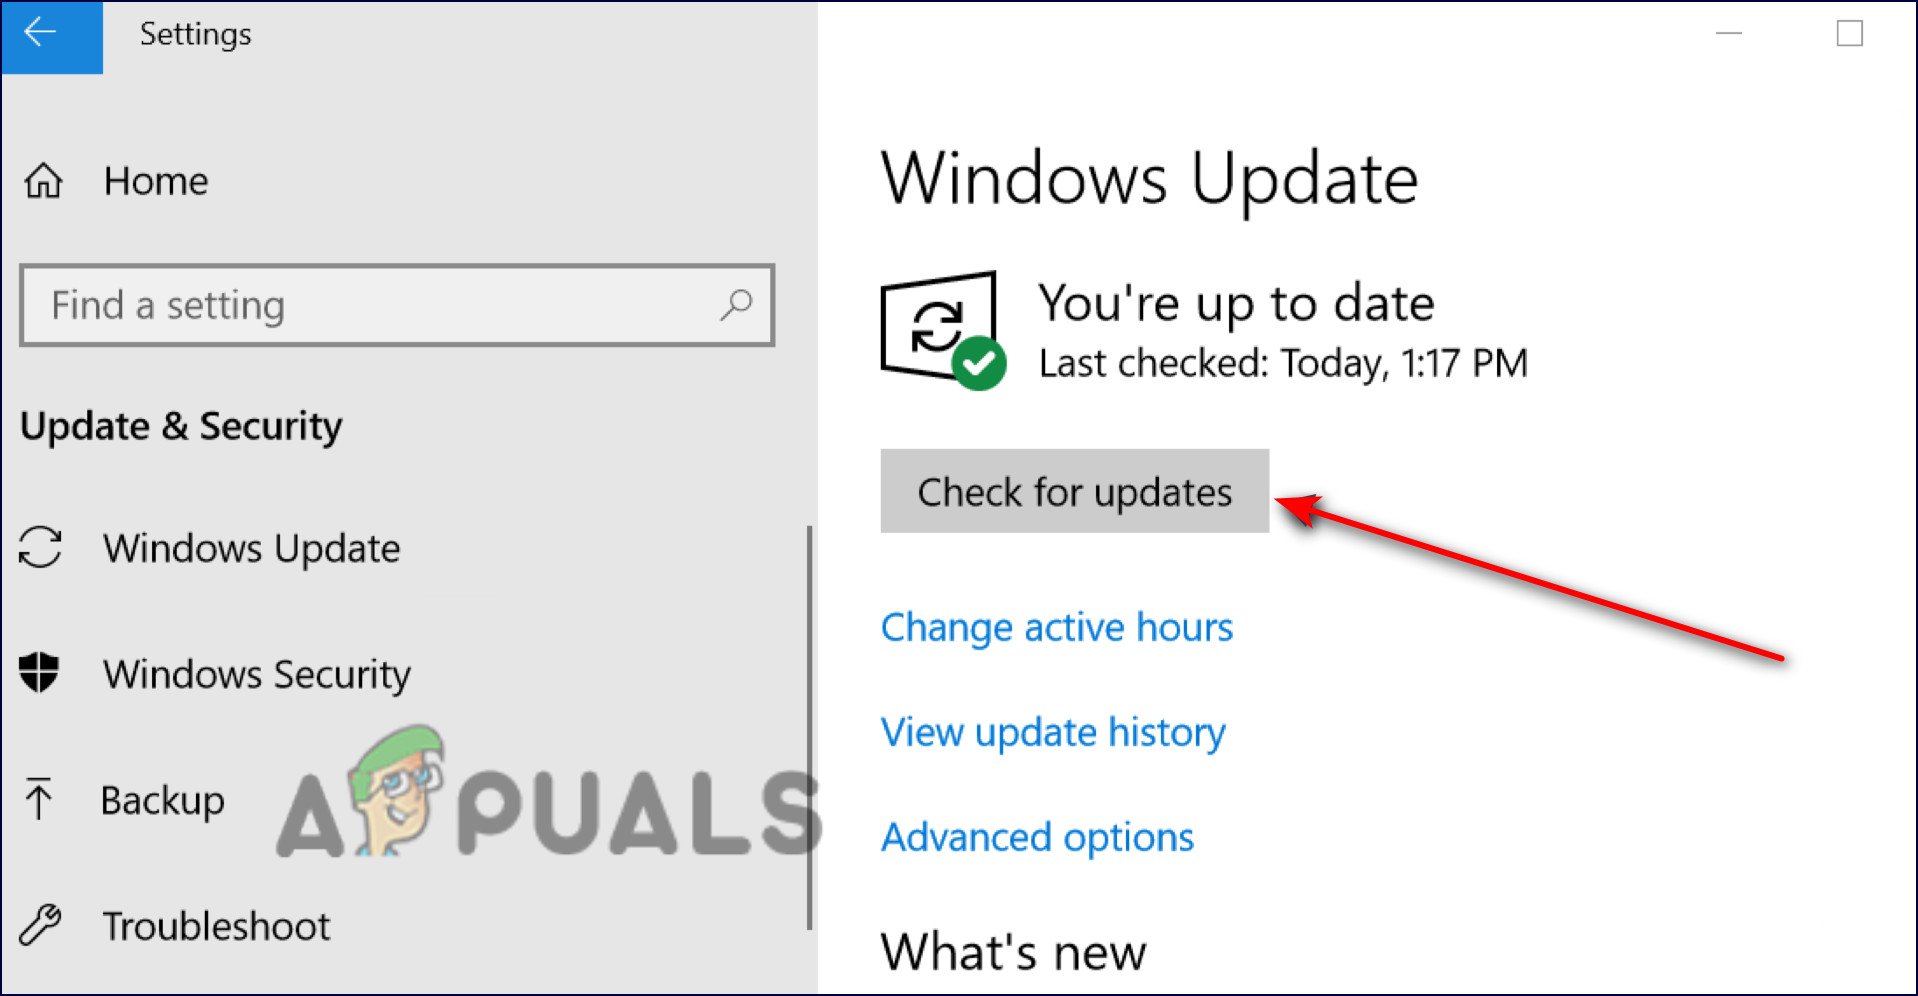
Choose update & security - Now select Windows Update from the left panel, and click on the Check for updates button from the right side.
Update Display Driver
You might also be facing the problem with video editor if your display driver is corrupt or outdated. The solution to this is simple, as all that you need to do is update the driver to its latest build.
Here is how you can do that:
- Type Device Manager in the search area of your taskbar and hit Open.
- Inside the Device Manager window, expand Display adapters.
- Now right-click on your display driver and select Update device.
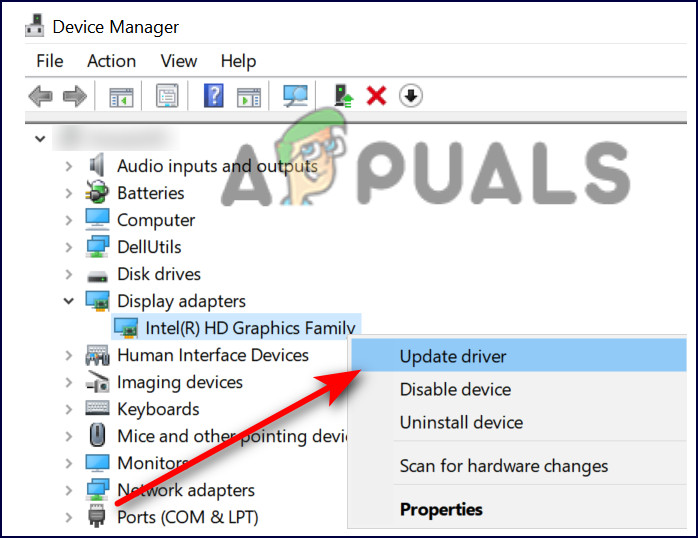
Update the driver - In the next window, choose Search automatically for drivers and wait for the process to complete.
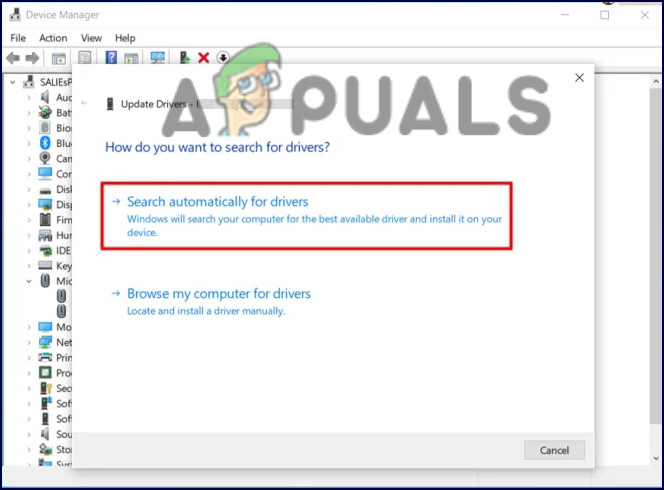
Search automatically for drivers - If an update is available, install it and check if the issue is resolved.
Disable Hardware-Accelerated Video Encoding
This method was discussed by an affected user on the official Microsoft forum and has worked for several other individuals as well.
Apparently, if the hardware-accelerated video encoding option is enabled, the video fails to be exported. Follow the steps mentioned below to disable it:
- Once you have chosen the preferred quality after finishing the video, click on More options.
- Unselect ‘use hardware-accelerated encoding’ then hit Export.
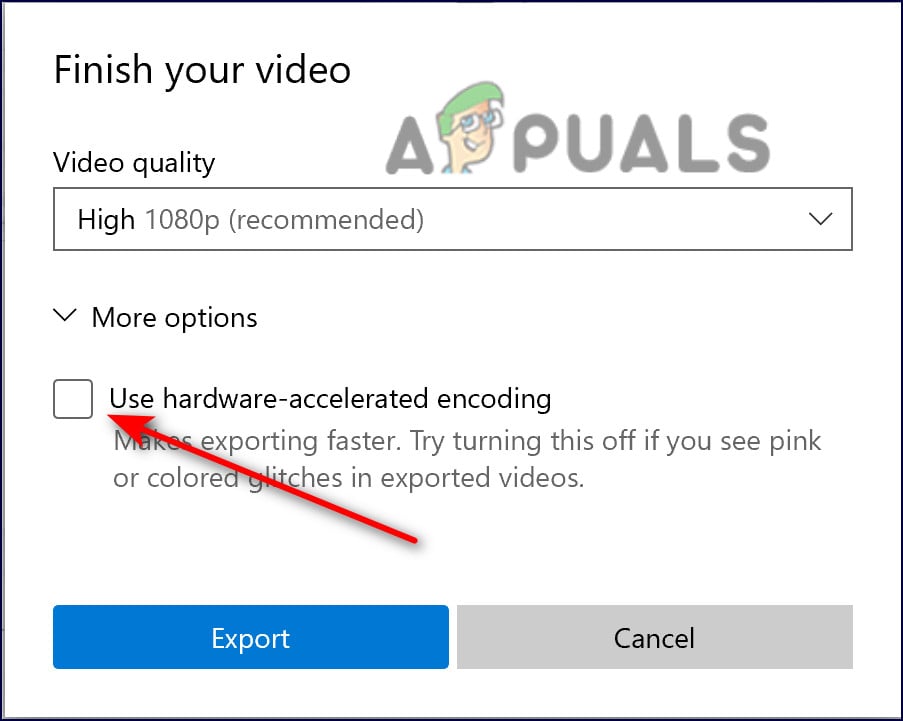
Unselect hardware-accelerated encoding
Convert Files Into MP4
In most cases, the problem appears to only apply to .mov files and other non-mp4 files in the video editor. Considering that most users are probably going to try to combine several non-mp4 files into one larger movie, Video Editor cannot handle that. Each file must be turned into an MP4 before being combined.
This worked like charm for quite a few users, which is why we recommend you give it a chance.
Repair or Reset the Photos App
Another solution that has helped users was repairing and resetting the Photos application. There are times when applications get affected by a bug or a corruption error within the system which prevents them from functioning properly.
In such cases, repairing and resetting the application can bring them back to their normal, error-free state.
Here is what you need to do:
- Press Windows + I keys together to launch Windows Settings.
- In the Settings window, click on Apps.
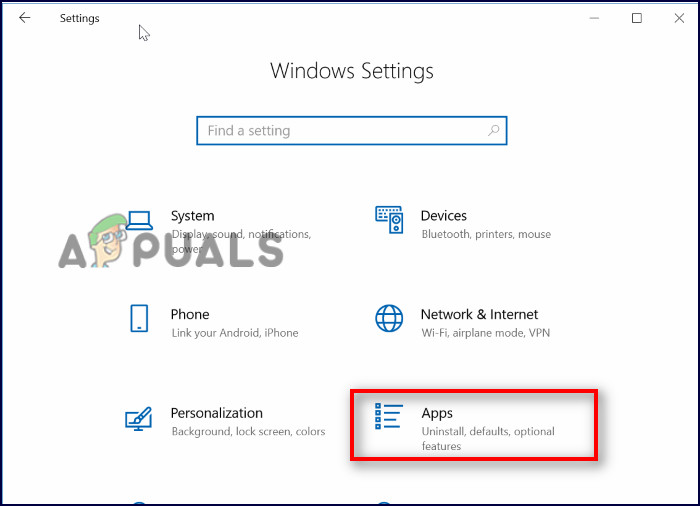
Windows Settings Apps - Now select Apps & features from the left panel and look for the Microsoft Photos in the right pane.
- Click on it and select Advanced options.
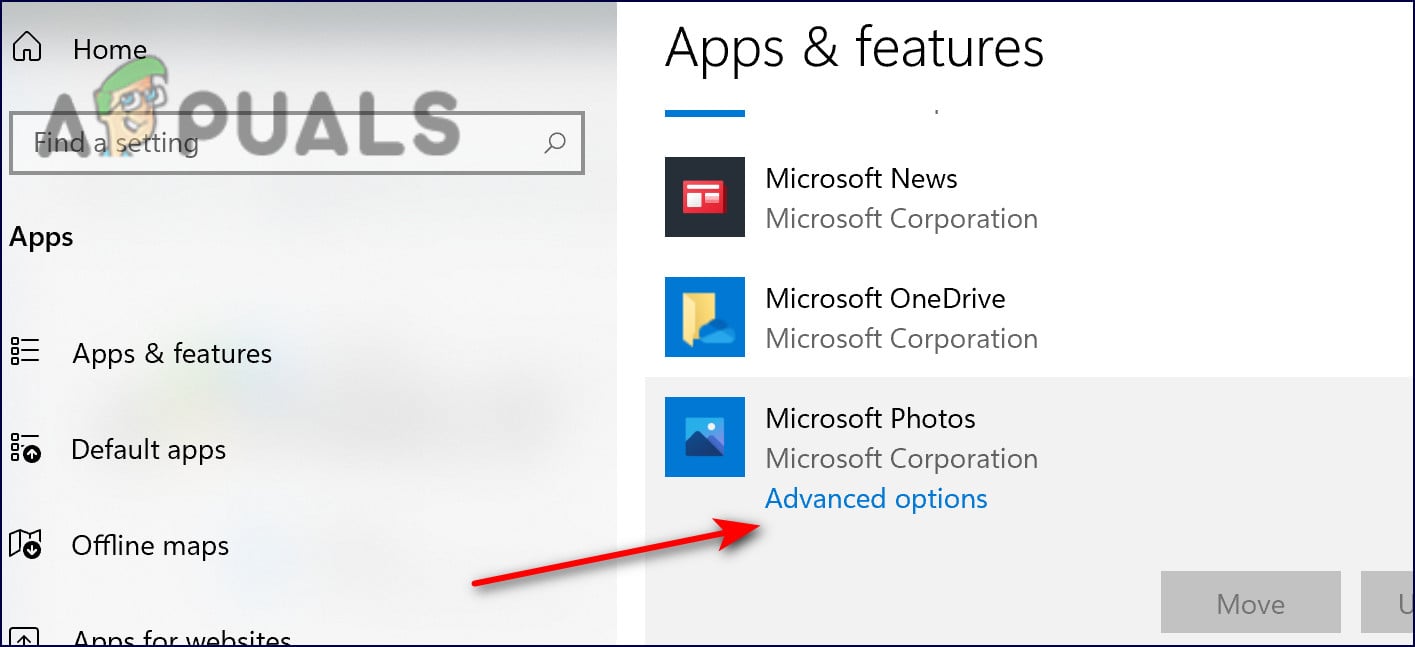
Microsoft Photos app settings - Scroll down and press the Repair button.
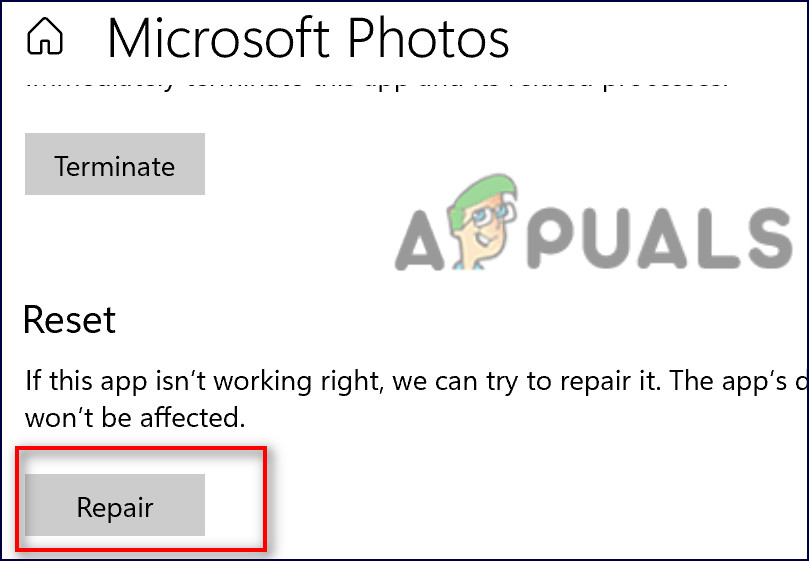
Repair Microsoft photos app - Once the process is complete, check if the issue is resolved. If it persists, go back to the same window and this time, click on the Reset button. After that, check if the video editor works fine.
Use System Restore
Another viable solution is restoring your system to a previous point in time using the System Restore feature of Windows.
You can use “System Restore” to undo many of the most important changes in Windows and reverse certain kinds of changes made to Windows. When it is used, Windows will return important files and settings back to their previous versions, including drivers, registry keys, system files, and installed programs.
However, this utility does not guarantee that it will fix the issue. As an example, if the issue began occurring about three weeks ago, restoring the system to its state from a week ago will not solve it.
Here is how to revert the system back to a previous state when the error didn’t exist:
- Access Control Panel and navigate to System > System and Security.
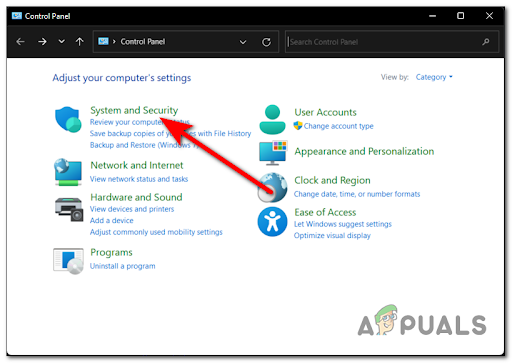
Accessing the System and Security tab - Choose System Protection.
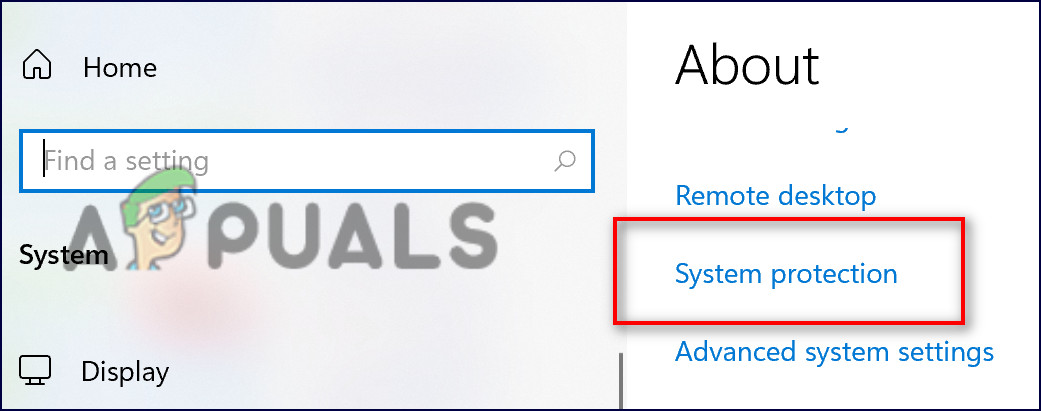
Open system protection - In the System Properties dialog, head over to the System Protection tab.
- Click on the System Restore button.
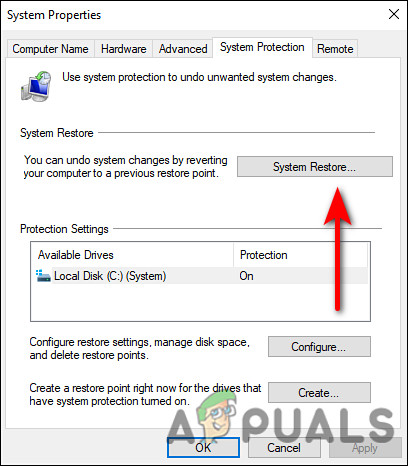
Hit the Restore button - Follow the on-screen instructions to proceed. If a dialog pops up, choose Recommended Restore.
- Once the operation completes, your operating system will boot and upon reboot, hopefully, the Video Editor will work fine.
In case running the System Restore utility did not do the trick for you, then try resetting your PC. There is also a chance that your operating system has the issue instead of the application and in this case, a complete reset is your best bet. Resetting Windows will remove all your data and third-party applications (unless you explicitly choose not to) and revert your system to its original, error-free state.


