Step By Step Guide To Install Microsoft Teredo Tunneling Adapter
To understand what Teredo Tunneling is, we must first understand what IPv4 and IPv6 are. IPv4 refers to an IP protocol that assigns our computers a unique address, enabling us to communicate with the world over the internet.
Most of the world, including many of us, uses IPv4 technology. However, the Internet is running out of IPv4 addresses due to all available IPv4 addresses being occupied. As more people heavily use the internet and networks, we transition to IPv6 (Internet Protocol Version 6).
IPv6 provides an unimaginably large number of addresses—2 to the power of 128, or 2^128 (340 undecillion)—ensuring a nearly infinite supply.
Understanding the shortage of IPv4 addresses makes it easier to understand what Teredo Tunneling is. IPv4 is still widely used. To put it simply, everyone used to speak one language, but now there are two languages. A system speaking the IPv4 language will be understood by others using that language but not by those using IPv6.
As the internet relies on interconnected and communicating networks, we need a way to translate between IPv4 and IPv6 and vice versa. This is the role of Teredo Tunneling: it acts as an interpreter between the two IP languages.
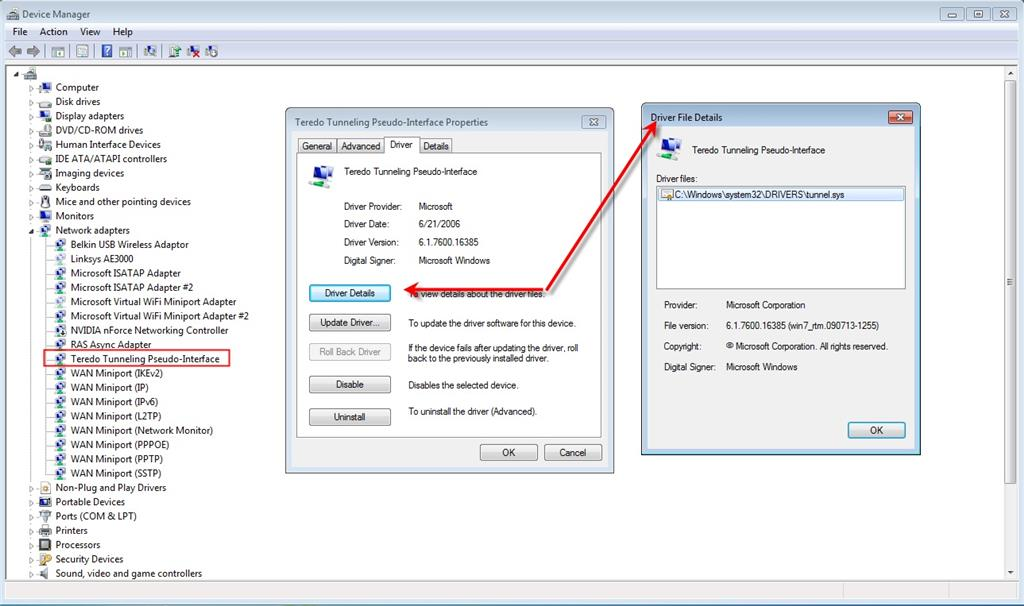
Microsoft’s Teredo Tunneling Adapter Driver
Let’s look at how to install the Teredo Tunneling Adapter on Windows 7, a driver that comes built into the operating system.
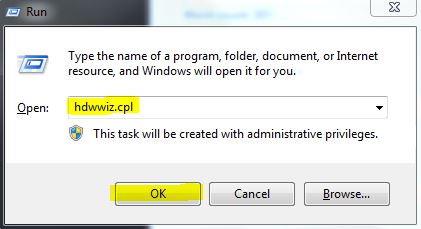
- Open the Device Manager by holding the Windows key and pressing R. In the Run dialogue that appears, type hdwwiz.cpl and click OK.
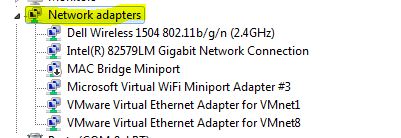
- In the Device Manager, click on Network Adapters.
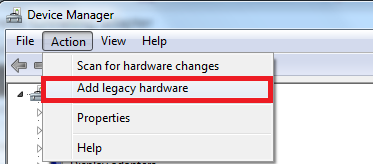
- Next, select the Actions tab at the top and choose Add Legacy Hardware.
- Click Next twice to proceed to the Common Hardware Types screen.
- Scroll down, select Network Adapters, and click Next. You will now enter the Add Hardware dialogue.
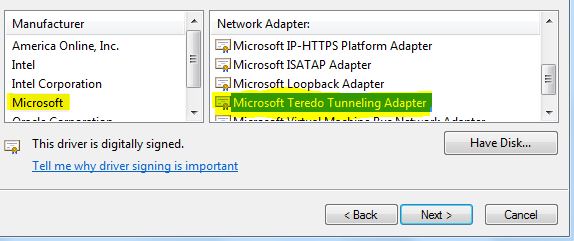
- Choose Microsoft from the Manufacturer list, then Microsoft Teredo Tunneling Adapter from the Network Adapter list, and click Next.
- Click Next, click Next again, followed by Finish to complete the installation.
If you cannot find the Teredo Adapter under Network Adapters or in the list of Legacy drivers, try the following steps that have helped many users:
- Open an Elevated Command Prompt by pressing the Windows key + R, typing ‘cmd‘, pressing Ctrl + Shift + Enter, and selecting ‘Yes’ at the User Account Control (UAC) prompt.
- In the elevated Command Prompt, type the following command to disable the Teredo interface:
netsh interface Teredo set state disable
- After disabling, close the Command Prompt and reboot your computer.
- Upon the next startup, open an elevated Command Prompt (following step 1), execute the command below, and press Enter:
netsh interface Teredo set state type=default
- Check Device Manager to see if the Teredo Adapter is now present and enabled.
If the method above is inefficient, follow these steps to check Teredo’s state and enable it if necessary:
- Open an Elevated Command Prompt as per the first step above.
- Type the command below to check your Teredo state:
netsh interface teredo show state
- If the state is ‘Client’ or ‘Dormant’, Teredo is functioning properly. If the state is ‘Offline’, enable Teredo with the following command:
netsh interface teredo set state type=enterpriseclient
- Restart your computer and verify if the Teredo adapter appears in Device Manager.
Resolving the Teredo Tunnel Error with a Yellow Exclamation Mark:
- Open the Registry Editor
- Navigate to the following key:
HKEY_LOCAL_MACHINE\SYSTEM\CurrentControlSet\Services\Tcpip6\Parameters
- In the right pane, right-click on ‘Disabled Components‘ and select ‘Edit.’ Set the DWORD value to 0.
- Restart your computer; the Teredo tunneling adapter should now function correctly.
How to Fix Issues with the Teredo Adapter on Windows 10
As the Teredo Adapter is considered a legacy component, Microsoft has removed it starting with Windows 10 Build 1803.
If you are experiencing issues with the Teredo Adapter on Windows 10 and have a build newer than 1803, here are alternative solutions:
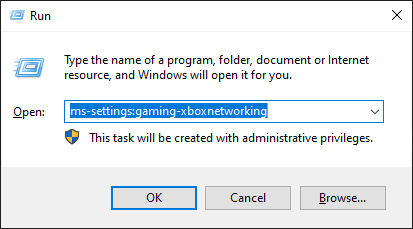
- Open the Xbox Networking tab of the Settings App by pressing the Windows key + R, typing
ms-settings:gaming-xboxnetworking
and hitting Enter.
- Allow the software to complete the checks, clicking Check Again if necessary.
- If your server connectivity is blocked, use the Fix it button to fix the issue.
- Reboot your computer and check if the issue has been resolved.
If the problem persists, make sure Windows Firewall is active, then follow these steps:
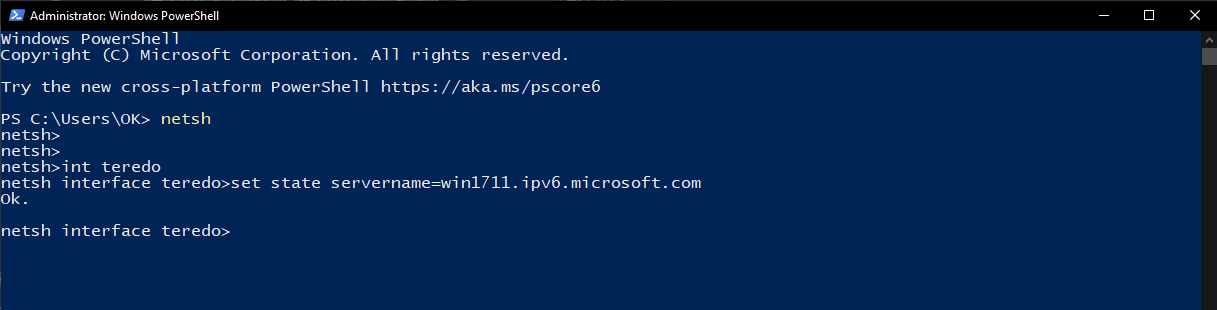
- Open an elevated PowerShell window by pressing the Windows key + R, typing powershell, then pressing Ctrl + Shift + Enter and clicking Yes at the UAC prompt.

- Execute the following commands:
netsh
int teredo
set state servername=win1711.ipv6.microsoft.com
- Restart your computer and check if the Teredo issue has been resolved.
If these steps are unhelpful, consider using the Group Policy Editor to change a potentially problematic port:
- Open the Local Group Policy Editor by pressing the Windows key + R, typing gpedit.msc and hitting Enter. (Note: This tool is only available in select versions of Windows 10)

- Navigate to Computer Configuration > Administrative Templates > Network > TCP/IP Settings > IPv6 Transition Technologies using the left pane.
- On the right side, double-click Set Teredo Client Port to edit this policy.
- Enable the policy and set the port to 3544, making sure it is open and forwarded through your router. If unsure how to do this, seek specific instructions for your router model.
Note: Sometimes, after installing the Microsoft Tunneling Adapter, you might encounter Error Code 10.
Je trouve pas adapteurs réseau