How to Fix Microsoft Teams Camera Not Working?
When your Microsoft Teams camera doesn’t work, you’ll usually encounter a black screen or be unable to start video during meetings, even if the camera functions in other apps. This is often due to permission issues or outdated drivers. The main problem typically involves incorrect app settings blocking Teams from accessing your camera, which may also be caused by other software or background apps using the camera simultaneously.
Other reasons include an outdated version of Teams, incorrect camera settings, or hardware problems. Before attempting complex troubleshooting methods, let’s explore some basic solutions that might resolve the issue.
- Restart Your Computer: Sometimes, simply restarting the computer can fix the issue.
- Ensure the Camera Is Working in Another App: First, ensure your camera is functioning correctly. You can check this by launching the built-in camera app or any third-party camera application. If the camera works in these apps, the issue may be specific to Microsoft Teams.
- Check Your Camera’s Cable: Occasionally, a loose or damaged cable can be the issue. Gently manipulate the wire near the connection points to see if the camera flickers or starts working. If it does, the wire may be damaged and require replacement.
- Try Different USB Ports: If your camera is connected via USB, try plugging it into a different port. Some ports (especially the front port of your PC) may not deliver enough power or have issues themselves.
- USB Extension Caution: If you’re using a USB extension cable, it might be causing connectivity problems. Try connecting the camera directly without the extension to rule that out.
Now that we have tried basic troubleshooting methods and the issue persists, you can follow the detailed solutions mentioned below.
1. Update or Reinstall Driver Using Device Manager
Device Manager in Windows is a tool for managing your computer’s hardware. It lists all connected devices, such as your keyboard, mouse, and printer, and allows you to troubleshoot, update drivers, and enable or disable devices. We’ll use Device Manager to check for problems with our camera and try to fix any main issues.
- Click on the Windows Search, type Device Manager, and open it.
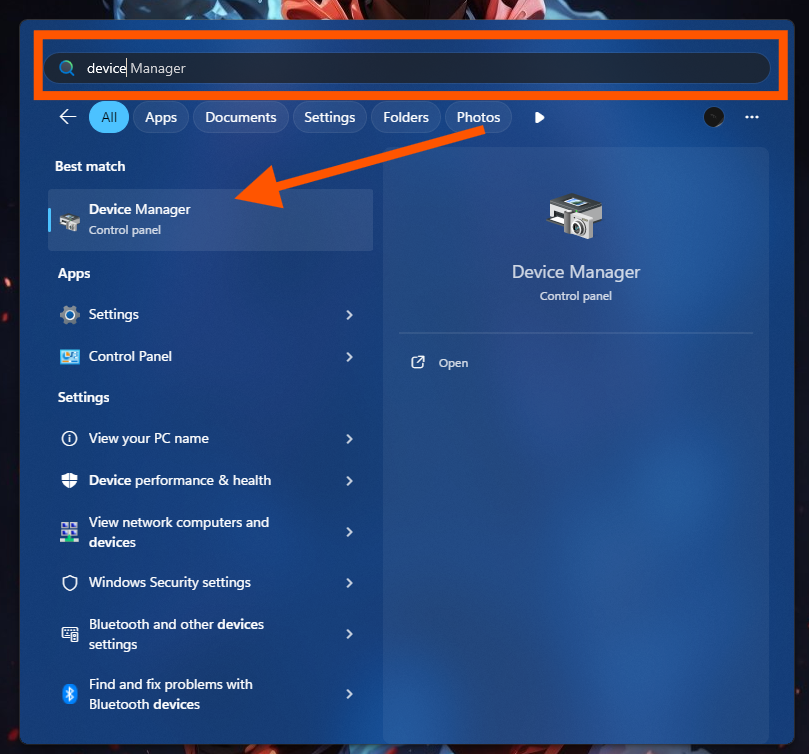
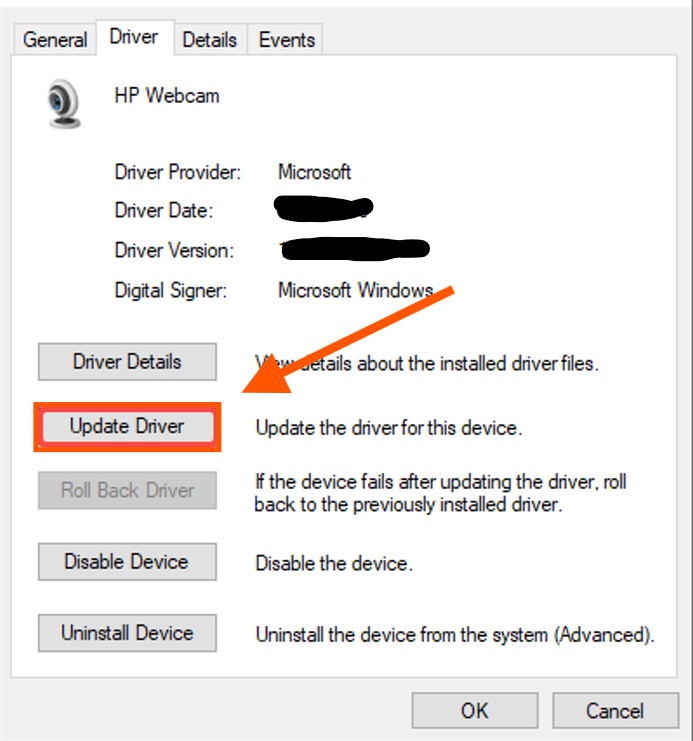
- Once you open Device Manager, locate the Camera section and right-click on your camera device.
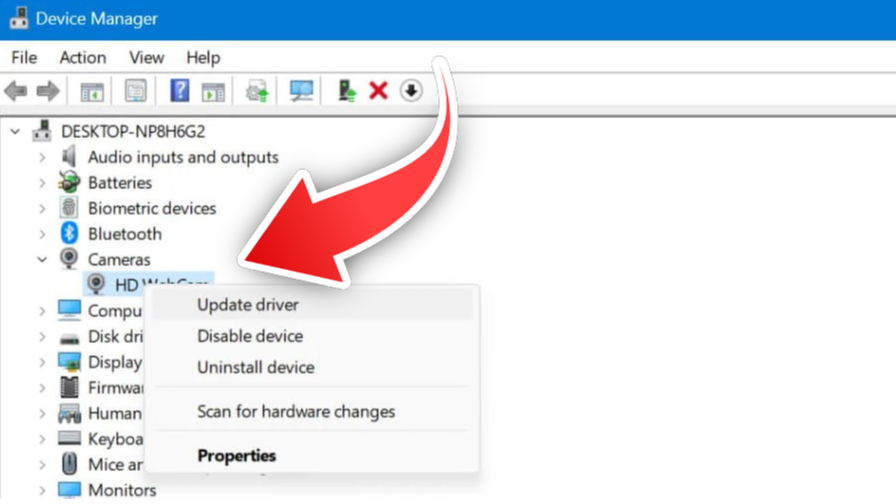
- Select Properties and then Update Driver.
- Now click on Search automatically for drivers.
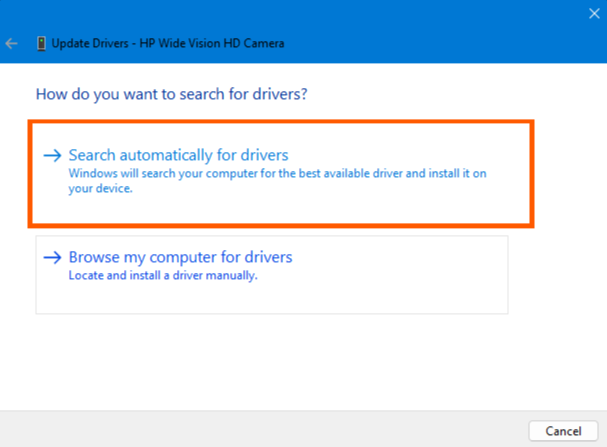
If your driver is already updated, you can alternatively choose Browse my computer for driver software and select from a list of available drivers > Let me pick from a list of available drivers on my computer.
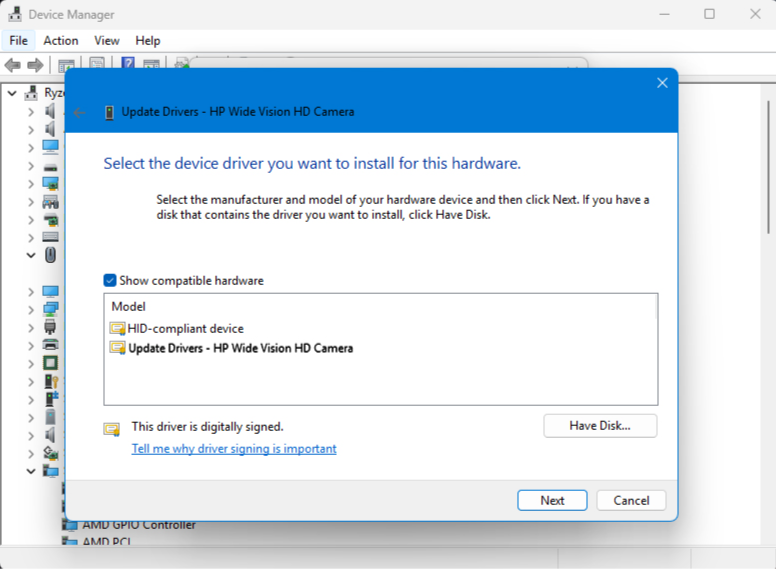
This shows a list of compatible drivers for installation. My camera uses the “HP Wide Vision HD Camera” driver, but there’s also a Windows camera driver. We’ll choose the specific one that supports my camera.
Some cameras, such as those from brands like RAZER or Logitech, come with their own built-in software and drivers. These cameras often use proprietary hardware, and it’s essential to install their specific drivers for operation. So, if your camera is one of these, make sure to visit the manufacturer’s website and download the official drivers. Otherwise, the camera won’t function properly.
Note: Most manufacturer-related detailed information is provided on your webcam or its box.
- Open the manufacturer’s website of your webcam on any web browser.
- Find the webcam drivers and download them from the website.
- After downloading, install the drivers, and you’re good to go.
2. Route Your Camera Through a Virtual Camera App
If you’re still encountering issues with Microsoft Teams not detecting your camera, you can solve this problem by routing your camera feed through a virtual camera application. Apps such as ManyCam, OBS Studio, or Snap Camera act as intermediaries that provide Teams with the necessary video feed.
We are going to use Manycam for demonstration purposes. If your camera adapter is not functioning properly, it works as a virtual webcam, allowing you to select and stream your camera feed without needing to rely on a faulty adapter.
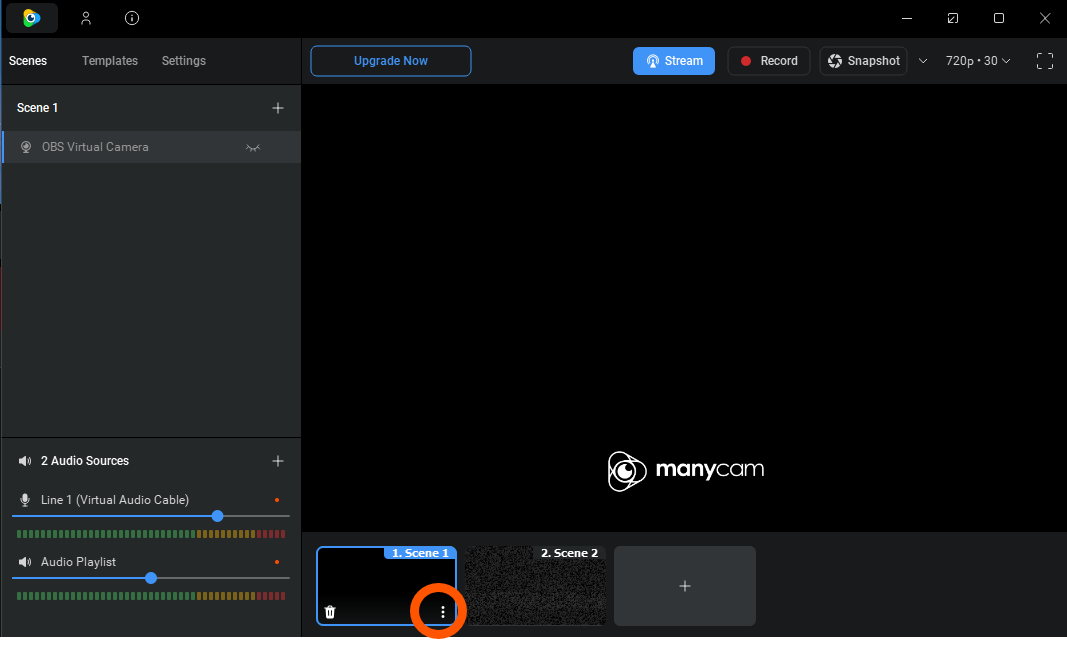
- Download a virtual camera app such as ManyCam.
- Now install and open the software.
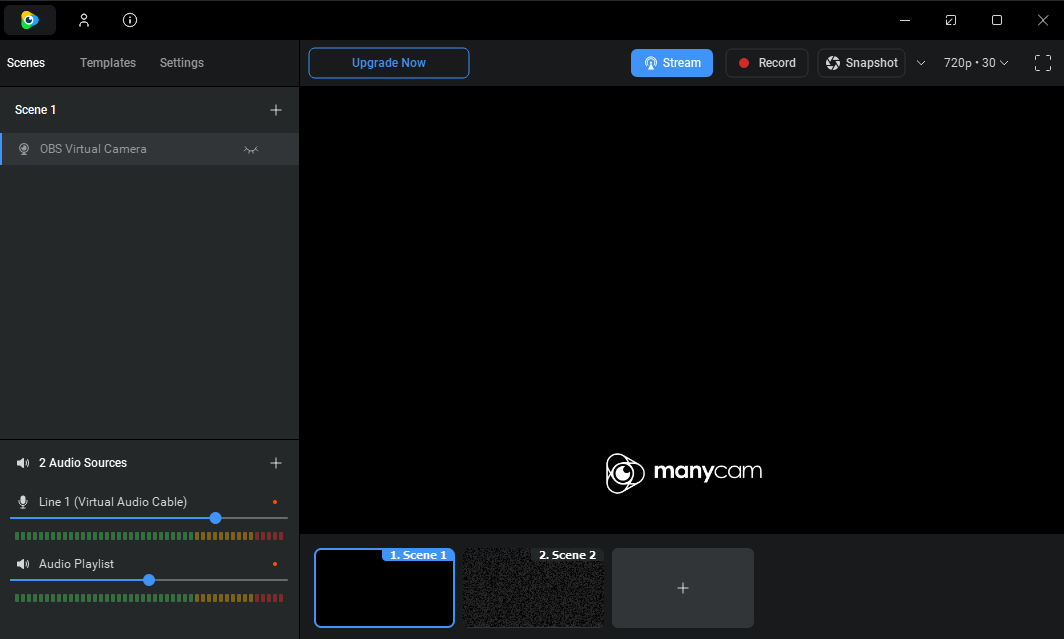 By default, it will automatically detect your webcam, but in case it doesn’t, you can choose manually.
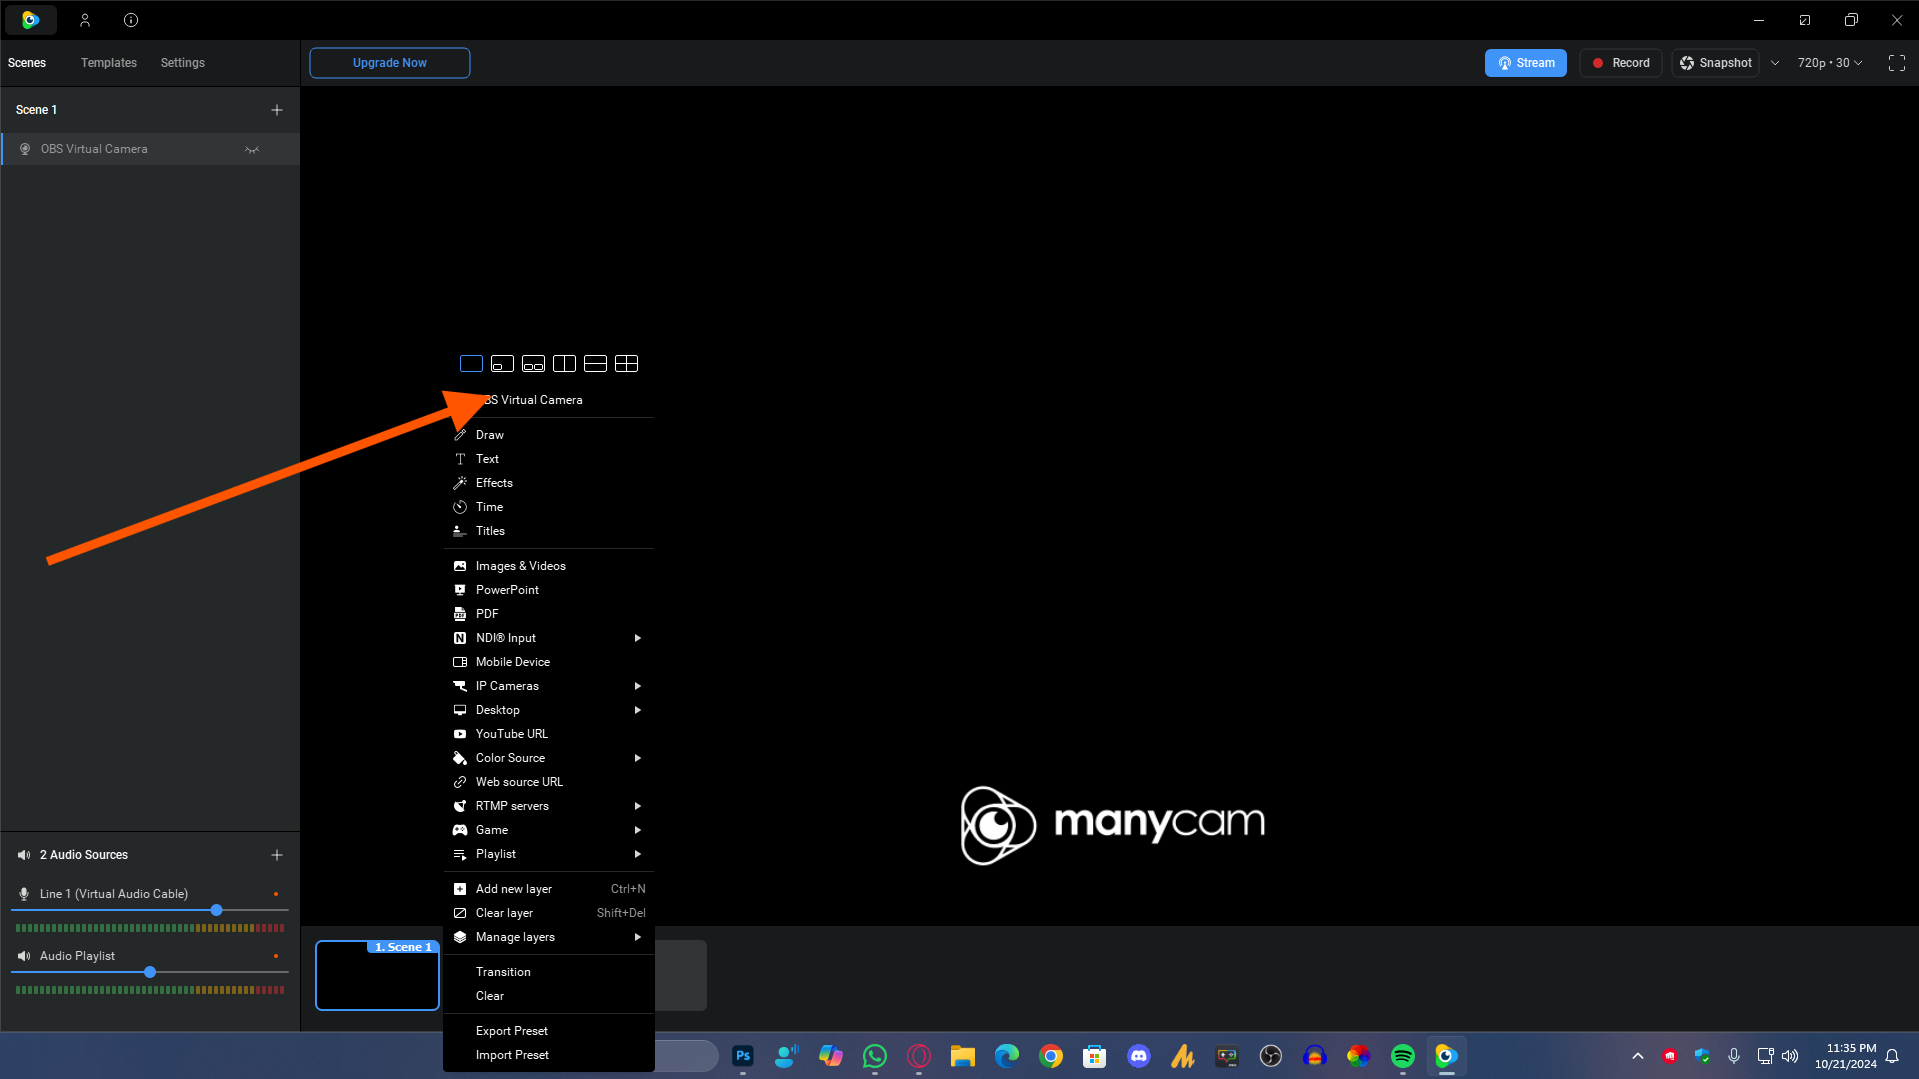
 - On the button panel, find and click on the “⋮ Dot” tab.
- In the drop-down list, click on “Webcam > *Your Camera*.
- After selecting your webcam, click the Minimize button (top right corner of the ManyCam window).
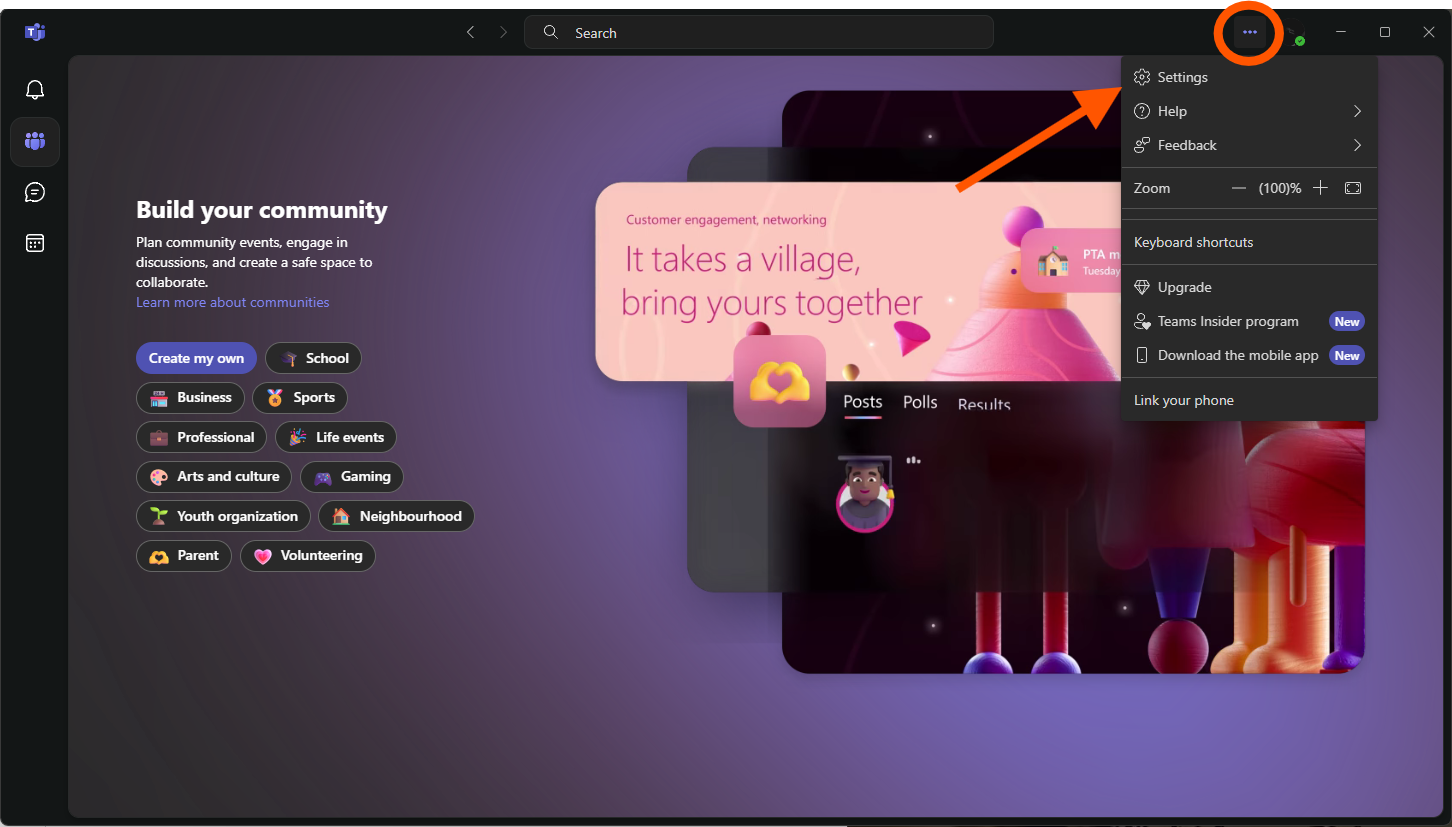
- Open Microsoft Teams. In the top right corner, click on the three dots “⋯ Dot“. From the drop-down menu, select “Settings“.
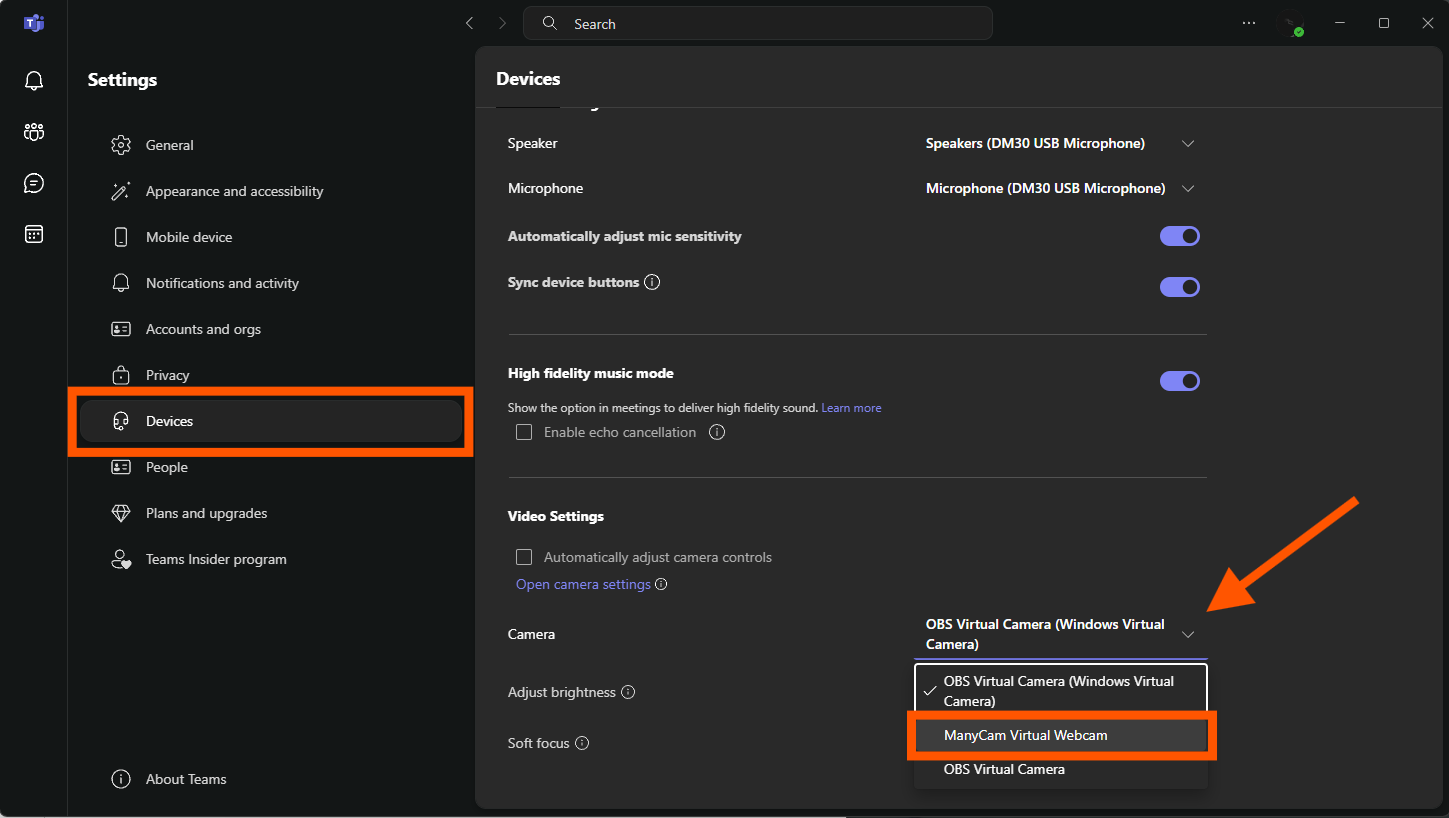
- In Settings, click on “Devices” from the left-hand side, then on the right side, scroll down to the Camera section, click on the drop-down menu under Camera, and select ManyCam from the list as your default webcam.
- That’s it! Now, whatever your ManyCam captures from your camera will transfer directly into Microsoft Teams through the ManyCam adapter.
3. Allow Access to Camera
If you’re still facing issues with your camera in Microsoft Teams, let’s take a look at the camera privacy settings. We’ll make sure the right permissions are enabled for Microsoft Teams to use your camera properly.
- Press and hold the Windows key + I to open Settings.
- Click on Privacy & Security from the left panel.
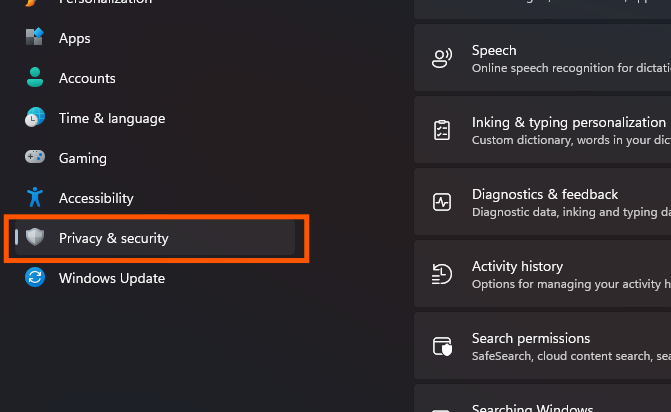
- Scroll down from the right side and select Camera under App permissions.
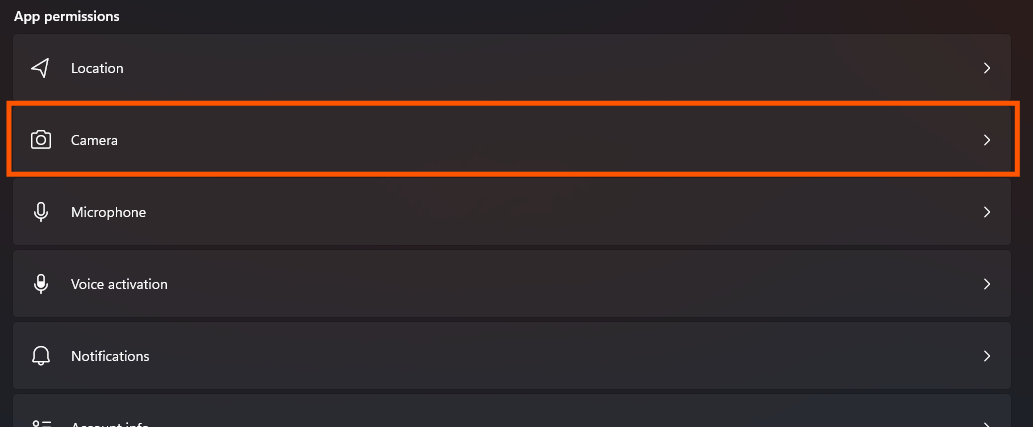
- At the top, switch Camera access to On to allow apps to use your camera.

- Below the main toggle, ensure that the camera is turned On for Microsoft Teams.
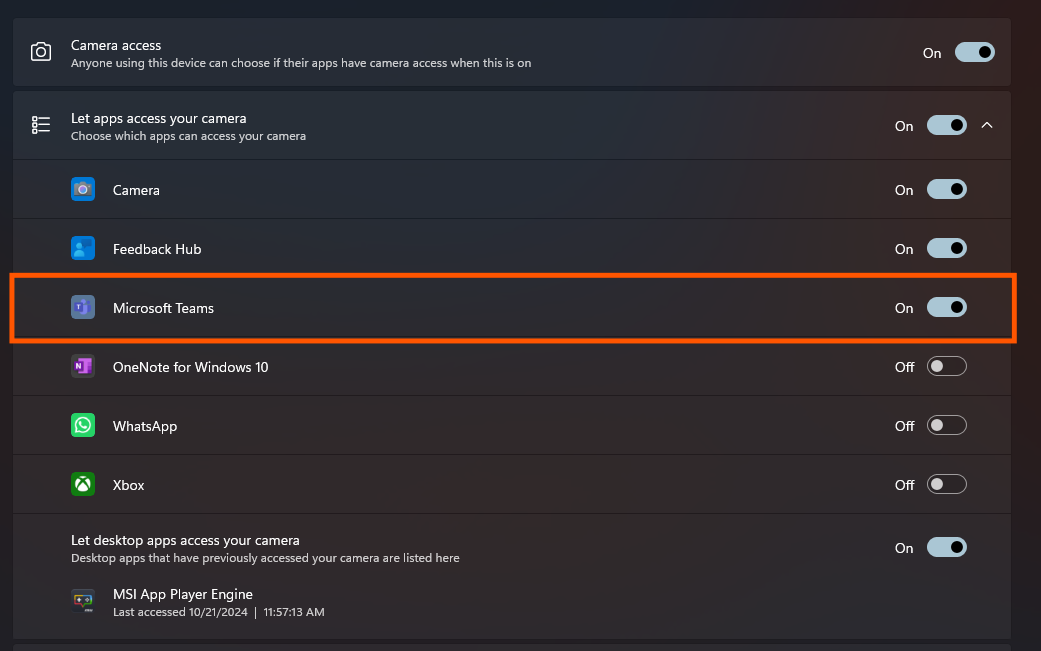
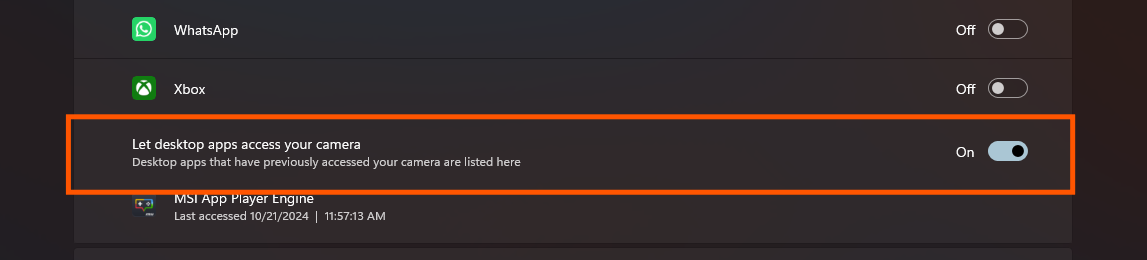
- Scroll down to Let desktop apps access your camera and turn it On if you want desktop apps to use the camera.
4. Set Group Policy Editor to Allow Apps to Use Camera
The Group Policy Editor is a tool in Windows that allows you to configure and control settings across the operating system, especially for privacy, security, and system behavior. For camera issues, it’s important because certain policies could be blocking access to your camera without you realizing it.
We’re exploring this because if the camera is disabled by a policy setting, it will prevent any application, including Microsoft Teams, from accessing it. This can occur due to privacy settings or corporate policies if you’re using a work device.
By checking the camera-related policies in the Group Policy Editor, we can ensure that nothing is blocking the camera from functioning properly.
Note: The Group Policy Editor is not available for Windows Home editions. Although you can install it, we recommend skipping this step if you are not familiar with it. If you still want to proceed, check out our detailed guide on How to Enable GPedit.msc on Windows Home Editions.
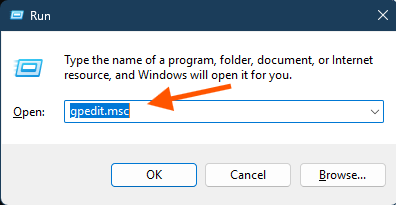
- Press Win + R, type gpedit.msc, and press Enter.
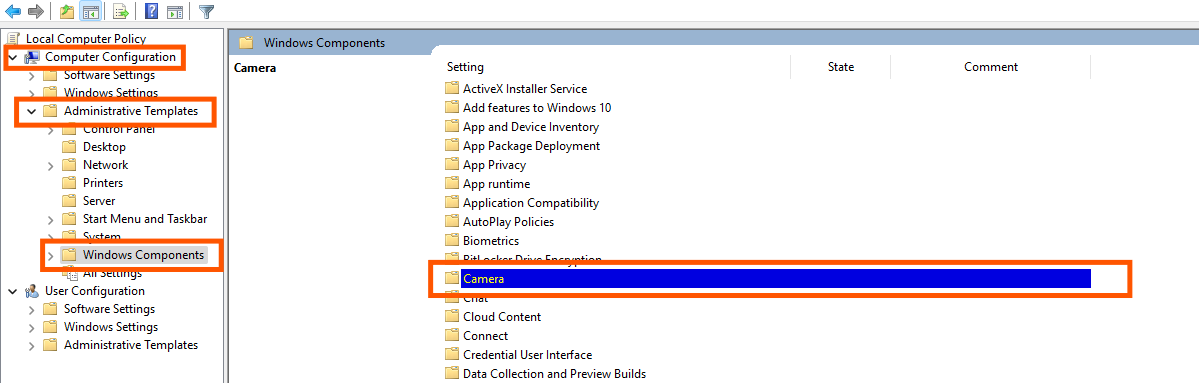
- Navigate to Computer Configuration > Administrative Templates > Windows Components > Camera.
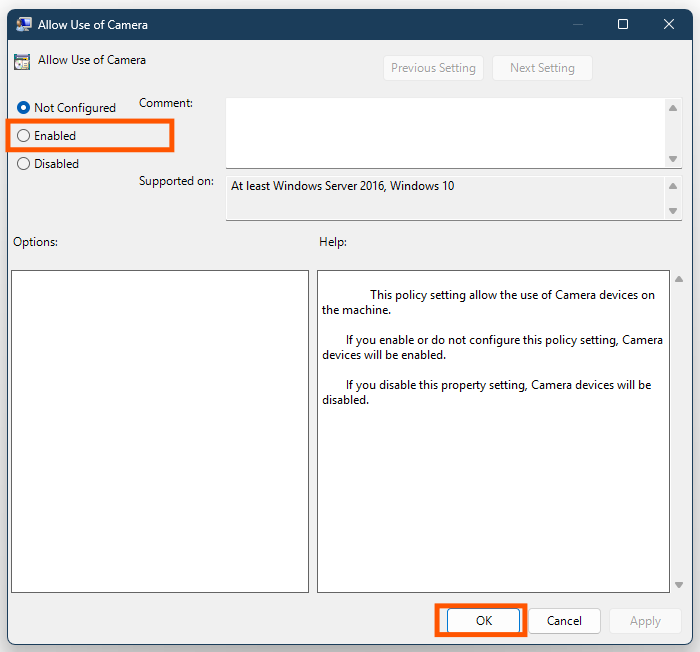
- Check if “Allow Use of Camera” is set to Enabled. If it’s set to Disabled, that might be why your camera isn’t working. You can change it to Enabled to unblock camera access.
5. Reset Microsoft Teams
If your Microsoft Teams app is misconfigured, it will not detect your camera. Misconfiguration is a common issue that renders a program unusable. To resolve this, we will reset its settings and configuration to revert the app to its default settings.
Note: Keep in mind that this will log you out of your account and reset all the configurations. Ensure you remember your Teams password before proceeding.
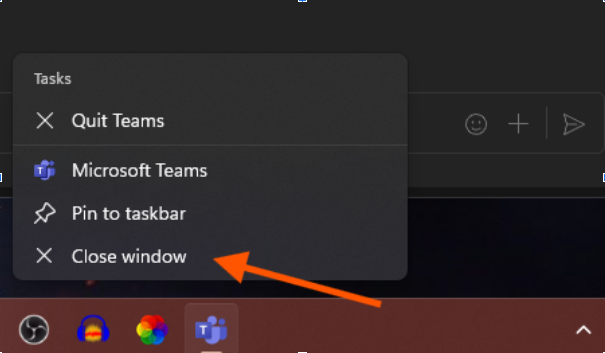
- Right-click the Teams icon in the taskbar (if it’s open) and select “Quit” to ensure the app is completely closed.
- Press Win + I to open the Settings app.
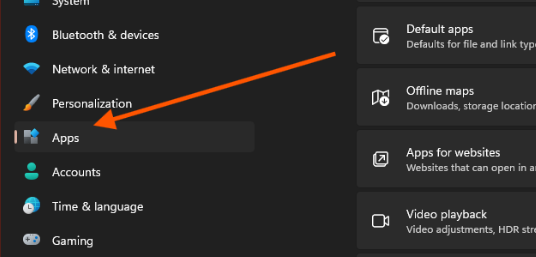
- In the Settings window, click on “Apps” from the left-hand menu.
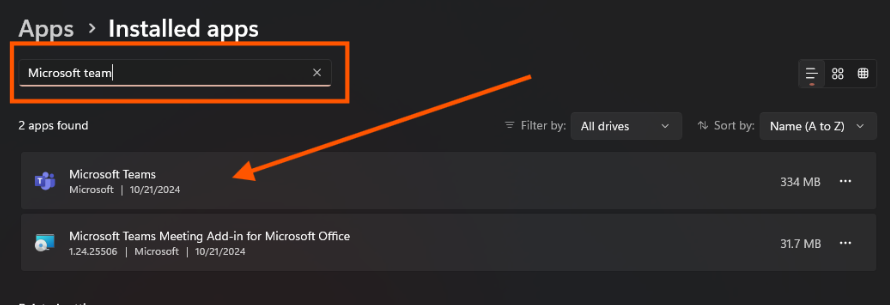
- Now in the Installed Apps section, scroll down the list or use the search bar to find “Microsoft Teams.”
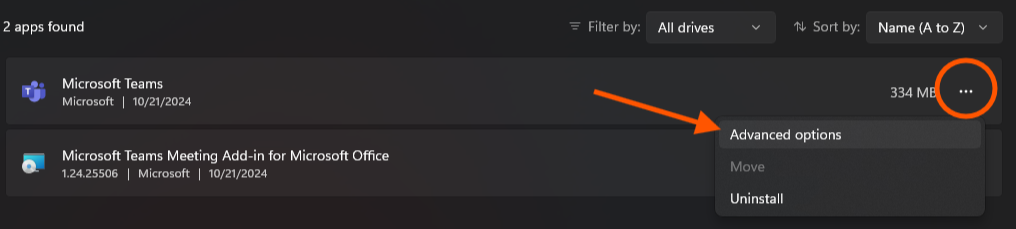
- Click on the three dots (•••) next to Microsoft Teams and select “Advanced options.”
- Scroll down to the Reset section.
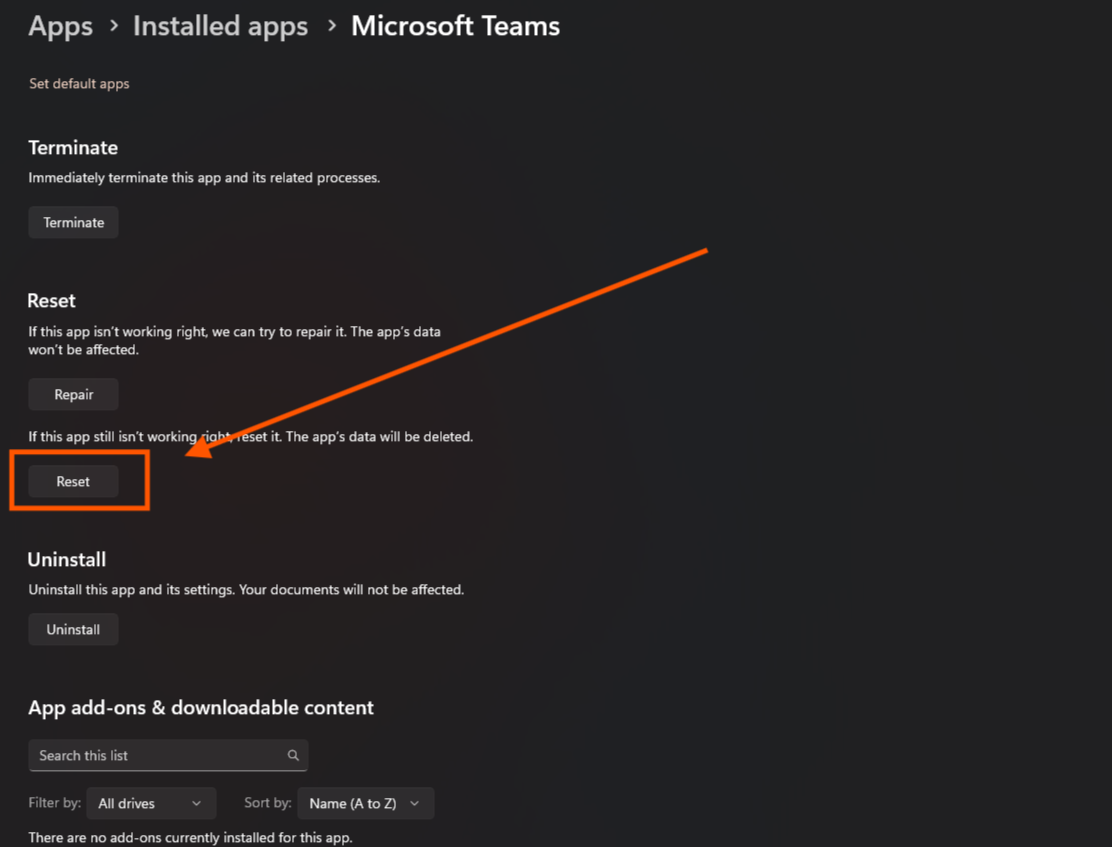
- Click on the “Reset” button. A prompt will appear confirming the reset.
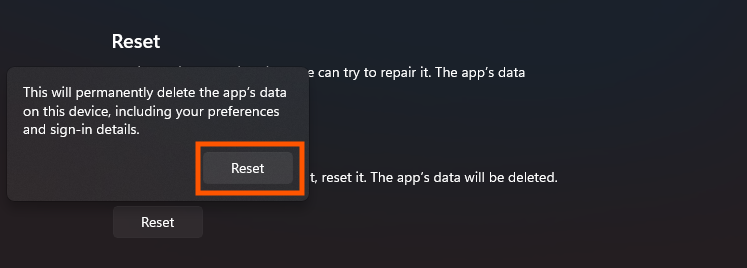
- Click “Reset” again to confirm.
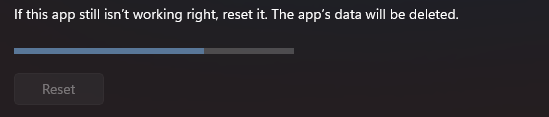
- Once the reset is complete, you can close the Settings app and reopen Microsoft Teams from the Start menu or desktop shortcut.
If none of these solutions helped you, it’s possible that something is wrong with your camera. You can confirm this by using a different camera (you can also try using your mobile phone as a webcam to verify). It’s also possible that something is preventing Teams from accessing your camera. If that’s the case, you may consider contacting Microsoft Teams support to get your issue resolved.