Can’t Find Microsoft Store App in Windows? Here’s what happened
Get your Microsoft Store App Back in 4 Simple Fixes
If you cannot locate the Microsoft Store in your system, the issue can be down to a number of reasons, such as corruption errors within the system or bugs in an update. The problem also affects some of the apps installed through the Microsoft Store.
To resolve the Microsoft Store app missing issue, you can try several different solutions, such as reinstalling the app, resetting the Windows Store cache, running a virus scan, and more. We have discussed different methods of fixing the issue that you can follow to regain access to the Microsoft Store app on your Windows device and continue to enjoy its wide range of features and benefits.
1. Reinstall Microsoft Store
The first thing that we recommend you do is reinstall the Microsoft Store to resolve issues with it and the apps downloaded by it. We will be using Powershell for this purpose.
Here is how you can proceed:
- Type Powershell in Windows search and click on Run as administrator.
- Click Yes in the User Account Control prompt.
- In the Powershell window, execute the following command:
winget install 9WZDNCRFJBMP
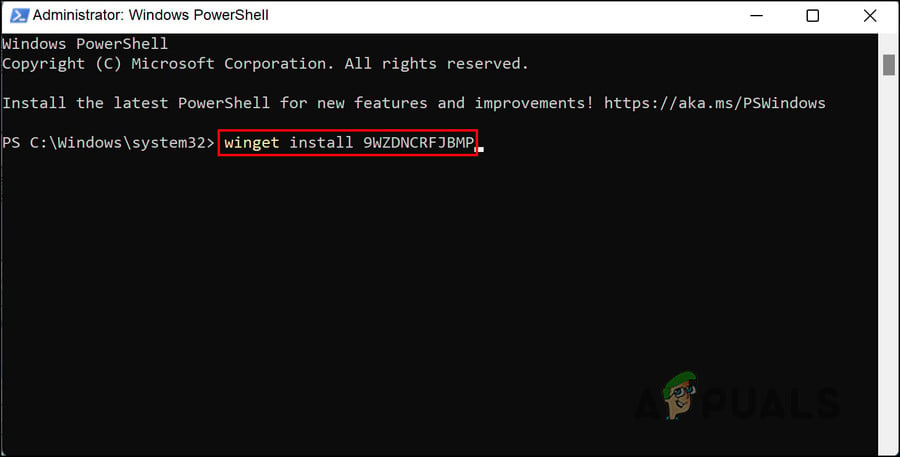
Execute the entered command
Once the process is completed, check if the issue is resolved. Alternatively, you can also try re-registering the Microsoft Store by following the steps below:
- Type Powershell in the search area of the taskbar and click on Run as administrator.
- Choose Yes in the User Account Prompt.
- Type the following command and hit Enter to re-register Store for current users:
Get-AppXPackage *Microsoft.WindowsStore* | Foreach {Add-AppxPackage -DisableDevelopmentMode -Register “$($_.InstallLocation)\AppXManifest.xml”}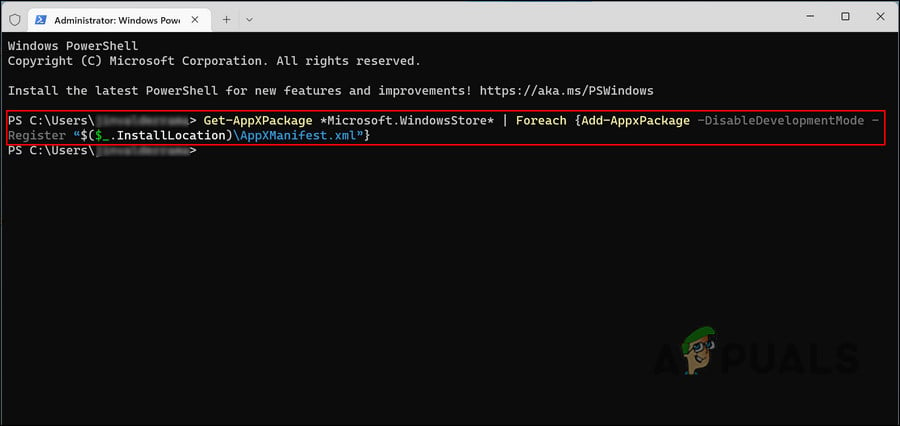
Re-register Microsoft Store for current users - Execute the following command to re-register Store for all users:
Get-AppXPackage WindowsStore -AllUsers | Foreach {Add-AppxPackage -DisableDevelopmentMode -Register “$($_.InstallLocation)\AppXManifest.xml”}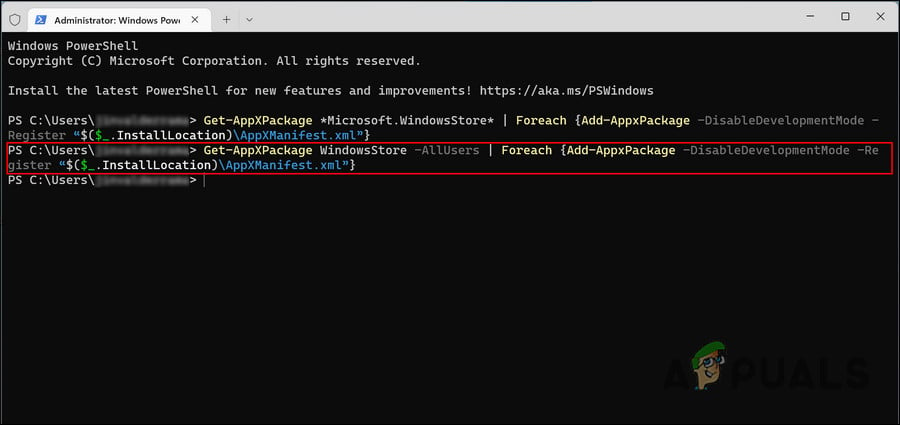
Re-register Microsoft Store for all users
2. Go Back to the Previous Build
You can also go back to a previous version of Windows, to a time when the Microsoft Store and its apps were working perfectly fine. This, however, means that you will lose any changes that you implemented after upgrading to the latest build.
We will be using the Recovery feature in Windows for this purpose, which works very similarly to the System Restore feature. Once Microsoft acknowledges the issues caused by the 22H2 update and releases fixes for them, you can install the update again.
Here is how you can proceed:
- Press the Win + I keys together to open Windows Settings.
- Choose System from the left pane.
- Now, move to the right side of the window and click on Recovery.
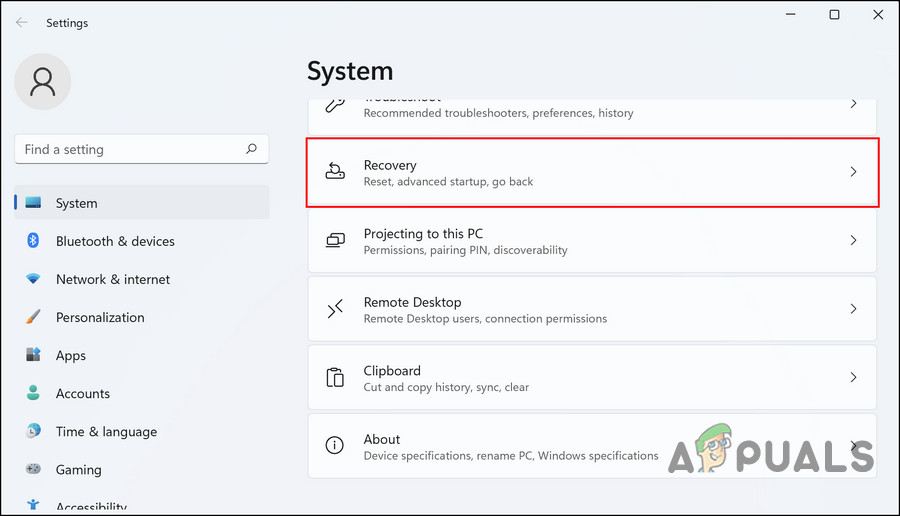
Choose Recovery in the Settings window - In the following window, click on the Go back button.
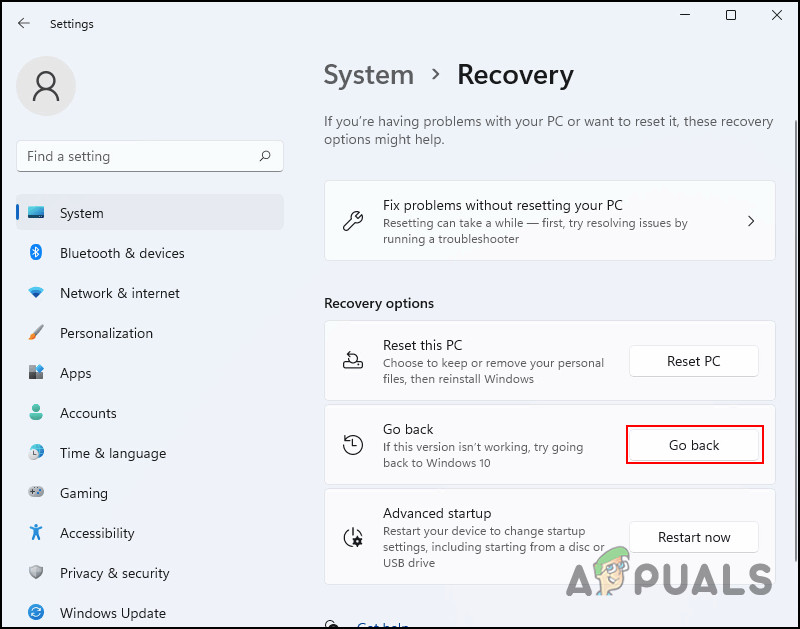
Click on the Go back button - Pick a reason for going back and follow the on-screen instructions to proceed.
In case you cannot find the Go back button, move to the next method below.
3. Create a New User Account
You can also face the problem if the user account you are currently using is corrupted. To check if this is the case, you can switch to another user account and check if the same problem appears there as well.
If you do not have a separate user account, then follow the instructions below to create one. Alternatively, you can try running SFC and DISM to resolve the issue within your current account if you don’t want to switch accounts.
To create a new user account, follow these steps:
- Open Windows Settings by pressing the Win + I keys.
- Choose Accounts > Family & other users in the following window.
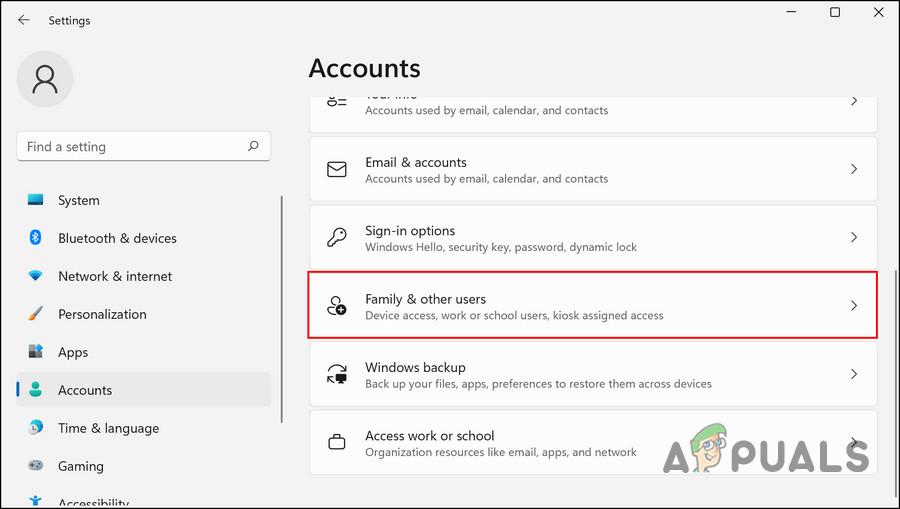
Access the Family & other users settings - Click the Add account button in the Other users section.
- Choose I don’t have this person’s sign-in information from the following dialog.
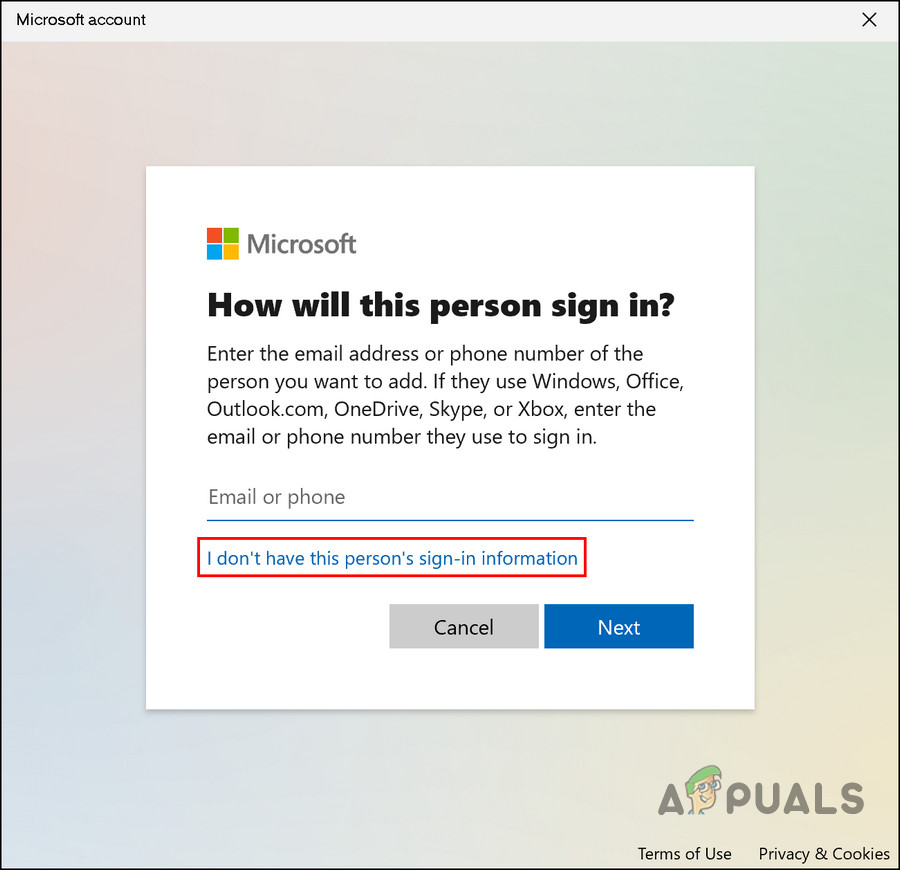
Choose the I don’t have this person’s sign-in information option - Next, click Add a user without a Microsoft account and enter all the required information.
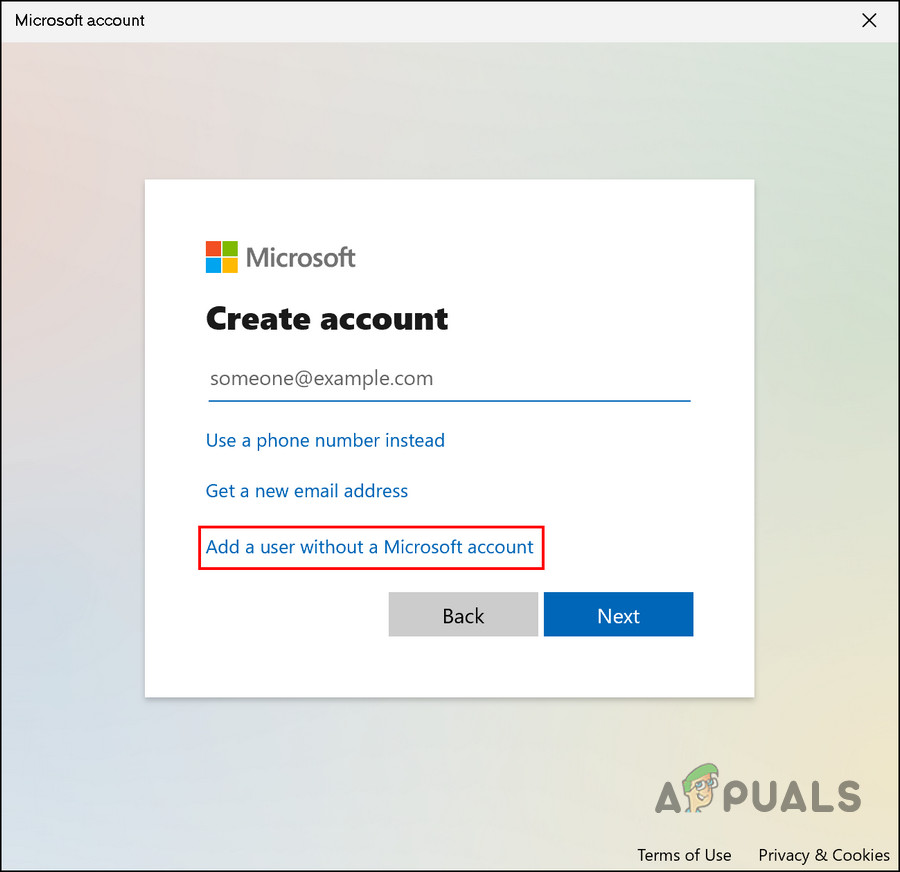
Add a user in Windows without a Microsoft account - Follow the on-screen instructions to proceed.
Upon creating a new account, log in and see if the issue has been resolved.
4. Reset or Clean Install Windows
As a last resort, you can try resetting or clean-installing Windows if none of the other troubleshooting methods suggested here work.
You don’t have to worry about losing your files and folders during a Windows reset because Windows will provide you with an option to keep them. However, if you want to proceed with a clean install, we recommend saving your important files elsewhere since this method will wipe other areas of the system clean.
4.1 Reset Windows
To proceed with a reset, follow these steps:
- Press Win + I to open the Settings app.
- Choose System from the left pane and then click on Recovery on the right side of the window.
- Head over to the Recovery options section and click on the Reset PC button.
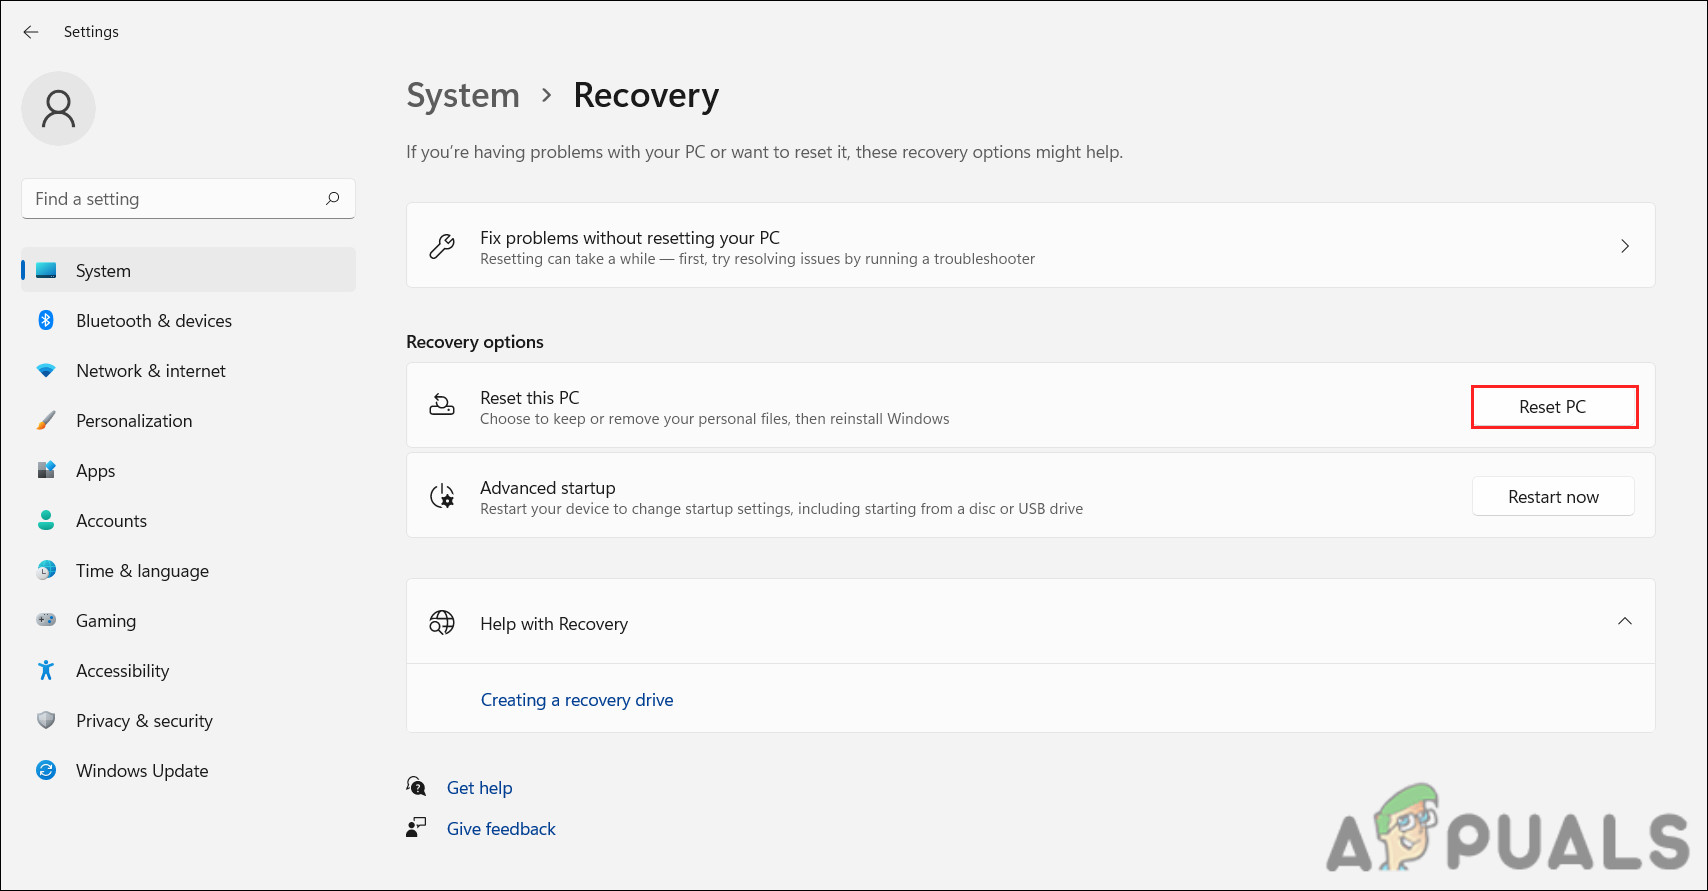
Click on the Reset button - In the following Reset this PC window, click on Keep my files or Remove everything, according to your preferences.
- A prompt will ask you how you want Windows reinstalled. Windows can either be reinstalled locally using the files on your system or through a cloud download from Microsoft’s servers. Choose one to proceed.
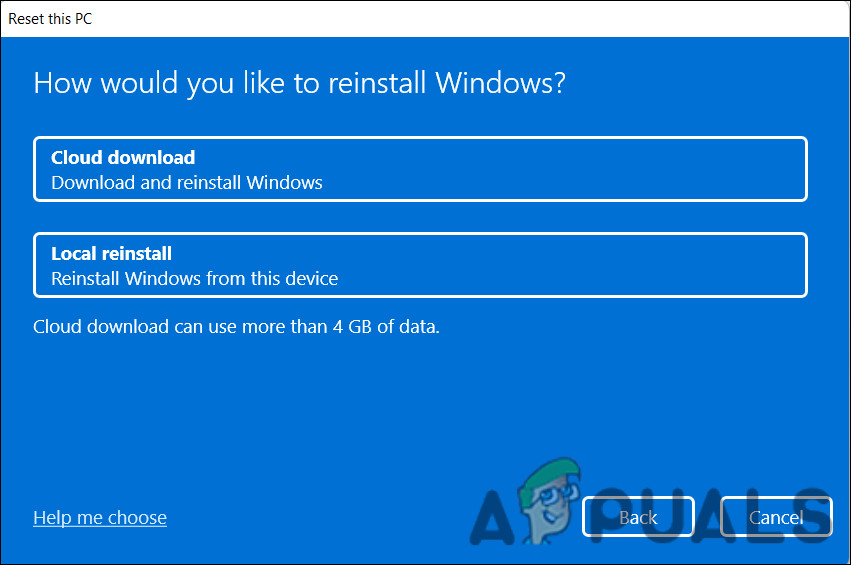
Choose a reinstall option - Now, click on the Change settings option if you would like to change any option that you previously selected, and then hit Next.
- Finally, click on the Reset button and wait for the process to complete.
4.2 Clean Install Windows
To proceed with a clean install, head over to this guide.
This is a lengthy process, so we recommend you proceed with it only when you have enough time on your hands. Hopefully, this will resolve the issue once and for all.


