How to Fix: LowLevelFatalError in Star Wars Jedi Survivor
 Reviewed by Huzaifa Haroon
The Low Level Fatal Error in Star Wars Jedi Survivor usually occurs due to the overclocked components on your PC. This can include the XMP profile applied to your memory via your BIOS configuration, or D.O.C.P. in the case of AMD motherboards, and more.
In addition, any overclocks you have applied to the graphics card on your PC or your processor can also contribute to rendering the low level fatal crash in Star Wars Jedi Survivor. To help you resolve the issue, we will be mentioning a variety of different methods which will help you get rid of the crashes in no time.
1. Run Star Wars Jedi Survivor as Admin
The first thing to start off with is to give the game process sufficient permissions in your Windows environment. Most times, game processes fail to run smoothly on your PC due to insufficient permissions which prevents them from properly accessing system resources, as well as interferences from various other services.
In such an instance, you can overcome these obstacles by simply running the game with administrative privileges. To do this, follow the instructions below:
- First, open the Steam client on your PC and right-click on Star Wars Jedi Survivor.
- From the menu, select the Manage > Browse local files option.
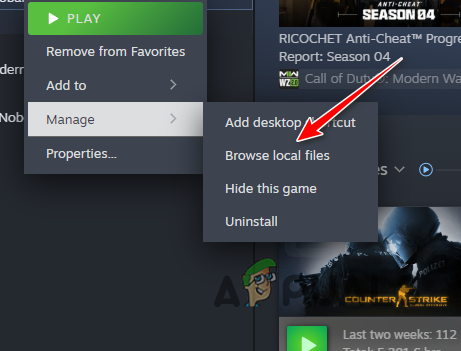
Opening Installation Folder - This will open a File Explorer window in the installation directory of the game. If you are not using Steam, simply navigate to the installation folder manually via the file explorer.
- After that, locate the jedisurvivor.exe file and open the Properties window by right-clicking on it.
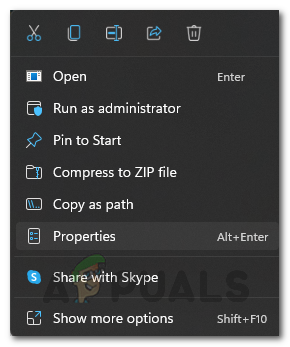
Opening Game Properties - Then, go to the Compatibility tab.
- Finally, select the Run this program as an administrator option and click Apply.
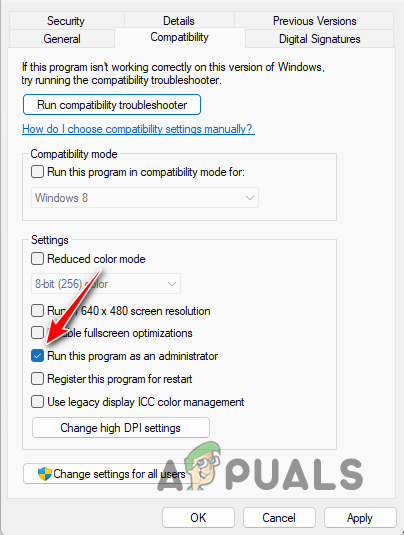
Running Star Wars Jedi Survivor as Admin - See if that resolves the issue.
2. Toggle Ray Tracing
Ray Tracing is a video game tech from NVIDIA that brings a new level of realism to your games by more accurately depicting the reflections and lighting in games. This helps in rendering a more realistic environment; however, it can come with its own caveats when not implemented properly.
The implementation of Ray Tracing in Star Wars Jedi Survivor is not clean, to say the least, which is why it is causing crashes in different instances with the feature turned on. Therefore, you will need to toggle the feature in the settings menu of the game in the areas where you encounter the crash.
Once you have gone past the area of the crash, you should be able to toggle Ray Tracing again without any issues. To toggle Ray Tracing, follow the instructions below:
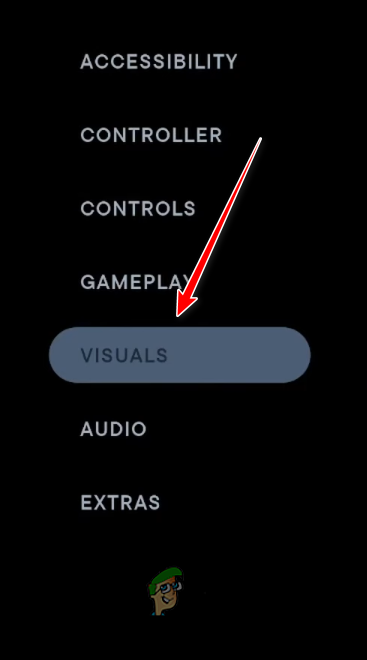
- First, open the game and navigate to the Settings menu via the gear icon.
- After that, switch to the Visuals tab on the left-hand side.
Navigating to the Visuals tab - Then, scroll down to locate the Ray Tracing option.
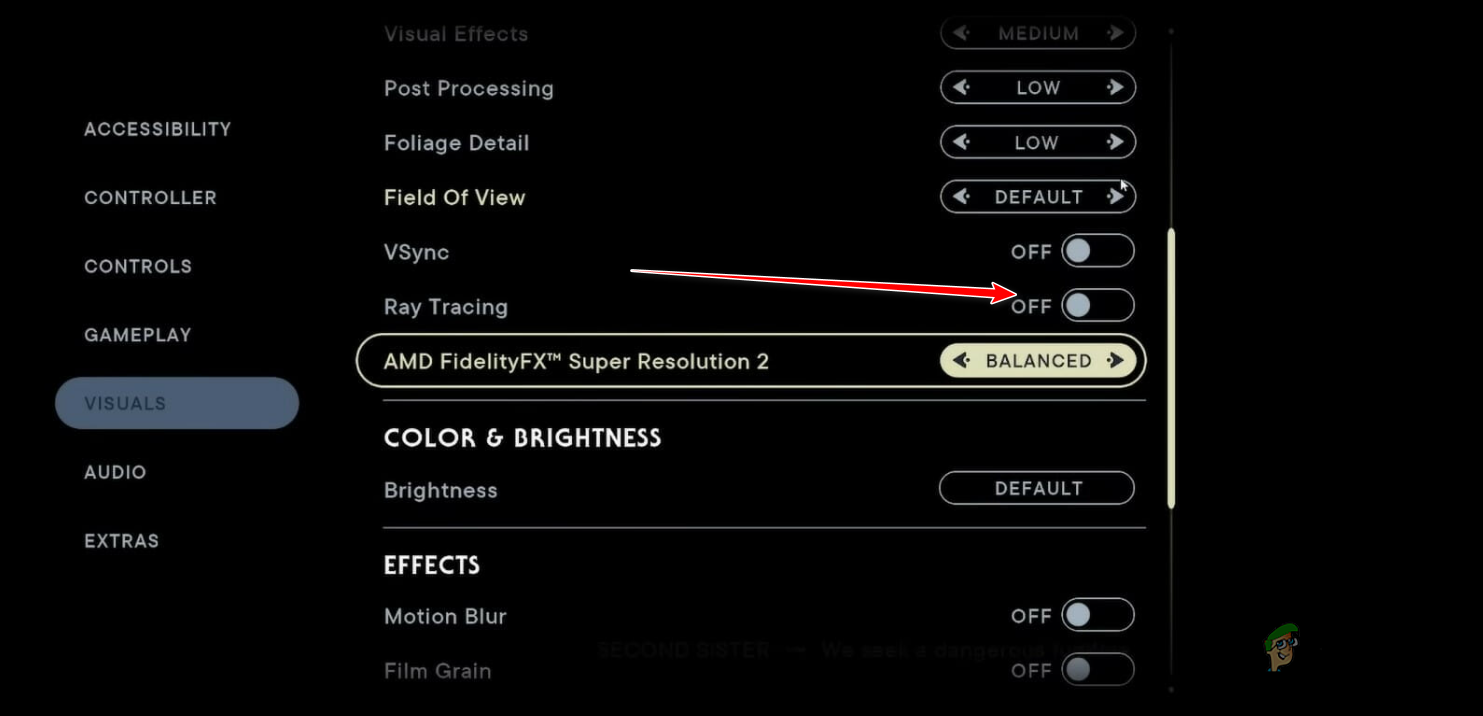
Toggling Ray Tracing - Use the toggle provided to toggle Ray Tracing on and off.
3. Lower Graphics Settings
The graphics settings you are using in Star Wars Jedi Survivor can also cause the game to throw the low level fatal error. This happens when your PC is not able to render the selected graphics quality properly which results in the game crashing.
To overcome this, you will need to lower your graphics settings. You should do this even if you have a high-end PC since it is not only limited to lower-end systems. To lower the graphics settings, follow the instructions below:
- Start by opening the Settings menu in the game.
- After that, go to the Visuals tab on the left.
Navigating to the Visuals tab - Then, use the Graphics Quality option to lower the graphics settings.
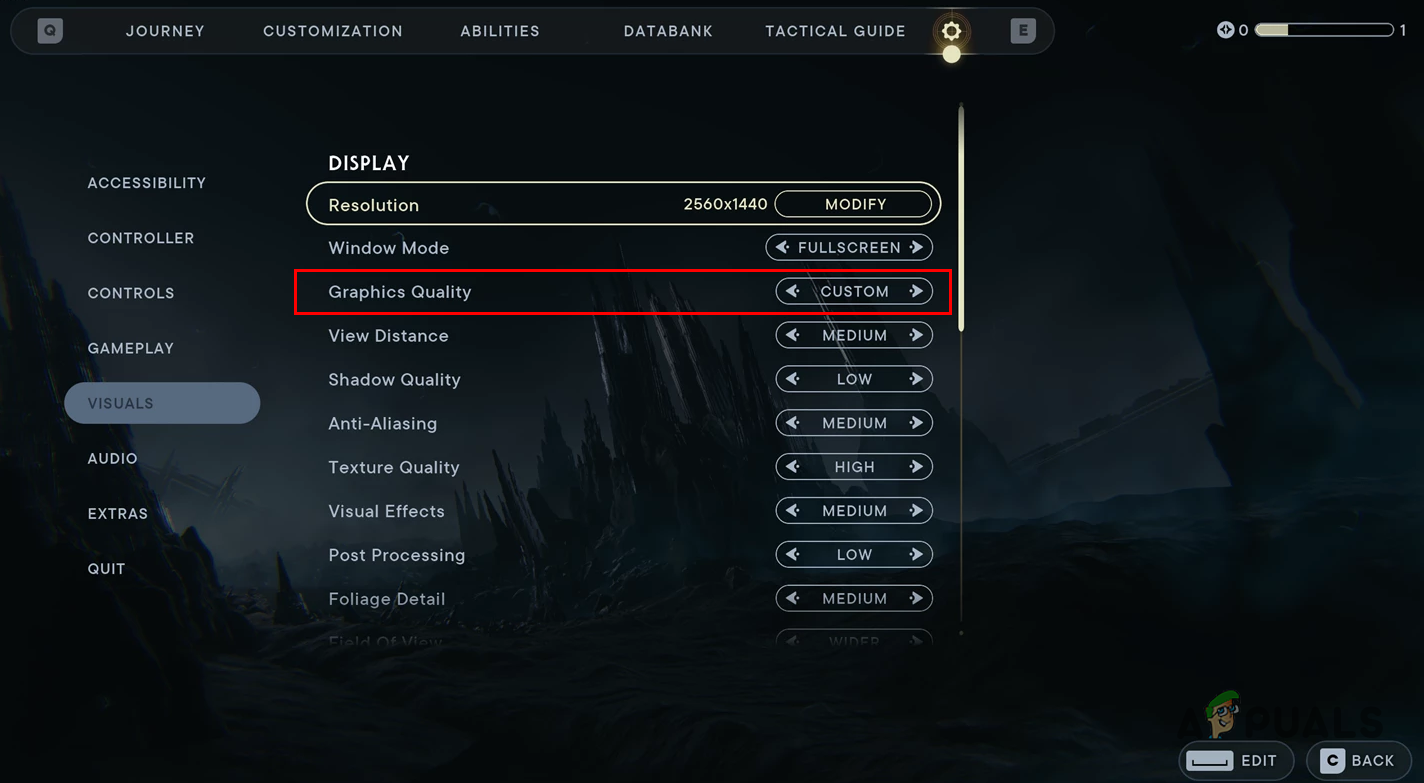
Changing Graphics Quality - In addition, we recommend changing the Resolution to 1920×1080 as well.
- Once you do that, see if the crashes still occur.
4. Run Star Wars Jedi Survivor in Compatibility Mode
In some instances, compatibility issues with your Windows version can be another factor for the game to throw the error message. In such a situation, you will have to use the compatibility mode feature in Windows to force the game to run in the compatibility mode of another Windows version.
This can often help in resolving any compatibility inconsistencies and get rid of the error message. To do this, follow the instructions below:
- First, open the File Explorer window and navigate to the installation directory of Star Wars Jedi Survivor.

Opening File Explorer - Then, right-click on jedisurvivor.exe and select Properties.
Opening Game Properties - In the Properties window, click on the Compatibility tab.
- Select the Run this program in compatibility mode for option.
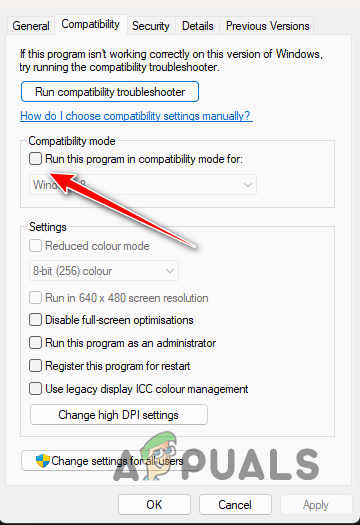
Enabling Compatibility Mode - Finally, select Windows 8 from the menu and click Apply.
- Open the game and see if the issue persists.
5. Disable Antialiasing via NVIDIA Control Panel
Antialiasing is a feature that is used to smoothen out the edges of images in a video game. This seems to be also causing the low level fatal error in Star Wars Jedi Survivor, and as such, you will need to disable the feature in the game altogether.
To do this, you will need to use the NVIDIA Control Panel. If you do not have an NVIDIA graphics card, you can use the game settings menu to disable the feature. Follow the instructions below to disable antialiasing via the NVIDIA Control Panel:
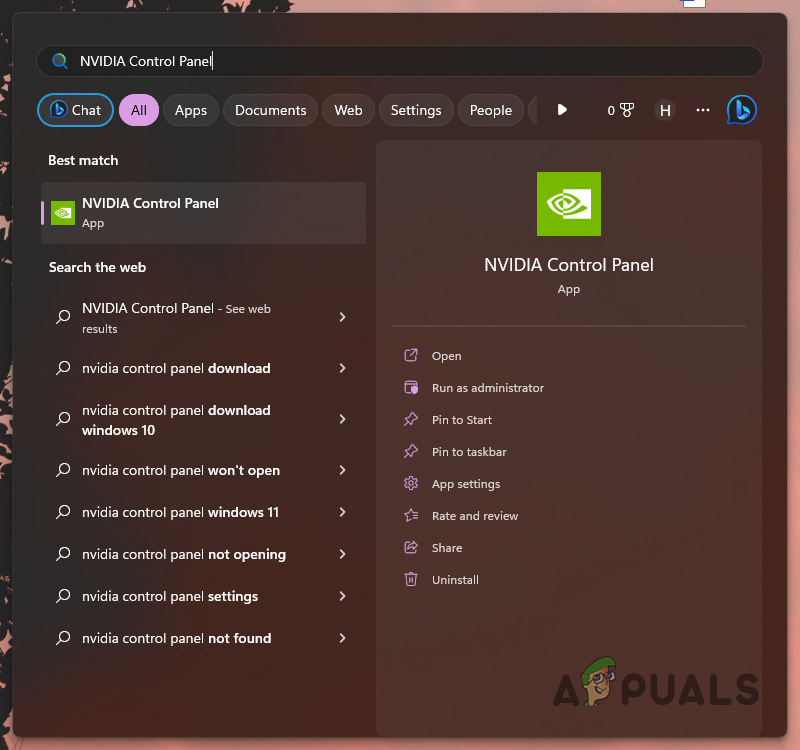
- First, open the NVIDIA Control Panel via a simple search in the Start Menu.
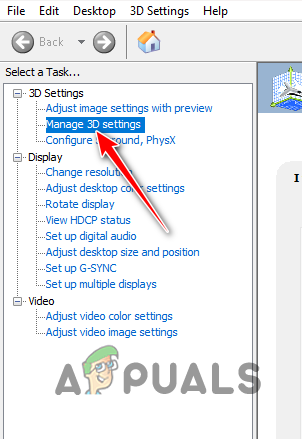
Opening the NVIDIA Control Panel - In the Control Panel, go to the Manage 3D Settings tab on the left.
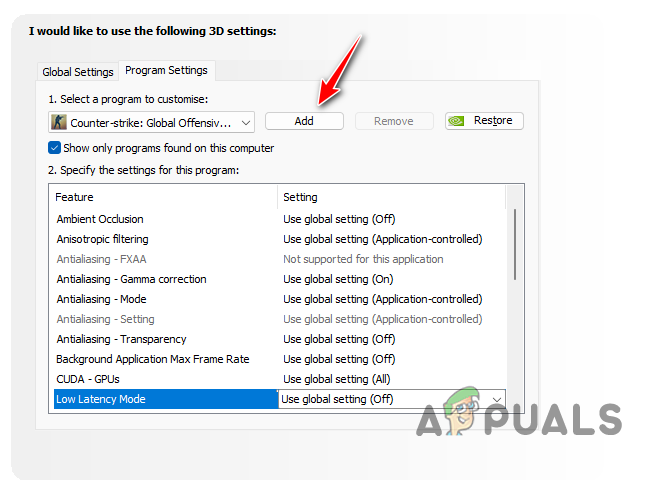
Navigating to Manage 3D Settings - After that, switch to the Program Settings tab.
- Then, select Star Wars Jedi Survivor from the menu.
- If you do not find it, click the Add button to add the program to the list.
Adding Program to NVIDIA Control Panel - After that, use the menu next to every Antialiasing option and select Off.
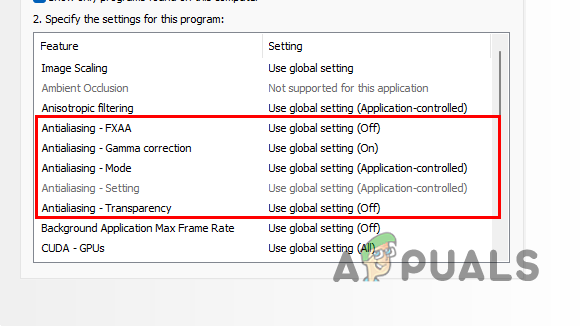
Disabling Antialiasing - Click Apply to save the settings.
- Finally, open the game and see if it gets rid of the crashes.
6. Optimize Settings via GeForce Experience
The game settings are a deciding factor of the error message in question in Star Wars Jedi Survivor, as obvious from the solutions above. Therefore, one way you can circumvent the issue is to use the GeForce Experience app to optimize your game settings.
The app will automatically select the right game settings as per your computer specifications so that you can get the best results. To use the GeForce Experience app, follow the instructions below:
- Open the GeForce Experience app via the Start Menu.
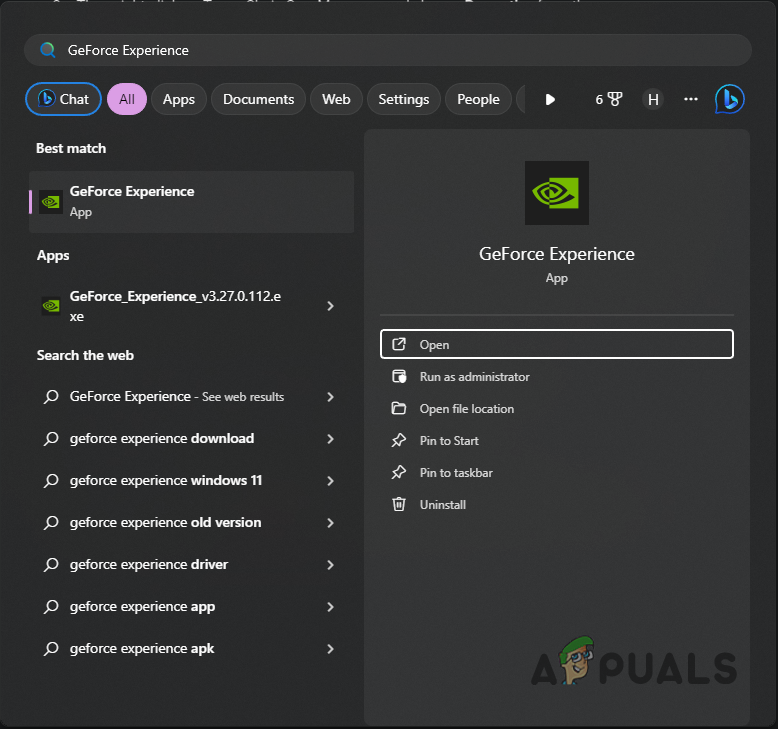
Opening GeForce Experience - After that, on the Home tab, select Star Wars Jedi Survivor.
- Then, click the Optimise button to automatically apply the best settings for your PC.

Optimizing Game with GeForce Experience - Once you do that, launch the game and check if the error message still appears.
7. Run EA Installer Utilities
The EA installation utility can be another reason for the error message popping up. This happens when the game installer does not complete properly, and there are inconsistencies with the game files. In such an instance, you can use the EA Installer utilities in the game directory to fix the issue.
To do this, follow the instructions below:
- First, open the installation directory of Star Wars Jedi Survivor in the File Explorer window.
Opening File Explorer - Inside the installation folder, open the _Installer folder.
- Then, right-click on the cleanup.exe and touchup.exe files one by one and select Run as administrator.
- These processes run in the background, so wait a while for them to complete.
- After that, open the game and see if the issue occurs.
8. Disable ReBar
Resizable Bar or ReBar is a feature that improves the performance of your games on your PC. This is done by changing how the in-game assets are requested by the GPU to be rendered, which frees up important CPU time.
While ReBar is available in Star Wars Jedi Survivor, using the feature can cause the game to crash in certain scenarios. Such an issue is usually resolved in a patch released by NVIDIA or the dev team, depending on where the issue is arising from.
In the meantime, you will have to disable ReBar to be able to continue playing the game on your PC. To do this, you can use the NVIDIA Profile Inspector utility that allows you to change driver settings for each game individually. Follow the instructions below:
- First, download the NVIDIA Profile Inspector utility from the official GitHub repository. Click on the nvidiaProfileInspector.zip file to do so.
- After that, unzip the file to a location on your drive.
- Open the nvidiaProfileInspector.exe file.
- Then, search for Star Wars Jedi Survivor in the top-left corner.
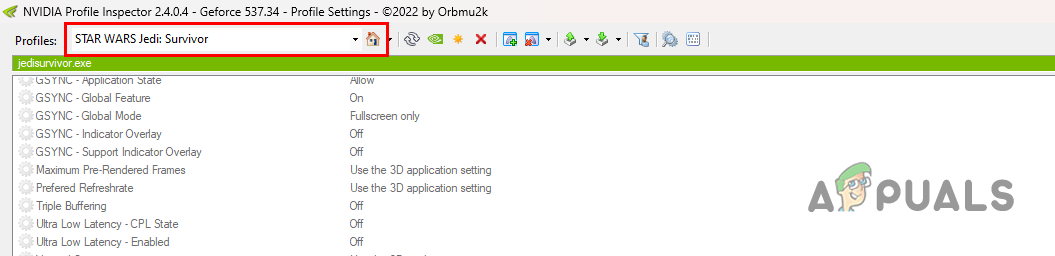
Searching for Star Wars Jedi Survivor - Once you do that, scroll down to the Common section and locate rBAR Feature.
- Use the menu to select Disabled.

Disabling ReBar - After that, click Apply changes in the top-right corner.
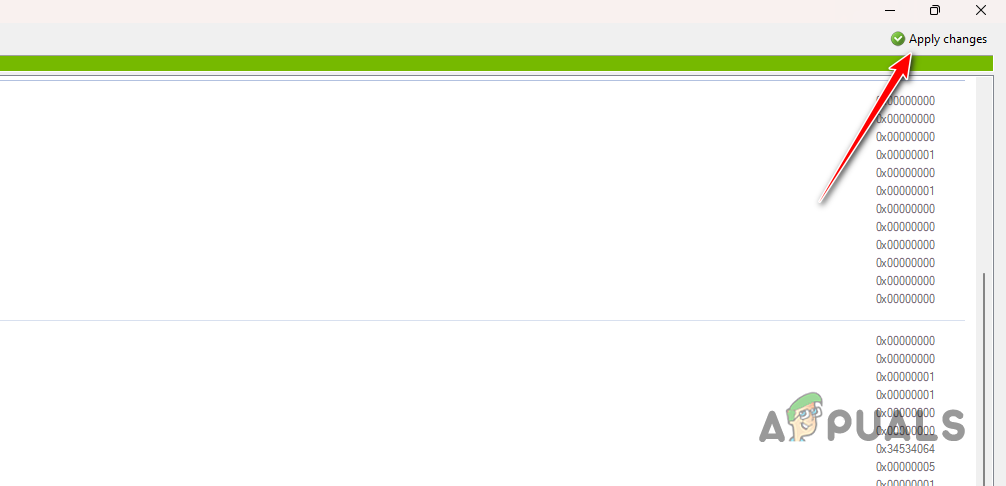
Applying Changes - Once you do that, launch the game to see if the error message still occurs.
9. Reinstall Display Drivers
Another factor for the low level fatal error in Star Wars Jedi Survivor can be the video card drivers on your computer. This can occur when the video card drivers are obsolete, or malfunctioning due to recent updates.
Installing new drivers is important especially for newer games since they contain official support and fixes for any issues with the game that might be occurring with previous versions. To reinstall your drivers, you will have to use a third-party utility to completely remove the drivers from your PC.
Follow the instructions below to do this:
- Use the official source here to download Display Driver Uninstaller (DDU).
- Unzip the file and open the Display Driver Uninstaller.exe file on your PC.
- Once it launches, click Continue on the Options box.
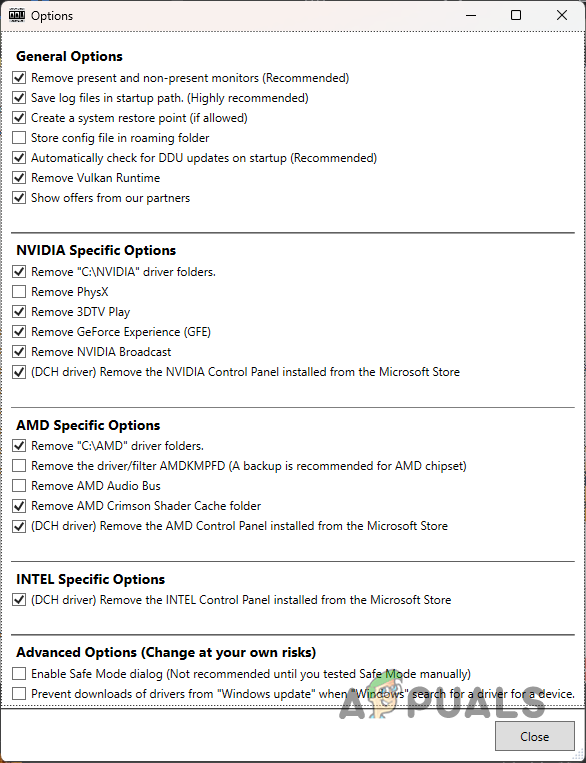
General Options - After that, use the Select device type menu to the right to select GPU.
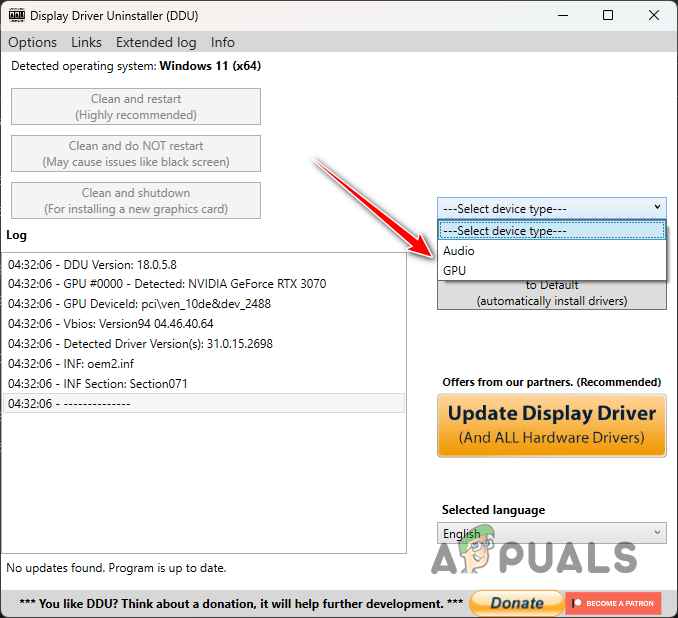
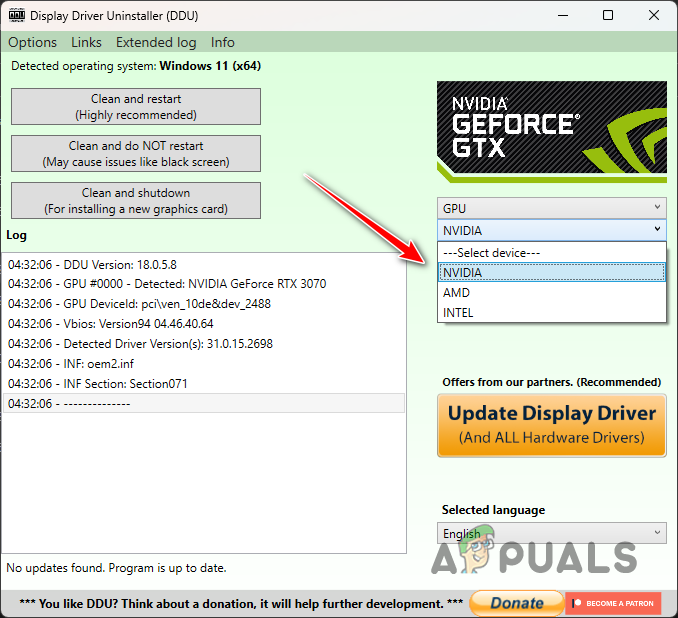
Selecting Device Type - Then, choose the manufacturer of your video card from the Select device menu.
Selecting Brand - Once you do that, select the Clean and restart option to remove the video card drivers.
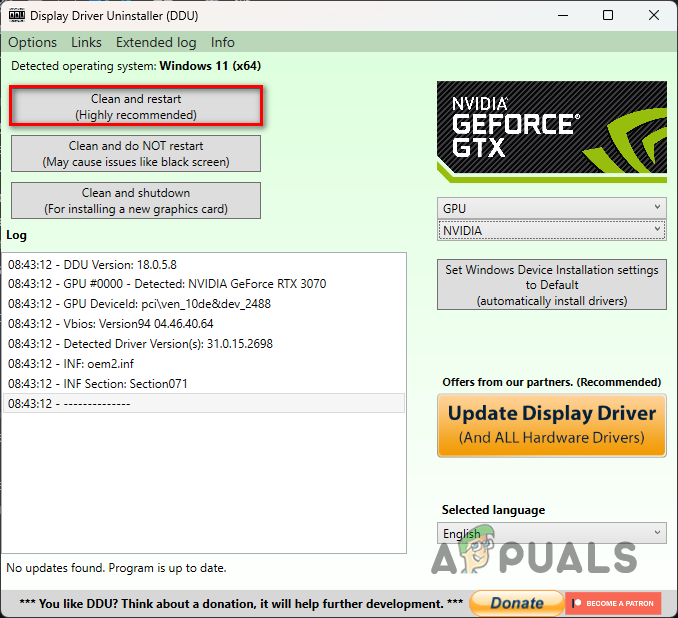
Uninstalling Video Drivers - After your PC boots, go to your video card manufacturer’s website and download the latest available display drivers for your card.
- Install the new drivers and see if the problem persists.
10. Repair Star Wars Jedi Survivor Game Files
The installation files of Star Wars Jedi Survivor on your PC can also be the culprit behind the error message in question. When this occurs, the game files on your system are damaged or corrupted, in which case you will have to repair them.
If you are using the EA client, you can repair the game files quite easily by right-clicking on the game and selecting Repair. In case you are playing the game on Steam, you will need to use the verify integrity of the game files feature.
Follow the instructions below to do so:
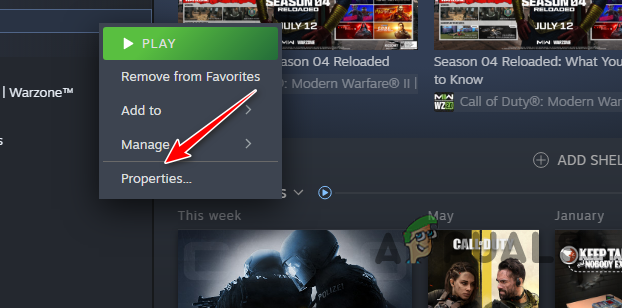
- Open the Steam client and right-click on Star Wars Jedi Survivor.
- From the menu, select Properties.
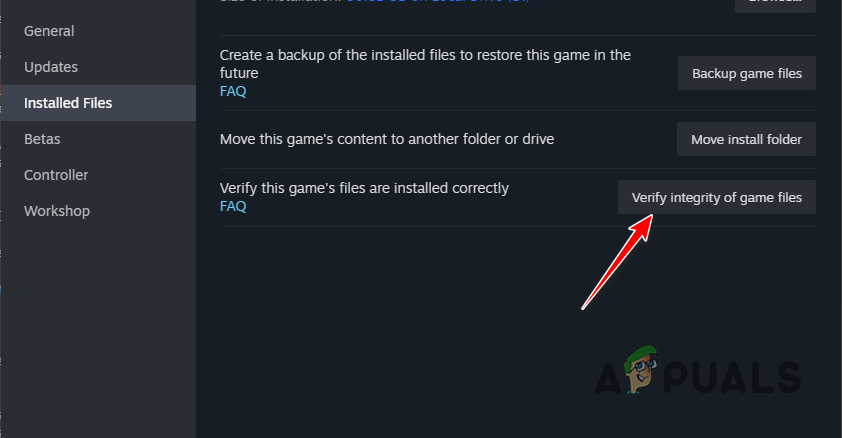
Opening Steam Game Properties - Then, jump to the Installed Files tab on the left.
- After that, click the Verify integrity of game files button.
Repairing Game Files on Steam - This will start scanning and repairing your game.
- Wait for it to complete.
11. Remove Overclock
Finally, if the above methods fail to resolve the issue for you, the problem is associated with your overclocked components. In such an instance, you will have to get rid of any overclocks applied to your PC components.
Overclocking is a great way of getting the most out of your PC parts, however, this can come at the cost of instability in some games which can cause them to crash. To resolve the issue, start by removing the XMP or D.O.C.P. profile applied to your memory.
Additionally, remove any overclocks from your processor or graphics card and then see if the problem persists.
With these solutions, you should be able to subside the low level fatal error in Star Wars Jedi Survivor. The graphics settings and overclocked components are often the root cause of such an issue. As such, ensure your graphics settings are appropriate per your system configuration and remove any unstable overclocks to prevent such issues from occurring in the future.
Reviewed by Huzaifa Haroon


