How to Fix ‘Localhost Refused to Connect’ Error on Windows?
If you are running XAMPP or WAMP or any other web server on your local computer, and you face the “Localhost refused to connect” error message, then there is likely something wrong with your configuration. This can also include scenarios where your localhost does not correspond to 127.0.0.1 correctly or when you have insufficient permissions to access the file. Localhost or 127.0.0.1 is the ip address of the web server running on your computer, not on the web and you can access it even if you do not have an internet connection.
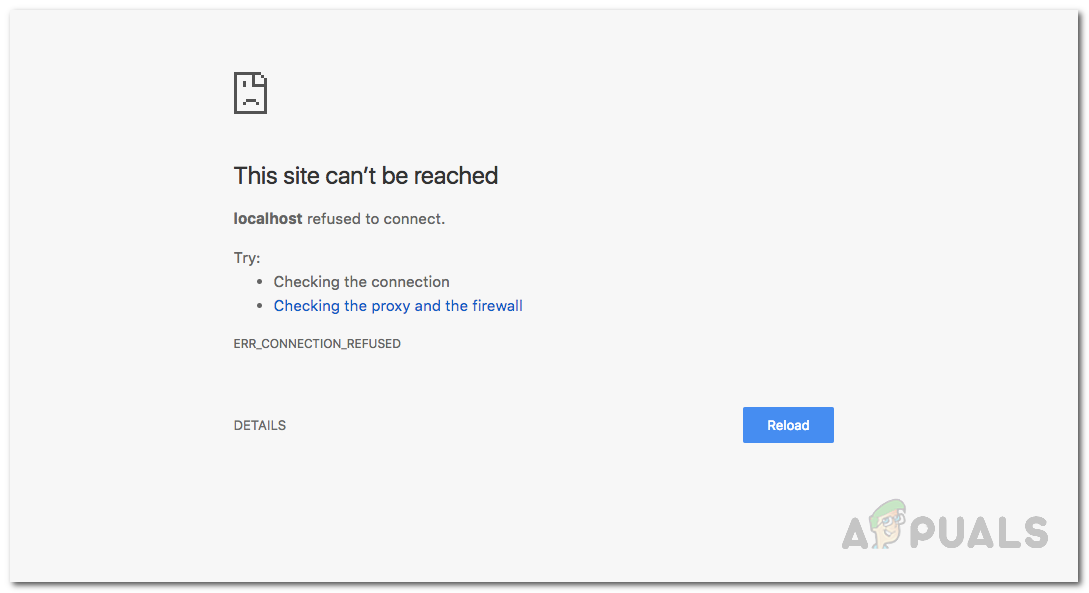
Localhost corresponds to any web server running on the computer that you try to access it from. Testing apps, making changes to the current apps and doing any other development work on your local computer is better than doing it on an online or production server. That way you can test the bugs and get rid of them without needing to mess up your working application running on an online web server or in a production environment. You would be able to test the application to make sure it works correctly and won’t cause any downtime or other issues when it is live in the production environment. There are even cases when you want to develop an application in an editor like Microsoft’s Visual Studio / Visual Studio Code, which you can use to develop Android apps, and you face this error when you want to connect your project to a webserver running on your machine or a web server package provided by the editor itself.
There are plenty of reasons why this error occurs, and the exact cause of this error depends on the root causing it. Therefore, before we get started with showing you how to solve this problem, let us first go through the possible causes of the error in order to establish a better understanding of the issue.
- Localhost isn’t corresponding to 127.0.0.1 — There might be cases when localhost on your machine isn’t correctly corresponding to 127.0.0.1. If that’s the reason, you wouldn’t be able to access your local web server by typing localhost in the web browser or by pinging localhost from the command prompt.
- Using WSL on Windows to run a web server — Sometimes, the LxssManager Service on Windows is the culprit if you are running a web server inside a linux distribution on a windows subsystem for linux.
- Port 80 is used by another application on your computer — In some cases, this error can occur if port 80 on your computer is used by any other application on your computer. Skype used to use port 80 back in the days and you wouldn’t be able to run an apache server on WAMP or XAMPP while simultaneously running Skype on your windows computer as well.
- Accessing your web server from a wrong port — It might be likely that your web server is configured to use another port rather than the default port 80, and you are trying to access it by typing localhost in your browser which defaults to localhost:80 i.e port 80. If that’s the case, then you would get this error message.
- Insufficient Permissions — In some scenarios, this error can arise if you are trying to access a file or directory in the local web server which isn’t permitted to be accessed by your user.
Now that we have already told you about some of the reasons why this error arises on a Windows computer. Now, let’s see what you can do to fix or get rid of this error and continue your web development journey.
Change Apache Web Server Port in XAMPP or WAMP
First off, the most common way to resolve this error is by changing the port of the apache web server if you are using XAMPP or WAMP on windows. Usually, some other web application that you might be running on your computer can get the hold of port 80 and it is blocked/not accessible to an application like apache. Thus even though apache is running, it won’t be able to fetch web pages on that particular port.
Change Apache’s port in XAMPP
In order to change the running port of apache web server in XAMPP, do the following:
- First of all, start XAMPP from the Start Menu.
- Then, in the system tray portion of your taskbar you would see the XAMPP icon, double click on it.
- You would now see the XAMPP Control Panel Window. In that window, you would see a list of services that are currently running i.e apache, mysql etc.
- Next to the service name, there would be a button called “Stop”. Click on Stop in front of the apache service.
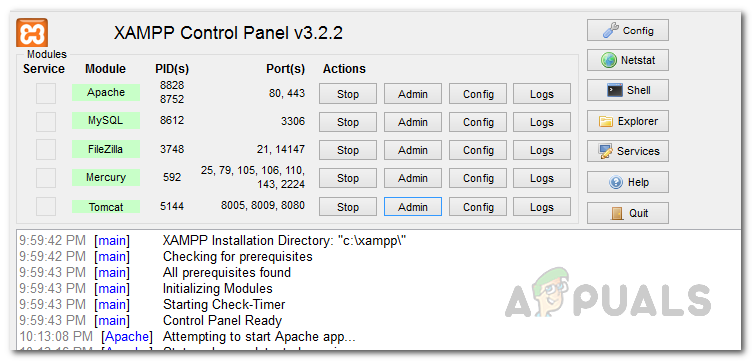
XAMPP Control Panel - Next open windows explorer, and go to C:\xampp\apache\conf directory. There, look for a file named httpd.conf.
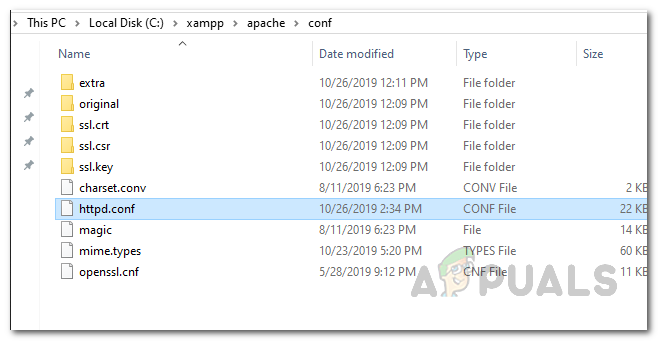
Opening up HTTPD Config File - Open it with Notepad or any other editor that you want. Inside the file, search for these two lines.
Listen 80
ServerName localhost:80
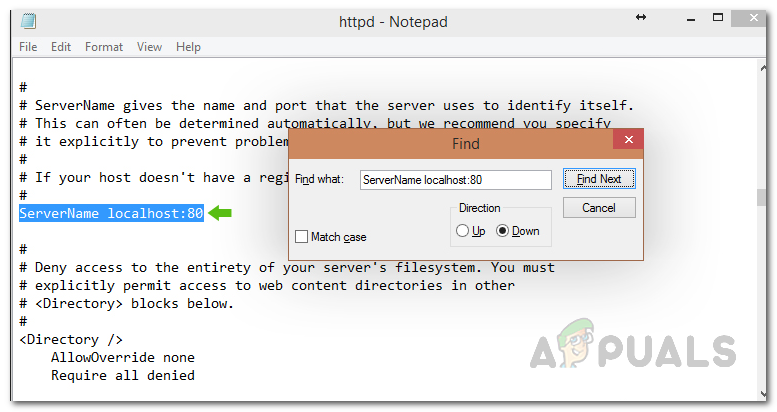
Replacing ServerName in HTTPD Config File - Once you have found them, replace them with the following:
Listen 8080
ServerName localhost:8080
- Now, save the file. It would ask for administrative privileges when you save the file. Click on Yes when the dialog box appears.
- Now open the XAMPP control panel again, and start the apache web server.
- If the error was caused by a conflicted port number, then doing this would have solved it.
Change Port Number of Apache Web Server in WAMP
To change the port number of the apache web server in wamp, first you need to close WAMP.
- To do that, open the Task Manager by right-clicking on your taskbar and choosing Task Manager from the menu that appears.
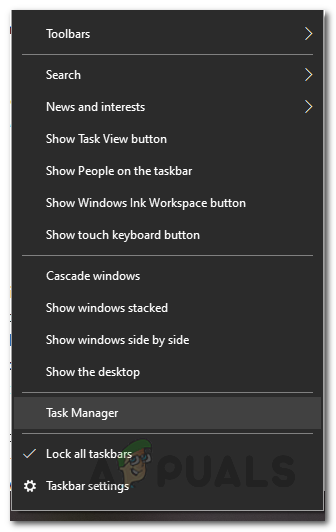
Opening up Task Manager - Once the Task Manager is open, see if any instances of WAMP are running. If they are, just click on the good old “End Task” button to stop them.
- Now, open Windows Explorer by double clicking the My Computer icon on your desktop. Navigate to the C:\wamp\Apache2\conf folder and open the file named httpd.conf with notepad or any other editor of your choice.
- Afterwards, search for these two lines in that file:
Listen 80
ServerName localhost:80

Replacing ServerName in HTTPD Config File - After locating these lines, replace them with the following instead:
Listen 8080
ServerName localhost:8080
- That’s it, save the file. And open WAMP again and see if you still face this error.
Access Localhost by Using 127.0.0.1
As we have mentioned earlier, one of the reasons the error message in question may appear is that, in some cases, the localhost isn’t corresponding to 127.0.0.1 which is the address of your local web server.
In order to fix that problem, start the web server by launching XAMPP or WAMP and go to your browser and type 127.0.0.1 and press Enter. If you are able to access the web server using this, then it means localhost isn’t pointing to this ip, and you would need to access any projects/files on your web server by typing 127.0.0.1/filename instead of localhost/filename.
Restart LXSSManager Service (For Web Servers running on WSL)
If you are using the Windows Subsystem for Linux on your computer to run a web server, as some people might do to develop Nodejs applications etc, while facing this error, then the simplest thing you can do is to restart LXSSManager service. To do this, follow the instructions that are given down below:
- First of all, open up the Run dialog by pressing the Windows key + R shortcut on your keyboard.
- When the Run dialog box runs open up, type in services.msc and press Enter.

Opening up Windows Services - This will open up the Windows Servers app where you will see a list of all the services currently available on your computer.
- In the Services window, search for the service named LxssManager.
- Right click on it and select Restart from the drop-down menu. Alternatively, you can double-click on it to open up the Properties window and then stop it. Finally, click Start again to complete the restart.
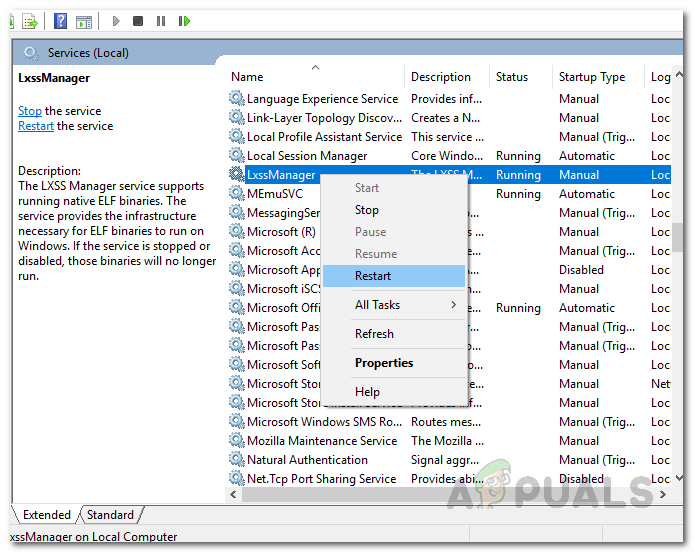
Restarting LxssManager Service - When done, see the web server again. Hopefully, it would be working now if it was caused by an issue with LxssManager service.
Access Localhost with the Port Number
As it turns out, another solution for the error message in question is if your web server isn’t running on the default port 80, you can access the local web server by specifying the port number as well. Usually, the port number is either 80 or 8080.
To do that, you have to type localhost:8080 in your browser. Note that you don’t have to type localhost:80 as 80 is the default port used by your web browser whenever it accesses any website or a web server, be it online or offline.
Delete Application Config File (if applicable)
If you are using Visual Studio and doing some asp.net programming and you face this error, then don’t worry, we have got a fix for you. What you need to do is delete the application.config file that is located inside a folder called .vs. In some cases, this folder can be hidden so make sure that you are able to see hidden files in your Windows Explorer window. Follow the instructions given down below to do this:
- First of all, open your project folder and then open up the .vs folder. If you are not able to see this folder, that’s because it is hidden. You will have to edit your folder options in the Windows Explorer window to be able to see hidden files and folders.
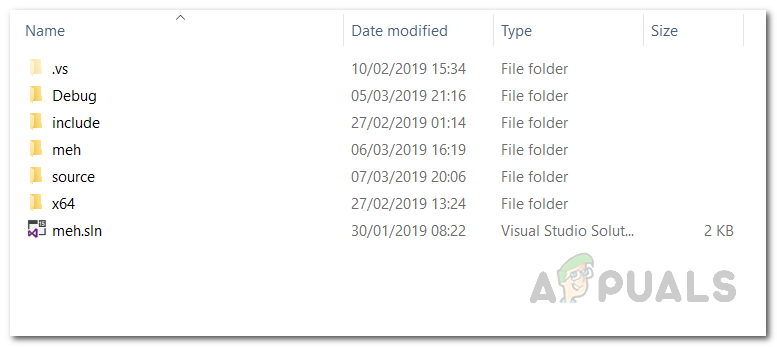
Hidden .vs Folder - Once inside the .vs folder, open the config folder.
- Inside the config folder, delete the application.config file.
- That’s it, if you were using IISExpress and doing some asp.net projects, then this would have hopefully fixed the problem of visual studio not being able to connect to localhost.


