9 Fixes for ISDone.dll (ISArcExtrac) Error in Windows
ISArcExtract is a DLL error linked with the ISDone.dll file that is used for the extraction of large archive files. This error occurs when the system fails to extract the archive files and in return gives you a DLL error message “It is not found any file specified for ISArkExtract”. The major causes of this error are corrupted archives, corrupted drivers, and lack of system memory. which prevents the system from extracting certain fails.
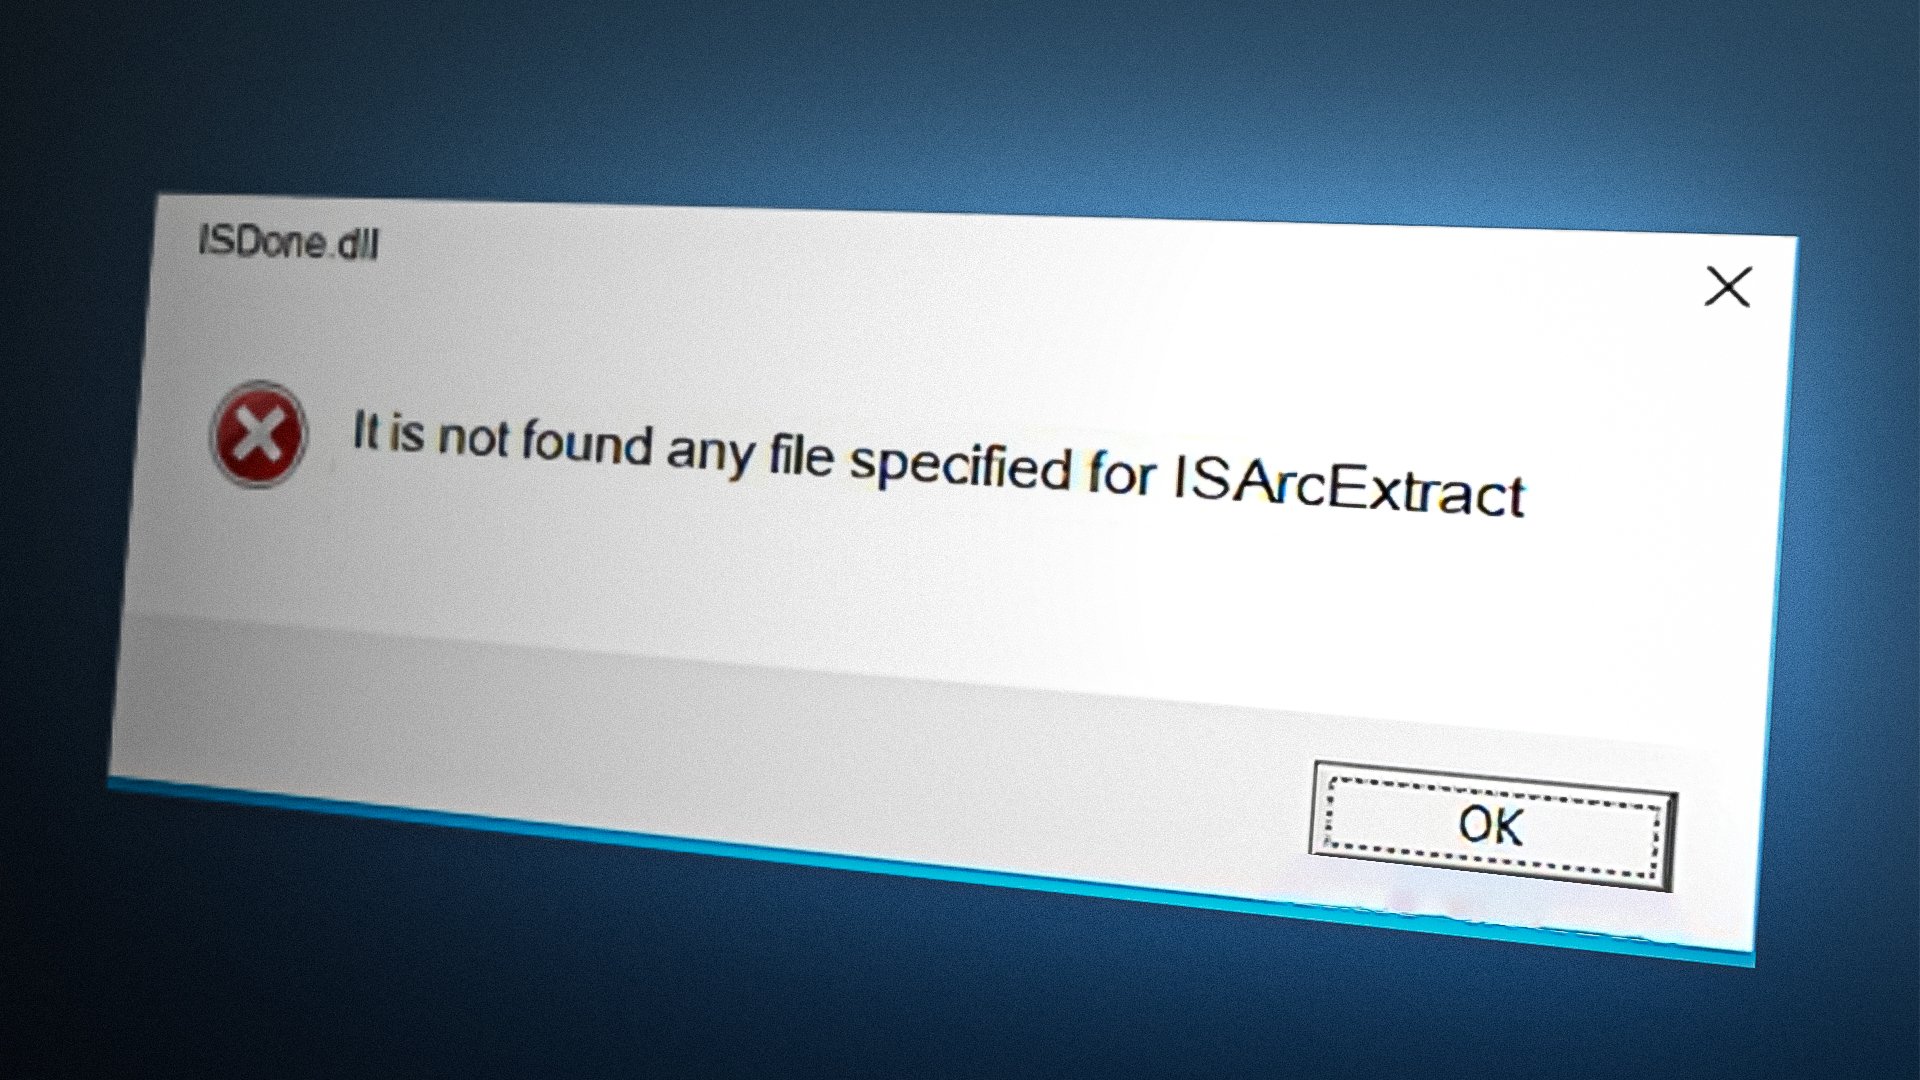
In this guide, we will be showing you how to fix the ISArkExtract (ISDone.dll) error.
1. Run the Setup as an Administrator
Administrative restrictions are one of the causes of this error because you may not have the authority to perform certain actions on the file. Therefore, to prevent such restrictions, you must run the file setup as an administrator. Run the setup as an administrator by following the steps given below:
- Locate the directory of the file that is facing the error. (We have used GTA V as an example below).
- Open the properties of the file by right-clicking on the setup and selecting the “Properties” option.
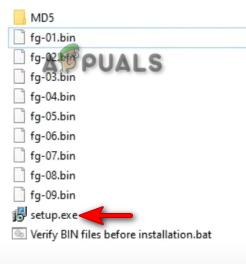
Opening Setup Properties - Open the compatibility tab and check both the “Run this program in compatibility mode” box and the “Run this program as an administrator” box.
- Click on Apply and OK to make the necessary changes.
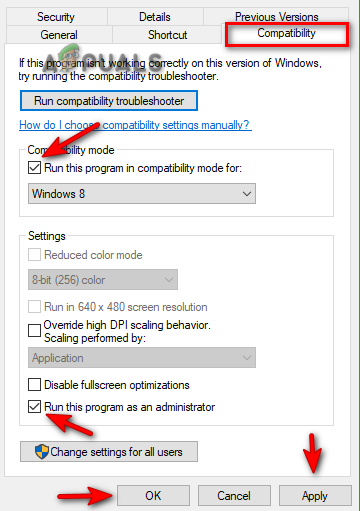
Changing setup properties - Lastly, launch the program again.
2. Run the Disk Checker
A corrupted disk prevents you from accessing certain programs and applications, leading to an error to occur. Therefore, to ensure that your disk is free from any type of corruption, you must run the disk checker that scans your hard drive thoroughly and detect the corruption causing the error. Below are the instructions to perform the disk checker:
- Open the Windows Start Menu by pressing the Win key.
- Type “cmd” in the Windows Search bar.
- Run the Command Prompt as an administrator by right-clicking on it and selecting the “Run as administrator” option.
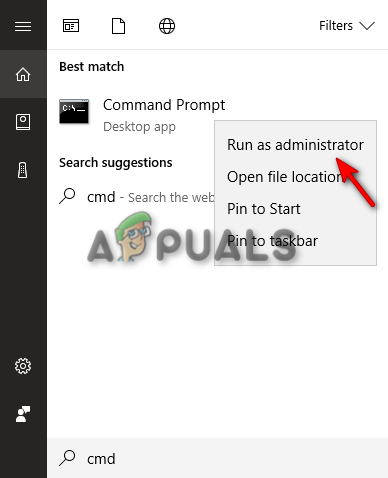
Running the Command Prompt as an administrator. - Now, type the following commands into the Command Prompt and press the Enter key
chkdsk C : /f
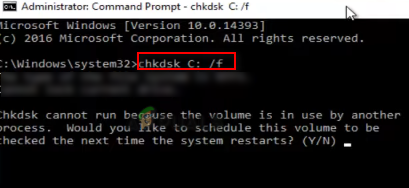
Running the Disk Checker - After the disk has been scanned, the disk checker will automatically repair the error.
- Restart your computer after the disk has been scanned and repaired.
3. Increase your Virtual Memory
Virtual Memory allows you to use your storage devices for caching data. Since lack of memory is one of the many reasons for the occurrence of this error, you can try increasing the Virtual Memory to add space to your system. Follow the steps below to see how to increase the Virtual Memory of your system:
- Open the File Explorer properties by right-clicking on “This PC” and selecting the properties option.

Opening This PC properties - Open Advanced Settings by clicking on the Advanced System Settings option.
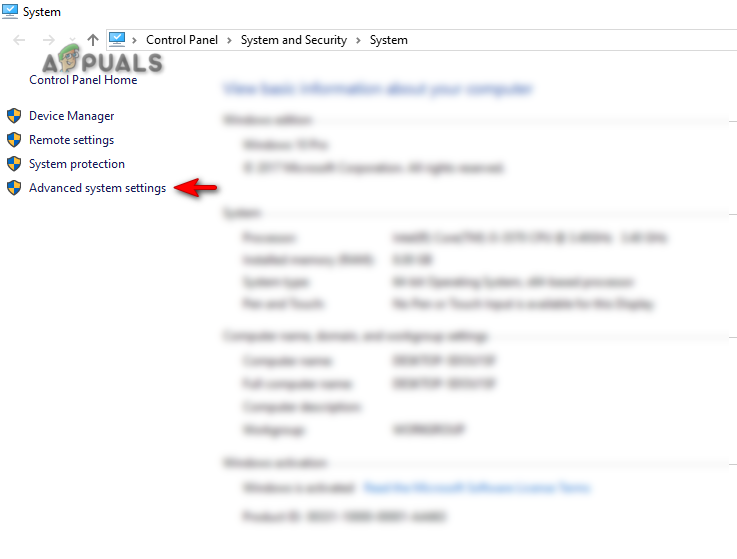
Opening Advanced system settings - On the Advanced tab, click on the Settings option under Performance.

Opening Performance Settings - Open the Advanced tab and click on the Change option under Virtual Memory.
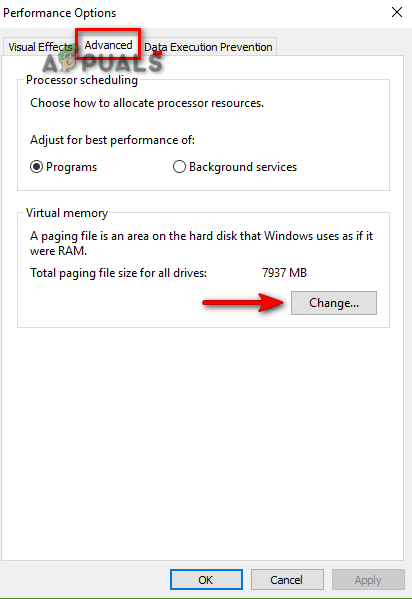
Changing Virtual Memory - Uncheck the Automatic size manager box at the top.
- Select the Default Drive (C-Drive here)
- Check the “Custom Size” option.
- Type the Initial and Maximum size according to your system requirements.
- Click on Set and OK to make changes.
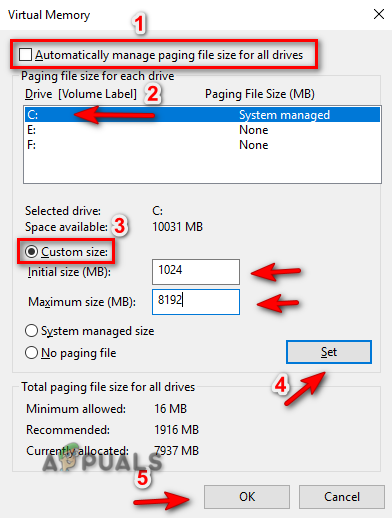
Managing Virtual Memory
4. Re-register the ISDONE.dll file
Another reason for the occurrence of this error is an unregistered/corrupted DLL File. Therefore, to make sure your DLL file is registered properly, you must register it. You can re-register the ISDone.dll file with the steps below:
- Open the Windows Start Menu by pressing the Win key.
- Type “cmd” in the Windows Search bar.
- Run the Command Prompt as an administrator by right-clicking on it and selecting the “Run as administrator” option.

Running the Command Prompt as an administrator. - Now, type the following commands into the Command Prompt and press the Enter key;
regsvr32 Isdone.dll
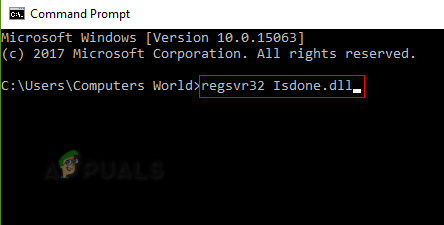
Re-registering the DLL file - Re-start the program and see if this helps resolve the error.
5. Run the System Scans
Damaged system files can also be a factor that leads to this error. Therefore, to ensure that your files are running properly, you must perform a System scans that scans your system entirely and repairs the damaged files automatically. Follow the steps below to perform a system file checker:
- Open the Windows Start Menu by pressing the Win key.
- Type “cmd” in the Windows Search bar.
- Run the Command Prompt as an administrator by right-clicking on it and selecting the “Run as administrator” option.

Running the Command Prompt as an administrator. - Type the following command in the Command Prompt while giving a space between “sfc” and “/.”
sfc /scannow
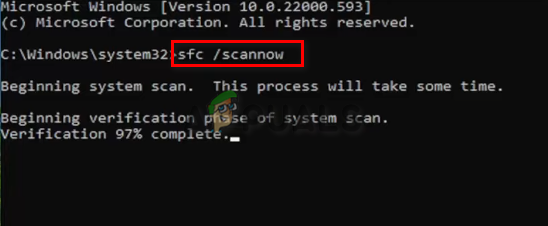
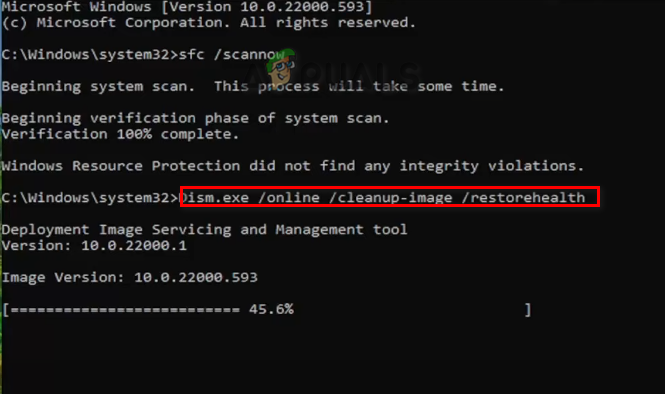
Running system file checker on the command prompt. - Once the scan is completed, the File Checker will automatically repair all the defective files
Dism.exe /online /cleanup-image /restorehealth
6. Temporarily Disable Third Party Software
Third-party security software such as Avast also interferes with how the program runs and can cause this error to occur. Therefore, disable this software before running the program at fault. Below we have shown how you can temporarily disable Third-party security software:
- Open the Avast Antivirus Software and navigate to Menu > Settings > Protection > Core Shield.
- To disable the security feature, turn off the Core-Shield toggle switch.
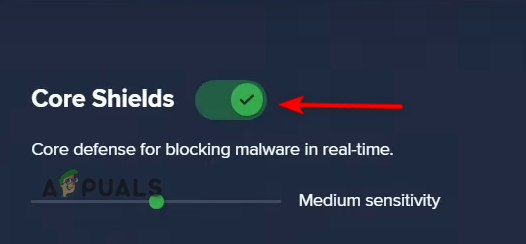
Turning off Avast Core Shield - Select the duration till you want to disable this feature and select OK to confirm the action.

Confirming feature disabling.png
- Open the Windows Settings by pressing the Win + I keys together.
- Now, navigate to Update and security > Windows Security > Virus and threat protection.
- Click on “Manage settings” under Virus and threat protection settings.
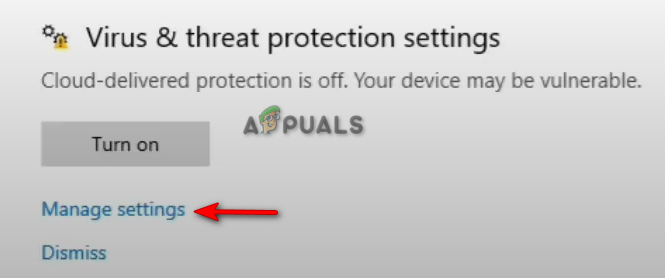
Managing Virus and threat protection settings - Turn off the Real-Time Protection feature from the toggle button.
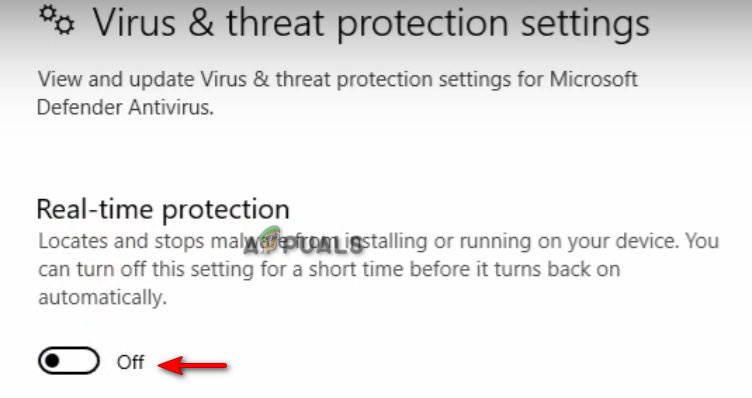
Turning off Real-Time Protection
7. Manually Download the DLL File
A misplaced or deleted DL file is also one of the reasons that cause this error. You can manually download the DLL file and place it inside the directory of the program in fault. Below are the steps you must follow to manually download and place the DLL file inside the program’s directory:
- Open the Official DLL File Website to download the ISDone.dll zip file.
- Download the file by clicking on the Download option of the latest version of the file.

Downloading the latest DLL zip file - Select the directory where you would like to download the file.
- Open the Browser’s download page by clicking on the three dots in the top right corner and selecting the “Downloads” option.
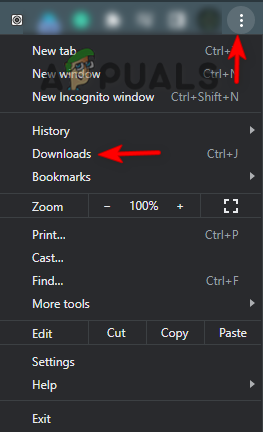
Opening the Downloads tab - To find the location of the file, click on the “Show in Folder” option.

Opening file location - Right-Click on the Zip file and click on the “Extract Here” option.
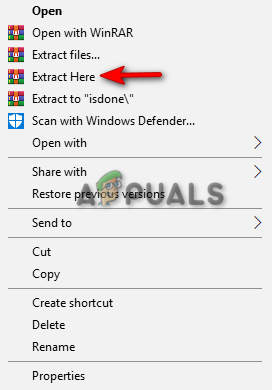
Extracting zip file - Copy the DLL extracted file ad paste it inside the directory of the program in fault.
- Lastly, restart the computer and apply the changes.
8. Re-Install the Program Entirely
If the error still persists, then as a last resort, you must re-install the program and get rid of the error. You can completely re-install the program by following the steps below:
- Open the Windows Start Menu by pressing the Win key.
- Open the Control Panel by typing “Control Panel” in the Windows Search Bar and clicking the Control Panel application.
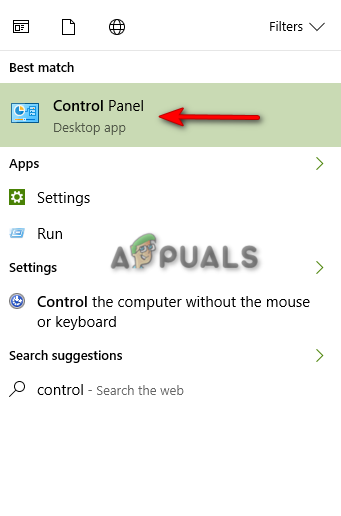
Opening Control Panel - Click on the Control Panel and click on the “Uninstall a program” option under “Programs.”
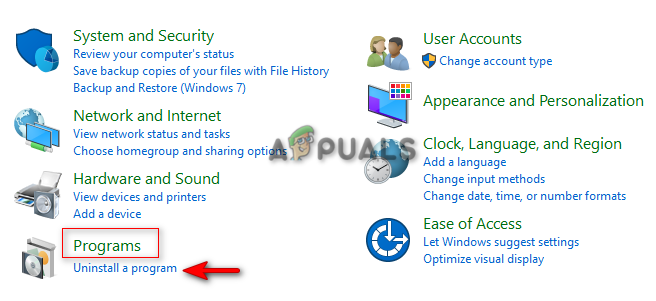
Opening Uninstall a program - Find the program you want to delete.
- Delete the program by right-clicking on it and selecting the “uninstall” option.
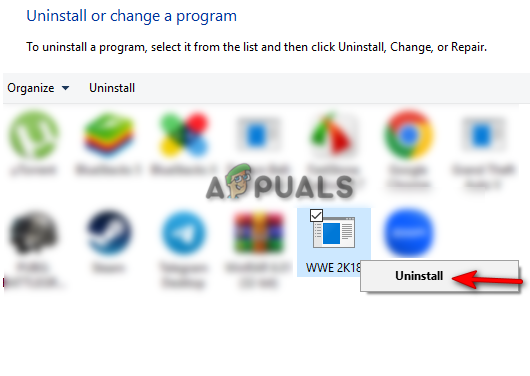
Uninstalling the program - Restart your computer and reinstall the program.
9. Perform a Clean Boot
If the error still occurs, then, as a last resort, you must Perform a Clean Boot on your system. Performing a clean boot will minimize interference from third-party software. Although this process doesn’t delete your data, still you should have a backup copy of your files just in case.


