Fix: Intel Wireless AC 9560 Not Working in Windows
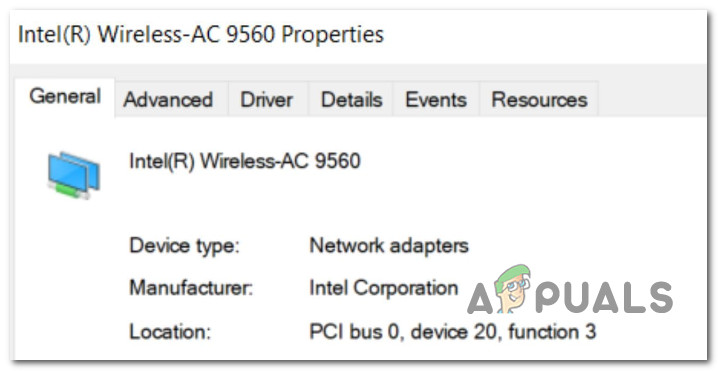
The main problem with Intel Wireless AC 9560 driver from Intel is that sometimes it disappears from Windows 10/11 systems, effectively preventing users from connecting to their wireless networks. Most users affected by this problem report that upon investigating the issue, they’ve discovered the ‘Error code-10‘ showing up in Device Manager.
There are a lot of potential causes that might cause this issue (directly or indirectly). A bad windows update or corrupted temporary files are at the top of this list.
Other potential triggers include a network inconsistency, an inconsistent DNS, a power setting interrupting power to the network card, misconfigured WLAN AutoConfig driver, a corrupted or outdated WI-Fi Driver, and corrupted Bluetooth drivers.
Update: This error can also occur due to a BIOS or UEFI setting that prevents Wireless devices from communicating.
Here’s a list of methods that other users have used to fix the ‘Error code-10’ with the Intel Wireless AC 9560 driver:
1. Perform a hard shutdown
You should first perform a hard shutdown on your computer to troubleshoot the issue.
Note: A hard shutdown will forcibly shut down your computer by interrupting power. This has the benefit of shutting down the PC without allowing it to cache any data that will be used during the next startup.
As it’s been confirmed by other users experiencing the ‘Error code-10’ with the Intel Wireless AC 9560 driver, this easy fix might restore your Wi-Fi access.
To perform a hard shutdown, press and hold on to the power key (on your PC or laptop) and keep it pressed until you physically cut power to your computer.
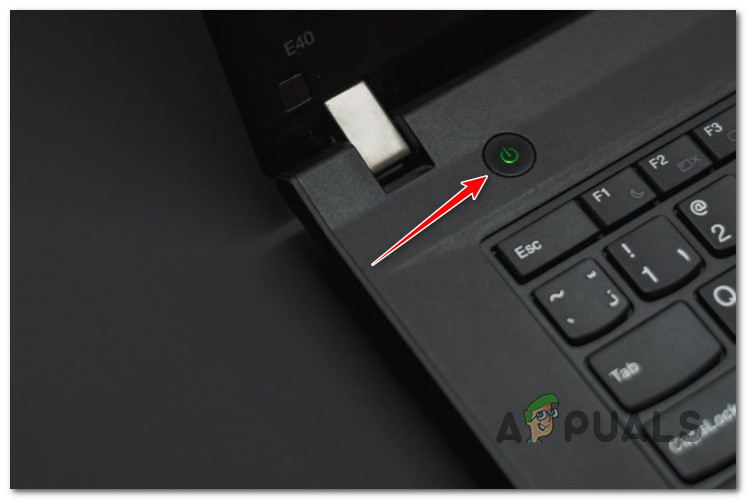
Once the power has been interrupted, remove the AC power adapter and battery (if applicable) from your PC or laptop.
2. Update Windows to the latest version
If the hard reset procedure above didn’t work for you, the next thing you should do is troubleshoot against a Windows update issue.
In the past, there was a surge of the ‘Error code-10’ after Microsoft released a feature update to Windows 10 that messed up the Intel Wireless AC 9560 driver.
Fortunately, Microsoft is usually very fast when it comes to fixing problems they cause indirectly.
If you’re lucky, a new hotfix might be already available. Test this scenario by connecting to the Internet via an ethernet cable and follow the instructions below to ensure that every pending update is installed:
- To launch Windows Settings, use the Windows key + R shortcut.
- Next, type “ms-settings:” in the search bar and hit Enter.

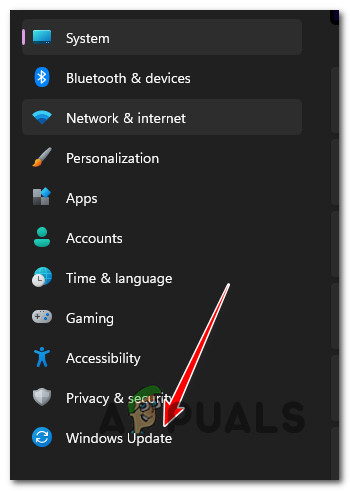
Access the Ms Settings menu - Locate Windows Update and click on it on the left side of the screen.
Access the Windows Update Screen - On the next screen, you should see if any updates are waiting to be installed. If the driver is waiting to be installed already, click on the Download & Install all button.

Download and install all available updates Note: If the scan doesn’t happen automatically, press the Check for Updates button and wait while the check is run.
- Wait patiently until every pending update is installed. To apply the updates, your computer might need to be restarted.
- Attempt to connect to the WI-Fi network once again and see if the problem is now fixed.
If the Intel Wireless AC 9560 driver from Intel is still not working, it should move down to the next method below.
3. Perform a network Reset, WinSock Rest, and Flush DNS
If you have tried all the suggestions above and can still not connect to a Wi-Fi network, the problem is likely due to some network inconsistency.
We advise running a flush DNS cache reboot, a WinSock Reset, and finally, a network reset to ensure that you address both a router-based and a DNS-based issue. After completing these three steps, run a network reset to restore all network adapters to their factory settings.
Note: Resetting Winsock will undo any configurations you’ve made to the Windows Winsock Catalog. After a reset, the wsock32 DLL file is restored to its original state, allowing programs to connect to TCP/IP communication from scratch. By flushing DNS, any IP addresses or other DNS entries will be eliminated from your cache. A network reset will effectively clear any temporary data accumulated from exchanging data pallets.
To complete all of the above procedures, follow these steps:
- To bring up the Run dialog box, press the Windows key + R.
- Open an elevated CMD terminal with administrative access, type “cmd” in the Run box, and press the following keys simultaneously: Ctrl + Shift + Enter.

Open a CMD window - When the User Account Control (UAC) prompt appears, select Yes to grant admin access.
- When you have at last reached the elevated CMD prompt, enter the command to clear your DNS cache as follows:
ipconfig /flushdns
- When you’re done, type or paste the next command to reset your Winsock:
netsh winsock reset
- Restart your computer once both of these commands have been successfully executed.
- To access the Windows Settings menu, press the Windows key + I.
- Click Network & Internet from the menu on the left, then click Advanced network settings on the right.
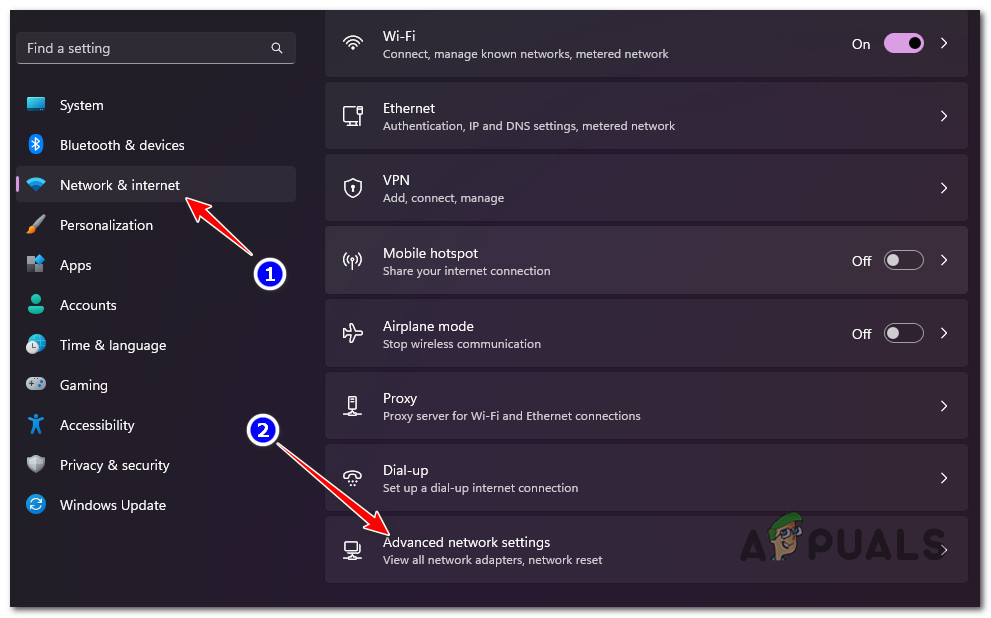
Access the Advanced Network Settings - Click Network Reset from the More Settings menu under the Advanced network settings menu.

Access the Network Reset menu - Select Reset Now from the following menu, then click Yes when prompted.

Deploy a network reset - Restart your Windows computer to see if the issue has been resolved.
If you’re still experiencing the same issue with the Intel Wireless AC 9560 driver, move down to the next method below.
4. Restart Network Adapter
Another reason you can expect to deal with the Intel Wireless AC 9560 error is a scenario where the main adapter driver is stuck in a limbo state (it’s neither open nor closed).
If this scenario is applicable, you can fix the issue by accessing Device Manager and restarting the main network adapter under the Network Adapters menu.
For step-by-step instructions on how to do this, follow the instructions below:
- Press the Windows key + R to open up a Run dialog box.
- Next, type ‘devmgmt.msc’ and press Ctrl + Shift + Enter to open up Device Manager with admin access.

Open Device Manager - Click Yes to grant admin access at the User Account Control (UAC) prompt.
Note: You might not be asked to do this, depending on how aggressive your UAC settings are. - Inside Device Manager, scroll down through the list of devices and expand the Network adapters drop-down menu.
- Next, right-click on the Intel(R) Wireless AC 9560 entry and click on Disable device.
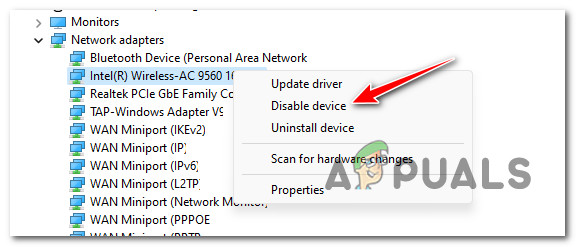
Disable Device - After you’ve disabled it, wait a minute before right-clicking the same entry again and selecting Enable Device.
- Now that you have effectively restarted the network adapter, see if you can connect to Wi-Fi networks.
If the problem is still not fixed, move to the next method below.
5. Update Network Adapter
Make sure you’re using a network adapter that is entirely compatible with your Windows OS version if you’re still getting the same ‘Error code-10’ with your network driver.
Note: You can upgrade it through Device Manager if it was transferred from a previous Windows version with an incompatible version.
You must restart your computer after using Device Manager to remove the active network adapter driver to accomplish this. This way, you’ll force Windows 11 to acknowledge the lack of a network adapter driver. As a result, the next time your PC boots up, your OS will install a generic substitute that is completely compatible.
For step-by-step directions on how to do this, refer to the list below:
- Press the Windows key + R to open the Run dialog box.
- Enter “devmgmt.msc” into the text box and press Ctrl + Shift + Enter to start Device Manager.
Open Device Manager - Click Yes when the User Account Control asks you to provide admin access.
- Expand the Network Adapters drop-down option by looking through the list of devices at the bottom of the page.
- In the Network Adapters drop-down menu, right-click the Wireless adapter and choose Properties from the context menu.
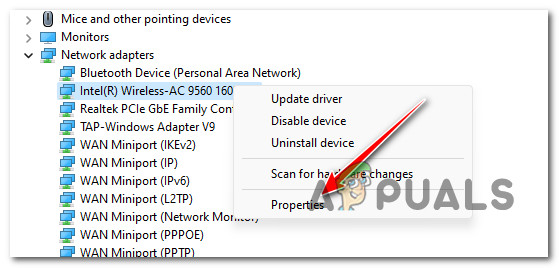
Access the Properties screen - Choose the Driver option from the top menu.
- Click the Uninstall Device button at the bottom of the screen, then click Uninstall once more at the prompt to begin the process of removing the active network adapter driver.
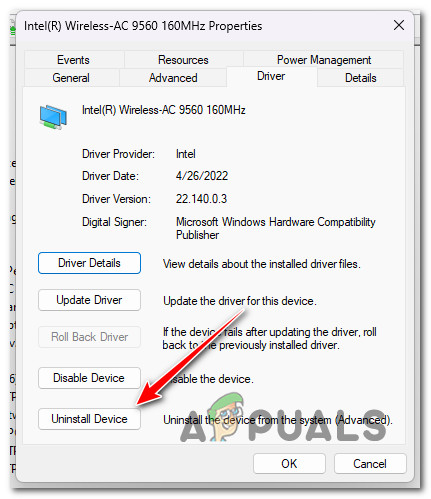
Uninstalling the device Note: Before clicking “Uninstall” to complete the process, check the box next to “Attempt to delete the driver for this device.”

Uninstalling the driver properly - When the process is finished, you’ll see that you no longer have network connectivity; this is completely normal. If this happens, restart your computer.
- During the subsequent system startup, your OS will detect that the network adapter driver is missing and install a compatible replacement to restore Wi-Fi access.
Scroll down to the next potential fix if you’re still getting the Intel Wireless AC 9560 issue.
6. Set Power Saving Mode to Maximum Performance
An unlikely culprit that is confirmed to trigger this issue is a power setting that ends up interrupting the power supply to your network card prematurely while it’s in idle mode and not exchanging data pallets.
This scenario is most likely the cause of the issue if you notice that your ability to connect to Wi-Fi networks disappears when you’re not actively surfing the internet or performing online tasks on your PC.
Fortunately, you can fix this issue easily by accessing your device’s Power Settings and modifying the current plan settings to Maximum Performance mode.
Here’s a quick guide on how to do this:
- Make sure your laptop or ultrabook is plugged into a power source first.
- To access the Power Settings on your Windows PC, type “powercfg.cpl” in the text box that just appeared and hit Ctrl + Shift + Enter.

Access the Power Settings menu - In the User Account Control (UAC) window, select Yes to grant admin access (UAC).
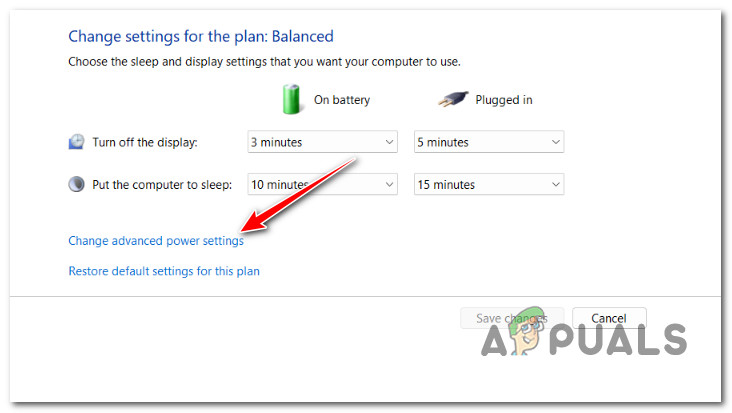
- After entering the Power Settings, click the link for the current power plan’s Change plan settings.
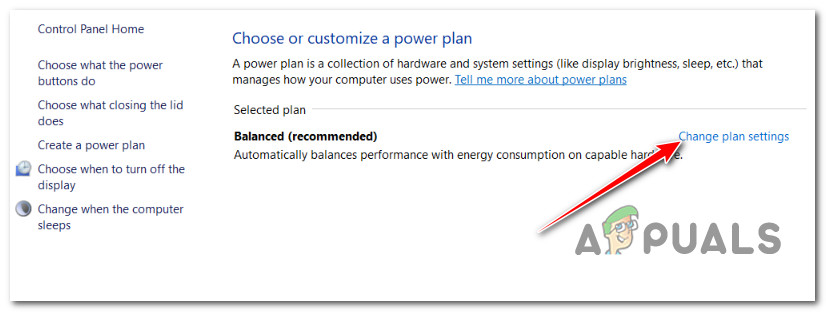
Changing the current plan settings - Click on Change advanced power settings on the following screen.
Change advanced power settings. - Scroll down to the bottom of the Advanced Settings screen to locate the Wireless Adapter Settings.
- Under Wireless Adapter Settings, expand the Power Saving Mode Settings, and click the “+” button.
- Next, confirm that the settings for Plugged in and On battery are set to Maximum Performance.
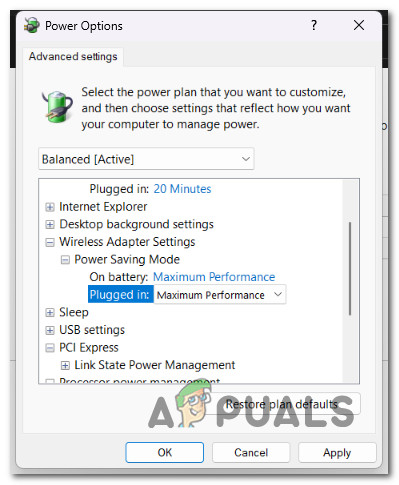
Change every plan to Maximum Performance - To save the changes, click Apply.
- Restart your computer to see if the issue has been resolved.
If you still have issues with the Intel Wireless AC 9560 driver, move down to the next method below.
7. Reconfigure behavior of WLAN Autoconfig
A missing service dependency might also be responsible for the sudden loss of connection caused by the disappearance of the Intel Wireless AC 9560 driver.
The main service culprit that might be responsible for this behavior is WLAN AutoConfig.
In this case, you should be able to fix the issue by accessing the Services screen and modifying the behavior of the WLAN AutoConfig service so that its startup type is set to Automatic.
Follow the steps below for specific instructions on how to do this:
- Press the Windows key + R to open up a Run dialog box.
- Next, type ‘services.msc’ and press Ctrl + Shift + Enter to open the Services screen.

Access the Services screen Note: If the User Account Control prompts you, click Yes to grant admin access.
- Scroll down through the list of services and right-click on WLAN AutoConfig.
- Click on Properties from the context menu.

Access the Properties screen of WLAN - Select the General tab and then modify the Startup type to Automatic.
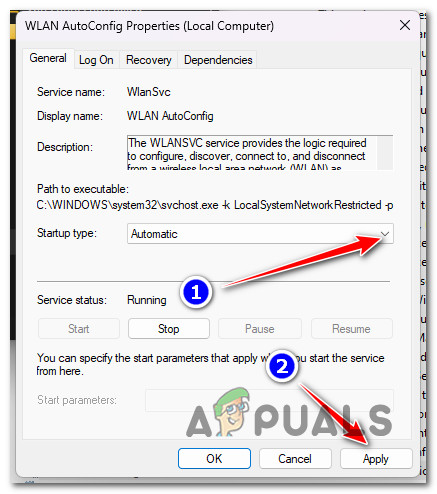
Changing the startup type of WLAN Config - Save the changes by clicking on Apply, then reboot your PC.
- At the next startup, see if you can now connect to Wi-Fi networks.
If the same issue persists, move down to the next method below.
8. Download & Install the latest Wi-Fi Drivers from Intel
Windows 11 is far more reliant on a set of Intel firmware drivers. Similar statements can be made regarding Windows 10 but to a lesser extent.
It’s not uncommon to see the ‘Error code-10’ with the Intel Wireless AC 9560 driver because you’re missing a key dependency.
Since Windows update is not always capable of installing the dependencies of a driver, the best way is to do it manually.
Launching the Intel Update Assistant and installing the pending driver updates is the easiest way.
Here’s how to do this:
- Open your Windows 11 computer’s default browser and go to the Intel Driver & Support Assistant website.
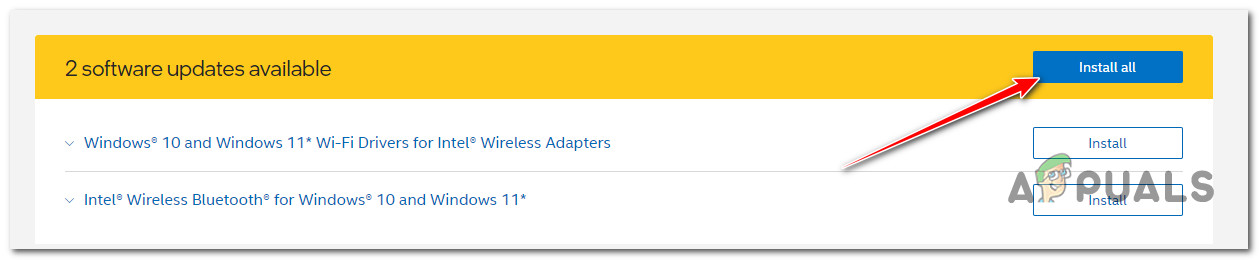
Note: If you’re using this tool for the first time, you’ll be prompted to download and install a small piece of software that will check your system locally for outdated drivers and firmware. - After installing the application locally, please wait until it has finished scanning your system for outdated drivers. Choose Download All if any occurrences are discovered and wait while the application downloads all required drivers.
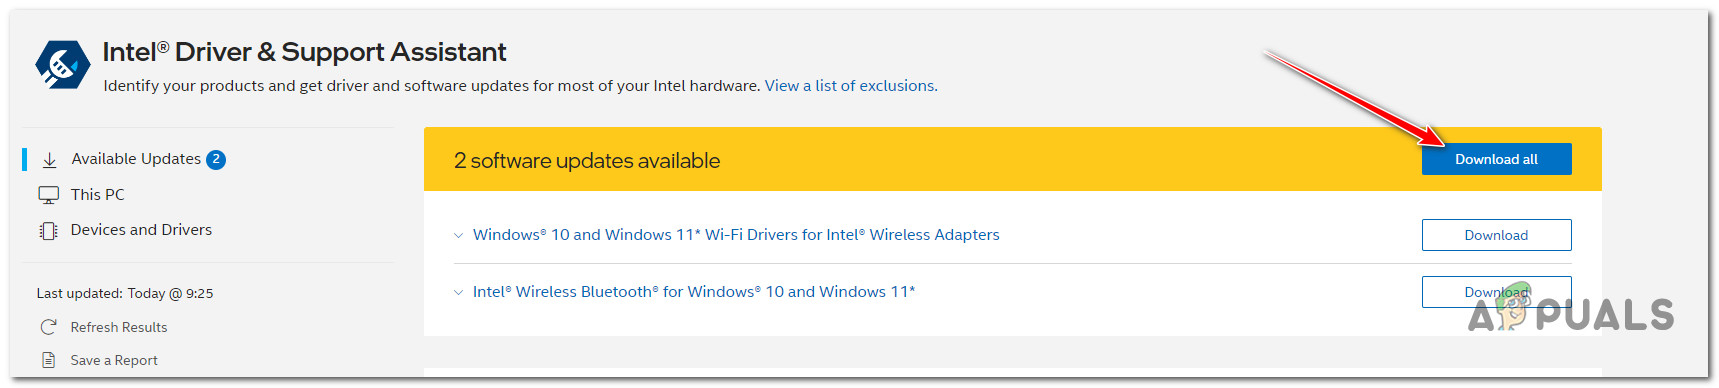
Downloading the pending drivers - Select Install all to replace out-of-date generic drivers with Intel-specific replacements.
Install all pending drivers - Restart your computer as directed, then test to see if the problem has been resolved after the subsequent start.If the problem code continues appearing, try the next potential fix.
9. Enable Wireless Devices via BIOS or UEFI
Another reason you might experience this issue is a scenario in which wireless devices are disabled at a BIOS or UEFI level. This should not happen unless you specifically made this change, as wireless devices are enabled by default.
Note: If wireless devices are disabled, none of the installed network adapters drivers and Bluetooth drivers will work properly.
If you think this scenario might be applicable, follow the instructions below for specific instructions on making sure that wireless devices are enabled at a BIOS or UEFI level:
- Reboot your device and press the BIOS / UEFI Setup key as soon as you see the initial screen.

Press the BIOS or UEFI key Note: In most cases, the setup key is either Esc, Del (for Dell devices), or one of the F keys (F4, F6, F8, F10, etc.).
- Once inside the advanced BIOS or UEFI settings, access the Advanced (or Expert) menu and look for the Wireless tab.
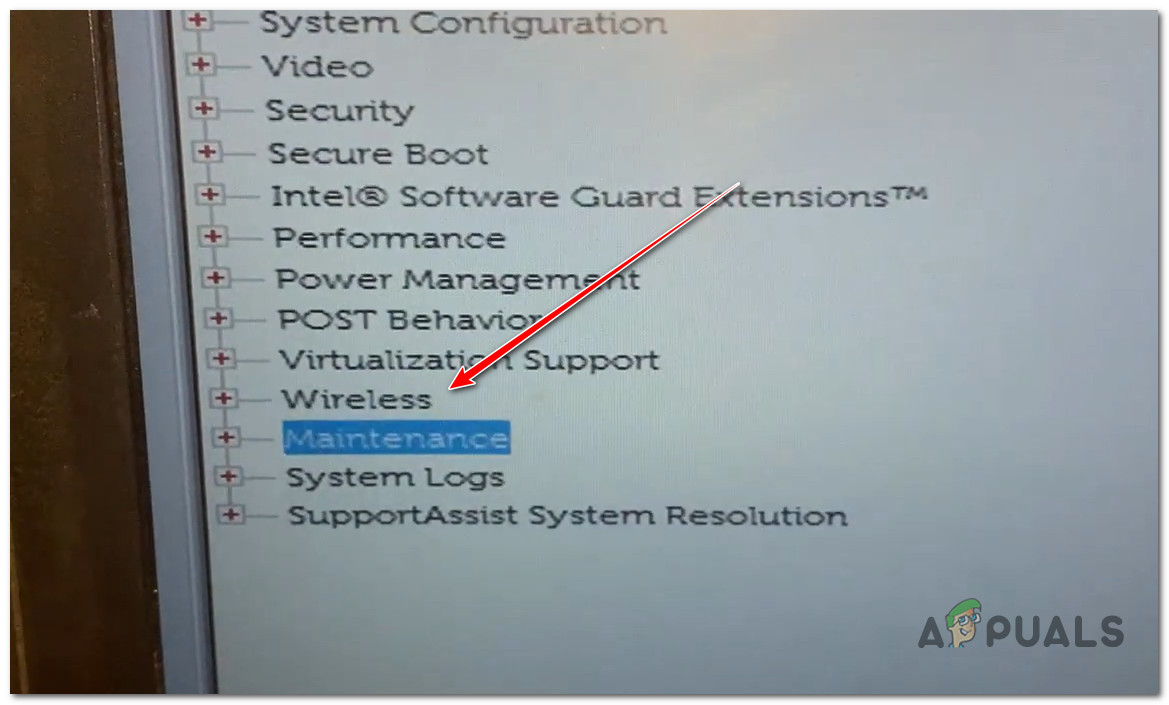
Access the Wireless tab Note: This menu will be different depending on your motherboard manufacturer.
- Next, look for the Wireless Device Enable (or a similar naming convention) and make sure that both WLAN and Bluetooth devices are enabled.
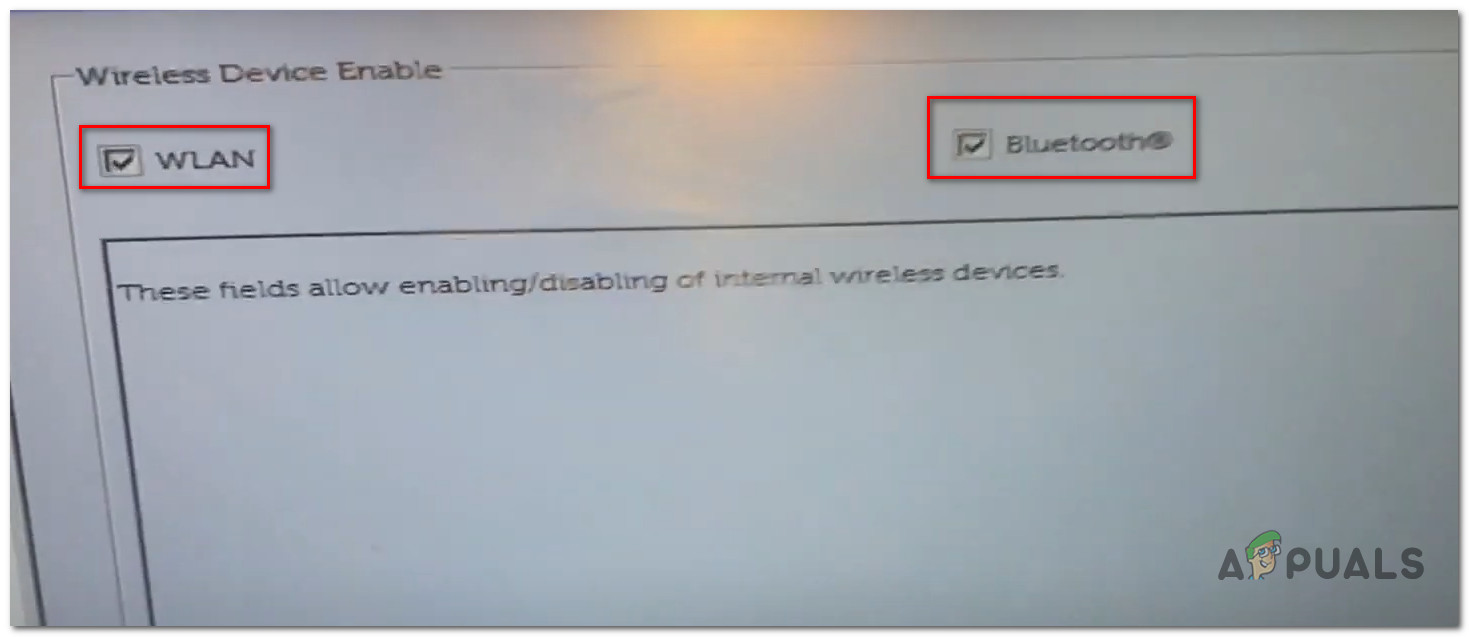
Enable both Bluetooth devices - Once these changes have been made, enforce them by saving them and booting your PC normally.
If the problem is still not fixed, move to the next method below.
10. Uninstall the corresponding Bluetooth driver (if applicable)
Although this might seem unlikely, the Bluetooth driver currently in use might conflict with the Intel Wireless AC 9560 driver and cause the ‘Error code-10‘.
As it turns out, a few versions of the Intel Wireless Bluetooth drivers might indirectly cause this problem.
In this case, the solution is to uninstall and reboot your PC to allow your OS to find a generic replacement and install it automatically.
For specific steps on how to do this, follow the steps below:
- Press the Windows key + R to open up a Run dialog box.
- Next, type ‘devmgmt.msc’ and press Ctrl + Shift + Enter to open up Device Manager with admin access.
Open Device Manager Note: If you are prompted to grant admin access by UAC (User Account Control), click Yes to grant admin access.
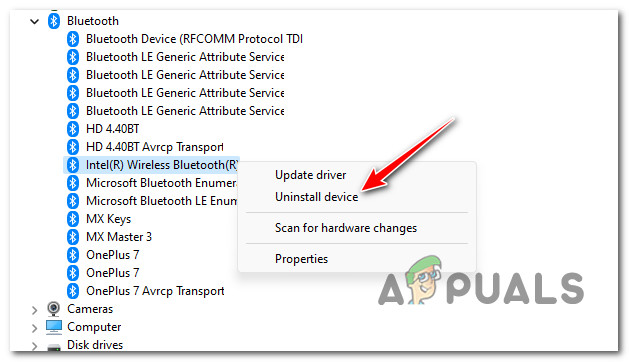
- Inside Device Manager, please scroll down to the Bluetooth tab and expand it.
- Right-click on the Intel(R) Wireless Bluetooth driver and click on Uninstall device.
Uninstall the Bluetooth Device - Confirm the uninstallation, then reboot your PC at the end of this procedure.
- At the next startup, your Windows will detect a missing Bluetooth driver and automatically install it.
If the problem is still not fixed, move to the next method below.
11. Reset BIOS / UEFI settings
Information currently stored in your BIOS or UEFI settings might also indirectly cause issues with the Intel Wireless AC 9560 driver.
Suppose none of the above methods have allowed you to connect to Wi-Fi networks again. In that case, one simple way to fix the issue (if it’s caused by a BIOS or UEFI setting) is to effectively reset the BIOS / UEFI settings to their default values.
Here’s a quick guide on how to do this:
- Reboot your device and press the BIOS / UEFI Setup key as soon as you see the initial screen.
Press the BIOS or UEFI key Note: In most cases, the setup key is either Esc, Del (for Dell devices), or one of the F keys (F4, F6, F8, F10, etc.).
- Inside the BIOS or UEFI settings, look for the Load Defaults option and use it to revert every BIOS setting back to its default value.
Save the changes to enforce the default values, then allow your PC to boot normally and see if the problem is fixed.
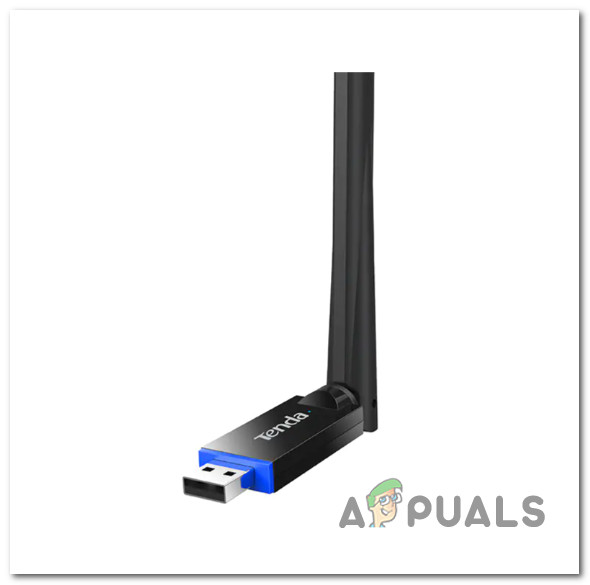
12. Use an External Wi-Fi Adapter (if applicable)
If you have an external Wi-Fi adapter, plug it in and see if the connection is re-established.
A hardware issue affecting your motherboard’s built-in WI-Fi receiver may be damage. In this case, your only option would be to use an external adapter.
Update: Some users have confirmed that the built-in Wi-Fi receiver has started working even after they’ve unplugged the Wi-Fi adapter.
If using an external Wi-Fi adapter is not an option, move to the final method below.


