TurboTax Error 1603 When Updating: Causes and Solutions
The Error 1603 TurboTax occurs when users try to update TurboTax 2020 to the latest build available. This error can occur whether the user is trying to install the latest version directly or by updating an older build.
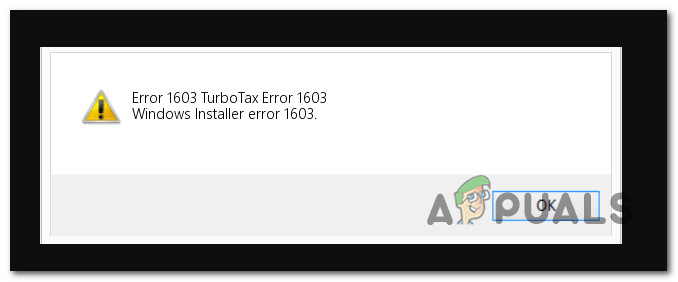
In most cases, this error is caused by interference from antivirus, antimalware, or firewall programs, or from a backup program interfering with the Windows installer. It can also occur if there is not enough free space on the Windows drive or if the user is not logged in as an administrator.
Other potential causes of Error 1603 include a severely outdated Windows build, a proxy/VPN interference, and a missing .NET dependency.
If you are experiencing this issue with TurboTax, follow the steps provided below to troubleshoot and resolve Error 1603.
1. Update Windows to the latest version
The primary cause of the 1603 error with TurboTax is typically an outdated version of Windows.
TurboTax requires the latest feature update available for Windows 10 or Windows 11 in order to meet security protocols. If you have been postponing updates and encounter the 1603 error when trying to update the TurboTax app, installing all pending Windows updates should resolve the issue.
To update your Windows build, follow these instructions:
Here’s how to update your Windows build:
- Utilize the shortcut Windows key + R to open the Run dialog box.
- Type “ms-settings:” and press Enter to access the Windows Settings menu.
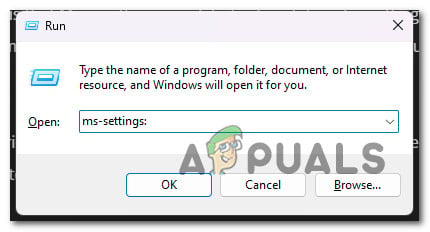
Access the Settings menu on Windows Note: If User Account Control prompts you for admin permission, choose “Yes.”
- Locate Windows Update on the Settings screen and choose it from the menu on the left.
- On the following page, click Check for Updates to see whether there are any updates you need to install.
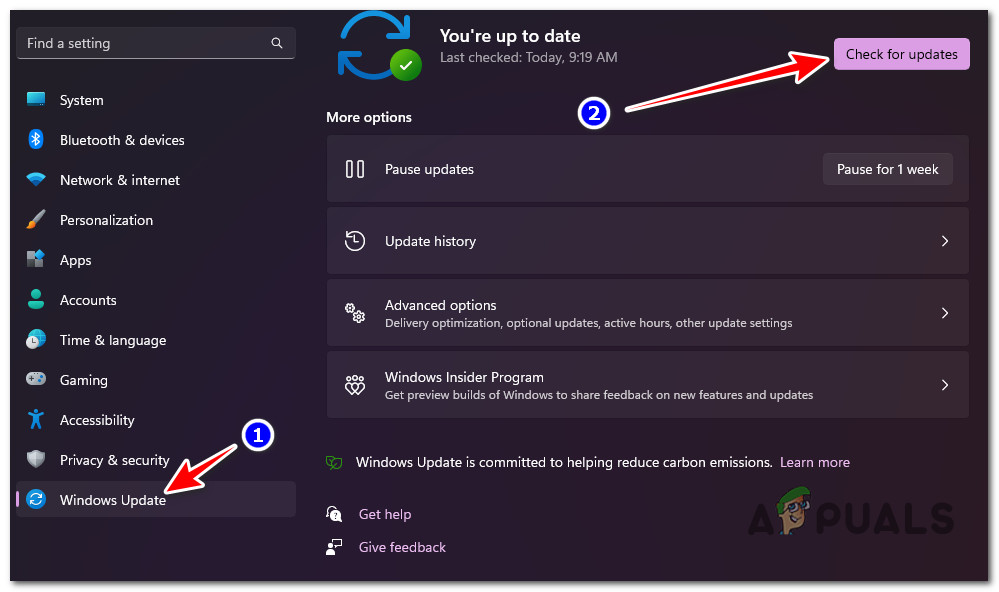
Checking for new Windows Updates - If the driver is ready for installation, click Download & Install all.
- Be patient and wait until all necessary updates have been deployed. You may need to restart your computer for the modifications to take effect.
- Restart your computer, launch TurboTax again and see if the problem is now fixed.
2. Use an administrator account
One solution that has been known to help some TurboTax users is to run the executable on an admin account. If you are logged in with an administrator account, you will have access to every aspect of Windows.
If you do not currently have an administrator account to use, the steps below will guide you on how to convert a standard Windows account into an administrator account:
- Press the Windows key + R to open the Run dialog box, then type ‘ms-settings:’ in the search bar and press the Enter key to enter the Settings menu.

Access the Settings menu on Windows - From the Settings menu, select Accounts, followed by Family & other users (Windows 10) or Family (Windows 11).

Access the Family tab - Select the user account, and then click the Change account type option.
- You must now choose the Administrator account type. Then click OK.
- After completing these steps, launch TurboTax initiate an update, and see if the problem is fixed.
3. Disable antivirus, antimalware, or firewall
Another possible cause of the 1603 error when updating TurboTax is interference from antivirus, antimalware, or firewall software. Some users have reported that third-party security suites can cause this issue, but Windows Security (Windows Defender + Windows Firewall) can also be the culprit.
If you are using a third-party security suite, temporarily uninstalling it before attempting to update TurboTax can resolve the issue. You can use this guide to ensure that no remnant files are interfering with the update process.
If you are using Windows Firewall and Windows Security’s real-time protection, you can resolve this issue by disabling the Windows Firewall and Real-time Protection.
Here’s a quick guide on how to disable the Windows Firewall and Real-time Protection to prevent interference:
- Open the taskbar’s search box and enter Windows Defender Firewall, then press Enter to launch it.
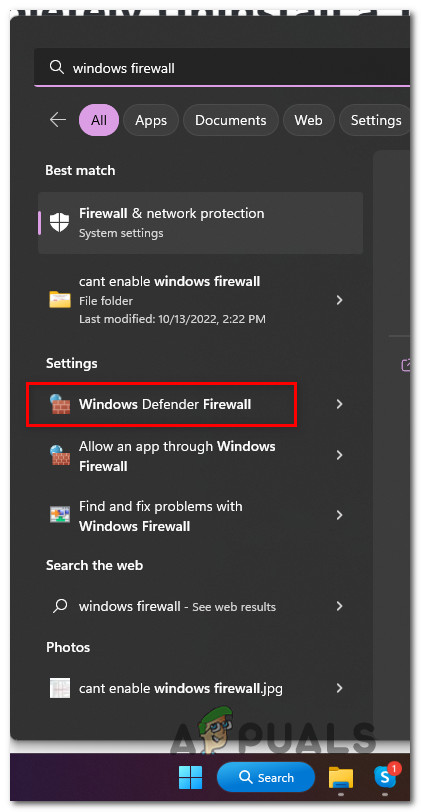
Open Windows Defender Firewall - Click the Turn Windows Defender Firewall on or off link in the Windows Firewall app’s menu on the left.
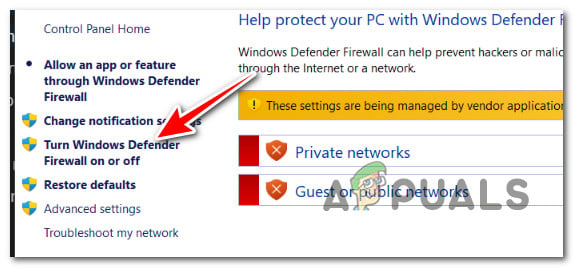
Access the Dedicated Menu - Then, disable the Windows Defender Firewall for both the Private and Public network settings, and then select the OK button.
- Close the tab, then utilize the taskbar’s search box to conduct another search for Windows Security. When you locate the app, launch it.
- From the Windows Security menu, select Virus & threat protection, then click Manage settings.
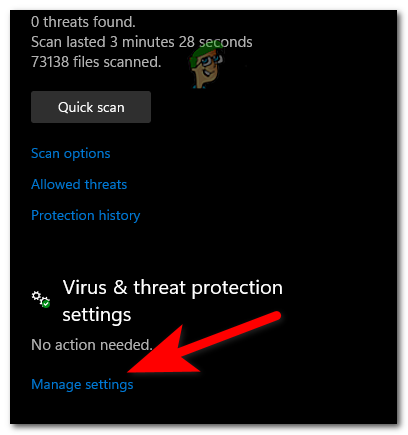
Access the Windows Defender menu - To disable Real-time protection, click the toggle button just beneath the phrase.
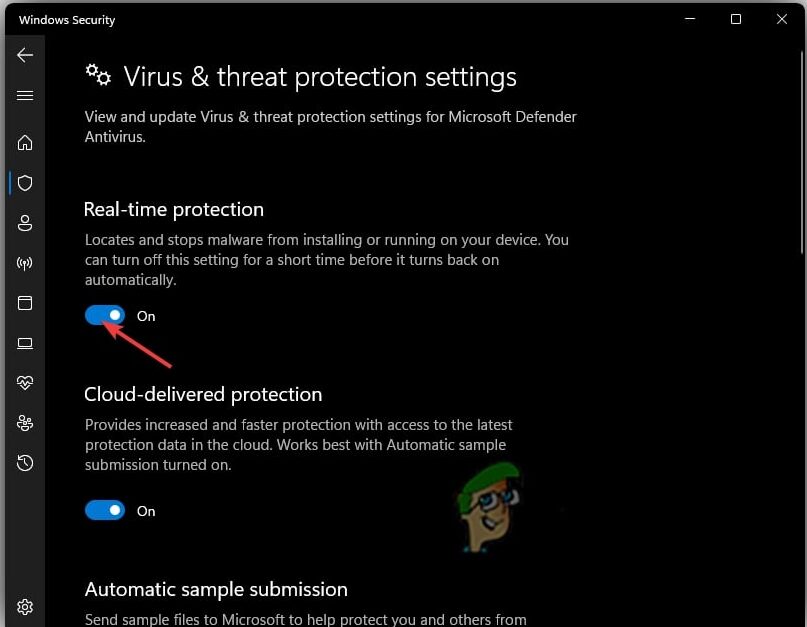
Disable the real-time protection - User Account Control will then request you to confirm the change; select Yes at this prompt.
- Once the security component has been disabled, reboot your PC and attempt to update TurboTax again. Note: If this method allowed you to bypass the 1603 error, don’t forget to reverse engineer the steps above to re-enable the security component.
4. Install missing .NET framework dependencies
Since TurboTax was originally built for Windows 7, you might have quite a few missing dependencies if you’re on Windows 11 and you didn’t install any .NET framework packages manually.
Fortunately, you can resolve this issue easily by running a DISM command from a compatible Windows installation media.
Here’s a quick guide on how to do this:
- Insert the relevant installation media into your DVD drive, or flash drive, or mount it if you’re employing an ISO file.
- Press the Windows key + R to launch the Run dialog box.
- Next, input “cmd” in the text field and click Ctrl + Shift + Enter to launch a Command Prompt with elevated privileges.
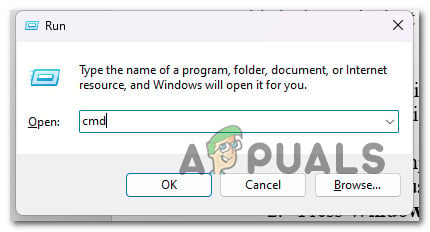
Open up an elevated CMD prompt - When prompted by the UAC (User Account Control), select Yes to give administrator access.
- Once you’re at the elevated CMD prompt, run the following command and replace ‘XXX’ with the letter of the installation media:
Dism /online /enable-feature /featurename:NetFX3 /All /Source:XXX:\sources\sxs /LimitAccess
- To start the installation of the missing .NET dependencies, press Enter and wait for the operation to finish.
- After the installation is complete, restart the computer and attempt to install the pending TurboTax update once again.
5. Disable VPN or Proxy server
You can also expect to see the 1603 error when updating TurboTax if the authentication module is inhibited by a proxy or VPN program. TurboTax, like most other income tax return apps, is known to malfunction when used on a proxy or VPN server.
If you use your device both at home and at the office, it is important to stop the proxy connection or delete the VPN module before retrying the update. The required steps may differ depending on whether you are using a proxy or a VPN.
We’ve two sub-guides to assist you with disabling VPN and proxy connections.
Follow the instructions that apply to your specific situation:
Disable VPN Connection
If you established your VPN connection using the VPN connection tab, you can only disable this functionality via the Network & Internet Connections menu.
The steps necessary to deactivate a native VPN connection on Windows are as follows:
- To open the VPN tab in Windows Settings, enter ‘ms-settings:network-vpn’ in the search field and press the Enter key.
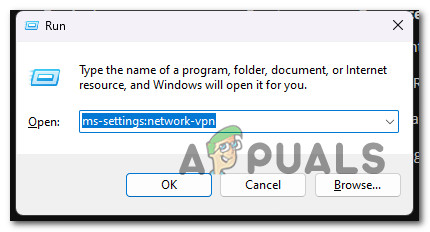
Access the VPN menu - If you are prompted by the User Account Control (UAC), click Yes to grant admin access.
- Once within the VPN tab, look to the right of the screen and select VPN connections.
- Next, click the arrow associated with the current VPN and then click Disconnect.
- Next, indicate that you want to end the connection. To confirm your decision not to use the VPN again, you can just click Remove.

Remove the VPN connection - Restart your computer and attempt to update the proxy app once again.
Disable the Proxy Connection
To disconnect the proxy connection and prevent interference with the updating process of TurboTax, you must browse to the Settings menu and disable the active proxy from the Proxy tab.
Inside, you will be able to determine whether the proxy server is operational and, if required, shut it down to prevent it from interfering with TurboTax.
Here’s how to do this:
- To launch the Run dialog box, press the Windows key + R.
- Then, in the search bar, enter “ms-settings:network-proxy” and press the Enter key. This shortcut will take you directly to the Proxy area of the Windows Settings.
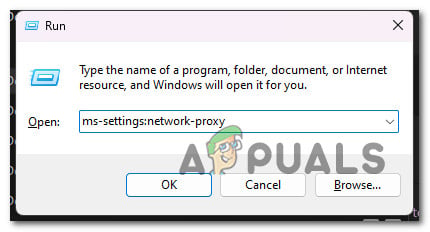
Access the Proxy server - Upon opening the Proxy settings, you’ll notice two tabs labeled Automatic proxy setup and Manual proxy setup. Both should be disabled.
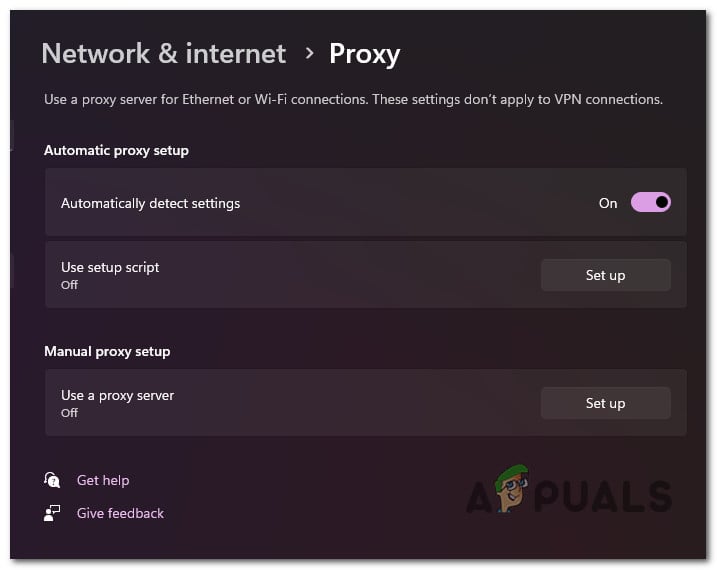
Disable the Proxy server - Upon completion, close the Settings window and restart your computer before attempting to update TurboTax again.


