How to Fix Installation Failed Error 800f0830 – 0x20003 on Windows 11
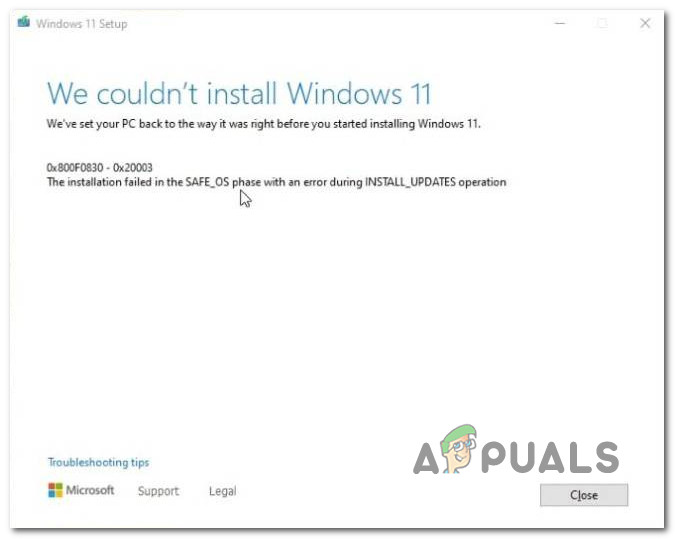
Some Windows users are unable to clean install or make the upgrade to Windows 11 – every attempt ends with the 800f0830 – 0x20003 error (The installation failed in the Safe_OS phase with an error during INSTALL_UPDATES operation).
We’ve investigated a lot of user reports that we’re dealing with this issue and we realized that there are several common scenarios that are usually responsible for the apparition of this error:
- Incorrect Windows version – One of the most common reasons why you’d get this error is when the user tries to upgrade to a Windows 11 from an incompatible version. For example, attempting to upgrade to Windows 11 PRO from a Windows 10 Home version will result in this error. In this case, you either attempt to install a compatible version or clean install instead of upgrading.
- Not enough free space on the Windows partition – Keep in mind that in case you’re attempting to upgrade to Windows 11 from an existing Windows version, you need to make sure that you have at least 36 GB of free space on the Windows partition. If you fail to do so, expect to see the 800f0830 – 0x20003 error when the installer gets to the part where the downloaded files are installed.
- Windows 11 Update glitch – As it turns out if the issue only occurs when you’re trying to use the Upgrade assistant to complete the upgrade to Windows 11, you might be suffering from the notorious ‘Optional Update’ glitch. To avoid it, you’ll need to configure the installer to complete the operation without downloading and installing optional updates.
- Security Violation glitch – Early version of the Windows 11 build (the issue was addressed since) has been suffering from a weird issue where this error code was thrown after the installation of Windows 11 failed due to an alleged security violation. The issue has been addressed with newer builds, but if you want to install an older build, you can avoid this issue by temporarily disconnecting your PC from the internet while installing.
- Secure Boot is disabled – Security Boot is one of the most important requirements for Windows 11, but don’t expect the Windows 11 installer to tell you that specifically in case the installation fails. If you haven’t done so already, take a look at your BIOS / UEFI settings and ensure that secure boot is enabled.
- 3rd party antivirus interference – If you’re using the Windows 11 Upgrade assistant utility, you can expect to see it conflict with certain 3rd party antivirus suites. If this is the underlying cause of the error code, you can avoid the conflict entirely by disabling or uninstalling the problematic antivirus suite prior to initiating the upgrade.
Now that we went over every potential scenario that might be responsible for causing this issue, let’s go over every confirmed fix that other affected users have successfully used in order to get around the 800f0830 – 0x20003 error.
1. Make sure you upgrade to the correct Windows 11 version (if upgrading)
If you’re just starting troubleshooting this issue, you should start by ensuring that the Windows 11 you are trying to upgrade to is compatible with your current version of Windows.
Keep in mind that you won’t be able to upgrade with an incompatible Windows version. For example, if you currently have installed Windows 10 Home, you won’t be able to upgrade to Windows 11 PRO.
Note: This is only applicable to people attempting to upgrade their current version instead of clean installing. If you are simply trying to clean install, skip this method entirely (and the other three below) and move directly to Method 5.
If you find yourself in this particular scenario, you have two ways forward:
- Upgrade to a compatible Windows 11 version.
- Clean install Windows 11 instead of upgrading your current version.
The route you’ll want to take really depends on your particular scenario.
If you already purchased a license key for a Windows 11 version that is not compatible (as an upgrade path) to the current version that you have installed, you’re better off just clean installing the compatible version.
However, if you haven’t purchased a license key yet, there’s no reason to clean install (unless you have to). In this case, you can simply download and install the compatible Windows 11 version instead and proceed to use that ISO to complete the upgrade process.
In case this method is not applicable to your particular situation, move down to the next potential fix below.
2. Create at least 36 GB of Free space on the OS partition (if upgrading)
If you previously ensured that you are indeed attempting to upgrade to the correct Windows 11 version and you’re still dealing with the same 800f0830 – 0x20003 error, the next thing you should investigate is your free partition space.
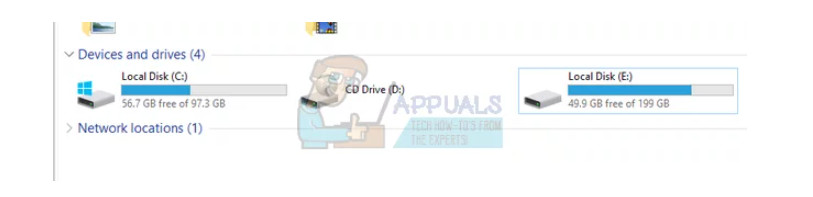
When attempting to upgrade to Windows 11 (regardless of the version), you need to have at least 36 GB of free space on the same partition as your current Windows installation.
Note: Although the installer won’t tell you this specifically, you can expect the installation to fail if the check done by the installer reveals that you have less than 36 GB available on the OS partition.
Open File Explorer and check if your current C: drive space is less than 36 GB.
In case you discover that you don’t have enough space, you can follow this article to Free up space before re-attempting the upgrading process.
Once you manage to free up enough space, attempt to upgrade once again and see if the problem is now fixed.
If the same kind of issue is still occurring or this method was not applicable, move down to the next potential fix below.
3. Upgrade without Optional Updates (if upgrading)
Depending on when exactly you see the 800f0830 – 0x20003 error, you can actually tell if the problem occurs due to a windows update glitch.
In case the first section of the upgrade installs just fine and you only get the error once the Windows Upgrade assistant gets to the part where optional updates are installed, you should be able to avoid the problem entirely by specifically instructing the installer to upgrade without installing option updates.
If this scenario is applicable, you can typically avoid the apparition of the 800f0830 – 0x20003 error by mounting a compatible ISO and specifically instructing the installer to install Windows 11 while neglecting the Option Updates.
Note: Keep in mind that going this route won’t make you miss out on anything. Once the installation is complete, Windows 11 will ask you if you want to install Optional Updates anyways.
Follow the instructions below for step-by-step instructions on mounting the compatible Windows 11 ISO and configuring the setup to upgrade to Windows 11 without installing the optional updates:
- First things first, open File Explorer and mount the compatible Windows 11 ISO by double-clicking on the file.
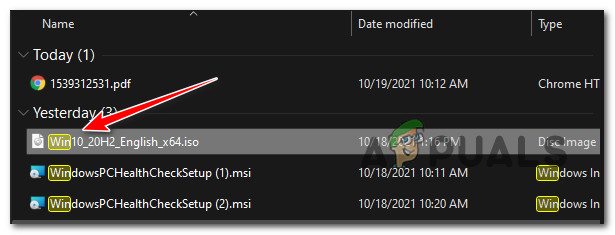
Opening up the Windows 11 ISO Note: If you don’t have a Windows 11 ISO at the ready, you can download the latest compatible version by following this guide.
- Once the Windows 11 ISO is mounted, access the recently mounted directory, then double-click on setup.exe.
- When you arrive at the first Windows 11 Setup screen, start by clicking on the Change how Setup downloads updates.
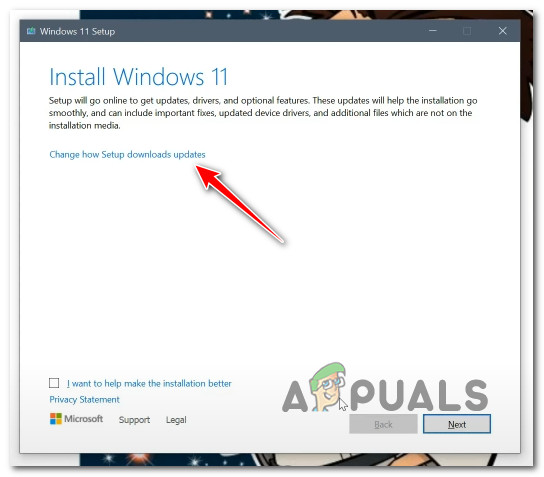
Modify the default Setup downloading behavior - Once you’re inside the Get updates, drivers, and optional features, choose the Not right now toggle, then click on Next and proceed to install Windows 11 normally.
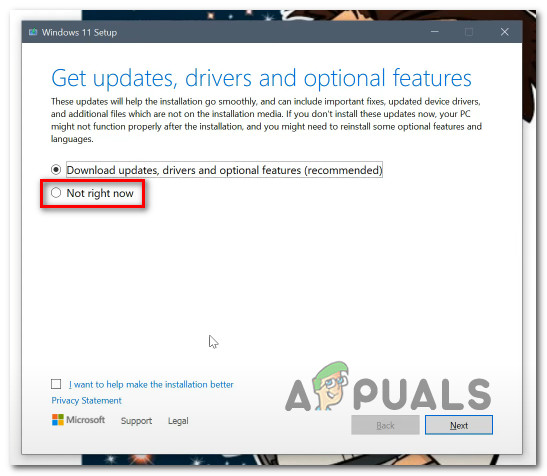
Forcing the Windows 11 setup to install new OS version without the optional updates - Follow the remaining prompts to complete the upgrade to Windows 11 without the need to install the optional updates.
If the operation still resulted in the same 800f0830 – 0x20003 error even after you configured the setup to ignore the optional updates, move down to the next method below.
4. Disable 3rd party antivirus (when upgrading)
If none of the methods above have proven to be effective in your case and you’re attempting to upgrade your current version of Windows to Windows 11, the next thing you should investigate is a potential 3rd party security interference.
Keep in mind that if you’re attempting to use the Windows 11 Upgrade assistant, the tool is known for conflicting with certain antivirus suites – Zone Alarm and the free version of AVG are the most commonly reported conflicting tools.
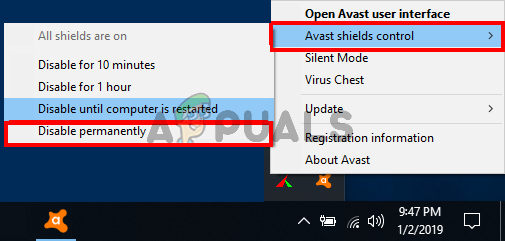
In most cases, you can disable the 3rd party antivirus simply by right-clicking on the AV’s taskbar icon and disabling the real-time AV shields.
Important: Keep in mind that this operation will only be effective if you’re using an AV suite without a firewall component.
In case you’re using a 3rd party suite that includes a firewall component, follow the instructions below to temporarily uninstall the 3rd party tool and remove any remnant files before attempting to do the Windows 11 upgrade once again:
- Press Windows key + R to open up a Run dialog box. Next, type ‘appwiz.cpl’ inside the text box, then press Enter to open up the Programs and Features screen.
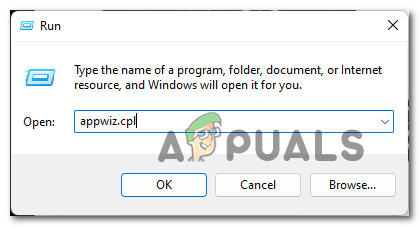
Open up the Programs and Features menu - Once you’re inside the Programs and Features menu, scroll down through the list of installed applications and locate the 3rd party antivirus that you suspect for conflicting with the Windows 11 Upgrade assistant.
- After you locate the correct listing, right-click on it and choose Uninstall from the context menu.
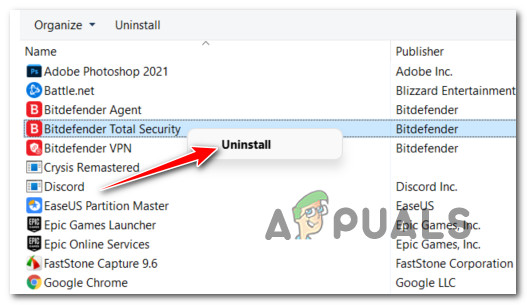
Uninstall the 3rd party antivirus - Inside the uninstallation screen, follow the on-screen instructions to complete the uninstallation of the conflicting antivirus suite.
- Once the AV suite is uninstalled, follow this guide to ensure that the AV installation didn’t leave any remnant files behind.
- After you finally ensured that the AV suite is uninstalled and there are no remnant files left, attempt to do the upgrade procedure once again and see if the installation completes without the same 0x800f0830-0x20003 error.
If the same kind of issue is still occurring, move down to the next potential fix below.
5. Install without Internet
If you get this error while attempting to clean install Windows 11, you should also troubleshoot against a potential ‘security violation’ glitch that only affects Windows 11 builds.
Microsoft has addressed this glitch with the latest Windows 11 Public and Insider releases, but if you’re insisting on installing an older Windows 11 build, the only way to do it without the risk of encountering the ‘security violation’ glitch is to disconnect the PC from the Internet until the installation is complete.
This fix was reported to be successful by a lot of Microsoft insiders that we’re attempting to install a preview build of Windows 11 – if you find yourself fin the same situation, doing the same might help.
On the other hand, if you’re experiencing the 0x800f0830-0x20003 error while attempting to install the latest build of WIndows 11, move down to the final potential fix below.
6. Enable Secure Boot
In case none of the methods below have been effective in your case, you should make sure that the most important requirement for Windows 11 is enabled – Secure Boot.
Keep in mind that you will get a specific error that Secure Boot is disabled in case you clean install. But if you use the Upgrade assistant, chances are you won’t be given any indication that this feature is disabled on your PC and it’s the reason why you’re seeing the 800f0830 – 0x20003 error when you attempt to clean install (or upgrade) to Windows 11.
Note: Secure boot is the new industry standard to ensure that modern PCs only use software trusted by OEMs ( Original Equipment Manufacturers).
If you have a fairly new motherboard, there’s no doubt that secure boot is supported. In most cases, you just need to enable it from your BIOS settings. Follow the instructions below to enable Secure boot in order to avoid the 800f0830 – 0x20003 error:
- Boot up your PC conventionally and start pressing the Setup key (boot key) immediately after you see the initial screen.
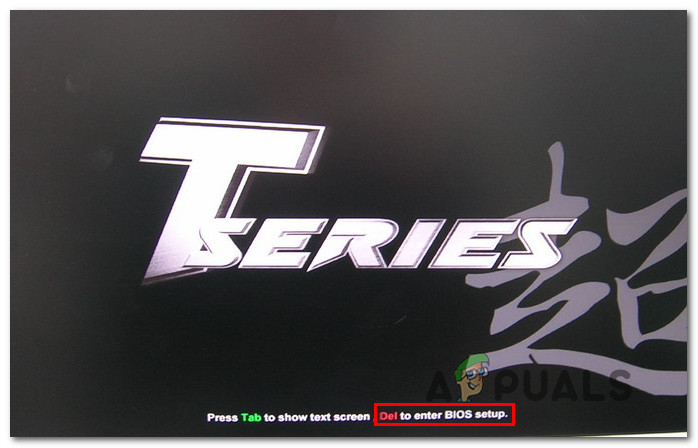
Press the Setup Key Note: Most motherboards will display the Setup key at the bottom of the screen. If you can’t see it, press one of the following: F1, F2, F4, F8, F12, Esc, or Del key.
- Once you’re inside the BIOS or UEFI settings, look for an option named Secure Boot and make sure that it’s enabled. Every BIOS is different depending on its manufacturer, but you can typically find this option somewhere under the Security tab.
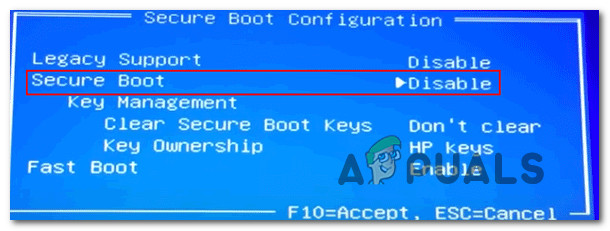
Enable the Secure Boot - After the Secure Boot feature is enabled, go ahead and save the changes in order to boot your computer normally.
- Once your PC boots back up, attempt to use the Windows 11 upgrade assistant once again and see if the problem is now fixed.
In case the same kind of problem is still occurring, move down to the next potential fix below.


