How to Install the Nokia PC Suite on Linux
Nokia mobile phones often need special software to sync files and transfer over images via Bluetooth, or even USB. They might even need special drivers to appear as mass storage devices for that matter. Due to the complexities of Nokia’s custom system software, several steps might be required to interface your phone with your preferred distribution of Linux.
This shouldn’t be thought of as a deficiency of Linux, since these same steps are required to work with Nokia phones connected to Windows PCs and Apple Macintoshes. That being said, you might want to try using the regular Nokia PC suite with Wine if it suits your needs. Barring that, you may find some of the native Linux software quite useful, but much of the Bluetooth connectivity of the past has been deprecated over time because of changing software standards.
Method 1: Using the obexftp Software
Since Nokia phones use the Object Exchange (OBEX) binary hypertext protocol, you can communicate them by installing the obexftp package. If you’re on an apt-get managed distribution of Linux, then you can type sudo apt-get obexftp and approve the installation with your administrator password. Since Debian maintains the hosting for this package, it should be readily within your repositories.
Once it’s installed, you’ll more than likely want to install a front-end by issuing wget https://sourceforge.net/projects/obexftpfrontend/files/OBEXFTP%20Front-End/v0.6.6/obexftp-frontend-0.6.6.deb/download?use_mirror=master&modtime=1216323028&big_mirror=0 followed by sudo dpkg -i obexftp-frontend-0.6.6.deb to install it. Keep in mind that while it’s no longer developed, there might be a more recent version to come in the future if someone forks it.
Type lsusb once you’ve connected your Nokia phone to your PC using the USB cable, and you’ll then find something that features Nokia Mobile Phones N## USB Phone Parent on a line. The two octothorpe symbols will be replaced by the Nokia model number. The two other numbers in the line presented as ####:####, which can be a combination of numbers or digits, represent both the vendor and product ID. Issue the command sudo nano ![]() and add BUS==”usb”, SYSFS{idVendor}==”####”, SYSFS{idProduct}==”####”, GROUP=”plugdev”, USER=”theUserName” with replacing the first four octothorpes with the first four digits before the colon in the lsusb line, the second with the second four and then theUserName with your actual non-root user name.
and add BUS==”usb”, SYSFS{idVendor}==”####”, SYSFS{idProduct}==”####”, GROUP=”plugdev”, USER=”theUserName” with replacing the first four octothorpes with the first four digits before the colon in the lsusb line, the second with the second four and then theUserName with your actual non-root user name.
Now run obex_test -u from the terminal, which should give you a pair of lines discussing your particular model of Nokia phone. If that worked out just fine, then you can actually sync your phone properly. Issue the command obexftp-frontend & and push enter. If it doesn’t open a configuration box by default, select Options and then head to Configuration.
Specify the ObexFTP path, which should be /usr/bin/obexftp on most Linux installations. You could type which obexftp to find the directory if this doesn’t work out right.
Head over to Advanced Options and then select Device Info Fetching. Find the Connection Type drop down box in the Device Information field, and then select USB. Enter 1 into the Connection Line box and click on the Test button. It should now read Connection Established, which means you can click on the Device menu and select Query Root Files to get the job done.
Support for Evolution Bluetooth syncing for most Symbian devices has now been deprecated, and many of the repositories are no longer active. You could try Wammu, which attempts to provide graphical support for the Gammu CLI program, though it doesn’t support newer Symbian phones. This in itself is something of a misnomer, as the Symbian platform itself is deprecated. While KMobile Tools in the KDE Plasma desktop environment and gnokii as well as Phone Manager may be able to detect these phones, they may not be able to work with them. The one bright spot in all of this is that Nokia has been providing hardware for the Android platform since they hinted at their C1 phone series, which provides USB mass storage connectivity for attached devices. Please keep in mind that the Nokia PC suite for Windows doesn’t function correctly under Wine, and you’re better off not messing with it.
Method 2: Opening Your Nokia Phone as a Mass Storage Device
When you attach your phone to your Linux PC via a USB cord, you might hear a tone or see a window that tells you that the operating system has automatically mounted a new volume. This is the same dialog box that appears if you insert a USB memory stick or something similar. In this case, you may be running an Android-based operating system, and can access your files directly, especially if they’re stored on a microSDHC or microSDXC memory card attached to your phone.
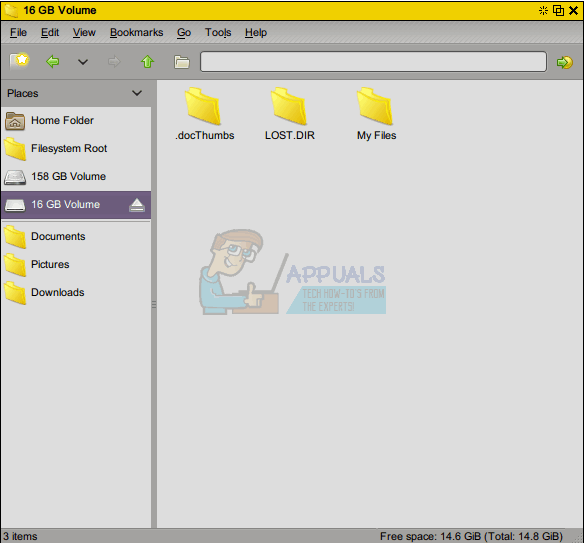
In a graphical file manager, look for a new mounted volume other than the one that you used to boot the operating system from. You may see a number of different partitions, which you can simply ignore. If you have a new volume and in the root directory of said volume you have a subdirectory called LOST.DIR, then you’re actually working with an Android device, and not a Symbian one. You’re in luck, since it’s now connected as a mass storage device and you should be able to transfer files freely at this point.

You may wish to explore LOST.DIR, because this is where Android puts files after it recovers them from a damaged file system on your phone, much as GNU/Linux does with the /lost+found directory. Having .docThumbs or anything else of the sort is also a giveaway that you’re working with an Android device, since this is following the Unix convention of hiding directories by placing a leading dot on them.

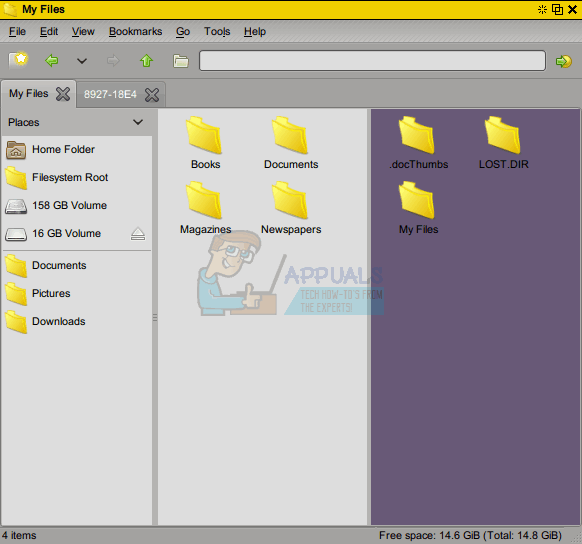
Photos, as well as Books and Magazines you might have downloaded, will end up in the My Files directory. This is an excellent place for you to transfer files over to your phone as well. If you have a DCIM directory, then you can look in here for images as well. This means your Nokia phone looks to Linux as a digital camera does.