How to Fix HP Solutions Center Not Working in Windows?
Since Adobe permanently discontinued the Flash Player (as of January 2021), the HP Solution Center has started malfunctioning on every system where Flash is not installed. If you are affected by this issue, you’ll see a Flash icon when attempting to open the HP Solution Center.
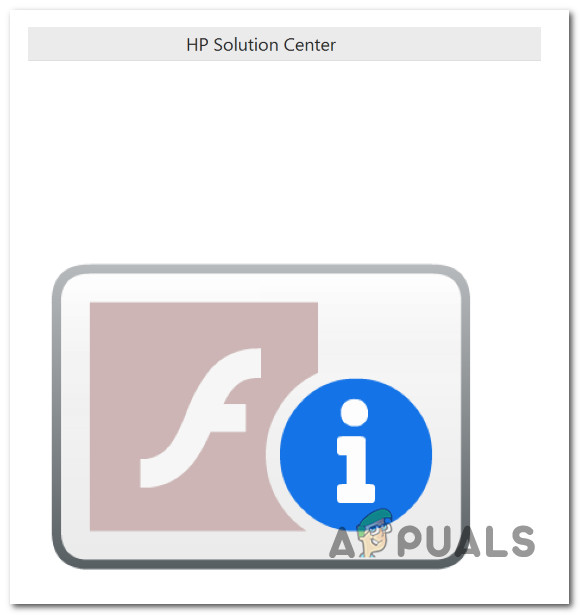
Note: HP Solution Center was initially created to support HP printers manufactured before 2010. The functionality was then extended to newer printer models where Flash was present. But now, since Flash is discontinued and no longer supported by the industry, this application doesn’t have any utility.
IMPORTANT: We don’t recommend any other workarounds that will allow you to use HP Solution Center now that flash is discontinued. It will leave your system vulnerable to a lot of potential security issues.
To continue using your HP printer without the HP Solution Center, there are a few workarounds that you can try:
1. Use the Windows Built-in Print Driver
Since using HP Solution Center is no longer an option, the only thing that will allow you to continue using your printer without installing 3rd party apps and without exposing yourself to vulnerabilities is to switch to the Windows built-in print driver.
Keep in mind that this is a generic driver that comes built into every build of Windows 10 and 11. While you don’t need to install any driver, you still need to configure your printer – depending if you’re using a USB-connected printer or a network printer, the instructions are different.
Note: To get the most out of your HP printer on Windows (now that HP Solution Center is gone), we recommend installing the HP Smart. This is a UWP app that HP released for Windows 10 and Windows 11. Additionally, you should download and install the dedicated full-feature driver for your HP printer model from the official download website.
Follow the instructions below to connect your HP printer to your Windows computer using the built-in driver.
Note: Follow sub-guide 1 if you’re adding a USB-connected print and sub-guide 2 if you’re adding a network printer.
1.1 Connect HP USB Printer via Windows built-in driver
Only follow these steps if your HP printer connects with a USB port and you only send printing instructions from a single PC.
Here’s what you need to do:
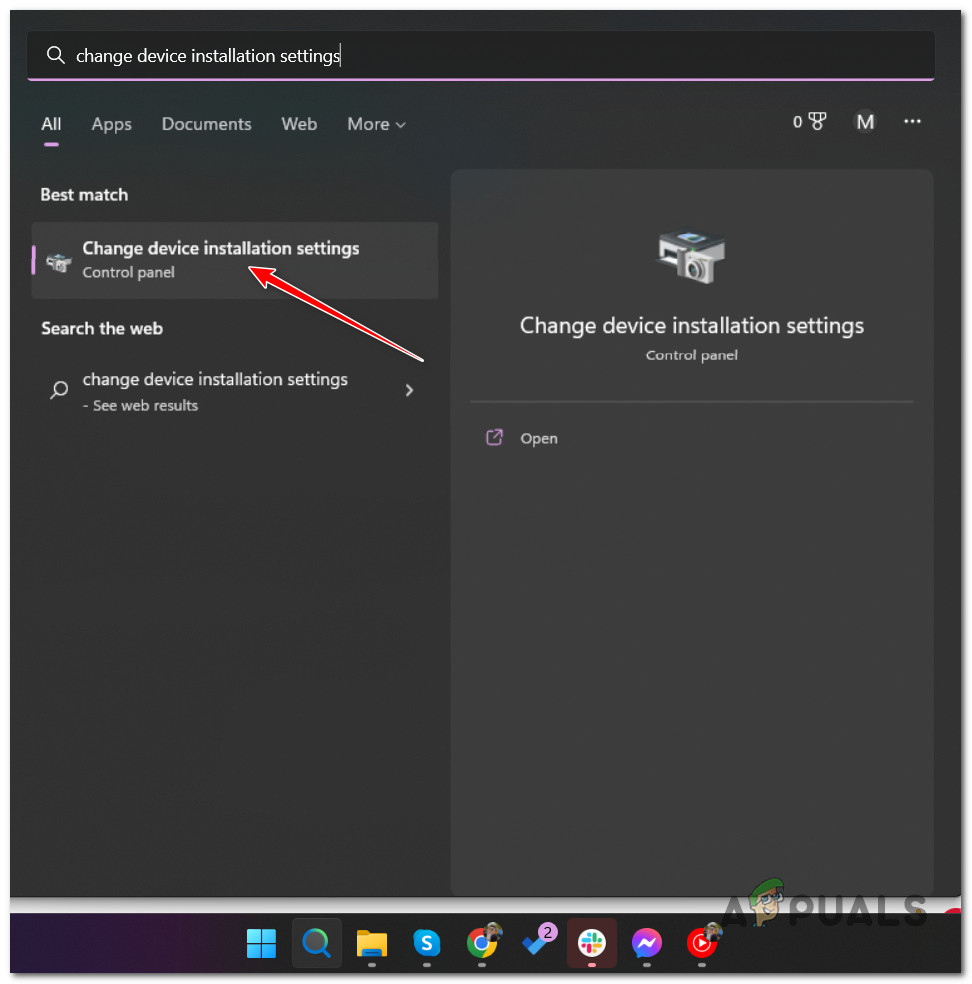
- Press the Windows Start key, then type ‘change device installation settings’ inside the search bar.
- From the list of results, click on Change device installation settings.
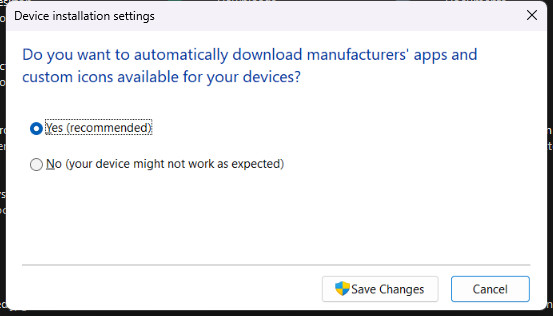
Change device installation settings - From the Device installation settings, ensure that the Yes toggle is checked, then click Save Changes to complete the operation.
Saving the Recommended Settings - Next, you’ll need to ensure that a working USB port is available on your PC.
Important: DO NOT connect your printer to a docking station or USB Hub. Most HP printer models won’t receive enough power to work in normal parameters if you do this. - Turn on the printer and wait until it enters idle mode.
Note: Wait until you longer hear any noise coming from it. - Connect your printer via the USB cable to your PC and wait until you notice a new printer has been discovered. Depending on your printer model, you might need to follow a series of on-screen prompts to install the printer locally.
- Once the operation is complete, see if you can print normally. If you still can’t continue with the steps below.
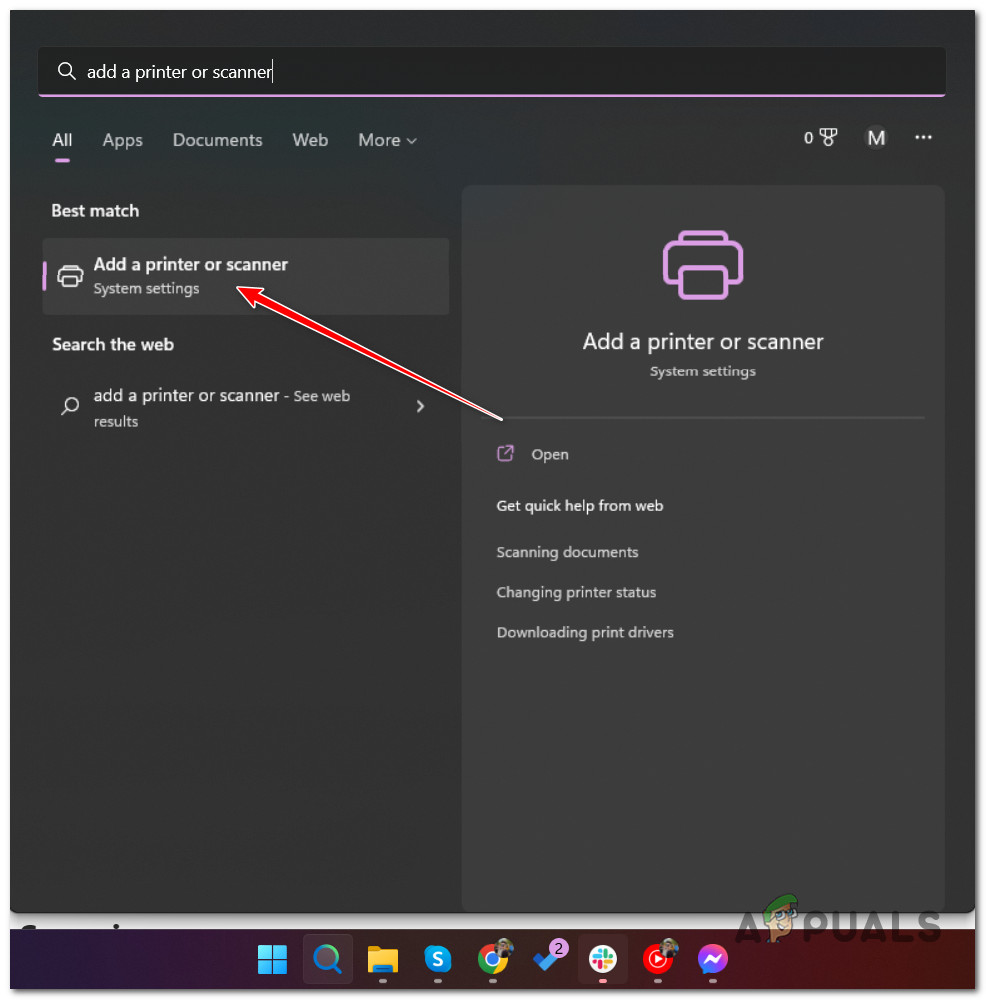
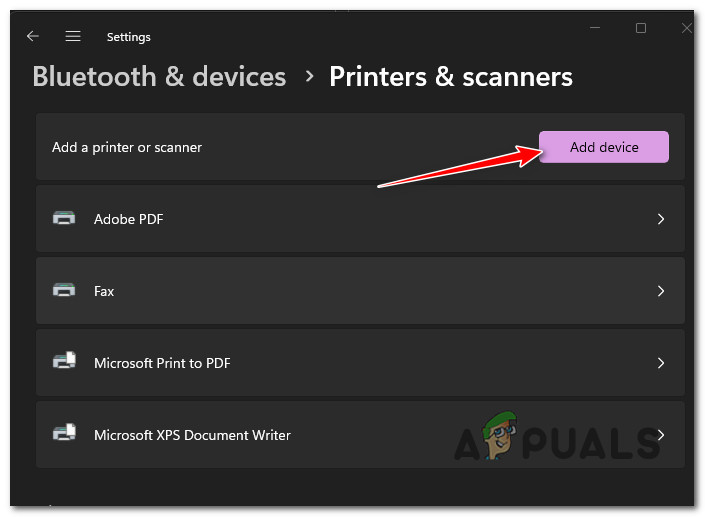
- Press the Windows key and type ‘add a printer or scanner‘ inside the search bar. From the list of results, click on Add a printer or Scanner.
Adding a local printer - Once Windows displays the full list of available printers, click Add Device.
Adding a new printer - Wait until the operation is complete, reboot your PC and see if the issue is now fixed.
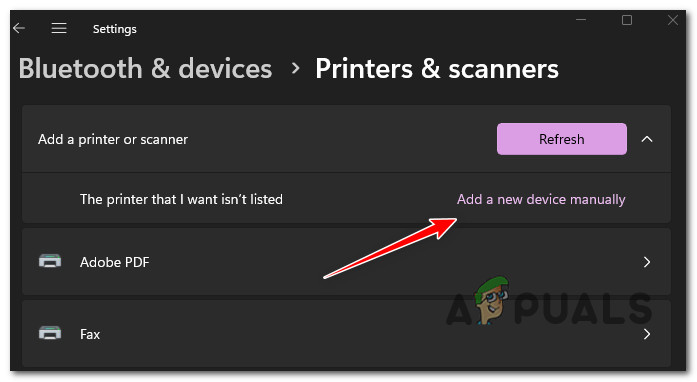
Note: If the printer isn’t added to the list, click on Add a new device manually, then choose the printer port and select your printer model.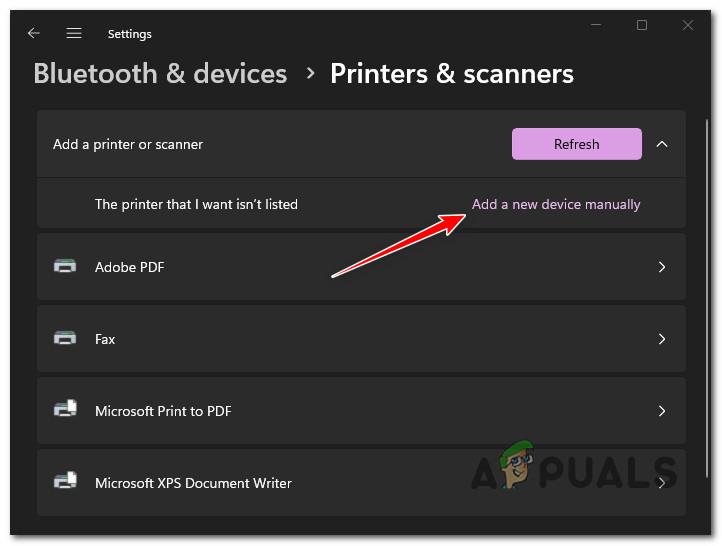
Adding a new printer manually - Reboot your PC and see if you can use your printer normally.
If the issue is still not fixed, move to Method 2 (below the following sub-guide).
1.2. Connect Network Printer to Windows via built-in driver
If you want to connect a Wi-Fi or wired network printer to your network while using the generic Windows printer drivers, follow the instructions below:
- Press the Windows key and type ‘change device installation settings‘, then click on Change device installation settings.
- Next, physically place the printer near the Wi-Fi router (or a Wi-Fi expander).
- Make sure you connect your printer to the same network as your computer.
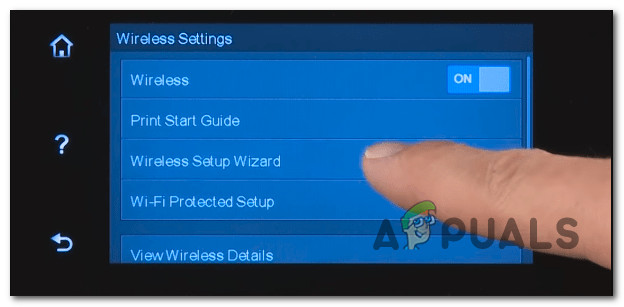
Connecting the printer Note: The instructions on doing this are different from model to model.
• On HP models with a touchscreen interface, go to Setup > Network > Wireless > Wireless Setup Wizard.
• On HP models without a touchscreen interface, press and hold the wireless button for 5 seconds or until you see the wireless light flashing, then press and hold the WPS button on your router.
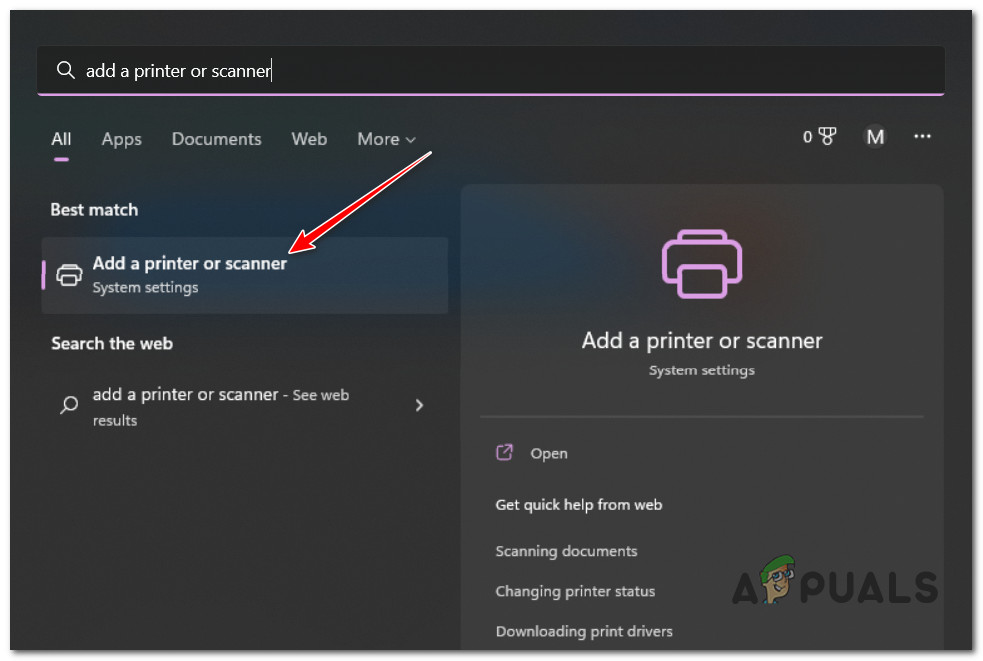
• On HP models that connect via ethernet cable, connect a network cable between your printer’s ethernet port and an access point on your router. - Press the Windows key on your PC and type ‘add a printer‘ in the search bar. From the list of results, click on Add a printer or scanner.
Adding a printer or scanner - Next, click on Add device from the next menu and wait until the initial scan is complete.

Adding a new network printer - Wait and see if Windows can locate the available printer (it should work as long as it’s connected to the same network as your PC).
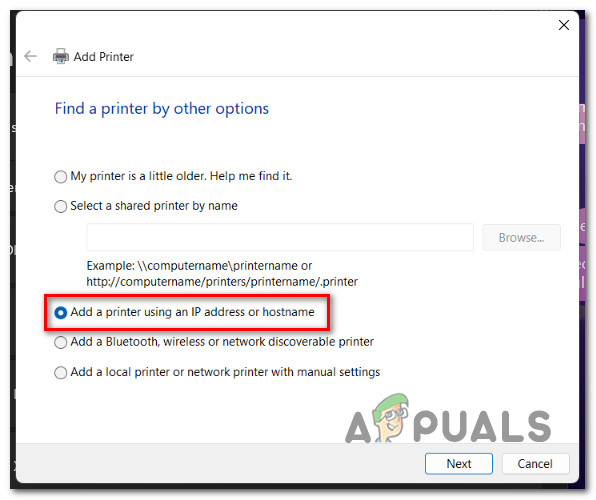
Note: If the network printer is not identified automatically, move to the next method below. - Click on Add a new device manually from the hyperlink that just appeared after the unsuccessful procedure.
Add a new network printer automatically - From the next screen that just appeared, select the Add a printer using an IP address or hostname toogle, then click Next.
Add a new printer using the IP address or hostname - At the next screen, set the Device Type drop-down menu to AutoDetect, then add the printer IP address in the box below and click Next to continue.
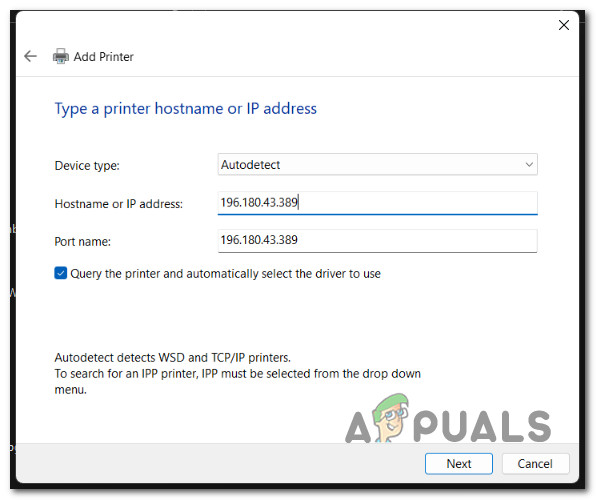
Configuring the network printer Note: The instructions for finding your printer IP address will differ depending on what type of HP printer you’re using.

Example of a printed HP network report • On HP models with a touchscreen control panel, go to Wireless Summary or Network Settings menu to view the IP address.
• On HP inkjet printers without a touchscreen panel, press and hold the wireless + the information button simultaneously (or the Start Copy Back buttons if available). This will prompt your device to print out a report containing network information, including your IP address.
• On HP laserjet printers, press the Wireless button for 10 seconds until you see the Ready light blinking. This will print out a report containing the IP address.
• On HP DeskJet 6000 and 6400, ENVY 6000 and 6400, and Tango printers, press and hold on to the information button until you see every panel button lighting up. When this happens, release the information button, then press it again with the resume button to print out a network report with your IP address.
• On Laser NS and Neverstop Laser printers, press and hold the resume button + wireless button for 3 seconds to print out an IP address report - Follow the remaining instructions to complete the printer installation, then see if you can print properly.
If your printer is already connected successfully, but you can’t use any of the scanning features we’re available with HP Solution Center, move down below.
2. Use a Printer Scanning app (if applicable)
Depending on your printer model, following the instructions above might not allow you to utilize some of the most advanced features, such as scanning.
Fortunately, there are apps that will allow you to compensate for the inconvenience brought about by the ‘death’ of the HP Solution Center program.
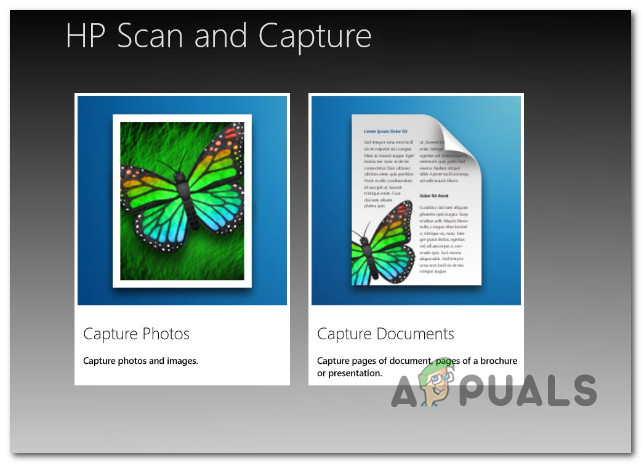
You can use several apps to circle this issue, but we recommend the official app – HP Scan and Capture.
Note: This is the newer app released by HP to facilitate Windows 10 and 11 with access to features that were only available via HP Solution Center. You can use it to scan and capture photos and documents from your printer or your computer camera.
Important: This UWP (Universal Windows Platform) app will only work for Windows 8.1 or higher.
To use this UWP app, you need to download & install it from the official channels.
Here’s what you need to do:
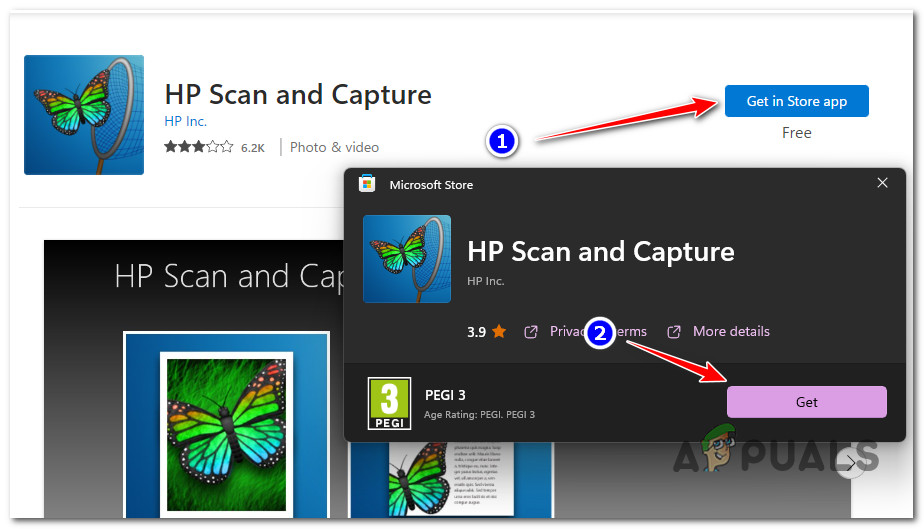
- Open your browser and navigate to the official download page of HP Scan and Capture.
Note: You can also find it inside Windows Store. - Click on Get in Store app from the next screen, then follow the on-screen instructions to initiate the download.
Download the HP Scan & Capture app - Once the app is downloaded locally, launch it and go to Settings. From inside, select your HP printer.
- Click on Document Scan Options or Photo Scan Options and configure your settings before saving the changes.
- Click on Capture Documents or Capture Settings (depending on what you want to do) to start using this feature.
Selecting the app mode
If this app doesn’t work for some reason or you’re looking for an alternative, here are a few:
- Windows Scan app – This is another 3rd party alternative you can download directly from the Microsoft Store. It’s compatible with most HP models. However, it’s a UWP app, meaning you can only use it on Windows 8.1 and higher.
- Windows Fax and Scan – This is a rudimentary tool that comes preinstalled with every recent Windows version. You can access it by searching for ‘fax’ inside your windows search bar. Unfortunately, it’s not compatible with every HP printer model.


