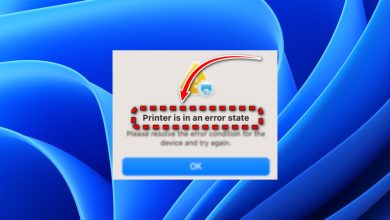
How to Fix HP Printer Error 0x6100004a?
When HP printer error 0x6100004a occurs, the printer suddenly stops working and shows a “Printer Failure” message, usually stopping all functions. This error indicates a mechanical issue, often involving the carriage movement or a paper blockage.
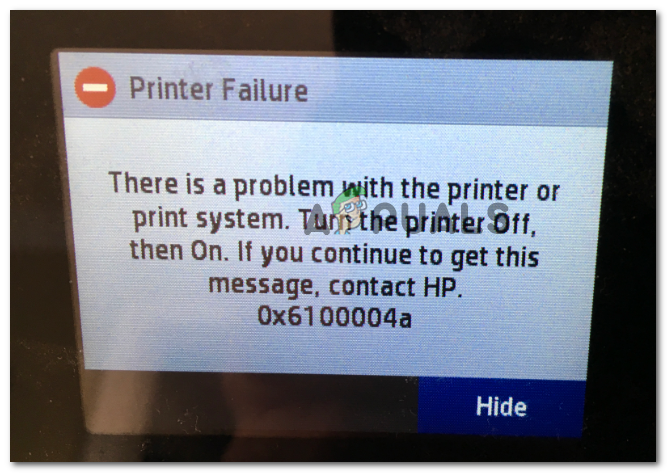
The usual cause is paper jams or a misaligned carriage, but it can also be due to faulty ink cartridges, debris inside the printer, or software problems.
In this article, we will discuss different ways to solve this error.
1. Reset the Entire Printing Mechanism
Sometimes, a complete reset can fix temporary problems in the printer’s system. By resetting the entire printing mechanism, you restart its parts, helping the printer to fix issues like a jammed carriage or errors in communication between its components.
- If not already on, turn on the printer and wait for the startup sequence to complete.
Note: Wait until the printer is in Idle mode and silent before proceeding. - While the printer is on and in idle mode, disconnect the power cord from the printer’s rear. Then, unplug the power cord from the wall outlet.
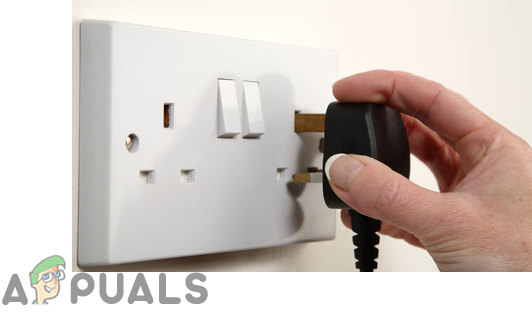
Disconnecting the Power Cord of Your Printer - Wait at least 60 seconds before plugging the power cord back into the wall outlet, then reconnect it to the printer’s rear.
- Power on the printer and wait for the initial warm-up to complete.
- Once the printer enters idle mode again and is silent, attempt to print and check if the issue is resolved.
2. Clean the Ink Cartridge Vents and Contacts
Blocked vents or dirty contacts on ink cartridges can stop them from working with the printer, causing errors like 0x6100004a. Cleaning these parts ensures ink flows correctly and restores the connection between the cartridges and the printer, effectively fixing any mechanical or recognition problems.
Important: This method is a bit more advanced and might damage other printer components if not performed properly. If your printer is under warranty, take it to a specialized technician, since the steps below might void your warranty.
Requirements:
- A pin (used to clean any clogged vents)
- A lint-free cloth (used for general cleaning)
- A dry cotton swab (used for general cleaning)
- Distilled or bottled water – Do not use tap water because it might contain contaminants that could damage the printhead.
Here’s what you need to do to clean the ink cartridge vents and contacts:
- Power off your printer and wait at least 60 seconds before proceeding.
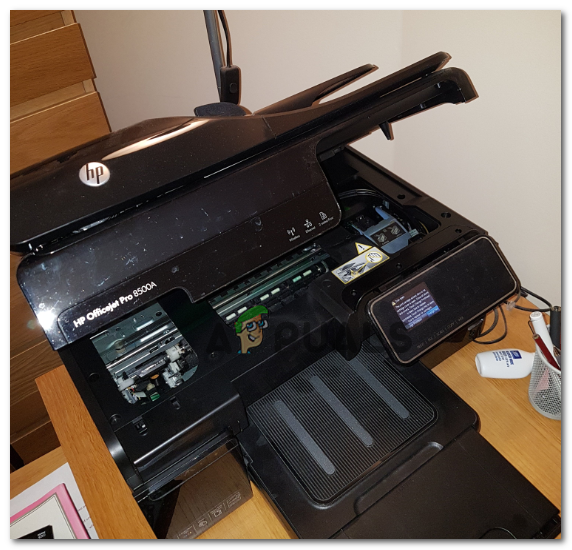
- Inspect the vent area on top of each cartridge for any clogged vents.
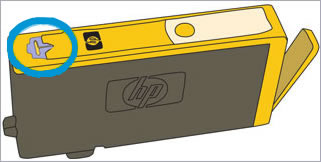
Checking for Any Clogged Vents - Use a pin to clear any clogged vents on the cartridges.
- Clean the copper contacts on the ink cartridge using a lint-free cloth to remove ink and debris.
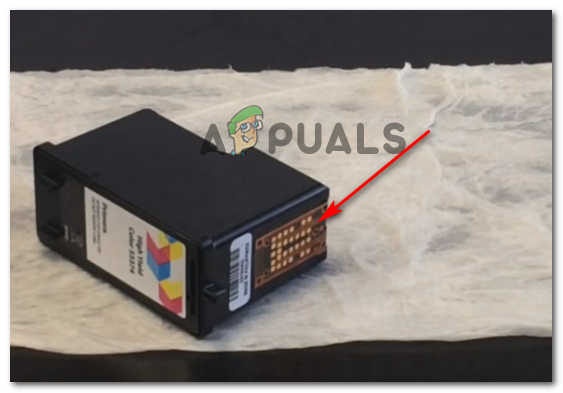
Cleaning the Copper Contact - Repeat the cleaning process for each ink cartridge contact.
- Use a lint-free swab to clean the copper-colored contacts on the print head.
- Carefully reinsert each cleaned cartridge into its slot, ensuring it snaps into place.
Note: Match each cartridge color to the corresponding colored dot on the carriage. - Close the ink cartridge access door and turn your printer back on.
- Test printing to check if the 0x6100004a error is resolved.
3. Ensure the Carriage is Not Restricted
The printer’s carriage is important for moving the ink cartridges smoothly across the paper. If it is blocked by debris, misaligned parts, or other obstructions, it can cause error 0x6100004a. Ensuring the carriage moves freely helps the printer work correctly and may fix the issue without needing more actions.
- Power on your printer and wait until it reaches idle mode (when it goes silent).
- With the printer on, open the cartridge access door and disconnect the power cord from the printer’s rear, then unplug the cord from the power source.
Opening the Cartridge Access Door Note: Unplugging is crucial to eliminate the risk of electrical shock as you interact with the paper feed mechanism.
- Use a flashlight to check for any paper remnants or objects in the carriage path. Carefully remove any obstructions.
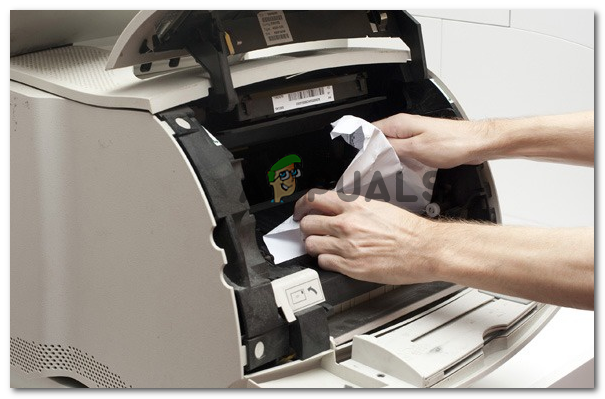
Paper Stuck Inside the Printer Note: Be cautious when removing stuck paper. Check the rollers and wells for torn pieces that might remain, as these can cause further jams.
- Once all obstructions are cleared, close the ink cartridge access door and reconnect the power cord to the printer, then plug it back into the outlet.
- Test the printer by attempting to print again to see if the 0x6100004a error persists.
4. Contact HP Support
If all troubleshooting steps fail, contact HP Support for specialized help. They have the tools and knowledge to find the cause of error 0x6100004a. They can fix complex hardware or firmware problems, provide replacement parts if needed, or guide you through advanced troubleshooting specific to your printer model.
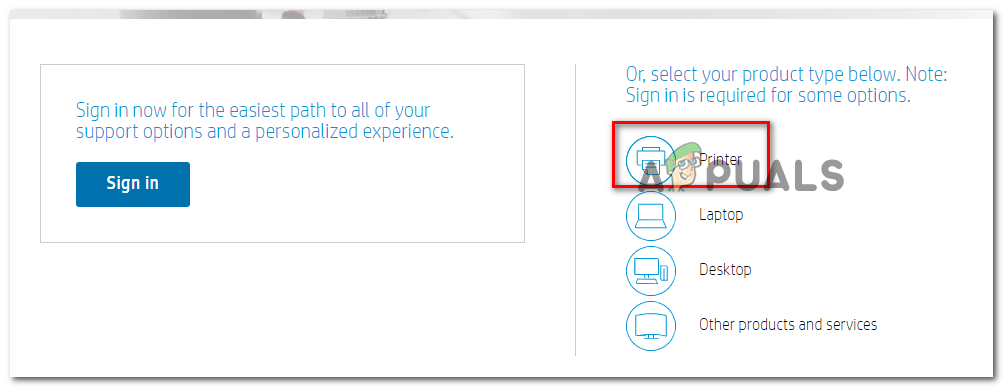
- Open this link in your default browser and select Printer from the product types list.
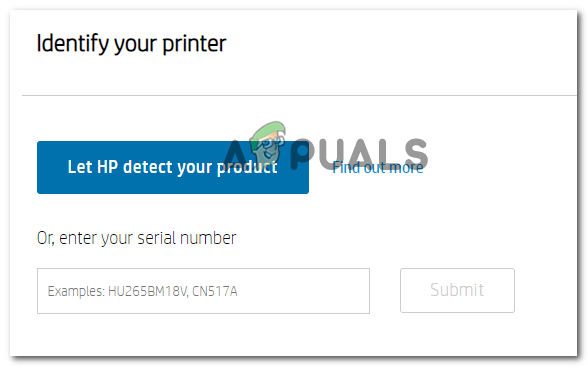
Accessing the Printer Contact Menu - Input your printer’s serial number in the provided box, then click Submit.
Identifying Your Printer - After identification, fill out the form and click HP Contact Forms > Get phone number.
- Contact the HP technician and follow their guidance to troubleshoot your printer issue.
I am receiving the hp.0x6100004a notice and I do not know what to do to get my printer working again