How to Safely Overclock Your GPU?
Most GPUs have untapped performance potential that can be unlocked through overclocking, enabling them to operate at speeds beyond their default factory settings. However, overclocking isn’t without risks pushing your GPU too far can lead to instability, crashes, overheating, or even permanent damage to your hardware. Since the GPU is a vital component of your system, it’s crucial to approach overclocking with caution and a clear plan.
This guide will go over the required checks and steps to take when dialing up the clocks on your GPU. It’ll cover different scenarios and indicators to understand the entire procedure, including when to stop or identify when your GPU has hit its limit, something that is especially important for first-time overclockers.
What Tool to Use?
While many GPUs come with manufacturer-specific tools for one-click overclocking, these solutions often leave untapped performance potential and may not guarantee stability. In some cases, they can even cause stutters, visual glitches, screen artifacts, or sudden crashes. 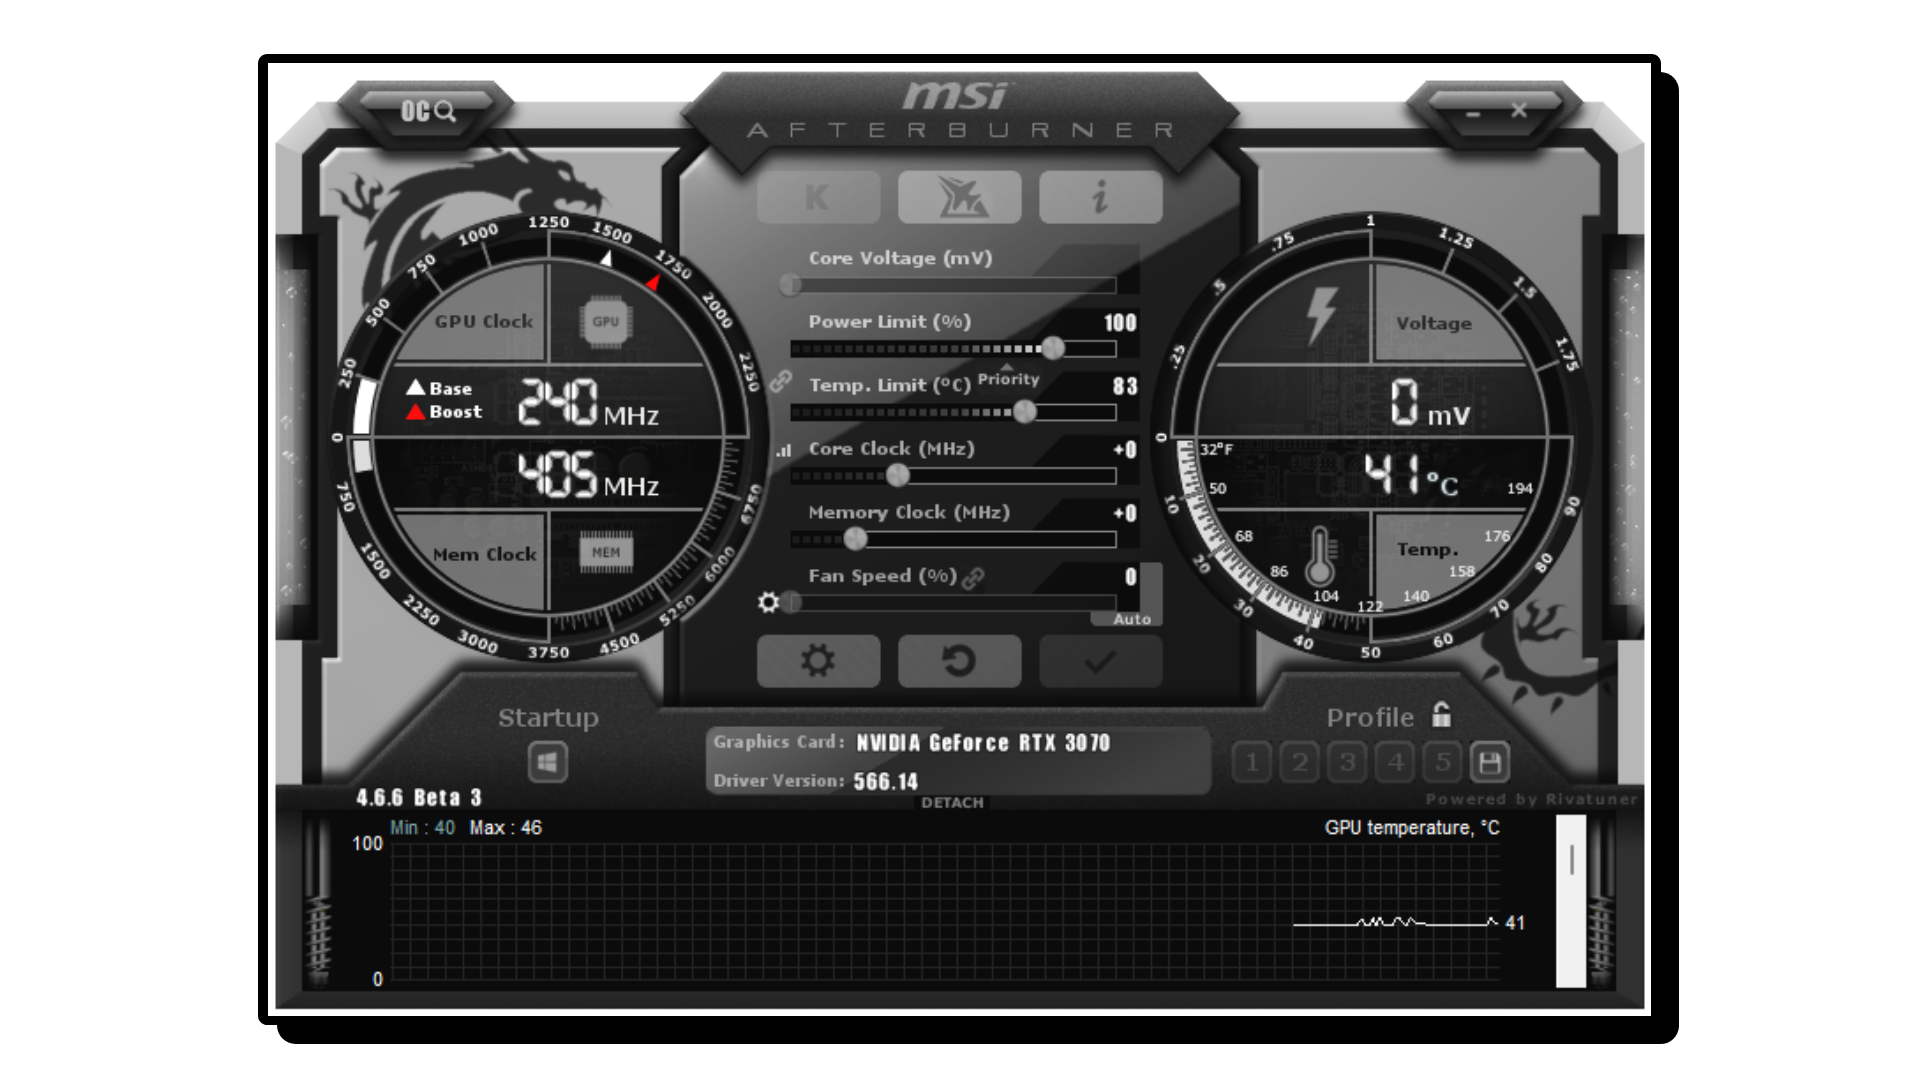
For this guide, we’ll use MSI Afterburner a free, user-friendly, and widely trusted tool for GPU overclocking. It offers precise control to maximize performance (think extra frames per second!) while letting you test and ensure your settings are stable.
To stress-test your overclocked settings, download one of these benchmarking tools:
- Unigine Heaven: A continuous stress test that helps spot visual glitches or instability.
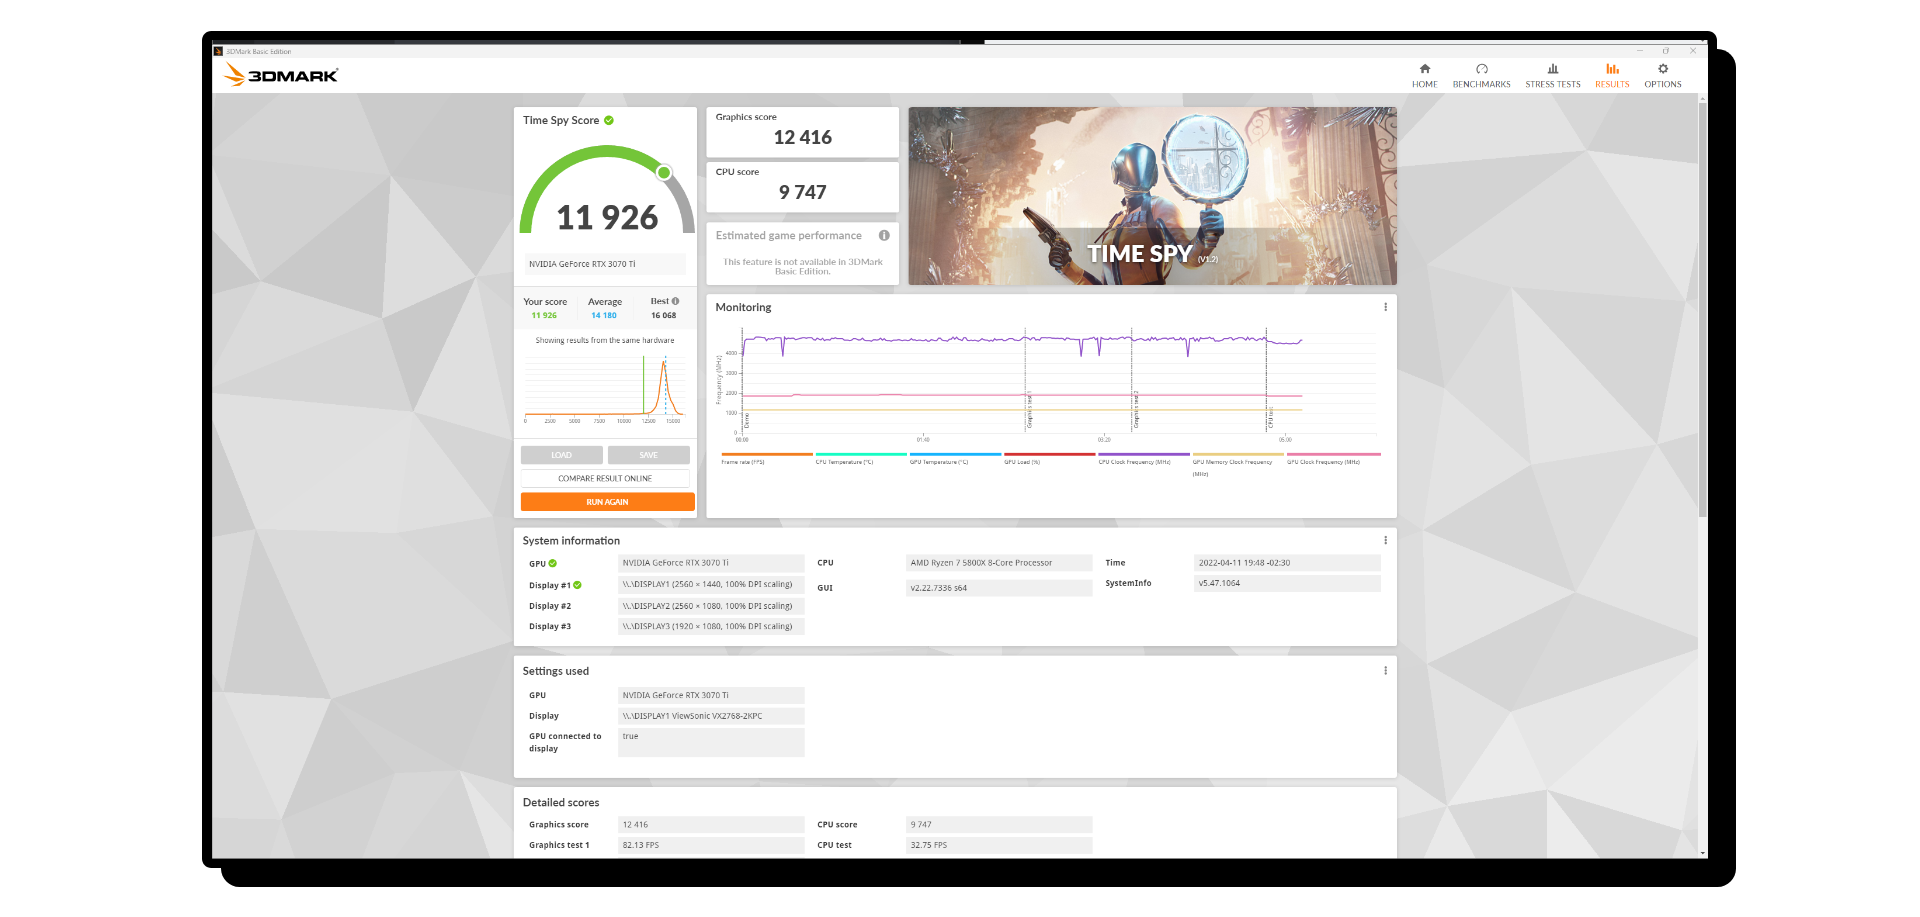
- 3DMark: A popular benchmark for testing performance gains and stability under load.
These tools will help you push your GPU safely while avoiding crashes or long-term damage.
How Much to Overclock?
A common mistake beginners make is copying pre-set overclocking values from online guides. The problem? No two GPUs are identical even if they’re the same model from the same brand.
Your GPU’s overclocking potential depends on the “silicon lottery” a term for the natural variation in chip quality during manufacturing. Higher-quality silicon can handle faster speeds and lower voltages, but there’s no way to tell this just by looking at your GPU.
A word of caution: Pushing your GPU’s clock speeds too high will generate more heat. If your PC’s cooling isn’t robust or your room temperature is already warm, dial back your overclocking goals. This ensures stability and helps your hardware last longer.
The Procedure
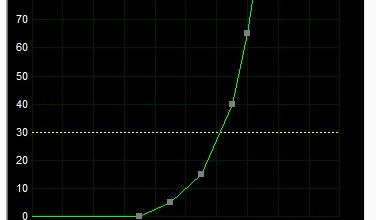
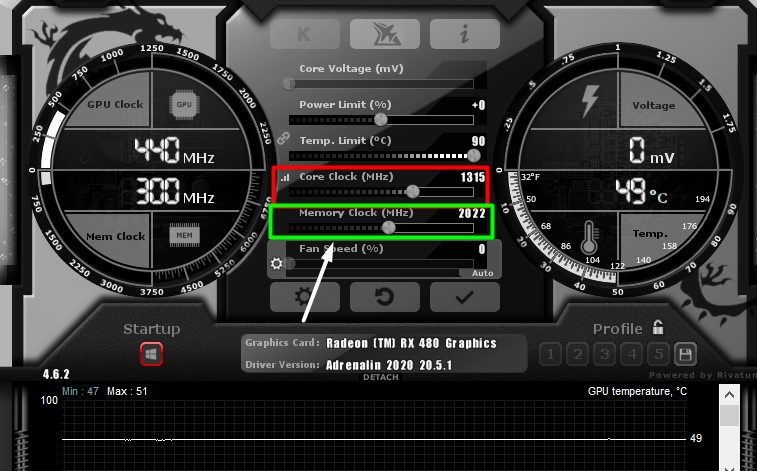
To begin, open MSI Afterburner. You’ll see five sliders, each labeled with its specific function (e.g., Core Voltage, Power Limit). Below these, the interface displays real-time GPU and memory clock speeds, along with temperature readings.
Next, launch Unigine Heaven and configure your graphics settings (resolution, quality presets) based on your display and system specs. For high-end GPUs, consider using 2560×1440 resolution (if your monitor supports it) to push the card harder. For mid-range systems, 1920×1080 is sufficient.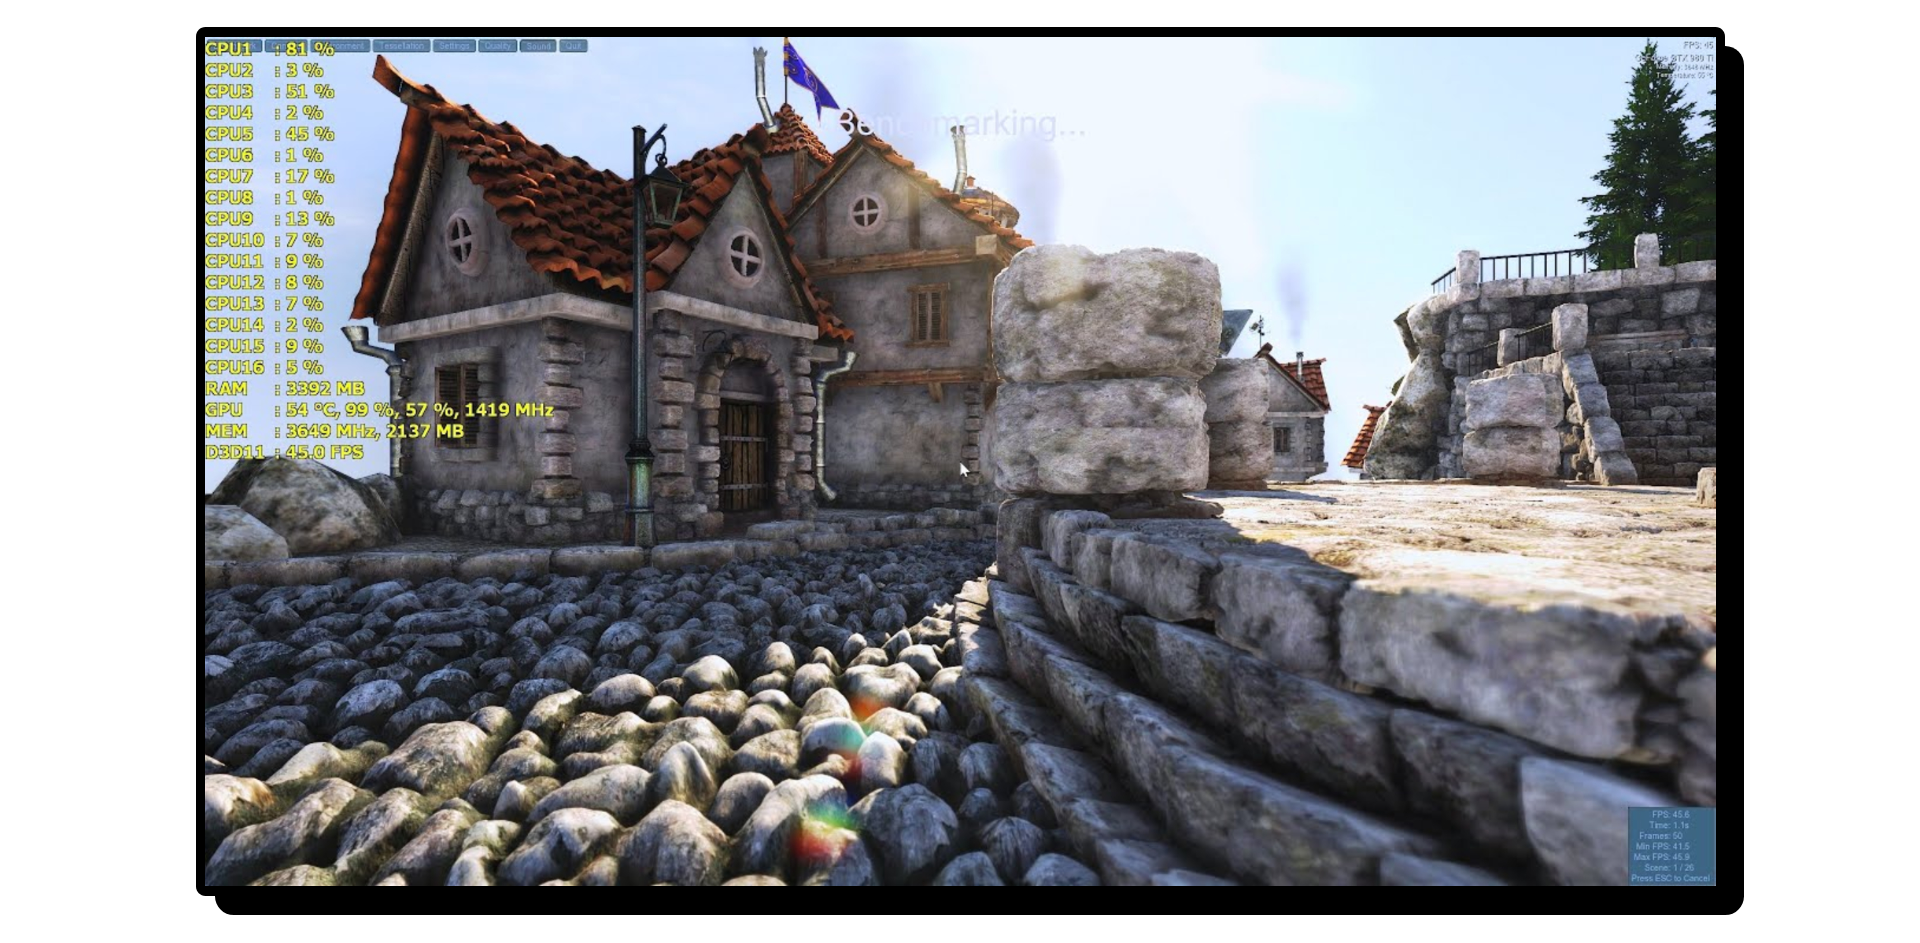
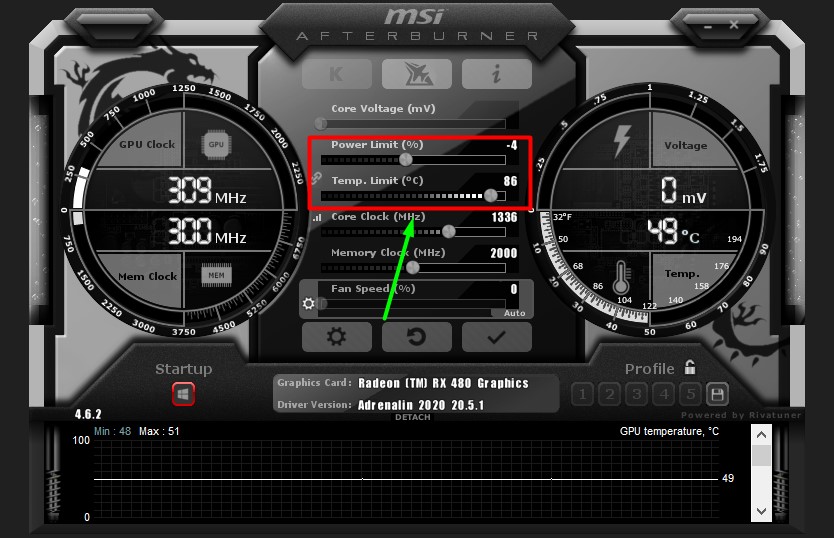
- In Afterburner, move the Power Limit slider to the maximum (far right). Set a reasonable Temperature Limit (e.g., 85°C). If successful, skip to Step 5.
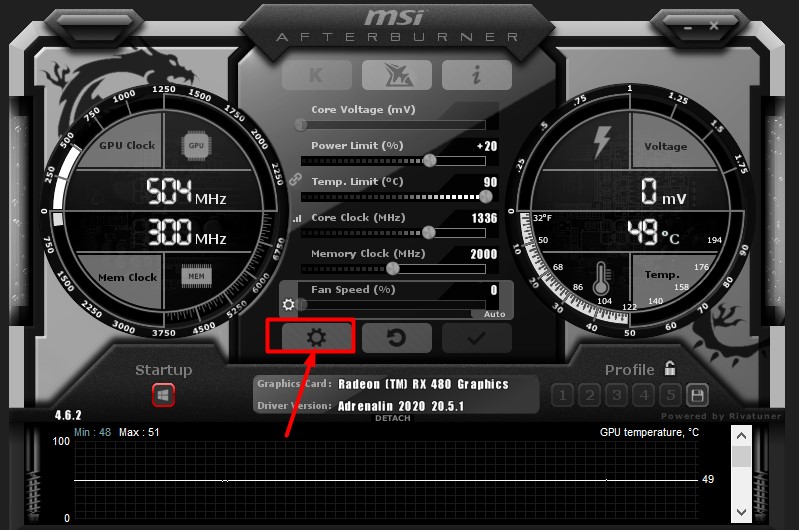
- If the sliders are grayed out, click the gear icon to open Afterburner’s settings.
- Under the General tab, check these boxes under Compatibility Properties:
- Unlock voltage control
- Unlock voltage monitoring
- Force constant voltage
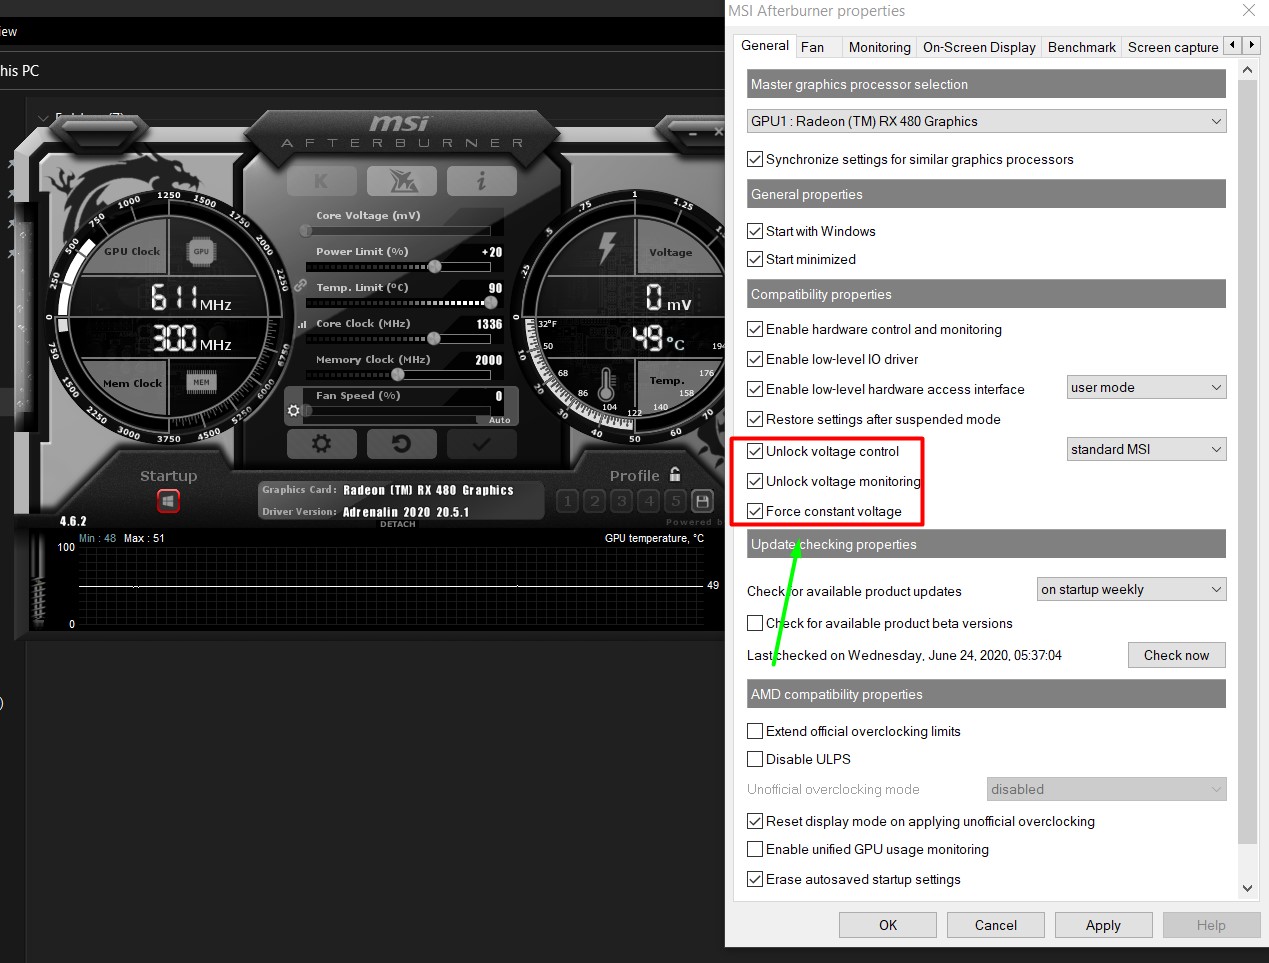
- Restart MSI Afterburner and set the Power Limit (%) to maximum.
- Increase the Core Clock by 10-15MHz increments, then click Apply.
- Switch to Unigine Heaven and monitor for frame drops, stutters, or visual artifacts (glitches).
- If the benchmark crashes, reduce the clock speed to the last stable value and rerun the test.
- Repeat Steps 5-7 for the Memory Clock.
Once you’ve finalized your overclock, run the 3DMark benchmark to measure performance gains and monitor your GPU’s temperature. Test your settings further by playing graphically intensive games to stress-test your GPU. If you notice crashes or instability, reduce the clock speed slightly.
If your GPU runs hot but the fans aren’t ramping up sufficiently, adjust the fan curve for better cooling. Check out Appuals’ in-depth guide to optimize your GPU’s fan settings. If overheating persists, dial back your overclock slightly to ensure stability.