How to Use Dashlane: The Complete Guide
First off, congratulations on choosing Dashlane as your password manager. You made the right choice. There are several great password managers and I understand that settling for one can be painstakingly hard but Dashlane is, without doubt, my number one recommendation. I even have a full post on why you should trust Dashlane.
It is secure and has a number of features that are not only convenient for password management but browsing the internet in general. Like the Dashlane VPN or the automatic filling of online forms. Nevertheless, if it’s your first time using the software then all these features can be a little hard to implement. This is why it was necessary to come up with this ‘How to’ guide. So regardless of whether you are using Dashlane on your PC or mobile phone, you should find everything you need here. This is irrespective of the operating system you are using. Dashlane is even compatible with Linux and Chromebook operating systems.
Installation and Configuration
If you already have Dashlane installed then skip this test. If not, then you can download it from above. Note that If you are using Google Chrome browser then you will first be prompted to download the browser extension before you can download the desktop application.
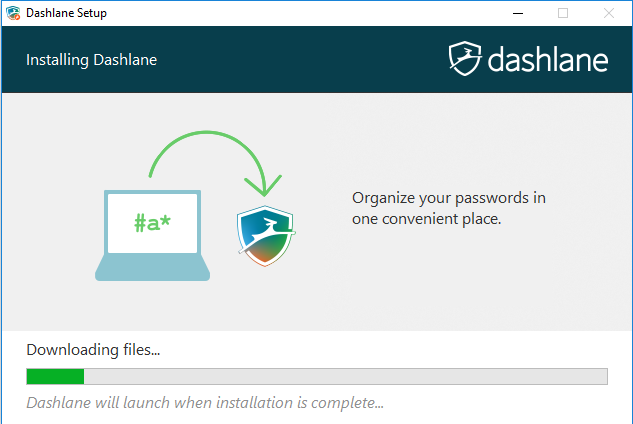
Once the download is complete then run/open the file. Dashlane will begin downloading the necessary files which may take anywhere from 3-10 minutes depending on the speed of your internet.
And then it will launch into the Sign-in page. It does not include any installation processes.
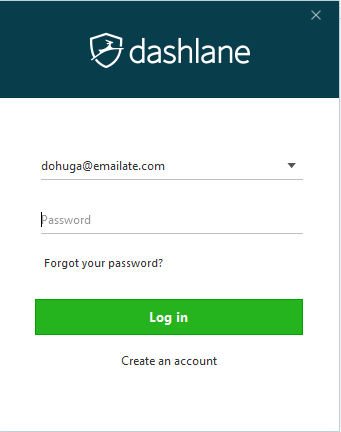
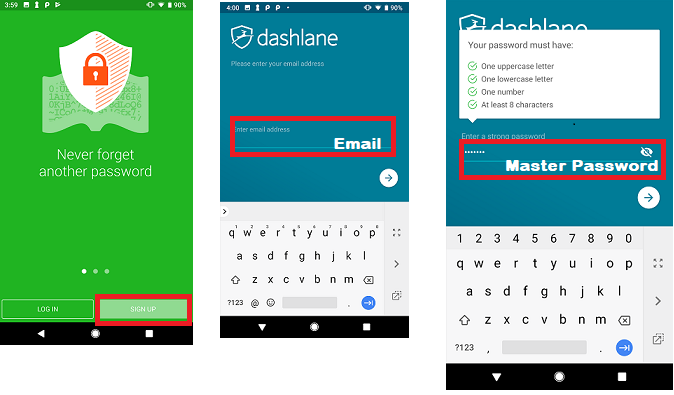
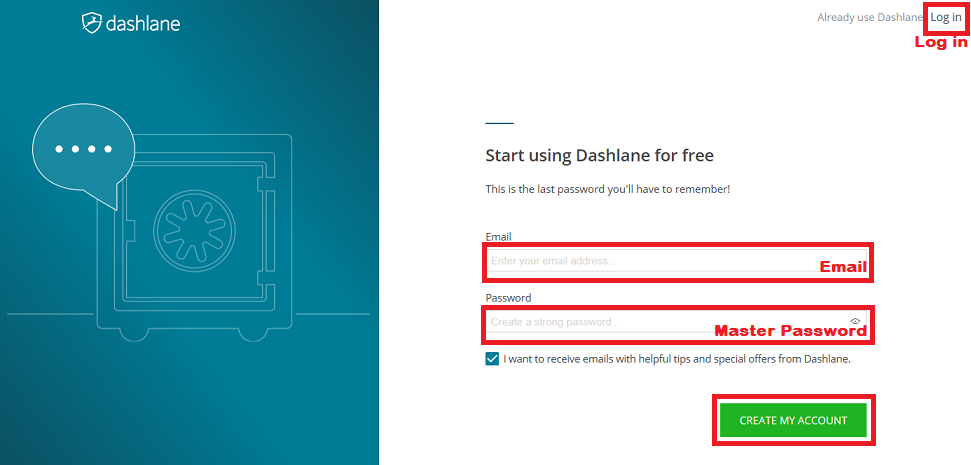
If you already have a Dashlane account then input the login details and proceed but if you are a new user then select the ‘Create an account’ option.
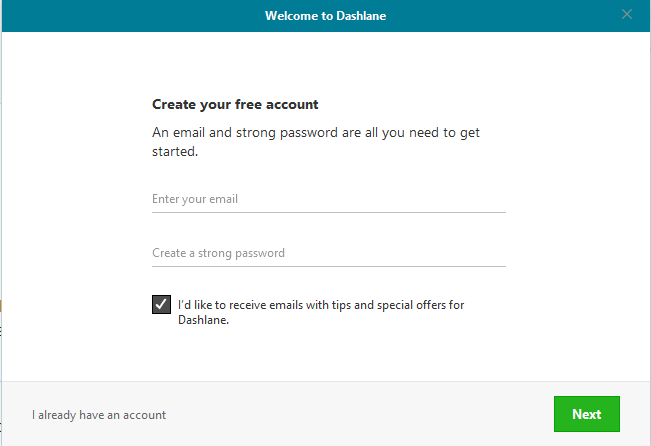
Dashlane already has a set password guideline to help you come up with a strong password but I still recommend you make your password as strong as possible. This is the master password and also the only password you will ever have to remember again so you are allowed to go big.
Also, this is the password that Dashlane uses to encrypt and decrypt all your saved passwords. And as part of their zero-knowledge security policy, the password will neither be stored on their server nor locally on your computer. This helps enforce security by ensuring that hackers cannot steal the password but it also means that if you forget it you lose access to your saved passwords. The master password cannot be recovered.
Importing Your Passwords to Dashlane
So you have already configured your Dashlane account you can now begin managing your passwords. The first step will be to import all the passwords that you have saved on your browser to Dashlane. Luckily, Dashlane automatically scans your browsers during set up and your job will be to select the passwords that you want to import.
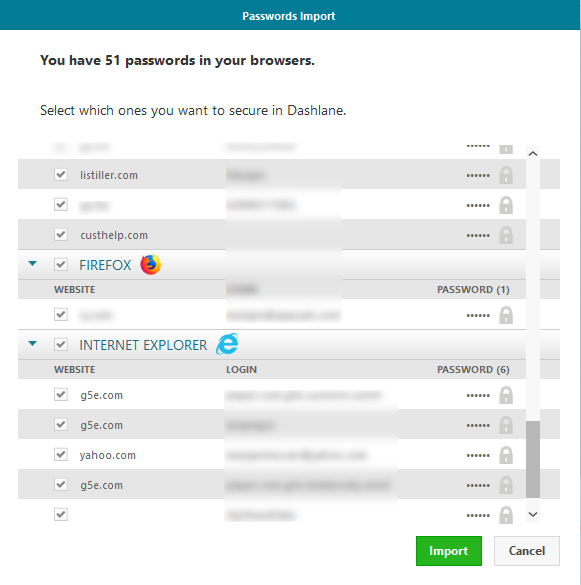
But if this step is not available during startup, you can still perform it manually. Just go to file section at the top-most part of the interface and select import passwords.
Dashlane will show you a list of browsers together with a number of other password managers from which you can import your passwords from. Some of the supported password managers include LastPassword, 1Password, and RoboForm.
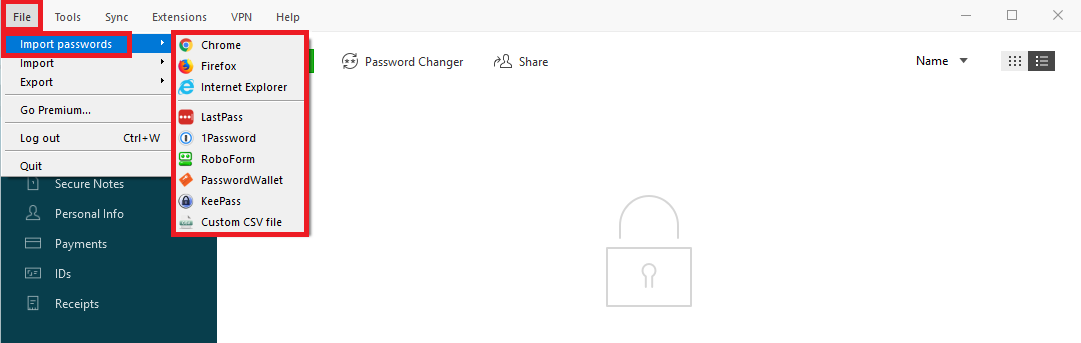
Additionally, Dashlane allows you to import passwords that are in a CSV file. This will work when say you had a physical copy of passwords in your computer or if your previous password manager is not among those supported by Dashlane. For the latter, you will first need to export the passwords from your previous manager into a CSV file which you can then upload to Dashlane.
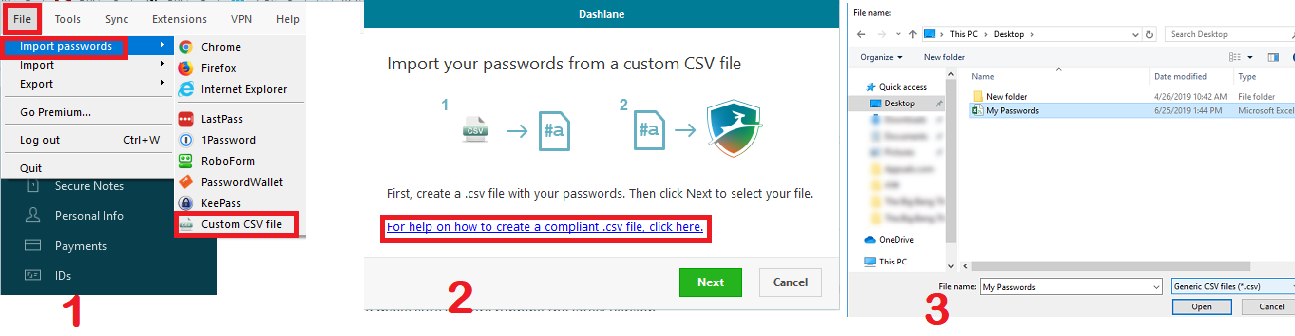
Go to the File option, ‘Import passwords’ and then select the Custom CSV file. This will direct you to your file manager. Navigate to the folder where the CSV file is stored and open it. Check this guideline by Dashlane on how to create a compliant CSV file.
Alternatively, you can add each password manually. Go to the passwords section and click on Add new. You will be prompted to enter the site URL, the Username and then the password you use to log in to the site. Dashlane then adds the password to the vault.
Here you can also put your password to the various provided categories so that they can be easily found when you need them. Or you can leave Dashlane to auto-categorize it for you. It is pretty efficient.

Nonetheless, we can agree that adding all your passwords one by one is a lot of work. So Dashlane provides you with another shortcut. Saving your passwords as you continue using the software. Every time you log in to a new website, Dashlane will display a pop up requesting to save the password.
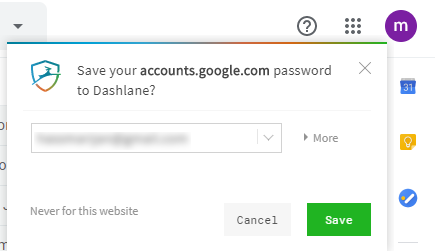
After a while, you should have all your passwords saved in the vault to enable you to log in to the sites automatically. This feature requires that you have the Dashlane browser extension enabled.
Enabling the Dashlane Browser extension
As I pointed out earlier Google Chrome users are prompted to install the web extension before the application. But other users will have to activate the extension after they have installed the desktop application. Here is how to do it.
On the topmost part of your Dashlane interface, click on the option labeled Extensions. This will extend to bring you the option to manage extensions on the various browsers installed on your computer.
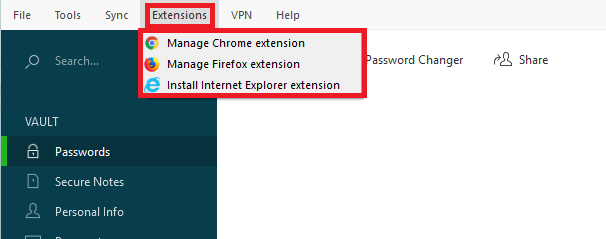
Click on the appropriate browser and you will be directed to Dashlane’s official site where you can download and add the web extension to your browser. Without this browser add-on then you would have to copy passwords from the Dashlane app every time you wanted to log in to a page and that is too much trouble.
You are all set up now. Let’s look at other ways to make use of the Dashlane password manager.
How to Use Dashlane Password Changer
The password changer is a nice feature that allows you to change site passwords directly from Dashlane. It works in conjunction with the password health feature which determines your passwords’ safety level by checking how strong they are and how many times you have reused them.
Unfortunately only a selected number of sites allow you to update your password directly from Dashlane. You can check all of them here.
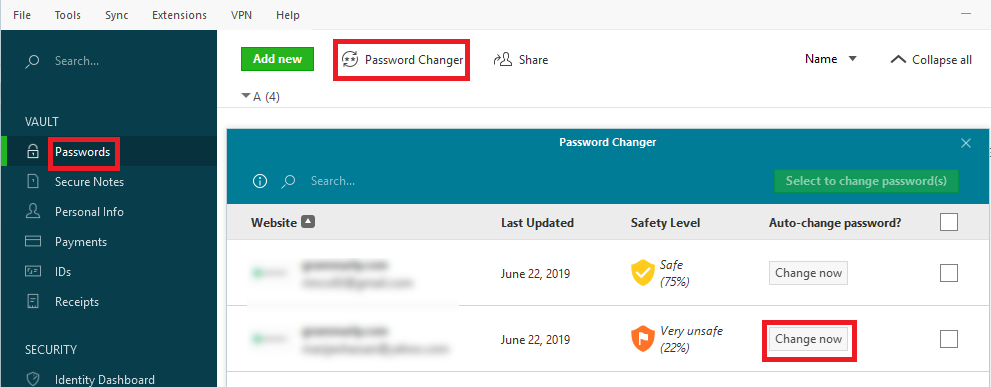
To use password changer go to the Passwords option on the left pane of the Dashplane interface and select Password Changer. Dashlane will list all your passwords that are in its list of supported sites, show you their security level and then provide you with the auto change option.
You will still be able to check the health of passwords from other unsupported site but then you have to follow their set guidelines for updating the passwords.
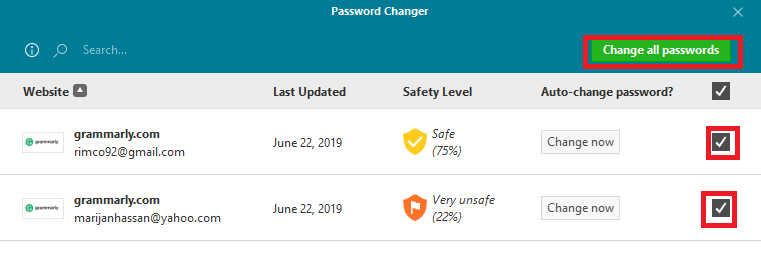
You can also change multiple passwords at the same time by marking their specific boxes and selecting the ‘Change all Passwords’ option.
For all the other passwords you will still be able to check their health level but you will have to change them manually by visiting the site.
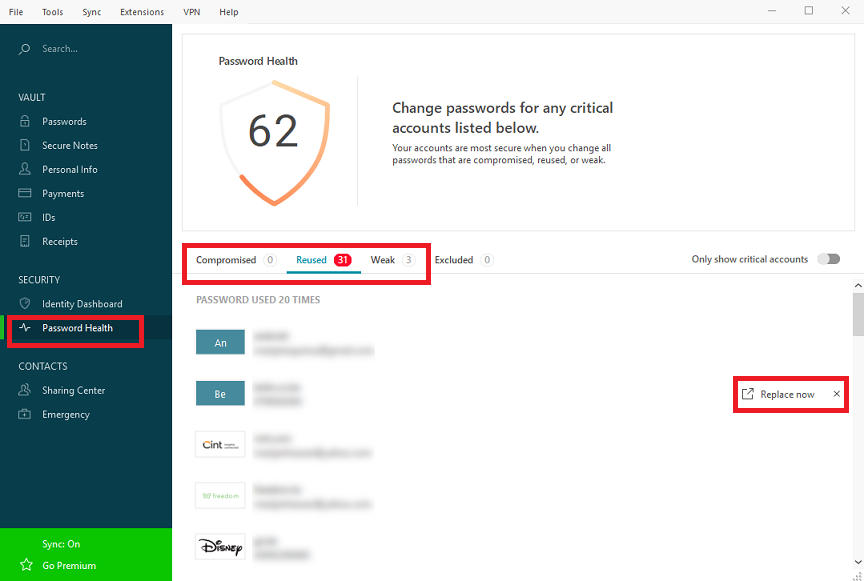
To do this, go to the ‘Password health’ section on Dashlane’s left pane and view the various performance metrics. Here you will be notified whether a password has been compromised, reused, or is weak.
When you hover over a specific password you can see the ‘Replace now’ option which redirects you to the official website. Log in to the site and proceed to change your password.
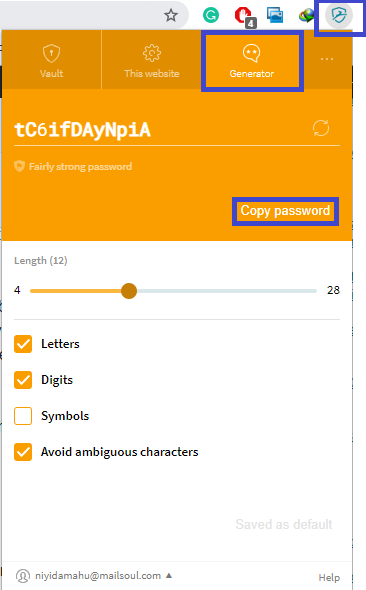
When updating your password you can make use of Dashlane’s password generator to come up with the best password.
Click on the Dashlane icon on your browser’s bar and navigate to Generator. There is a slider that lets you customize the size of your password after which you can copy it and paste it on the password field you want to update.
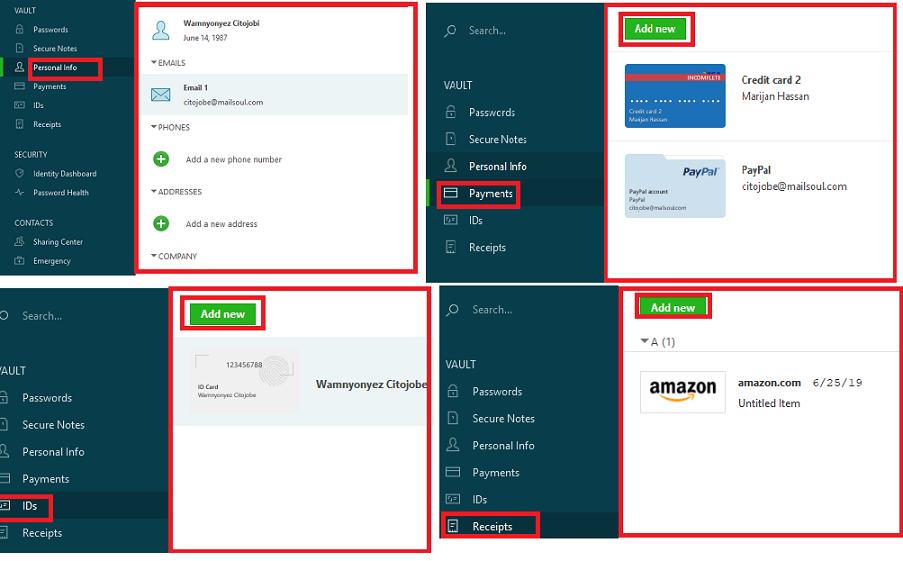
How to Add your Personal Information
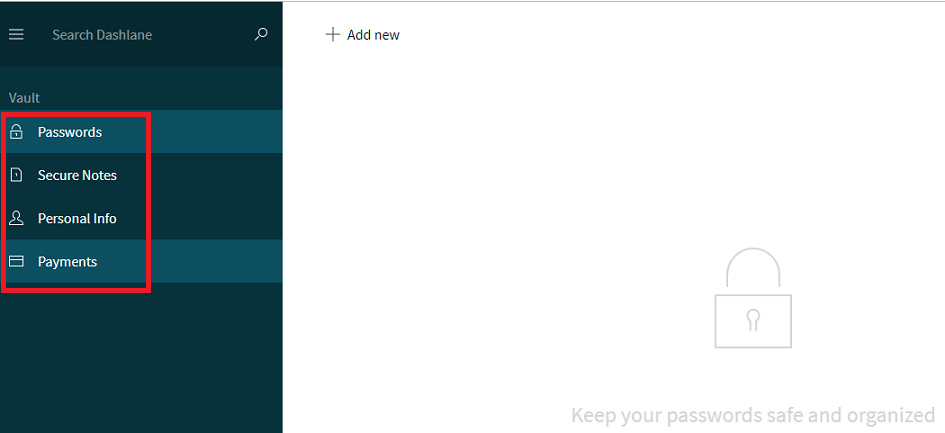
Dashlane also allows you to store your personal information that will be automatically added when filling online forms. The type of information you can add include Name, Email address, Phone address, address, company, and website address. You can also add payments to help you with online purchases. All these options are available from the left panel of the software interface. Clicking on them will open the detail addition page.
How to share passwords using Dashlane
In case you want to share the password to a specific site with someone then you can easily do this from Dashlane.
Simply go to the Sharing center and click on Add new. Select the specific password and then enter the recipient email.
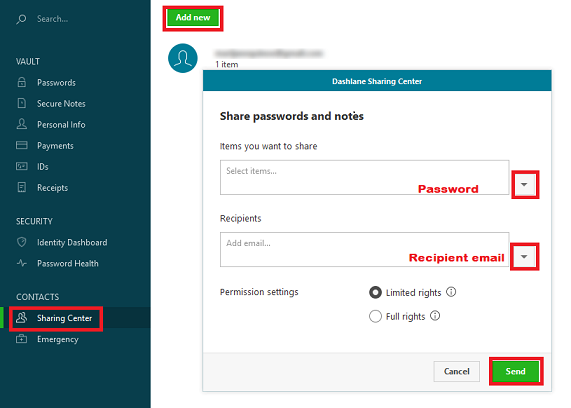
Dashlane provides you with two permission settings you can assign to the password. Limited rights allow the recipient to only use the password while Full rights allow the receiver to view, edit, share and even revoke your access to the password. That last bit about revoking access is an overstretch if you ask me. Too much power
Using Dashlane VPN
Dashlane VPN is a nice addition to the password manager that provides extra security when browsing on public and untrusted internet connections. It may not match a dedicated VPN software but considering you are not paying any extra money to use it’s worth it.
To configure the VPN go to the ‘Set up VPN’ option on the top bar and click on the ‘Set up’ button.
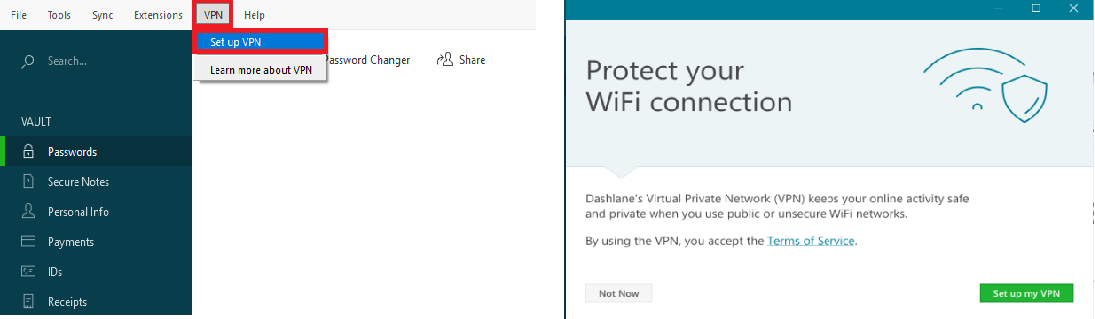
This will open a wizard that initiates the configuration process. Once setup is complete the VPN options will change.
Now when you click on VPN there will be an option to connect, select country and Disconnect. I don’t think that the first and last options need an explanation. Connect will activate the VPN while Disconnect will disable it.

The ‘Select country’ option is a new addition to Dashlane. It allows you to spoof your location to any of the available 26 countries. Just select the country of your choice and the VPN will update your location accordingly. Dashlane VPN is only available for the paid version of the software. You will, thus, not be able to access it if you are on the 30-day trial version.
How to Setup Dashlane on Android and iOS
If you understood the setup process of the Desktop application then you should have no problem using Dashlane on Android and iOS. It has a very intuitive user interface and all the steps followed in using the desktop version basically the same as the mobile version.
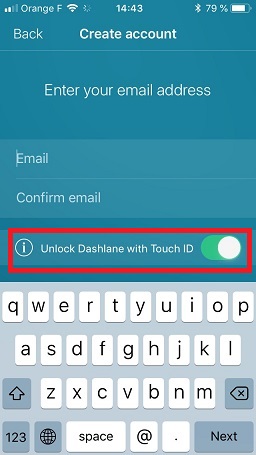
The only difference is that the iOS application also allows you to use a PIN or Touch ID that enables you to login using your fingerprints.
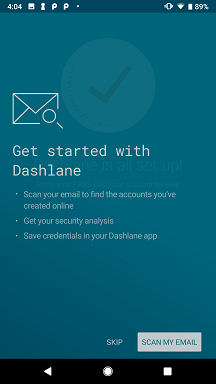
Also, the iOS and Android applications do not allow you to import your passwords from the web browser. Instead, they scan your Mailbox using the Inbox Scan feature, find the accounts you have created online using that specific email and import them to Dashlane account. This option is available during launch but it can also be accessed later by clicking on the tools, menu and tapping on inbox scan.
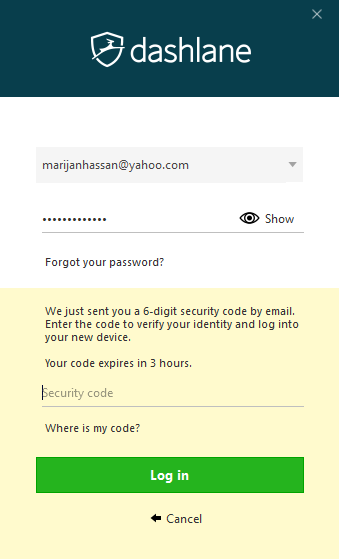
Before any new advice can access your Dashlane account it must first be verified using a 6-digit number that is sent to your email. This is known as 2-Factor authentication and is meant to enhance the security of your account.
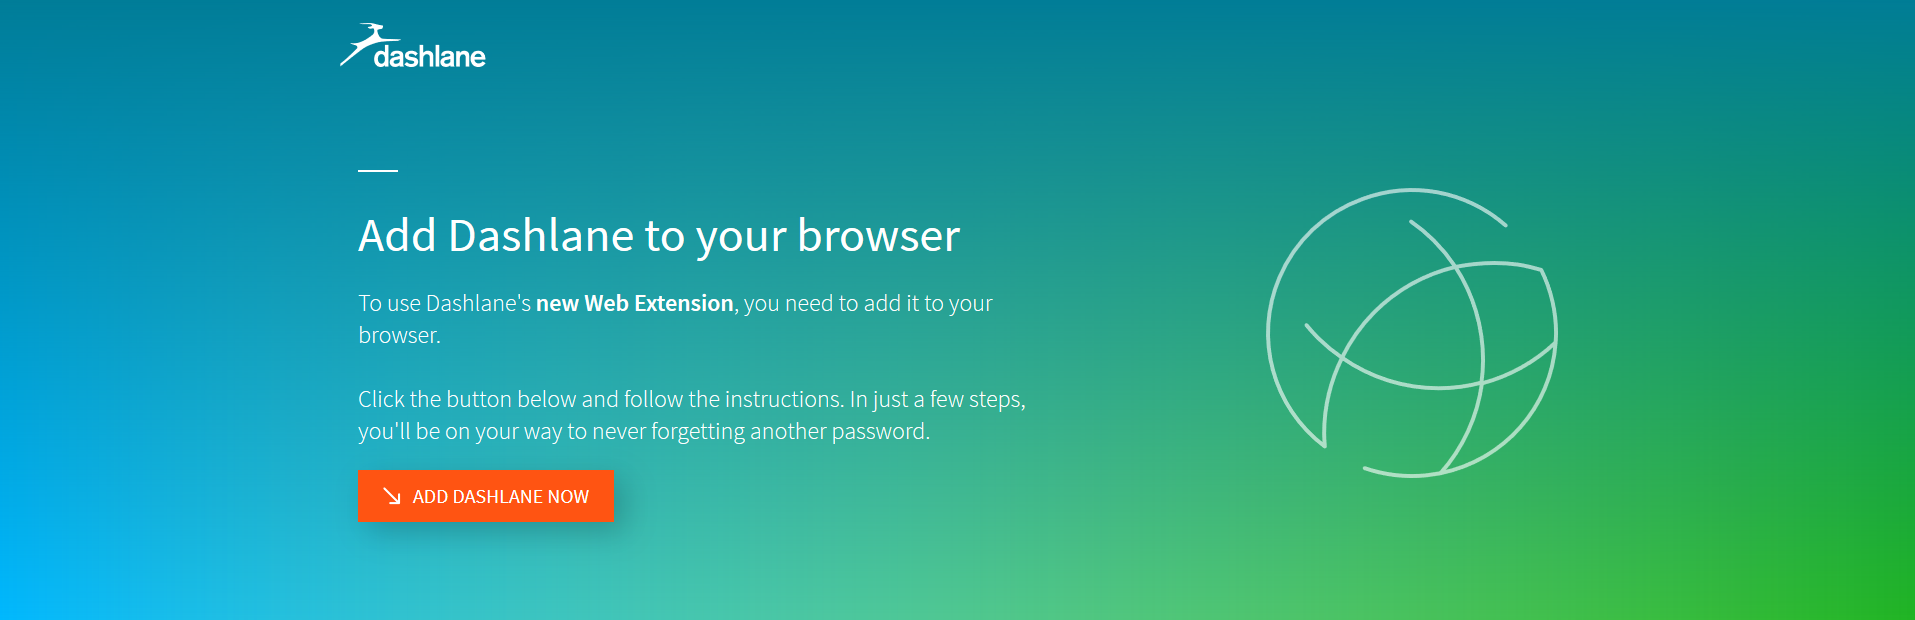
How To Use Dashlane in Chromebook and Linux
Since these two operating systems do not have dedicated applications, then you have to use the Dashlane web extension to secure and manage your passwords. Click here to add Dashlane to your browser. As it currently stands the extension can only be used on Google Chrome, Mozilla Firefox, and Edge.
Once the extension has been added successfully then it will automatically launch to a ‘Create My Account’ interface. If you already have an account select login button at the top right part of the interface. Otherwise, fill in the required details and proceed to create your Dashlane account.
If your account is properly set up you should now be able to see the Dashlane icon on your browser’s toolbar. It’s teal in color. At least that’s how Dashlane describes it. Ask me and I will tell you that it’s blue.
Double click on the icon anytime you want to launch the web application. This app allows you to add new passwords, add notes and attachments for security and also add your personal information that will enable auto-filling of online forms. You can also add your payment information like your Debit card or PayPal address. During setup, the Dashlane web app will prompt you to import any passwords that you may have stored on your browser to its secure database.
If you click on the Dashlane web icon once, it gives you quick access to your password vault and the password generator feature.
And that would be all. Everything you need to know about the installation and use of the Dashlane Password Manager. In case you have any more question regarding how to use this software then you can leave a comment and we will update the post accordingly.


