How to Unlock and Root the Realme X2 and X2 Pro
The Realme X2 is one of the best mid-level gaming phones, along with its higher-spec variant, the Realme X2 Pro. The X2 Pro comes with a 6.5” AMOLED screen, Qualcomm SM8150 Snapdragon 855+ (7 nm) chipset with Adreno 640 (700 MHz) GPU, and 6GB/8GB/12GB RAM variants.
Rooting either of these phones is rather easy, but one thing you need to be aware of for rooting the Realme X2 Pro. It was launched in Android 9 and later updated to Android 10, so the steps and required files are a little different depending which Android version you are running. Pay attention carefully to our steps given and comment if you experience any difficulty.
Method for Realme X2
Requirements:
- ADB and Fastboot (see ADB’s guide “How to install ADB on Windows”)
- Vbmeta.zip for Realme X2
- TWRP for Realme X2
- Latest Magisk
- Extract the vgmeta.img file from the vbmeta.zip you downloaded, and transfer it to your phone’s storage. Also transfer Magisk.zip to your device storage.
- Install the Deeptesting APK on your phone.

- Launch it and tap “Start Applying”, then go through the process.
- You may need to wait a given amount of time for your application to be approved (1 hour up to 1 week).
- After it is approved, you can tap “Start the in-depth test”, and hold the power button to boot into Fastboot Mode. If holding the power button doesn’t automatically bring you to Fastboot Mode, try manually entering Fastboot Mode using ADB.
- Once you’re in fastboot mode, connect your phone to your PC, launch an ADB terminal and type these commands:
fastboot flash recovery twrp.img
fastboot flash --disable-verification vbmeta vbmeta.img
- Now hold the volume buttons and power button together to reboot directly into recovery mode.
- Once in recovery mode, flash the Magisk.zip, and reboot into Android system.
(Optional) In order to have Magisk out of Core Only Mode (not needed with ColorOS 7/Android 10):
Boot into TWRP, mount SYSTEM in RW mode and use these ADB commands on your PC:
adb shell "cat /system/build_19771.prop >> /system/build.prop"
adb reboot
Method for Realme X2 Pro
Requirements:
- Deeptesting.apk for ColorOS / Realme UI (Android 9 / Android 10)
- OrangeFox recovery
- Vbmeta.img
- Magisk.zip
- Install the Deeptesting APK file depending on which Android version your Realme X2 Pro is running.

- Launch the app and tap “Start applying”. At the end of the application, you can minimize the app and check back in an hour or so to see if your unlock request is approved.
- After approval is given, tap “Start the in-depth test”.
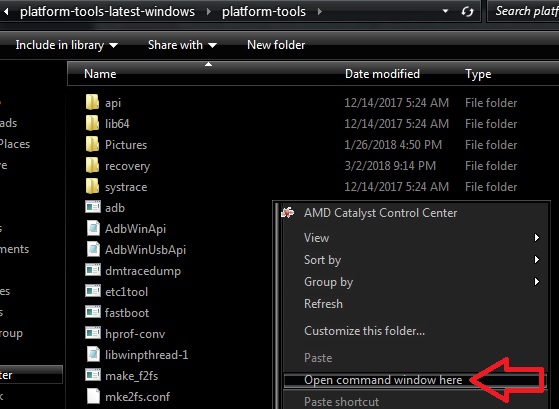
- Connect your phone to your PC via USB, and launch an ADB command window.
- If your phone doesn’t automatically reboot to a screen with a green “START” message, type in ADB: adb reboot bootloader
- Unlock the bootloader with: fastboot flashing unlock
- Confirm the bootloader unlock option using the volume buttons (volume up for Android 9, volume down for Android 10).
- In your ADB terminal on your PC, type: fastboot reboot
- Your Realme X2 Pro will now reboot and perform a factory reset, then boot into the Android setup wizard.
If you plan to root your phone, transfer the Magisk.zip to your phone’s storage.
Flashing OrangeFox Recovery
OrangeFox is a themed version of TWRP that seems to work a bit better on Realme devices.
From our requirements section, download both OrangeFox and Vbmeta.img, and place them in the main ADB folder on your PC.
Turn off your Realme X2 Pro, and boot into fastboot mode with Volume Down and the Power button.
If you will root the device:
- Connect your phone to your PC, launch an ADB terminal on your PC, and type:
fastboot flash recovery OrangeFox-R10.1_1.img - Now tap Install>choose the OrangeFox.zip and swipe to flash it.
- Tap “Reboot Recovery”, and flash the Magisk.zip the same way.
- Reboot recovery again, then flash the Vbmeta.img.
- Clean caches and reboot to system.
- Verify root with the Magisk Manager app.
If you only want OrangeFox recovery without root:
fastboot flash recovery OrangeFox-R10.1_1.img
fastboot flash vbmeta vbmeta.img
Now hold volume down until you see Volume Down until you see “Recovery Mode” in the top, and press the Power button.


