How to Turn Android Phone into a Wifi Extender
Nearly everyone knows about hotspot sharing on Android devices – creating a WiFi network on your phone that shares your data connection with other devices. It’s impossible to enable WiFi and Mobile Hotspot together on 99% of Android phones, to the chagrin of people who Google this question every day.
But what if you wanted to share a pre-existing WiFi network that your Android is already connected to? For example, if your Android phone can get WiFi signal that your PC’s weak USB adaptor cannot detect? No, I’m not talking about USB tethering – today I’m going to show you a bonafide method of turning your Android device into a WiFi repeater, sharing a router-based WiFi network with other devices.
Method 1: FQRouter2
This method will probably work on only 2% of modern devices, but it’s worth a shot if you’re one of the lucky few. FQRouter2 hasn’t been updated in a few years, and it was developed for older Android devices, around the KitKat era. In fact, it was actually developed to bypass Chinese government firewalls, so Chinese netizens could watch Youtube videos etc., through its built-in VPN.
The modern problem is that an Android phone needs to have WiFi repeater capable software – which a vast majority of modern devices do not. They used to in the Android 4.4 days, but then manufacturers realized they could make some extra bucks by stripping out wifi repeater technology and replacing it with mobile hotspot, which of course consumes your data connection.
If you have an old Android KitKat device laying around, all the better. Of course, your device also needs to be rooted for this app to work – search Appuals for a “how to root Android” guide for your device.
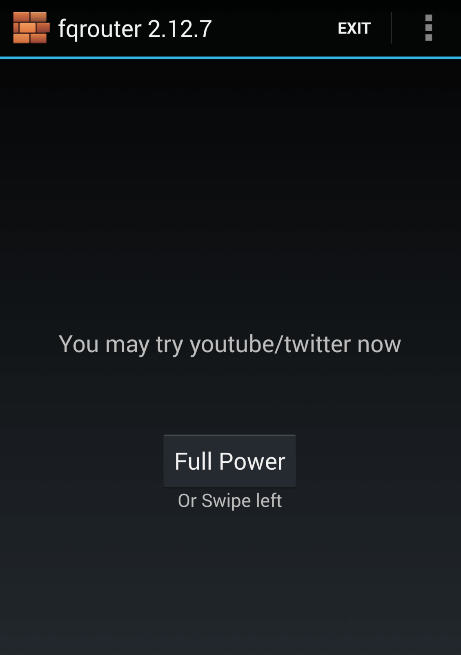
Start by downloading the FQRouter2 app, and launch it. Wait for it to load, and then press the “Full Power” button. It will then present you with new options: Free Internet and WiFi Repeater.
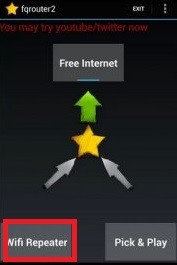
Ignore the “Free Internet” button, this was originally developed as a method of sharing proxied, non-restricted internet to other devices in China, like an uncensored wifi hotspot. You want to enable your WiFi connection on your Android device and press the “WiFi Repeater” button.
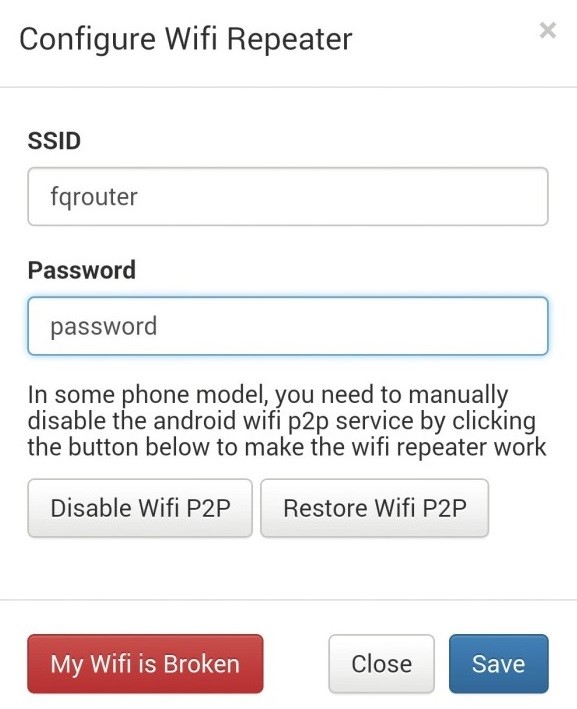
Now you want to go into FQRouter2 Settings, and tap “Configure”. This will allow you to set up the SSID/password of the wifi network, similar to Mobile Hotspot. Warning: Do NOT press the “My Wifi is Broken” button. This will delete all of the saved networks and passwords on your device. In any case, after configuring the FQRouter2 hotspot, you should be able to connect with another device.
Method 2: Netshare-no-root-tethering
Here’s an app that deserves to be on the front page of Google Play – Netshare-no-root-tethering. This app should work on a majority of devices, unlike FQRouter2, but the drawback is that the VPN connection combined with WifiDirect technology makes the connection very slow. Its fine for browsing Facebook and checking emails, but don’t plan on downloading any games over this connection – however, the developer has promised to address the speed issues in future updates.
First you’ll need to install the Netshare app on your Android device, and then follow my instructions depending on what other device you’ll be sharing with.
If you’re sharing the wifi with another Android device:
- Install the Netshare app on both
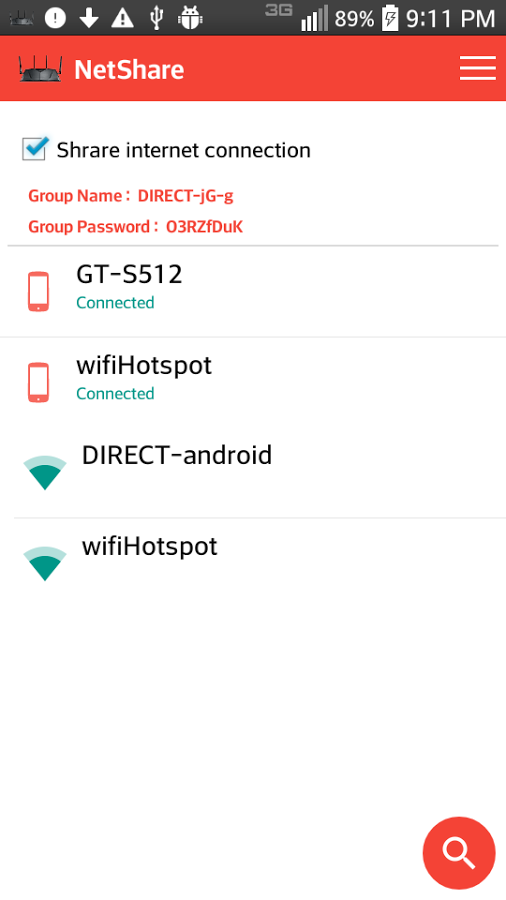
- Open the Netshare app on the first device that will be sharing wifi.
- Press the “Share internet connection” checkbox. It will give you a group SSID and password.
- Launch the Netshare app on the second device, and connect to the SSID with the password from Netshare.
- Accept the VPN pairing dialogue on the second device, if you receive one.
- Surf!
If you’re sharing the wifi with a desktop / laptop computer:
Follow the same instructions as above, except you’re not installing Netshare on the computer. What you want to do is launch the Netshare app on your Android device, press the “Share internet connection” button, and connect to the SSID on your desktop/laptop.
Now for Windows users, go into Control Panel > Network and Internet > Internet Options.
Click the “Connections” tab at the top of the Internet Options window, and then click the “LAN Settings” button at the bottom. Now check the box for “Use a proxy server for your LAN”.
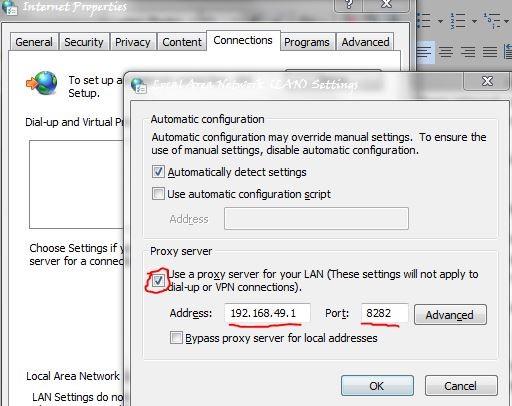
Set the address and port like this: Address: 192.168.49.1, Port: 8282
Click OK, and you’re all set to surf.
Installed NetShare and got it working. Thanks Kevin. Although could not get fqrouter2 working.