How to Troubleshoot WiFi Drivers on Linux
Wi-Fi drivers can sometimes be difficult to configure in Linux, even if they otherwise work when you start your computer up into a version of Microsoft Windows or another operating system. You may find that a wireless network adapter fails to automatically connect or you might even find that you have to click the connection icon more than once in a graphical environment to get it to work. Generally, what’s happening is that the system isn’t polling the driver long enough.
At first check to make sure you’re running the latest drivers for your hardware, and if that doesn’t work then take a look at the syslog to see if there’s unusual occurring. Drivers can sometimes periodically reset. Barring all of this, then you have another recourse. The syslog is a good place to start, but its location may be different in different distributions of Linux.
Method 1: Inspecting the syslog File for Wireless Driver Errors
If you use Debian, any version of Ubuntu regardless of graphical desktop interface, or any other Debian-derived distribution like Bodhi or Trisquel, then you can try tail -f ![]() to take a look at the last part of the file and see if there is any reference to your WiFi driver. The -f switch ensures that if something happens while you’re looking at it, then you’ll still see it as it comes up. Note that if you’re seeing a number of repeated disconnects to your WiFi driver, then more than likely it’s a hardware issue and you’ll want to make sure that your device is correctly attached to the physical system. If you instead see a number of USB disconnects, then this actually probably has little to do with the networking features the kernel offers. If you see a message such as:
to take a look at the last part of the file and see if there is any reference to your WiFi driver. The -f switch ensures that if something happens while you’re looking at it, then you’ll still see it as it comes up. Note that if you’re seeing a number of repeated disconnects to your WiFi driver, then more than likely it’s a hardware issue and you’ll want to make sure that your device is correctly attached to the physical system. If you instead see a number of USB disconnects, then this actually probably has little to do with the networking features the kernel offers. If you see a message such as:
New USB device found
New USB device strings
Then more than likely these are referring to mass storage devices you’re attaching and detaching from the system. However, pay close attention to those starting with a date and containing “New USB device found” if your WiFi adapter is connected via a USB port.
If you’re using Fedora, or anything that’s based on either Fedora or the enterprise-level Red Hat Linux distribution, then replace ![]() with
with ![]() in the previous command. If you can’t find it, then try the command more
in the previous command. If you can’t find it, then try the command more ![]() to find what directory the system messages are stored in. Should you want to view all of the syslog and not just the tail end, then use more
to find what directory the system messages are stored in. Should you want to view all of the syslog and not just the tail end, then use more ![]() or more
or more ![]() at the CLI prompt and then press the spacebar each time you want to go down one page of information.
at the CLI prompt and then press the spacebar each time you want to go down one page of information.
Method 2: Checking Out Network Manager Information
From a command prompt interface, try issuing the command nmcli nm wifi off. This should turn off your network adapter. Once you’ve done so, then try nmcli nm wifi on to turn it back on, then restart the computer. You may need either root access to reboot the computer through sudo reboot or, alternatively, you may have to reset it with the GUI. Typing reboot at the CLI and pushing enter may be enough on Ubuntu systems, but not for Debian.
Once the system is back up, see if this has corrected the issue. If it hasn’t, then run lspci -knn | grep Net -A2 and look at the information it provides.

This will tell you whether the machine is actually interfacing with the Wi-Fi adapter or not, and should provide more than enough information to correct the issue. If you’ve now completely ruled out hardware issues and feel that it might genuinely be a driver issue, then you’ll potentially need to install a closed-source driver. You’ll have to follow the instructions of your manufacturer if you’re on a distribution that doesn’t included closed-source material in the repositories, then you might have to contact the manufacturer or search on a Web forum for an installable package that suits your adapter. Users of Ubuntu and its various official Canonical-recognized derivatives like Lubuntu, Xubuntu and Kubuntu have a last recourse, however.
Method 3: Automatically Searching for Closed-Source Drivers
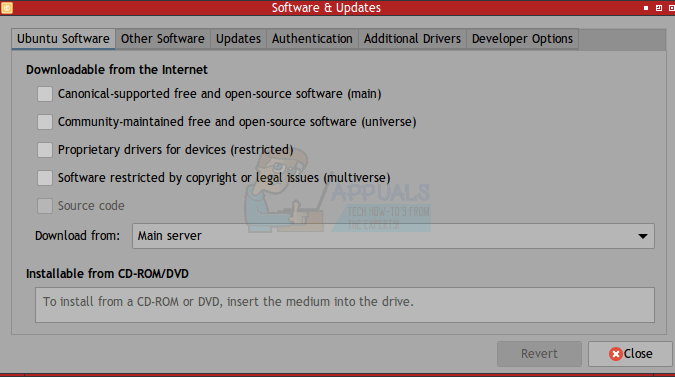
If you’re on any of the various *buntu distributions, then try opening up Software & Updates from the Dash, LXDE or Whisker menu. On the first tab that opens automatically, select “Canonical-supported free and open-source software (main),” “Community-maintained free and open-source software (universe),” “Proprietary drivers for devices (restricted),” and “Software restricted by copyright or legal issues (multiverse)” from the checklist. Some boxes may already be checked, and checking them might prompt you to enter your password.

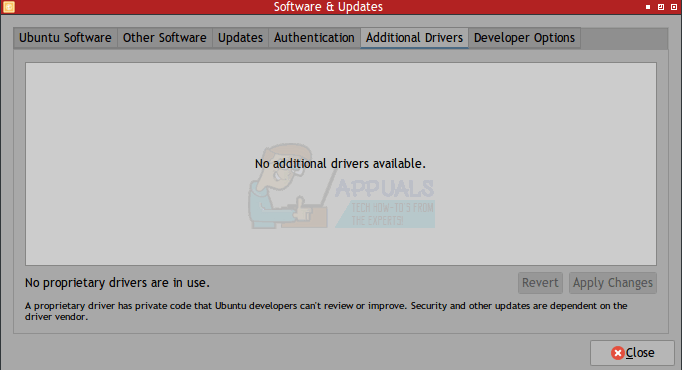
The program might tell you to update the repositories. If this is the case, then allow it to run the course by clicking on the Agree button. Keep in mind that this can take a while, and does generally require you to have networking capabilities. If possible, then use an Ethernet cord to attach your device directly into a modem or router until you get WiFi up and working. Once it’s run, then select the Additional Drivers tab.

The hardware manufacturer’s name viewed in Method #2 might show up in that box, and you can use their driver by clicking on Apply Changes. If it reads “No additional drivers available” and you have networking connection via a physical cord, then you might have to close it and reboot it. If there still isn’t anything, then run sudo apt-get update at the terminal while you have networking capabilities from a physical connection and then run sudo apt-get upgrade before opening up Software & Updates again. You may be asked to interactively respond to some prompts at the terminal while running these CLI commands, and your system might update other unrelated packages. Once these are through then you should be given the option to install the proprietary driver.
If this causes an unrelated problem or an open-source driver later becomes available and you’d prefer to eliminate closed-source code from your system, then you can always use the Revert button on the Additional Drivers sheet to purge it.