How to Setup Windows 10 on VirtualBox
Windows 10 was announced on July 29, 2015. It was a day long awaited by millions of Windows OS users, as Microsoft promised to put its best efforts into Windows 10, and it seems they have. They have fixed many things in the latest version of Windows, including the Start Menu, Windows Store, and much more.
So, if you are a Windows 8, OSX, or Linux user and you want to experience the most elegant version of Windows, but you don‘t want to install or upgrade your OS at the moment, you can definitely take advantage of the greatest facility available called VirtualBox. As the name suggests, VirtualBox is a virtual environment that allows users to try their favorite operating systems without installing them on their hardware. The guide below will help you set up Windows 10 on VirtualBox.
How do I set up Windows 10 on VirtualBox?
1. Downloading Windows 10:
The first thing you will be expecting to do is download Windows 10 from the Microsoft website. Fortunately, Microsoft has made it free to download from their site. Go to this link and select the 32-bit or 64-bit version of the OS from there. It will download an ISO file.
2. Downloading VirtualBox:
The next thing you will need is VirtualBox itself. VirtualBox is an open-source program developed by Oracle. Thus, you can download it free of cost.
Go to this link to download VirtualBox. Select the installer file specific to your particular OS and download it. After the download is finished, install and run the program.
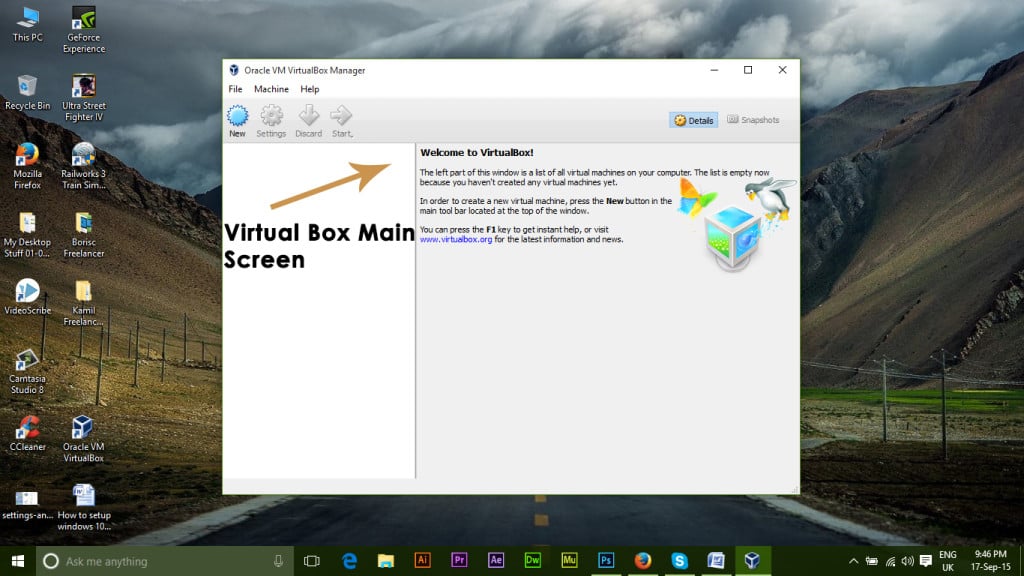
3. Creating a New Virtual Machine Inside VirtualBox:
After opening VirtualBox, click on the New icon button at the top left side of the window. A small window will appear, prompting you to enter the name of the virtual machine you want to create. You can enter any name in this box. It will also ask you to select the Type and Version of the OS you want to install. In this case, select Microsoft Windows as the type and Windows 10 (64-bit) as the version. Click “Next” after you are done.
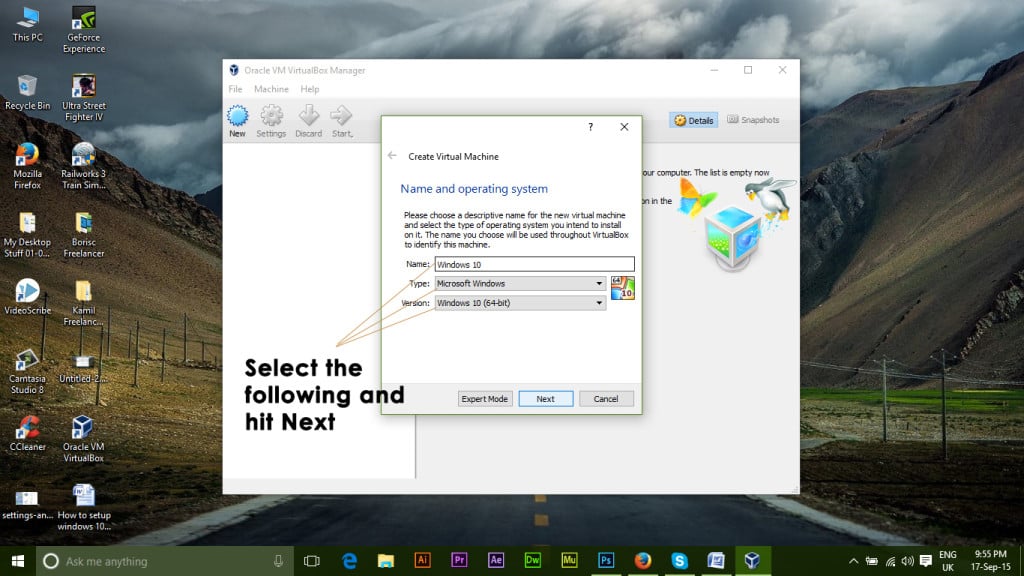
4. Allocating the RAM.
Every OS requires some RAM to function. Thus, RAM must be allocated to the machine for proper execution. This RAM is taken from your hard drive’s memory. Therefore, you need to select at least 2048MB of memory for Windows to work properly. Click ‘Next‘ to proceed to the next step.
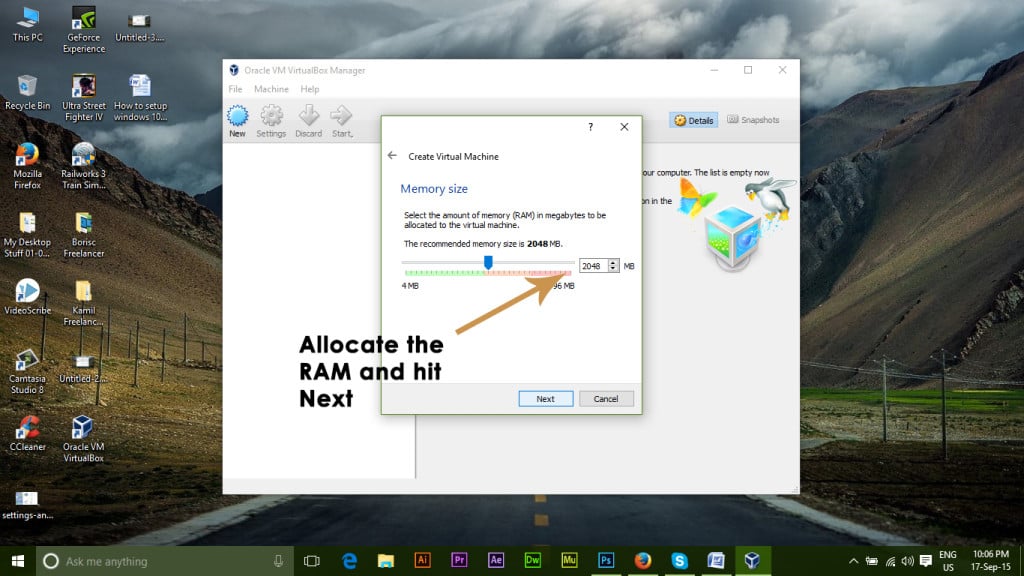
5. Allocating the Size of Hard Disk:
After clicking the ‘Next’ button several times, you will reach this important setting. It prompts you to choose the size of the disk you want to allocate for the virtual machine. Ensure that you select a size greater than 30GB. Afterward, click on the ‘Create‘ button.
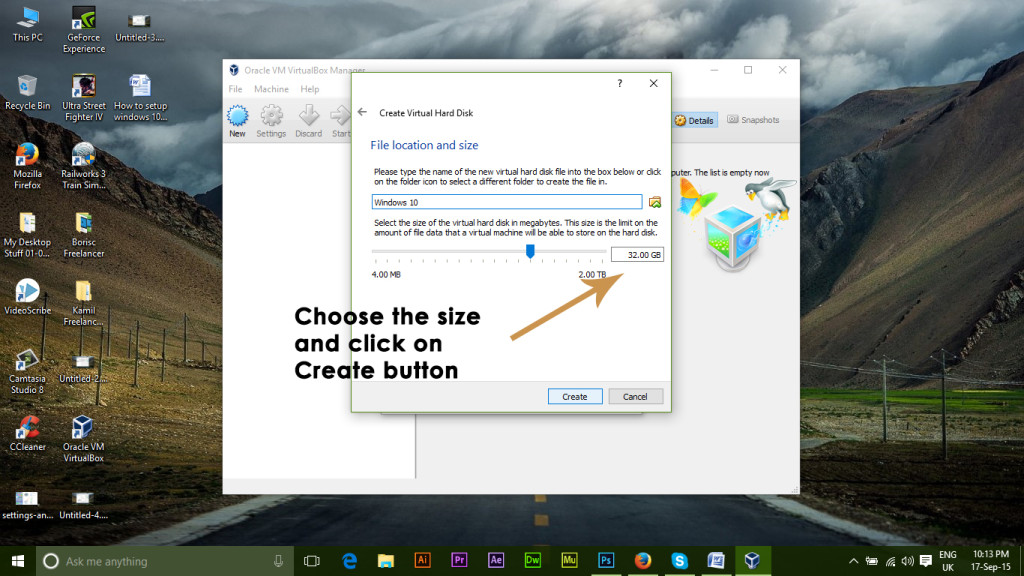
6. Choose the Windows 10 ISO:
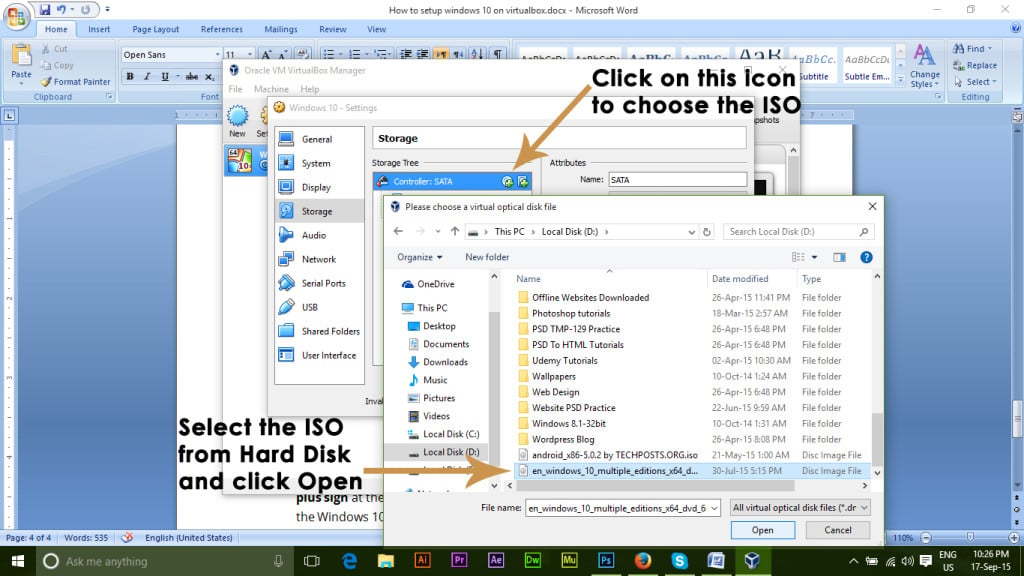
Now is the time to choose the Windows 10 ISO for the Virtual Machine. Click on Settings and select Storage from the left pane. Click on the circular icon with a plus sign at the top, located right next to Controller: SATA. It will ask you to choose the Windows 10 ISO file. Click OK after selecting the OS file.
7. Installing the Windows:
Click on the green Start button at the top of VirtualBox, and it will begin installing Windows 10 on your virtual machine. Follow the instructions, enter your credentials, and you will be good to go.
8. Switching to Full Screen:
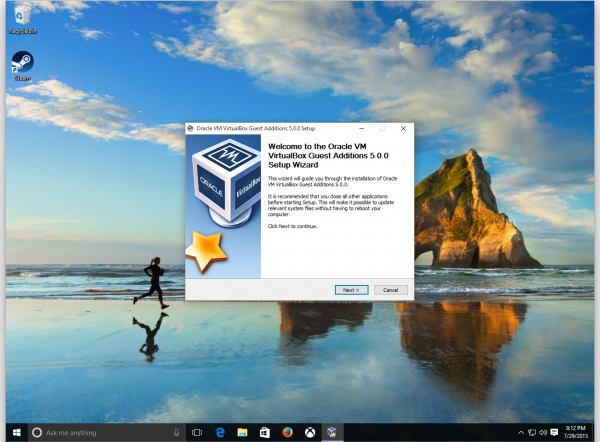
In order to have a real-time experience of Windows 10 on VirtualBox, you can switch to full screen by going to ‘View‘ and selecting ‘Full Screen’.
So, it might be a bit laggy, but you would need to ignore it. Have a nice experience using it.