How to Set Up a VPN on a DD-WRT Router
Why use VPN on just a handful of devices?
One of the major reasons probably why you might be using a VPN is to keep your online identity safe and secure. Using a VPN is easy. All you need to do is download the VPN client on your laptop/computer, connect to the VPN server and you are good to go. If you are using the internet on your iPhone or Android, the process is pretty simple too.
Most VPN providers like NordVPN provide you with an app for each of these platforms. You need to establish a connection via these apps, and that’s it. To know more about the supported devices, you can read this review.
But the problem arises when you want to connect your additional devices like an Apple TV to a VPN, and cannot figure out a convenient way to do so.
Further, what if you have 8 devices at home, all of which need to be connected to a VPN?
The ideal solution here is to connect your home router to a VPN, and you can then access the internet securely on each of your devices.
If you are using a DD-WRT router, here is an ultimate guide on how you can configure up the VPN on this router. The process isn’t trivial, but it is not overly complex either.
Let’s have a look.
Install DD-WRT
We’re assuming that your router doesn’t have DD-WRT. If that’s not the case, you can freely skip this step.
For the ones who do not have DD-WRT, follow the following steps (here) or perform the steps below.
- Visit https://dd-wrt.com/support/router-database/ and enter the model number of your router. If your router supports DD-WRT, you will be provided with all the details regarding firmware requirements that you need to download.
- Update your firmware, and reboot your router.
- Next, visit http://192.168.1.1 to set up your router. In here, you will be asked to provide a username and password.
- You will be then redirected to the next page. Click on Setup and provide the username and password you just created.
- The next page will provide you with all the basic details of the router including its name, IP address and DHCP settings.
- In the next dropdown, choose Automatic Configuration – DHCP.
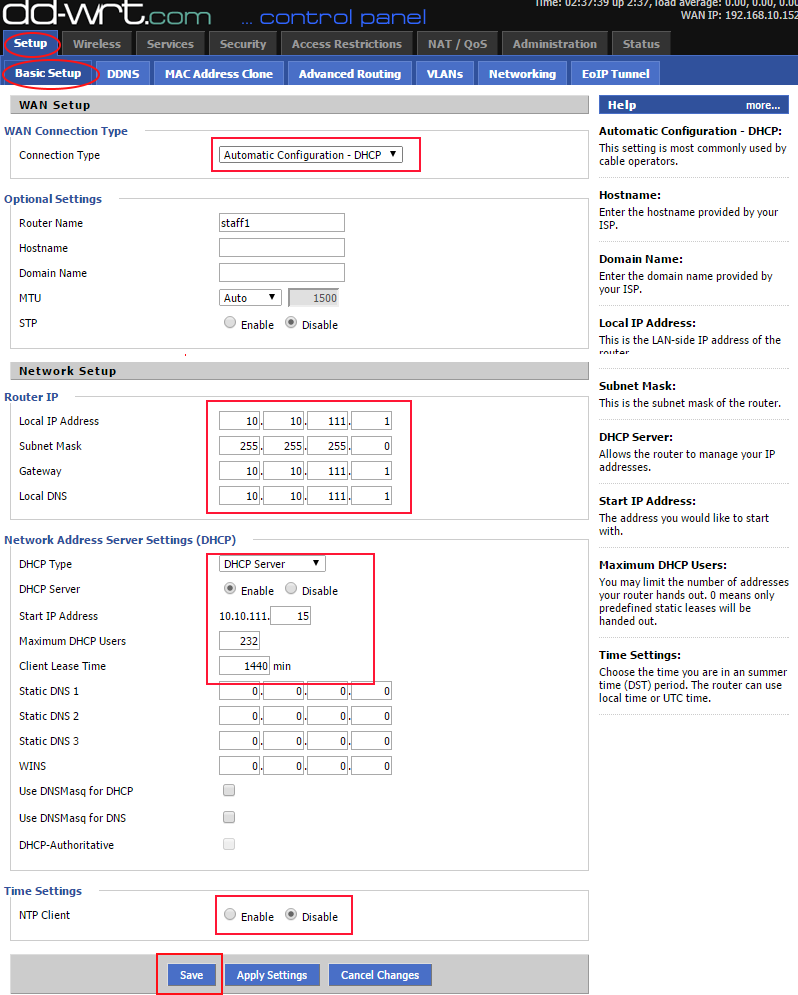
Choose DHCP - Do not touch the DHCP settings and leave them to default. Change the time settings according to your zone.
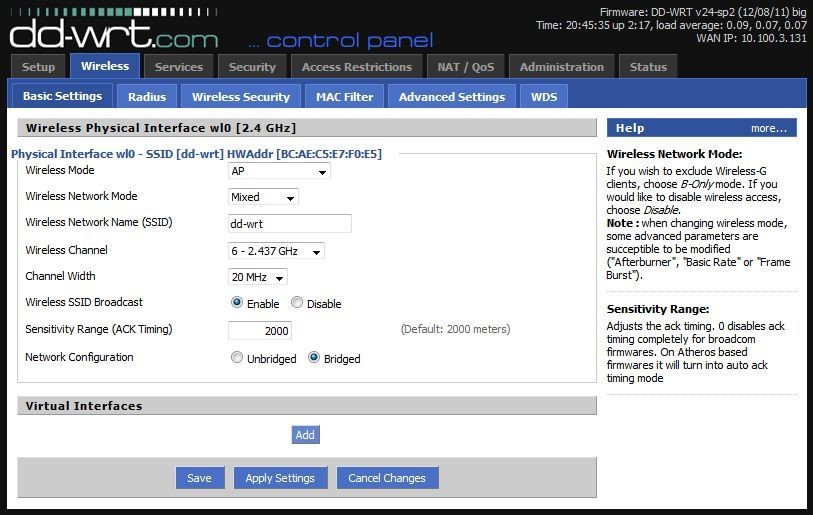
- Once this is done, click on the Wireless tab and configure your Wireless network.
Set Up Dynamic DNS
Now, you need to set up a DNS redirector for your dynamic WAN IP. The thing is that your ISP keeps on changing your IP address, until and unless you have paid it for a static IP.
This creates problems, as you will need to update your VPN settings every time your IP address gets changed.
Do not worry. There is a way out here. You can use a dynamic DNS service that creates a URL that reflects the updated IP provided by your ISP. Here are the steps you need to follow:
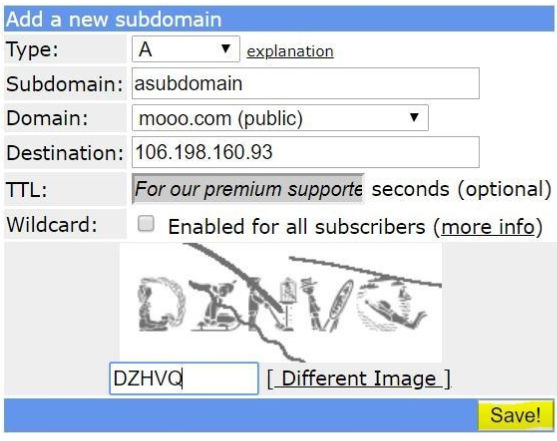
- Create a free account with afraid.org and go to subdomain menu.
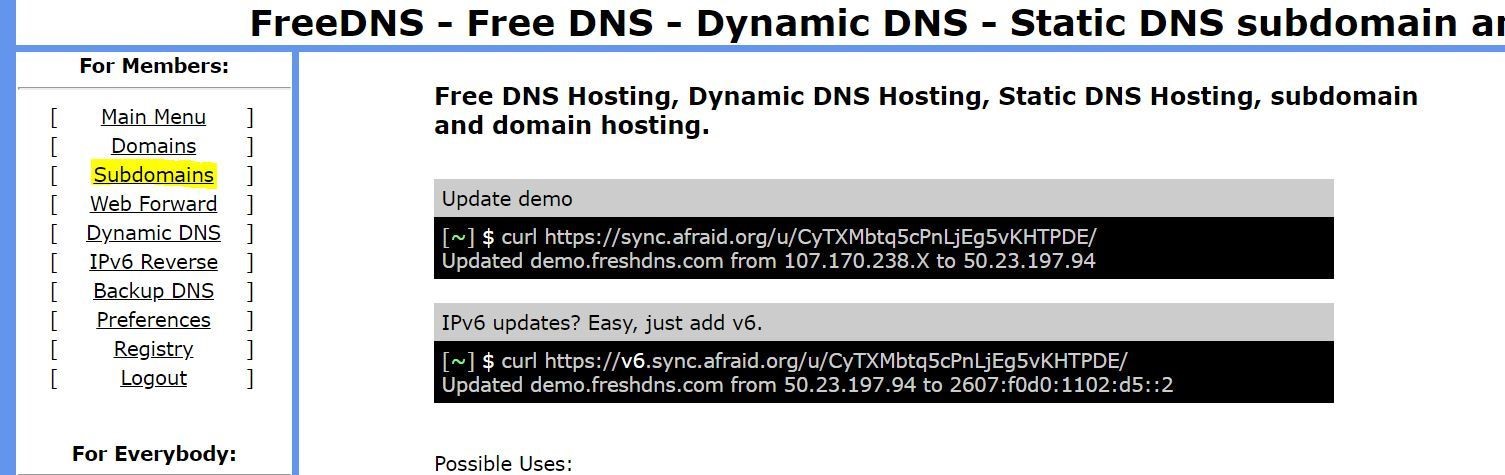
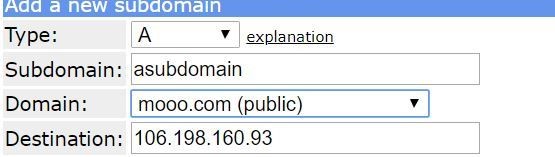
Go to Subdomains - In the next field, create a subdomain of your liking and then choose a domain from the dropdown.

Create the Subdomain - Next, enter your router’s WAN IP in the destination field. You can get the WAN IP from the DD-WRT page.
Enter your WAN IP - Next, click Save and then click on DDNS.
Saving DDNS - Now copy the URL provided to you on the next page next to the subdomain entry.

- Now, go back to your router page, and below Setup, click on DDNS tab.

- From the dropdown menu, select freedns.afraid.org and provide the required username and password.
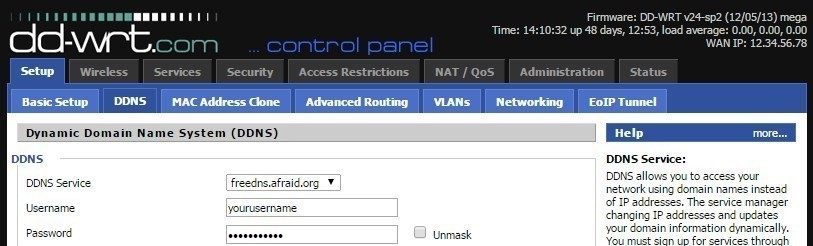
- Provide the URL copied above in the hostname field, and enable the external IP check as Yes.

- In the Force Update Interval field, enter 10.

PPTP Configuration
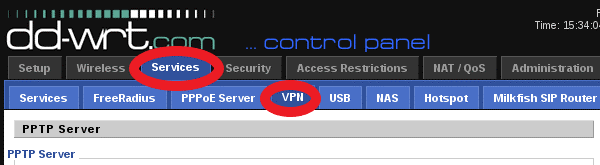
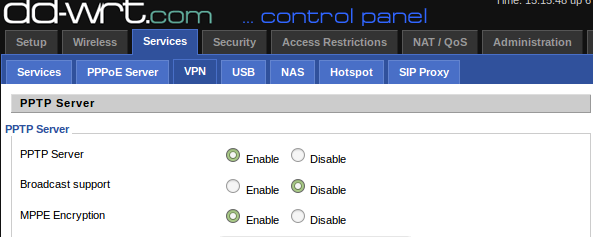
- On your router page, click on Services > VPN.
- Enable the PPTP Server. Disable the Broadcast Support, and enable the MPPE Encryption.

- Provide your DNS configuration.
- WINS servers can be skipped.
- MTU and MRU settings should be left as it is.
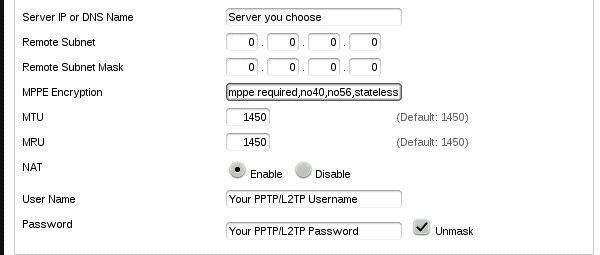
- Use your router’s IP as the server IP.
Device Configuration
Next, go ahead, and set up your VPN on the device, and you are done! Here is how you can configure a Windows laptop.
- Start > Settings > Network and Internet > VPN
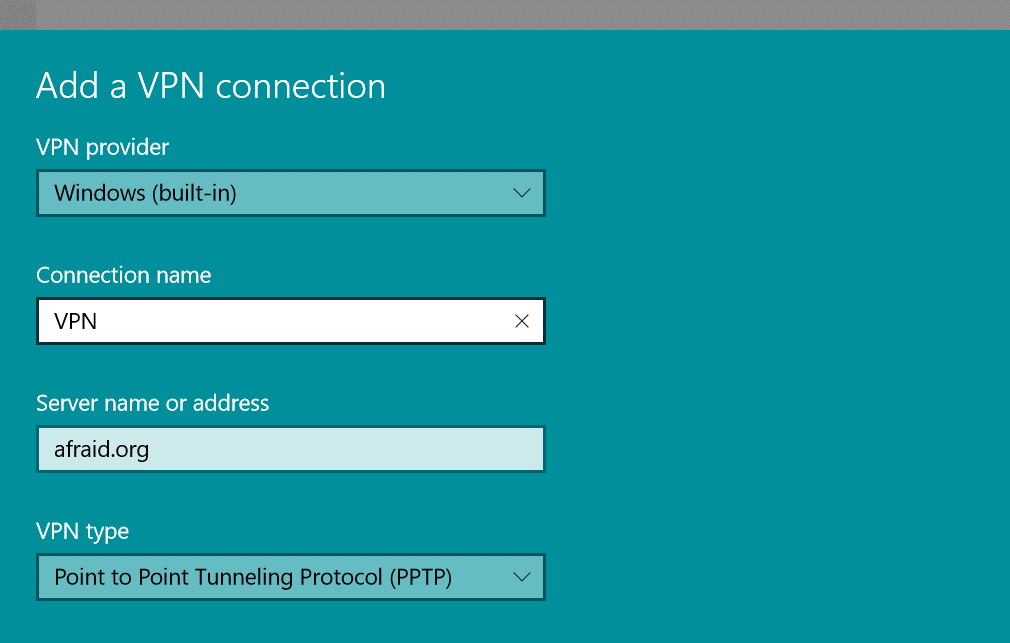
- Click on Add a VPN connection
- Under the VPN Provider, write Windows. Enter afraid.org DNS address in the Server name field. Or, you can enter your router’s WAN IP. Select PPTP in the VPN type dropdown.
- Type of sign-in info should be Username and Password.
- Next, provide the username and password.
- Click connect.
Wrapping Up
This brings us to the end of this tutorial. If you have any questions, let us know in the comments below.


