How to Root the Samsung Galaxy Tab S4

The Galaxy Tab S4 is one of the best tablet computer devices of 2018, but some users have had difficulty in rooting it. The most common complaint is that Magisk root doesn’t ‘stick’ after flashing in TWRP. In this Appuals guide, we will show you how to permanently root the Samsung Galaxy Tab S4.

Requirements

Before we begin, you should know that rooting this device will require a total wipe of all of your data. You should create a backup of all personal data before proceeding with this guide – you can create a backup in TWRP after flashing it, before you proceed to root.

  1. First download and install the Samsung USB drivers on your PC.
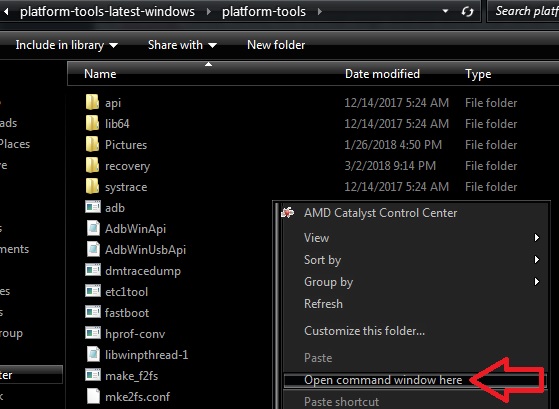
  2. Download and extract the Samsung Odin .zip onto your desktop.
  3. On your Galaxy Tab S4, go to Settings > About > tap Build Number 7 times, until Developer Mode is activated.
  4. Now go to Settings > Developer Options > enable OEM Unlock.
  5. Power off your Galaxy Tab S4 completely, and launch it into Download Mode. To boot into Download Mode, hold Volume Down and Power together until the device vibrates, then quickly release Volume Down and hold Volume Up + Power button. The device should boot into recovery mode, from there you can choose ‘Reboot to Bootloader’.
  6. Now connect your Galaxy Tab S4 to your PC via USB cable, and launch Odin software on your desktop.
  7. In the Odin window, you should see the box for “ID:COM” light up blue, to confirm it has established connection with your Galaxy Tab S4. If it does not light up blue, you may need to troubleshoot your USB connection or USB driver installation.
  8. Now in Odin, click on the ‘AP’ button and choose the ‘T830XXU1ARH8_dmverity_patched_boot_permissive.tar‘ file. After that press ‘Start’.
  9. Odin should flash the file, then reboot the Galaxy Tab S4 into the Android OS. Power it off again and reboot into Download Mode.
  10. In Odin, click the AP button again, and this time choose the ‘twrp_3.2.3-2_sm-t830_26918.tar‘ file. Press Start to flash it, and Odin will proceed to flash TWRP on your Galaxy Tab S4.
  11. You need to be quick about this – after TWRP is flashed, you must boot directly into TWRP. Do not allow it to boot to the Android OS! Hold Volume Down + Power until the device turns off, then hold Volume Up + Power to boot into TWRP.
  12. Once you are in TWRP, swipe to allow modifications (a prompt will display ‘Keep System Read Only’).
  13. You should now transfer the forced-encryption disabler .zip file to your SD storage.
  14. In TWRP main menu, tap Install > SD Card > ‘TabS4_oreo_forced_encryption_disabler.zip‘, and swipe to flash it.
  15. After it has successfully flashed, go back to TWRP main menu (do not reboot!), and go to Wipe > Format Data > YES.
  16. This is going to completely wipe the Galaxy Tab S4! Including the internal storage! This is an important step, because it will completely disable the device’s encryption, and allow access to the internal storage in TWRP.
  17. Once the formatting has finished, you can now Reboot to System. Your Galaxy Tab S4 will reboot to the Android OS.
  18. Now transfer the Magisk 17.2 zip file to your external storage, and reboot the device back into TWRP.
  19. Go to the Install button again, and this time flash the Magisk .zip you just transferred.
  20. After Magisk has been flashed, you can now reboot to system. You will see the Magisk Manager app has been installed on your device, and you can launch it to confirm if the device was successfully rooted (it should be).
ABOUT THE AUTHOR

Kamil Anwar


Kamil is a certified MCITP, CCNA (W), CCNA (S) and a former British Computer Society Member with over 9 years of experience Configuring, Deploying and Managing Switches, Firewalls and Domain Controllers also an old-school still active on FreeNode.

Comments

27
    PW
    Patrick Whittemore May 31, 2019

    My OEM unlock is missing from my developers options in my Galaxy tab s4 -.-

      SW
      Shane Warren Author Sep 11, 2019

      Disable autoupdate on your mobile after disabling auto-update of date and time. Go into manual time settings and choose a previous date that is at least 14 days old. Enable developer options and reboot your phone. The option should be there.

      Reply
    SA
    sinan avan Oct 6, 2019

    i have problem after step 10 tablet restart and on left side of screen i have yellow ”Set Warranty Bit: Recovery” i try many time’s turn off ( volume down + power ) but immediately tablet’s turn on . i cant open recovery mode. pls waiting help

    SW
    Shane Warren Author Oct 6, 2019

    You might not have followed the steps accurately, anyways, flash the stock firmware on the device using Odin, OEM unlock it, Make sure that the drivers for the phone are installed on the computer and repeat the process.

      NS
      Nick S Oct 9, 2019

      Having the same problem. How do you flash the stock firmware without being able to access the bootloader?

        SW
        Shane Warren Author Oct 10, 2019

        Download the firmware for your mobile, put it in download mode, open Odin, install the appropriate drivers for your mobile on the computer, connect the mobile to the computer and flash the firmware on the mobile. you don’t need to unlock the bootloader for this.

    AG
    Aayden Gaul Oct 19, 2019

    vm I just did the button press backwards

    AG
    Aayden Gaul Oct 19, 2019

    kay real question
    when using odin and choi]sing ap and the file u said and clicked start, what happenes is it finishes and says only officially realeased binaries are allowed to be flashed (boot) help?

      SW
      Shane Warren Author Oct 22, 2019

      you need to install the forced encryption disabler as well.

        AG
        Aayden Gaul Oct 24, 2019

        I’m not gonna root it I managed to fix it bye holding all buttons and resetting it to default because twrp front work and neither did the forced encryption disabller But thx

    WA
    Watn3y Apr 30, 2020

    After the 8 step my phone doesn’t go past the first Samsung logo. Pls help

      SW
      Shane Warren Author May 5, 2020

      Did you enable the OEM unlock?

    YI
    Yau Isaac May 19, 2020

    After the 10 step, my tab stuck at samsung logo and written “Set Warranty Bit : Recovery” at the top left corner, anyone could solve this? Olease help thanks a lot

      SW
      Shane Warren Author May 22, 2020

      Thats not good at all. Put the phone in download mode and use Odin to flash android on it from the top. Only this might fix this issue.

        YI
        Yau Isaac May 23, 2020

        I can only press the power, volume up and volume down button together to ge in to the logo screen but show “set Warranty Bit : Kernel” instead of showing “Set Warranty Bit : Recovery”

          SW
          Shane Warren Author May 27, 2020

          Remove the battery or wait for it to run out and put it in download mode and the flash firmware using ODIN

      ZU
      Zudir May 23, 2020

      I am also facing the the same issue. My tab got stuck at samsung Logo and displays “Set Warranty Bit : Kernal” at the the top left corner…. Please help… Resquesting the publisher to look into this issue. Eventhough following the steps correctly, getting into this situation is unnacceptable..

        SW
        Shane Warren Author May 27, 2020

        Flash the stock firmware on your device using ODIN. If it is stuck, wait for its power to run out and then do the same.

          HE
          help Sep 14, 2020

          this is NOT okay. i cant even get to the donwload button. please shane warren respond i need my tablet for a lot of important things. ;(

          KA
          K. Arrows Author Sep 17, 2020

          Can you list down the steps you have taken and at what step are you stuck?

    PS
    PsyCho Oct 14, 2020

    After step 10 my tablet got stuck in samsung logo screen and it says in top left corner with yellow writing Set Warranty Bit: Kernal. I cannot enter download mode nor reset the tablet. What should I do. should I wait for it to run out of power and then proceed with process of rooting or should I flash android files and not root?

      MZ
      Muhammad Zubyan Author Oct 15, 2020

      flash android files and not root and then try to root it again just to be safe.

    SB
    Sergey Bolbat Nov 21, 2020

    I have Live Demo Unit of Galaxy Tab S4 (SM-T830X). It’s firmware build is
    T830XXXU1ARG4_LLK and retail mode is disabled, there is no FRP, no
    account linked, I can make factory reset either using settings or
    recovery. But! Device has some limitations: battery stops charging at
    70%, I can’t remove demo software and device is not updating to actual
    firmware. I think I can remove all of these limitations after flashing
    stock firmware.

    I’m trying to flash stock firmware but Odin fails:

    SetupConnection..

    All threads completed. (succeed 0 / failed 1)

    OEM Lock is on according to download mode string and I can’t
    disable it because OEM Mode toggle is missing in developer settings. Of
    course I’ve tried all methods that Google search provided: disabled date
    & time sync, changed current date, rebooted, but that method
    doesn’t work for my device. Waiting for one week didn’t help: OEM unlock
    toggle still missing. How else I can unlock bootloader? Connecting to
    adb works but fastboot commands don’t work unfortunately.

    Any help will be appreciated.

    AH
    Alexander Huwiler Oct 23, 2022

    Apparently I was naive in downloading random software from random sources as this article mentions. I almost ruined my tablet. Im kind of (not completely) stuck in the boot. See https://forum.xda-developer… (I made a thread in a forum for that, if another person encounters the same problem)

    AH
    Alexander Huwiler Oct 23, 2022

    If you got stucked on step 8 or 10. Here is the only fix I found after one day. Caution, you will probably loose all your data. Go to sammobile (you can register for free) and download the most recent stock firmware for the SM-T830 and flash it with ODIN. Be careful with the country code this should be correct, mine is Switzerland so “AUT”. (When flashing there are 4 files in the stock firmware: BT, AP, CSC and CSC_Home, use only BT, AP and CSC_HOME (as this should not wipe your data (in theory), using CSC would apparently). That should do it. In my case, I had to wipe all data, as the “integrity check failed”. I lost all data (Ive only a partial old backup made with adb) but my TAB is working again! Apparently this Rooting Info is not correct at all.

    Reply
    JF
    Joshua Farmer Apr 16, 2023

    Does DEX mode still work?

      MZ
      Muhammad Zubyan Author Apr 20, 2023

      Yes, DEX mode should still work.